Automated Sheet Press

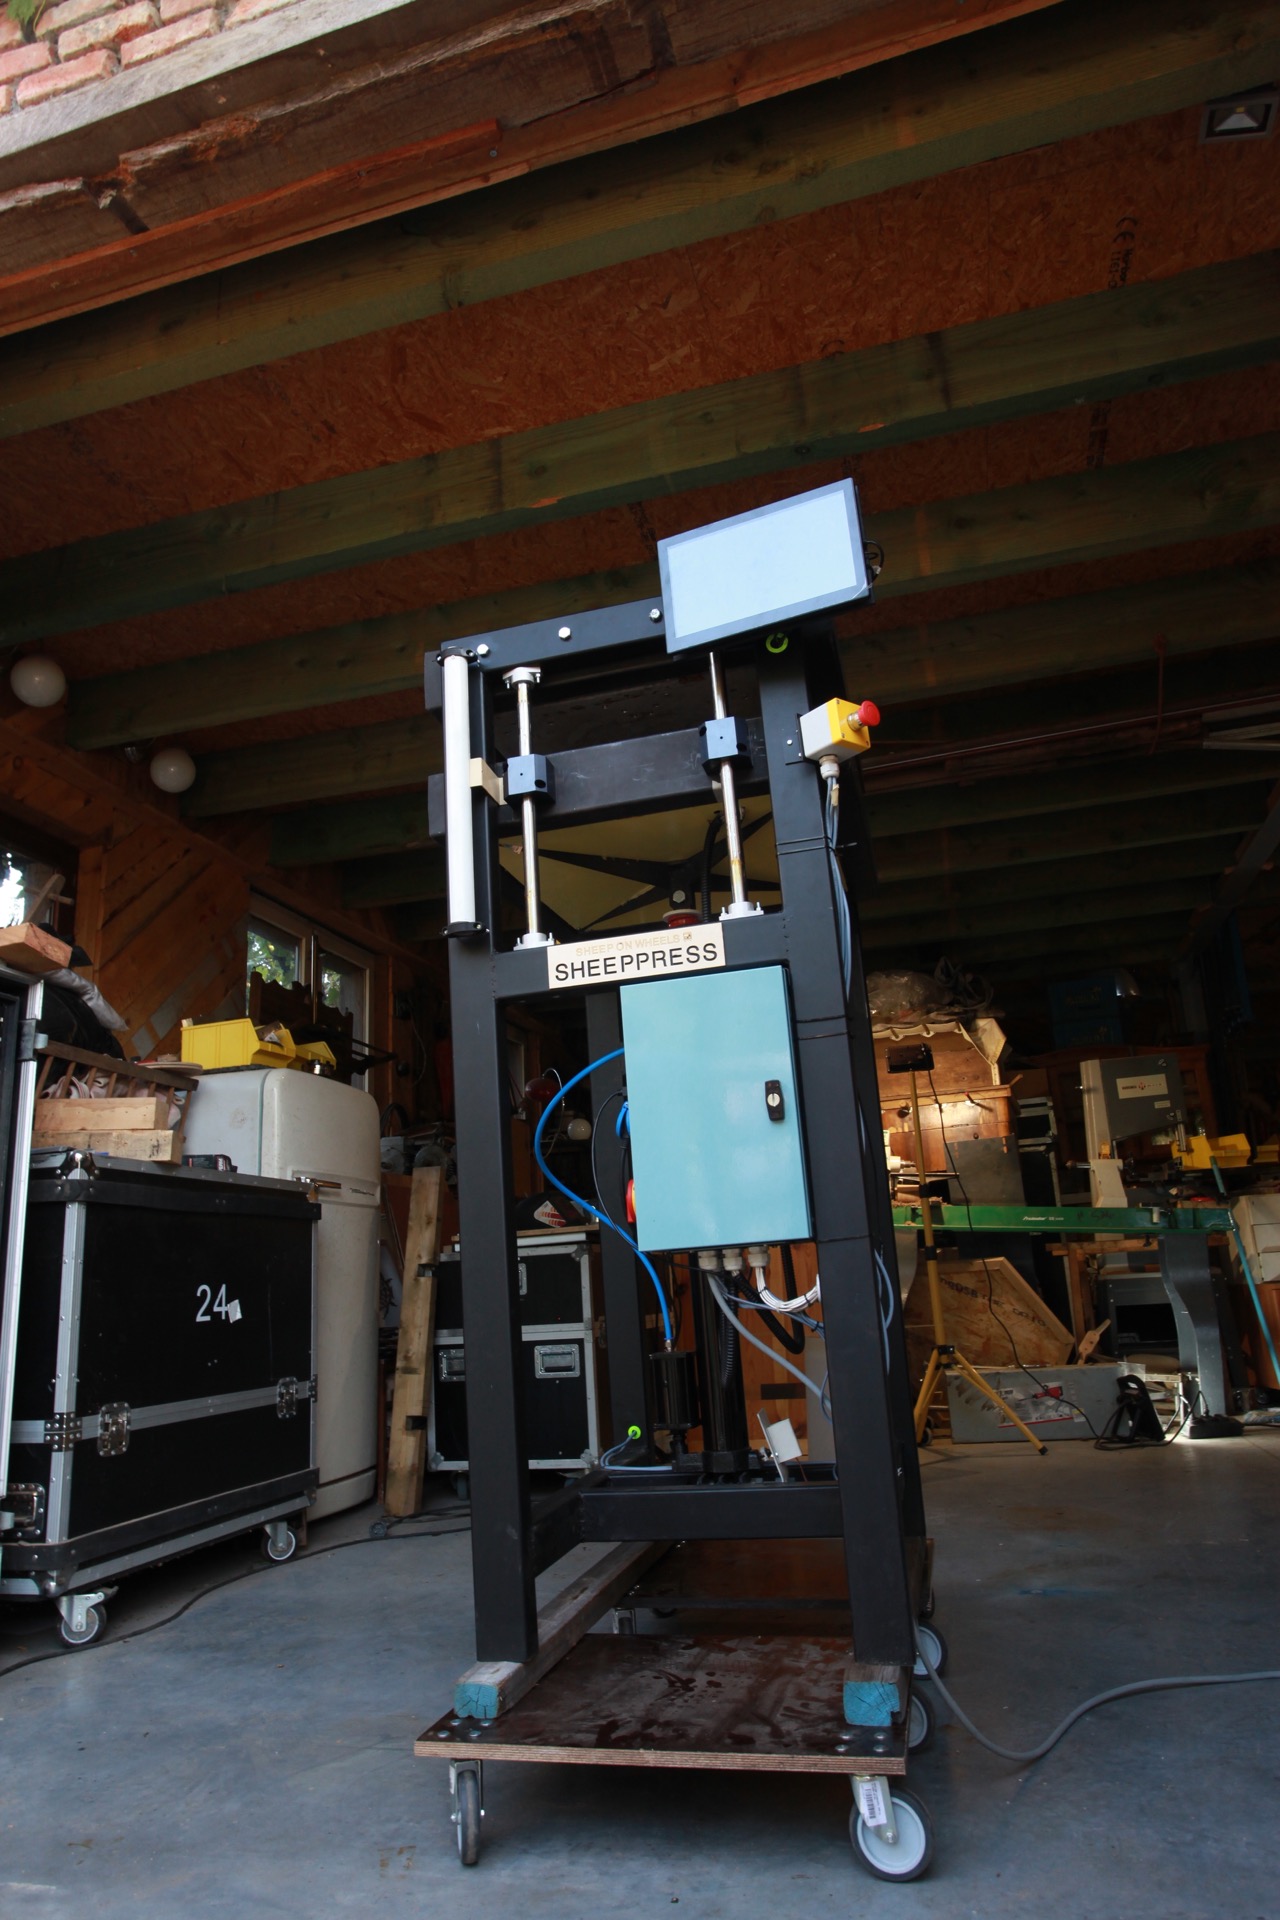
Here we describe some of the adaptations we made to the sheetpress. It is a step towards an automated version. The main goal was to adapt the sheetpress so that it needs minimal time investment.
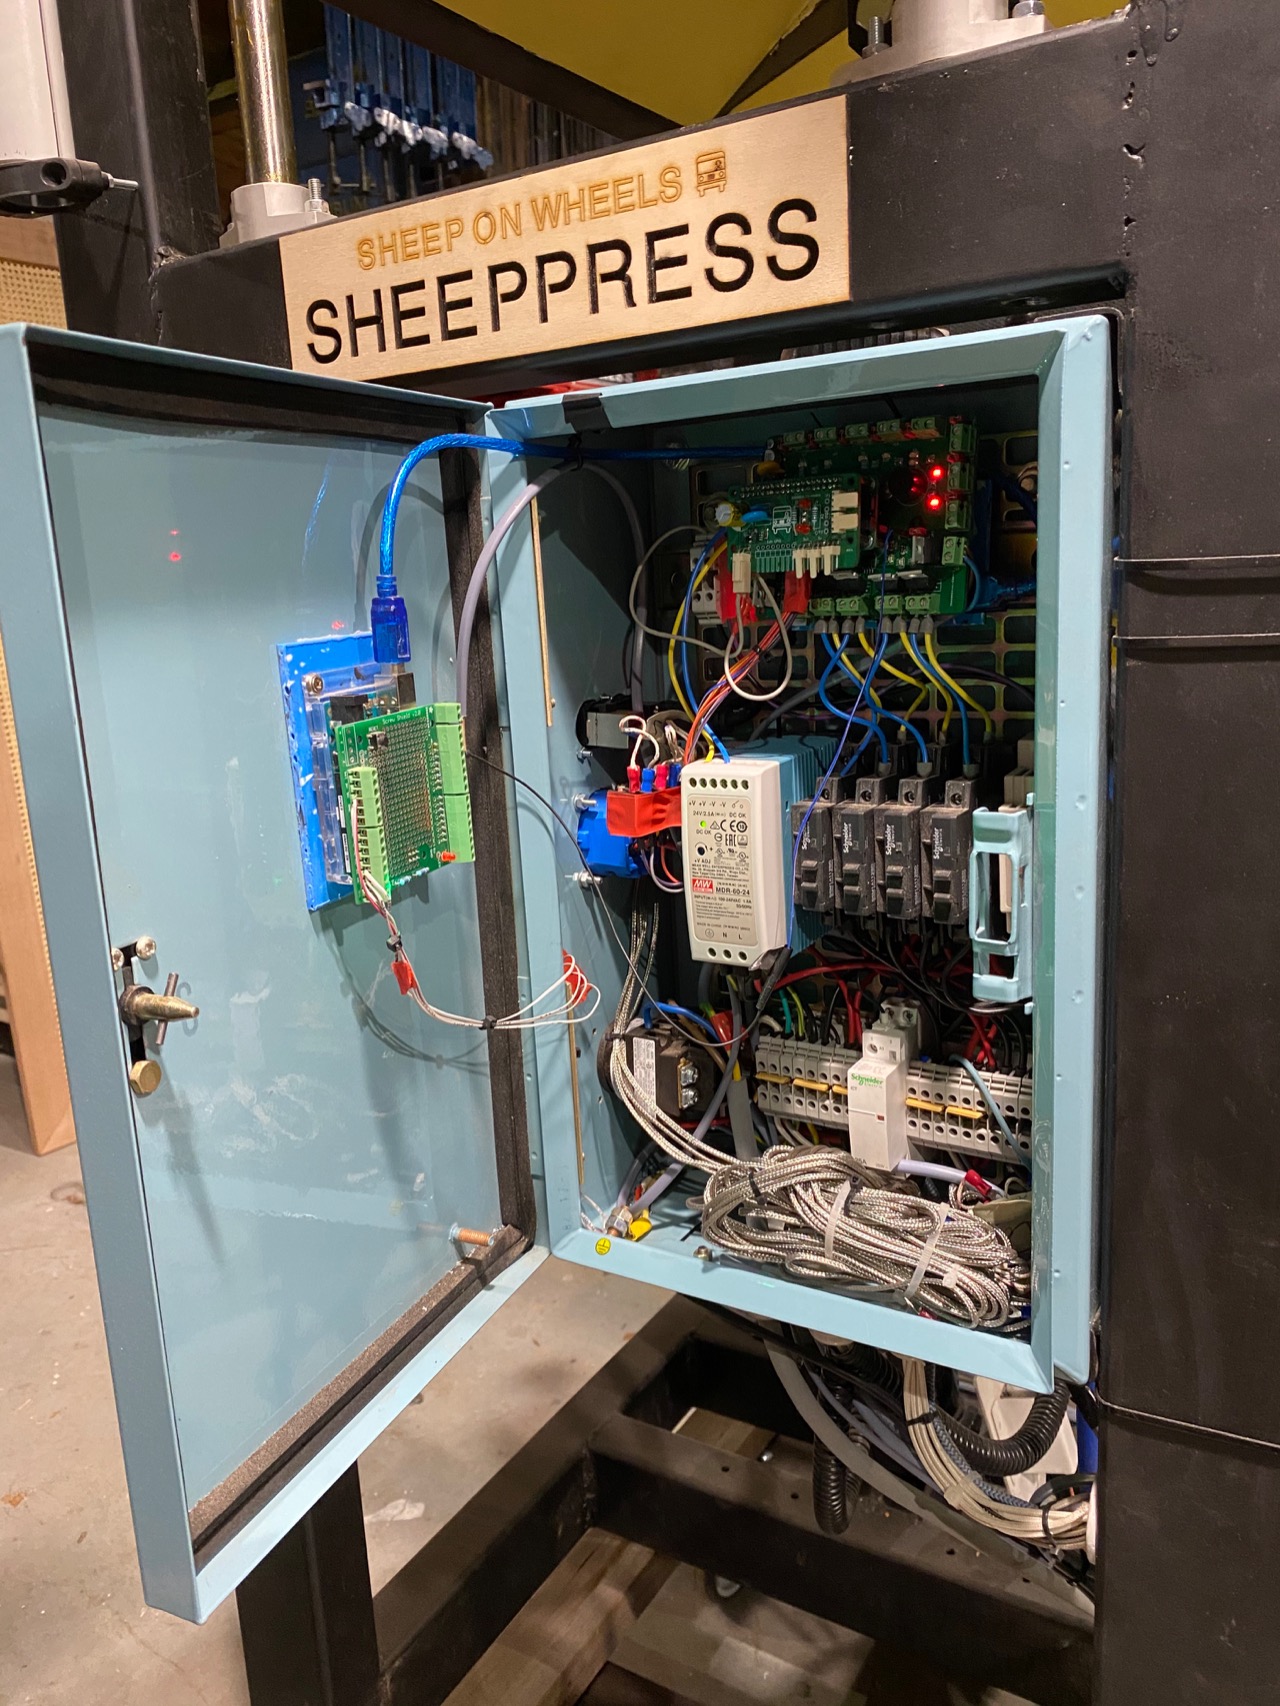
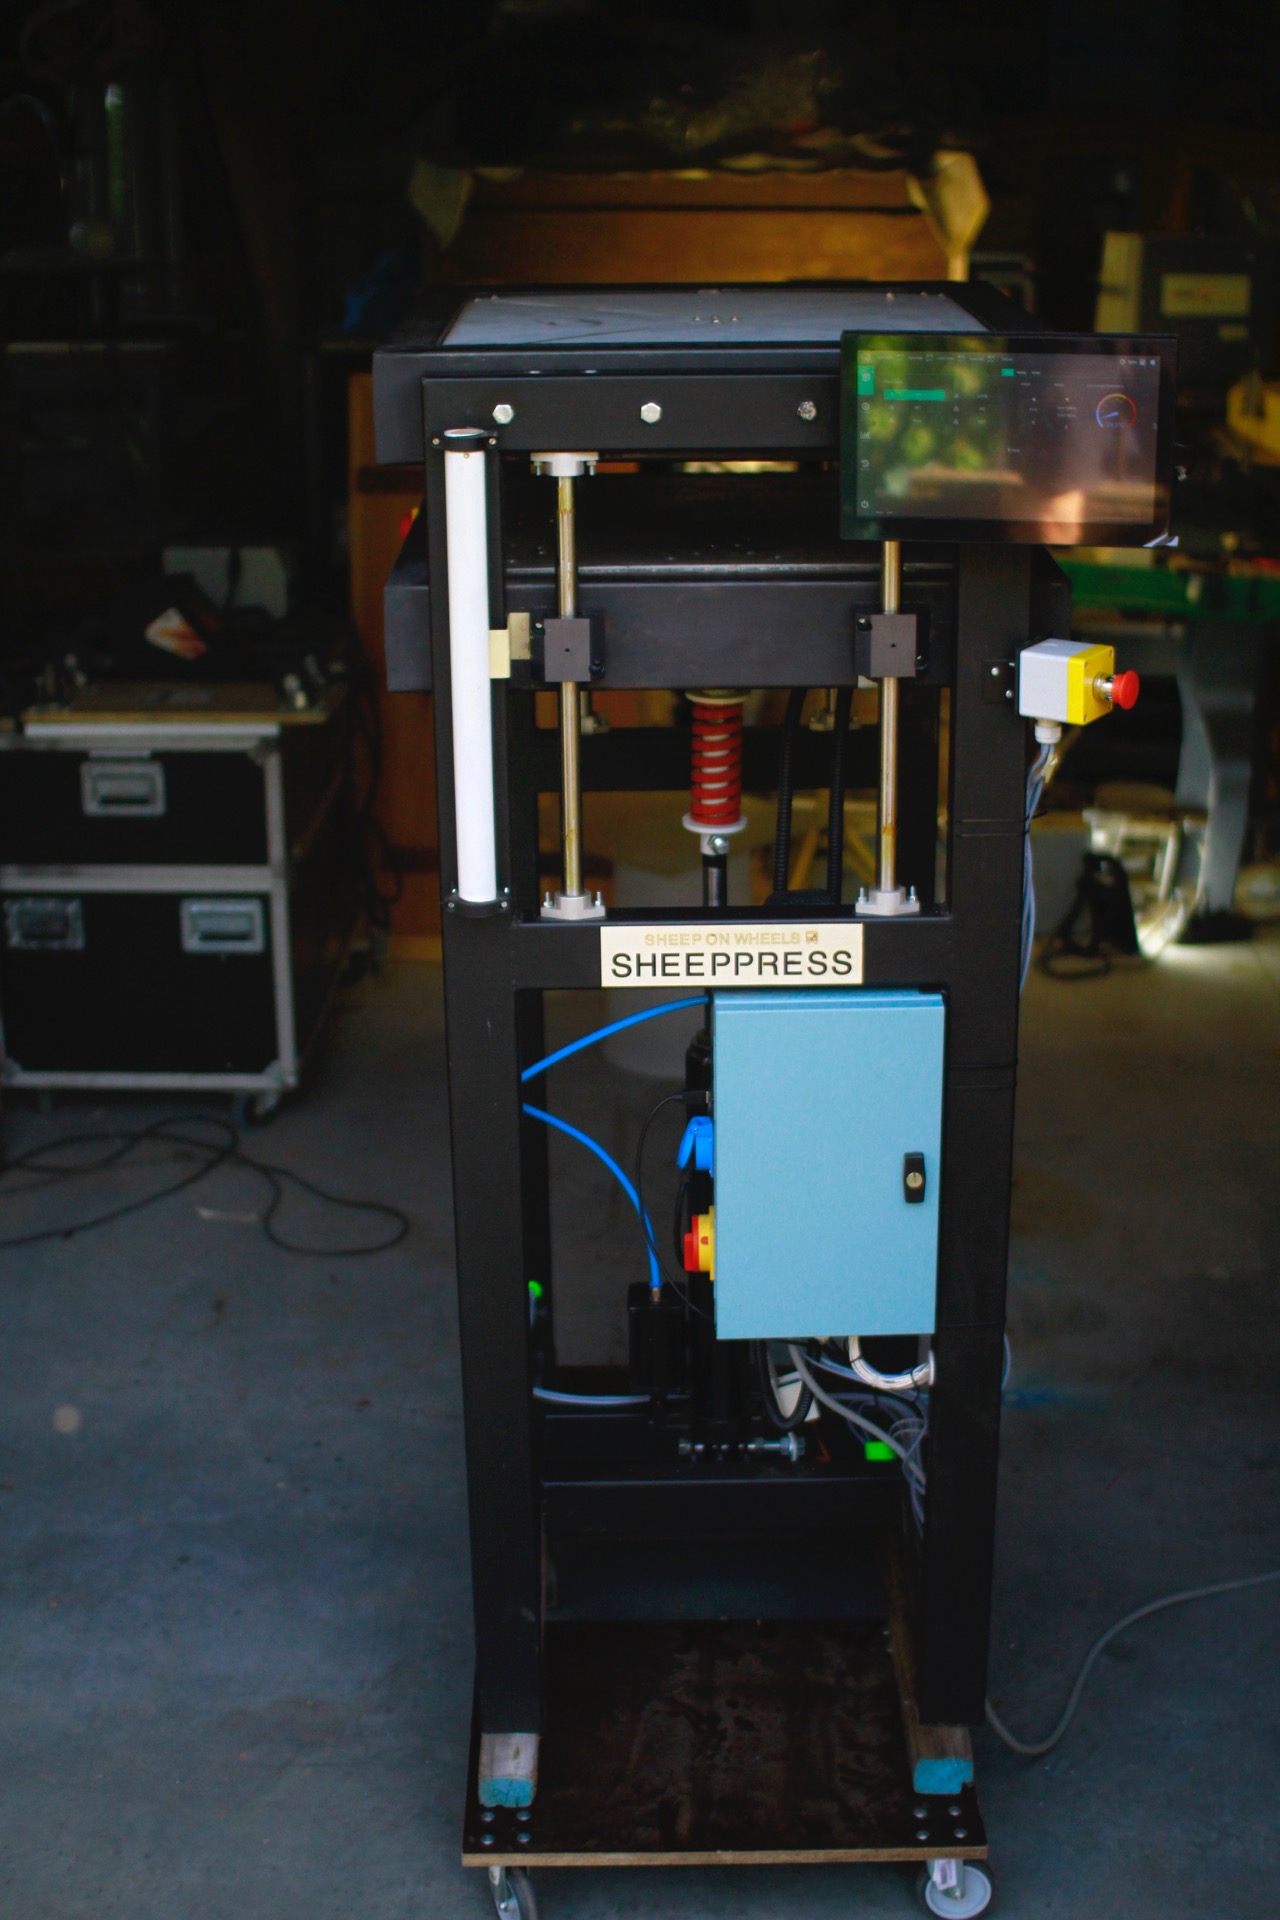
Our version has a 600x600mm pressing surface. We chose this size to fit our needs: a transportable machine that runs on standard single phase 230V.
If you want more info, contact us :)
—
Attachments
Resources
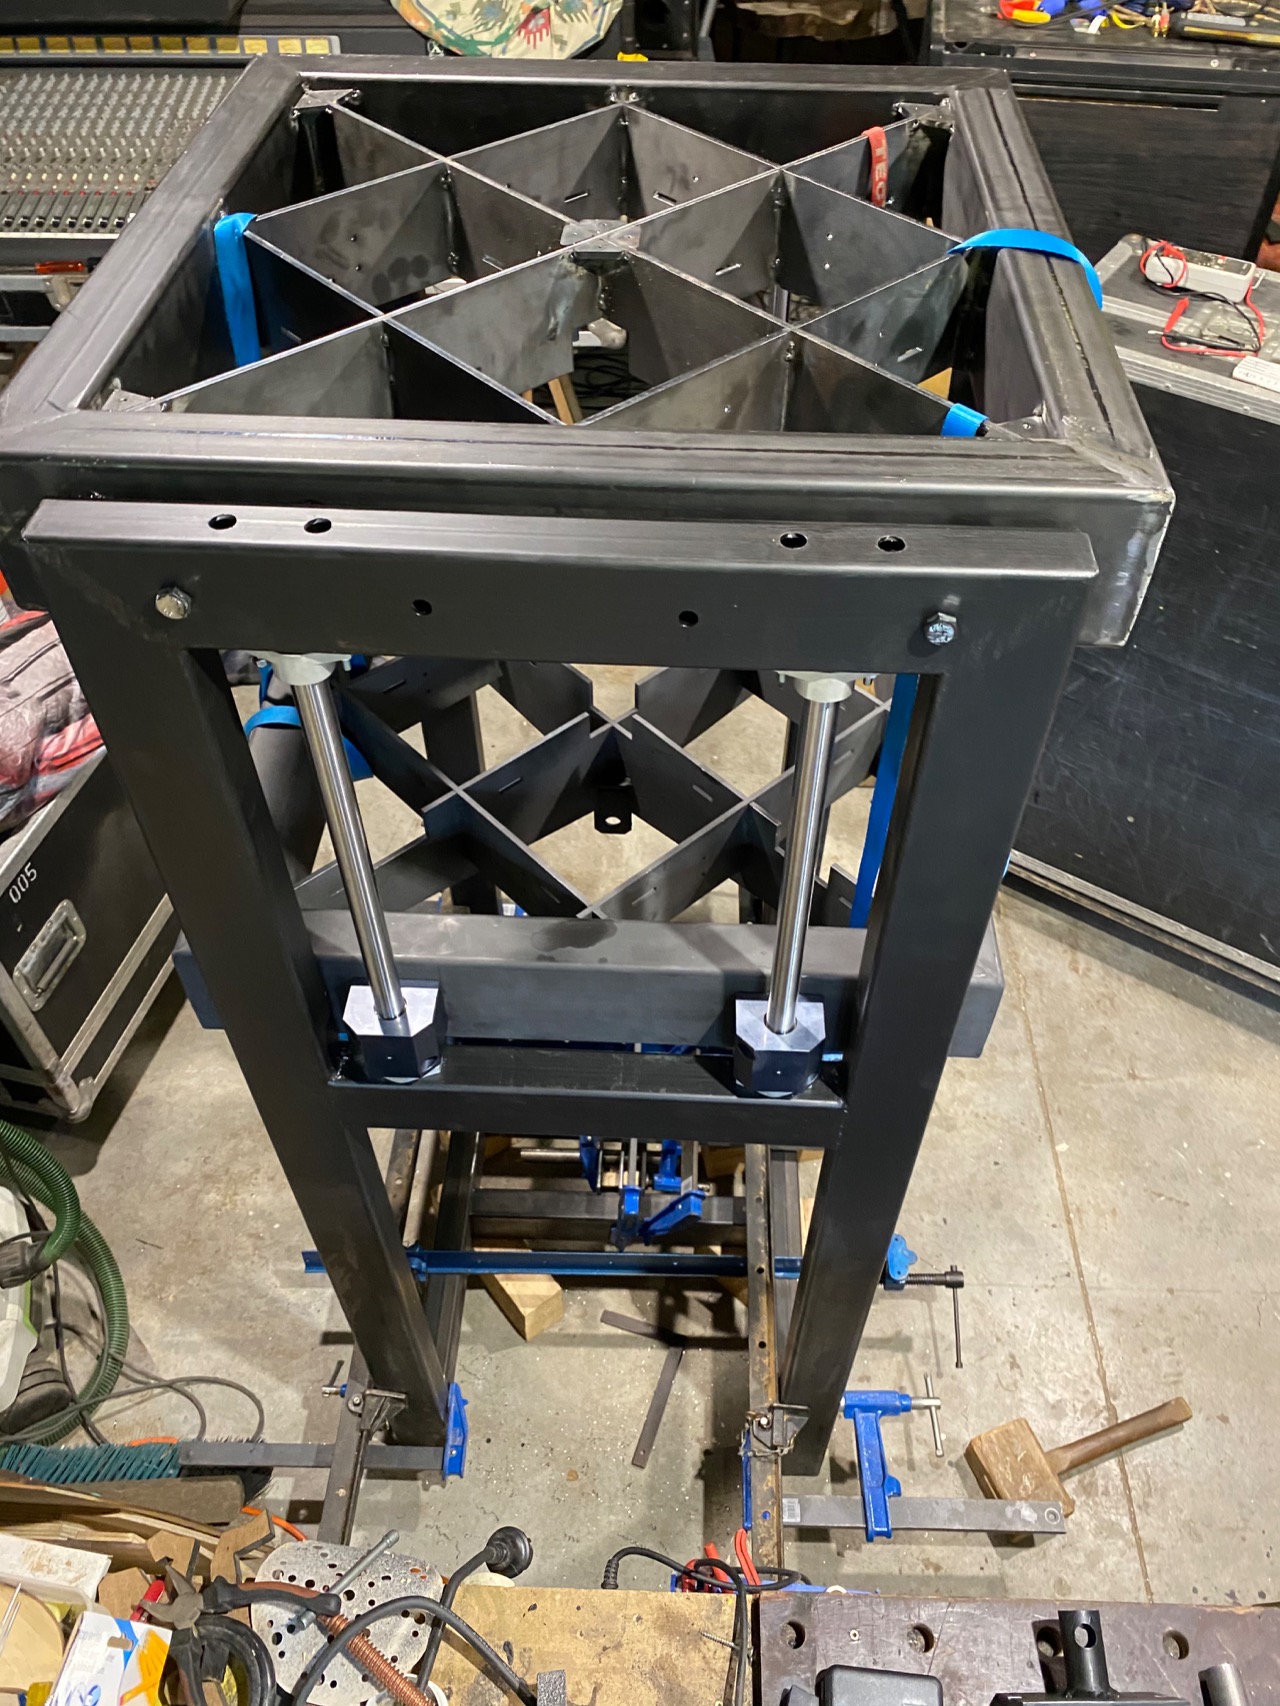
Step 1 - Structure
The basics are derived from the V4 sheetpress, with the same press, same cartridge heaters,... but a downsized steel frame so the pressing surface is 600 x 600 mm.
We changed the bearings for an alternative with a smooth fit.
We changed the bearings for an alternative with a smooth fit.
Step 2 - Heating: heater configuration
We chose to create 2 separate loops in every heated plate (Upper and Lower). One is the core or inside loop (5 cartridge heaters), the other is the outside loop (4 heaters). We expect the center loop to have less heat loss so it will shut down sooner/more.
One of the reasons we made a small version is to be able to use it in our mobile workspace. Reducing power consumption to 230V increases the chance we can plug it in almost anywhere.
One of the reasons we made a small version is to be able to use it in our mobile workspace. Reducing power consumption to 230V increases the chance we can plug it in almost anywhere.
Step 3 - Heating: sensor configuration
We added multiple type K sensors (eighth on each heating plate) to have an accurate heat map so we can identify problems: overheating, broken heaters,... These sensors also make it possible to check how the core and peripheral temperatures are behaving ( warming and cooling speed, fluctuations,...)
Sensors are distributed evenly, not linked to specific heaters.
How we use this data will be explained in a later step.
Sensors are distributed evenly, not linked to specific heaters.
How we use this data will be explained in a later step.
Step 4 - Heating : Digital PID
We switched out the original hardware PID's for a software implementation on the machine controller. This allows further automatisation, data logging and a fluent integration in the user control interface. We also can track (monitor) pressing times and (max) temperatures to optimize the machine use.
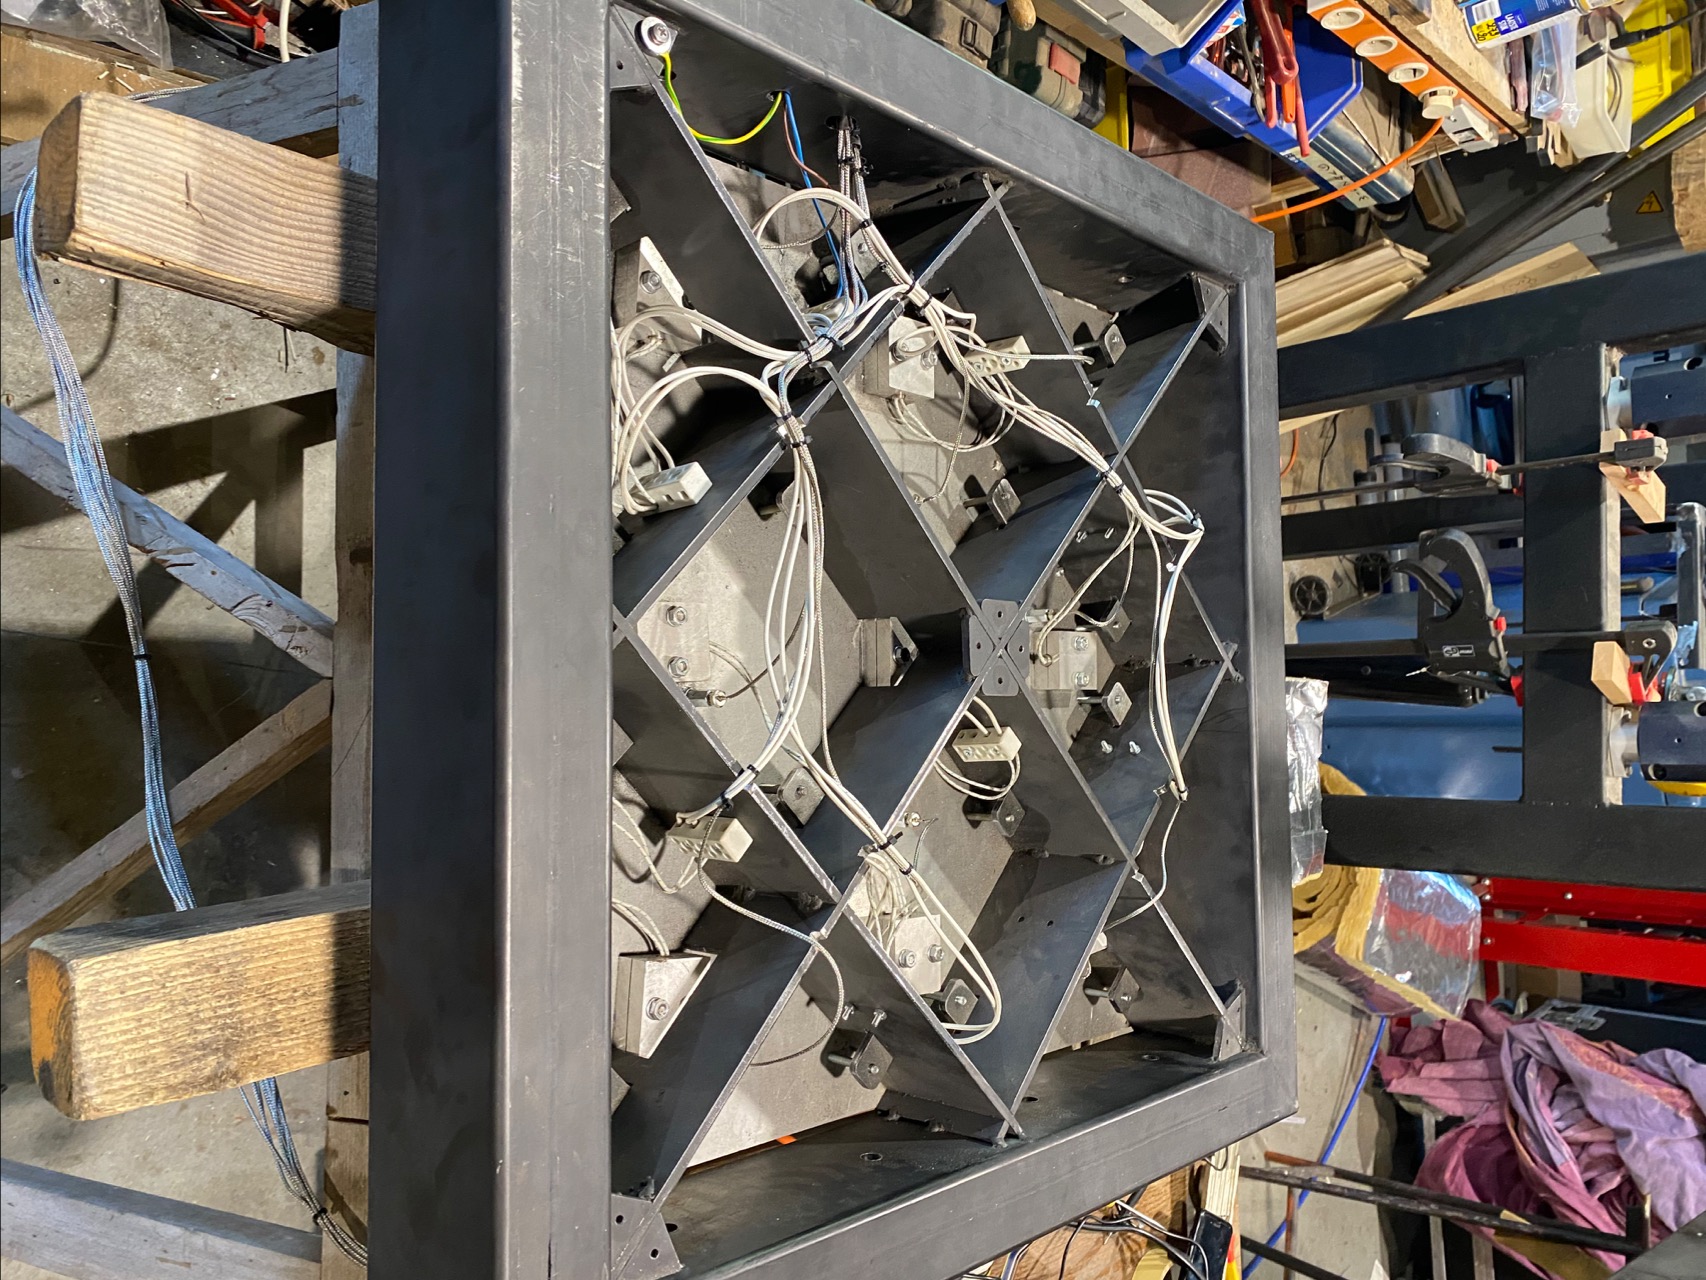
Step 5 - heater and sensor connection
At the moment the thermocouples are connected to a differential adc, specially made for the raspberry Pi from AB Electronics. To improve the functionality of the sensors, these adc’s will be replaced with a MAX31855. This is an integrated circuit from Maxim Integrated, dedicated to reading type-K thermocouples. The heating elements are divided into 4 circuits, 2 per plate, one outer circuit and one inner. Each circuit is controlled by the raspberry pi through a solid state relay. These relays are made to switch 230v AC and are controllable using a 4v-48v signal. To protect the pi from short circuits to the 230V ac the drive signals for the relays are optically isolated.
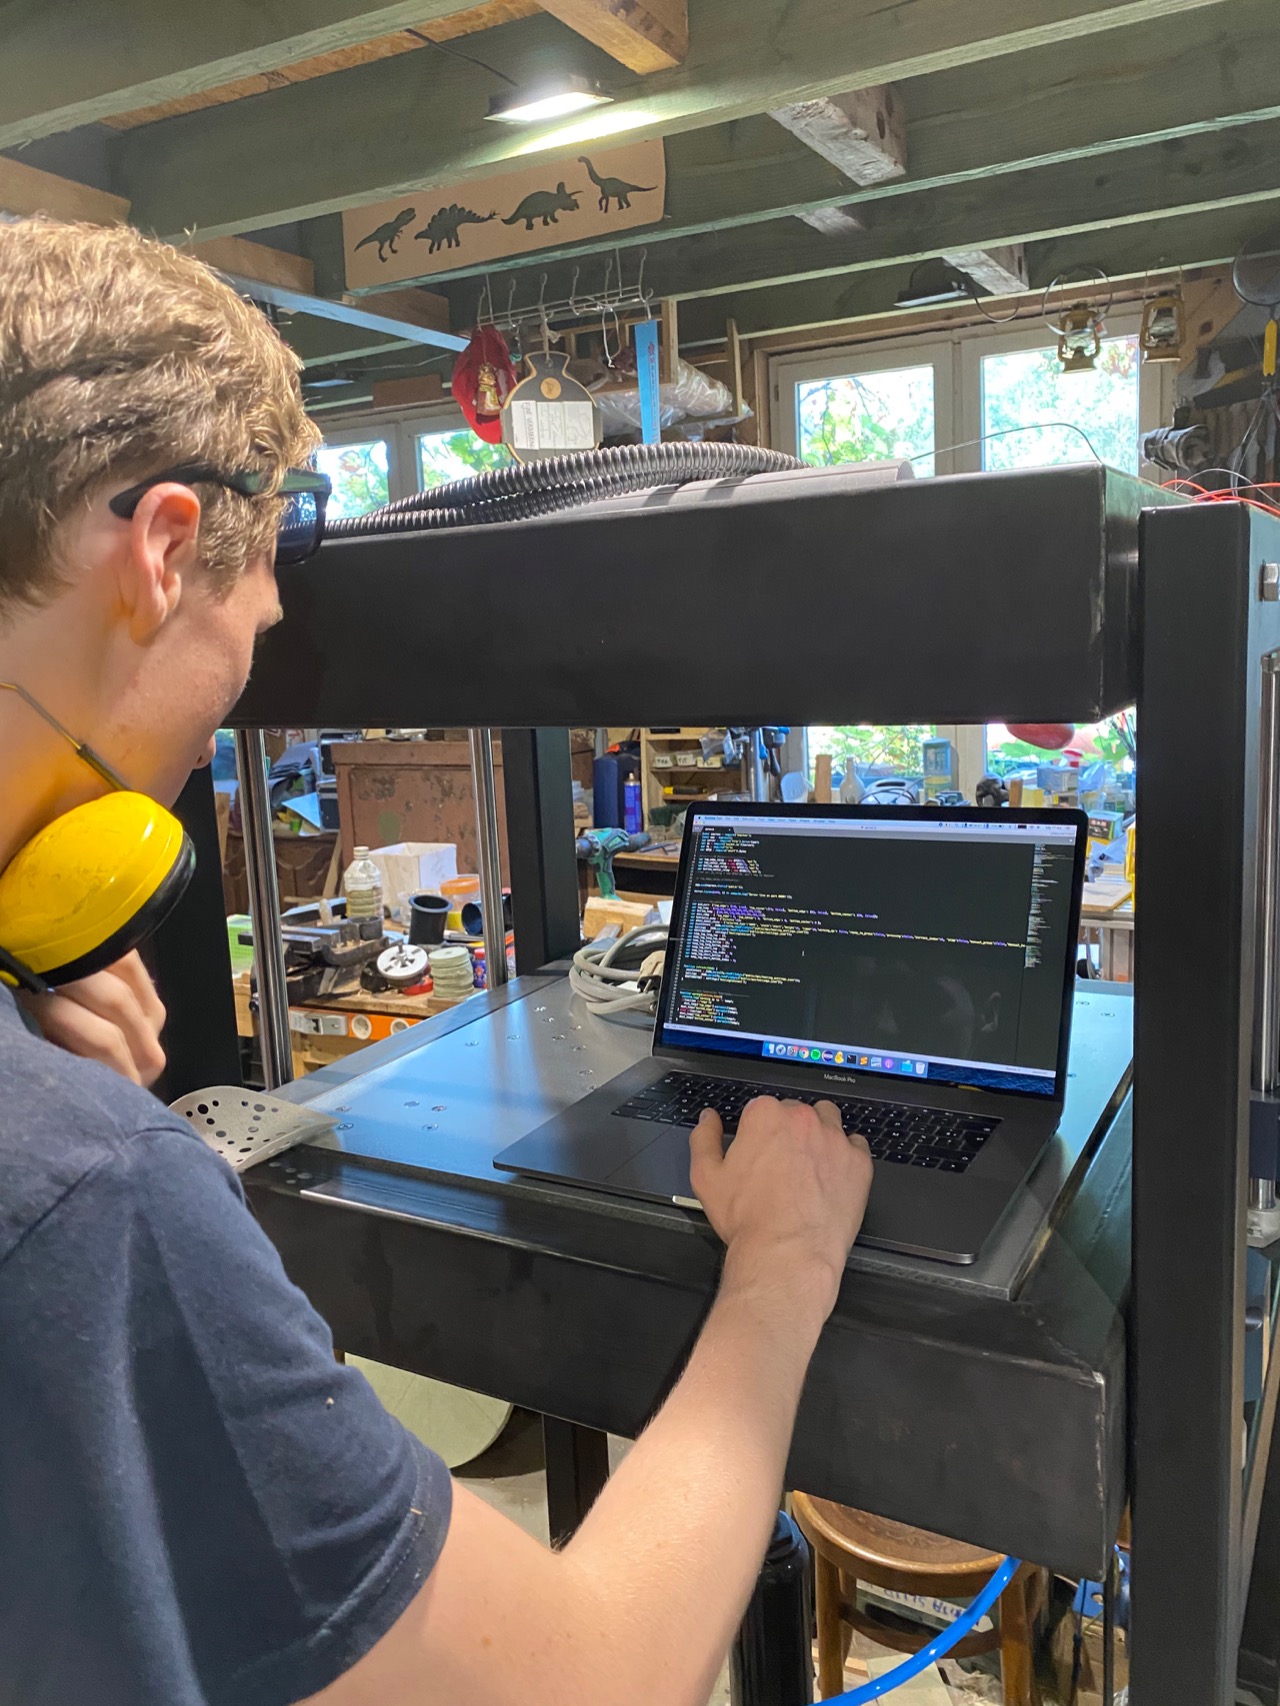
Step 6 - Digital interface
The digital interface runs on a Raspberry Pi that is connected with a touch screen. It is split up into two parts, the server part and the client side. The client side is a website that you can access from the Pi’s browser or from any device that is connected to the wifi on the raspberry Pi. The server is made with Nodejs.
Step 7 - Sheetmaker part 1
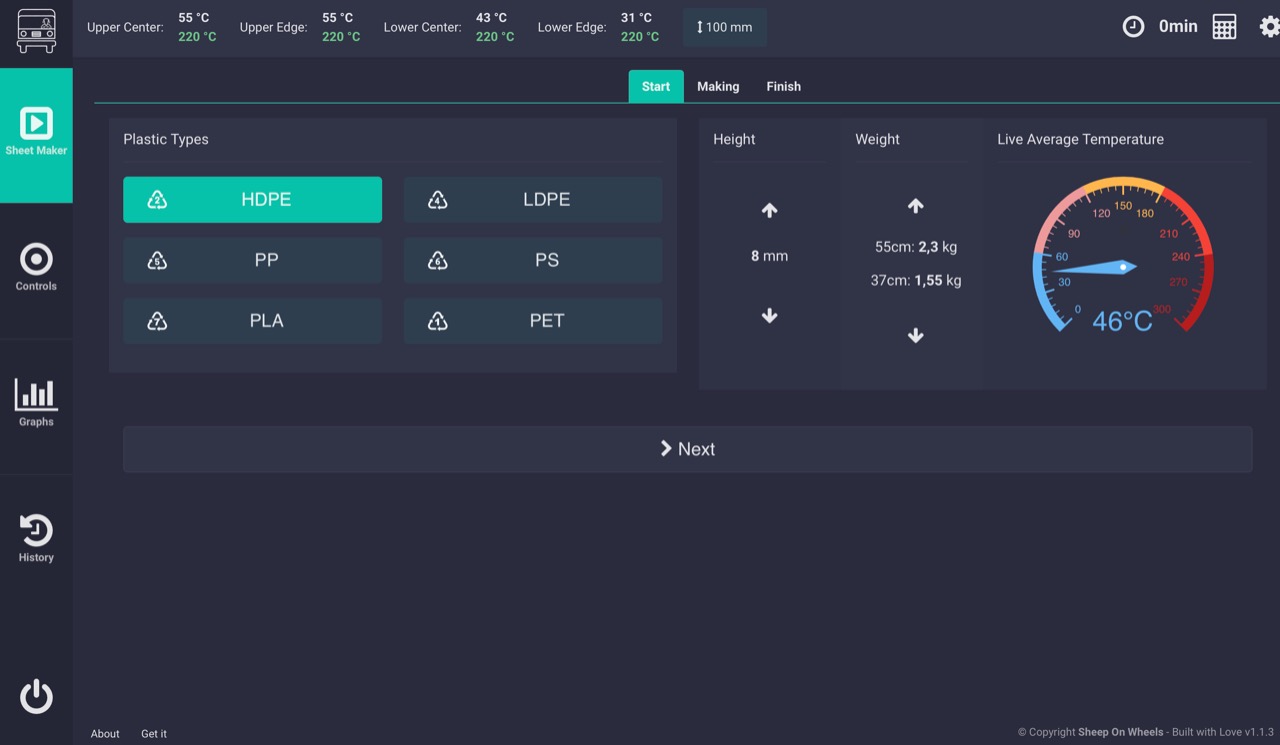
• The sheet maker page allows users to make an automated sheet. It is possible to select the type of plastic and the required thickness of the sheet. We use metal frames to set thickness and sheet size/shape. Based on these parameters the screen will indicate the weight needed to produce the sheet. The time and temperature needed to make a sheet is also displayed.
• In the following step it is possible to start the heating process. This can be done while preparing the sheet on the prep table. The system automatically sets the correct temperature for each plastic type.
• In the following step it is possible to start the heating process. This can be done while preparing the sheet on the prep table. The system automatically sets the correct temperature for each plastic type.
Step 8 - sheetmaker part 2
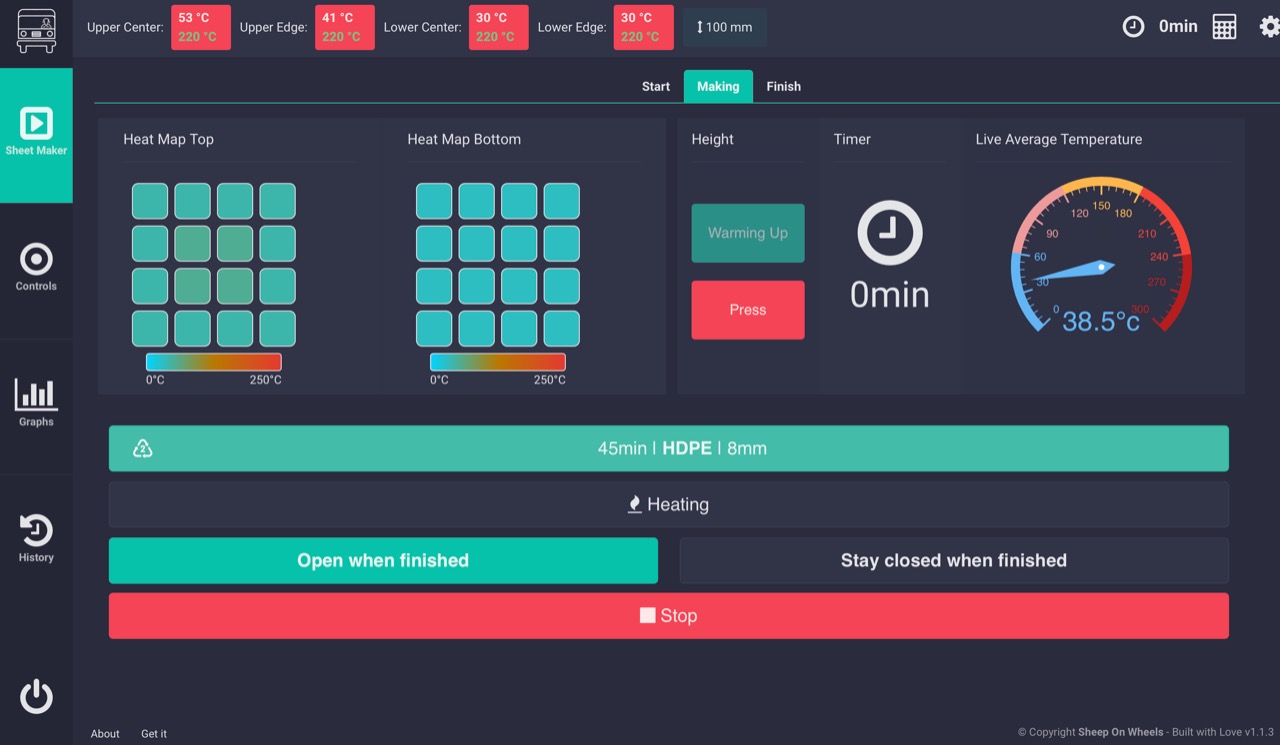
• When the plates are up to temperature and the prep sheet is inserted the operator needs to select the press function. This will start the automated pressing and the timer. Every few minutes the system activates to maintain pressure. A notification sound is played in advance to warn operators.
• While the sheet maker is pressing options for further steps can be chosen : automatic open (to 10cm) when the timer finishes or stay closed. In both cases the heating will be stopped.
• A sound indicates the timer had run out.
• While the sheet maker is pressing options for further steps can be chosen : automatic open (to 10cm) when the timer finishes or stay closed. In both cases the heating will be stopped.
• A sound indicates the timer had run out.
Step 9 - Sheetmaker part 3
• When finished you can choose to make the same or go back to the first step.
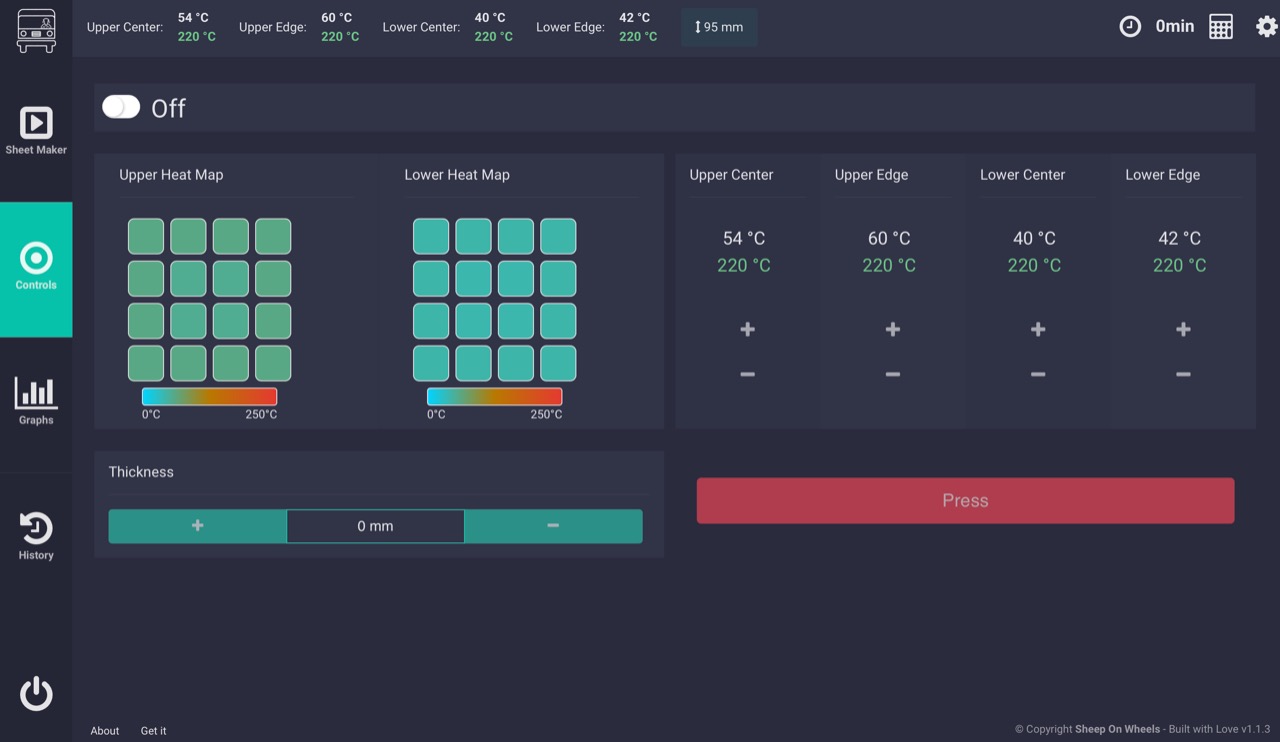
• All these steps can be controlled manually on the controls page. Each of the 4 heating circuits can be set to the desired temperature and open or close the press. While the sheet maker is making an automated sheet there is no access to the manual controls .
• There are 2 heating maps from each plate on the graphs page, this allows users to monitor each heating element. There are also 2 graphs: one that displays the average temperature from the last 15 minutes and one that displays the last 2 hours.
Step 10 - sheetmaker part 4
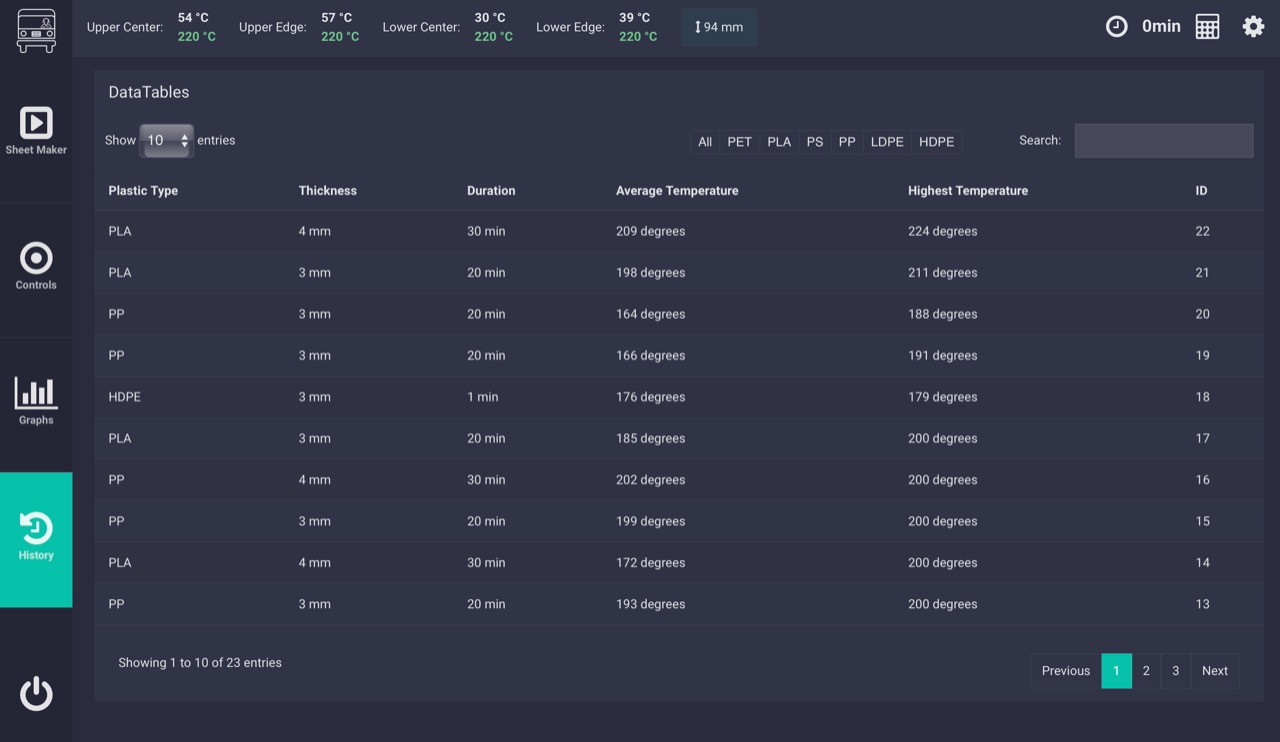
• The history tab will show you all the sheets that are made with the automated process. It will show the id number, the average temp, the highest temp, the plastic type and how long it was in the press.
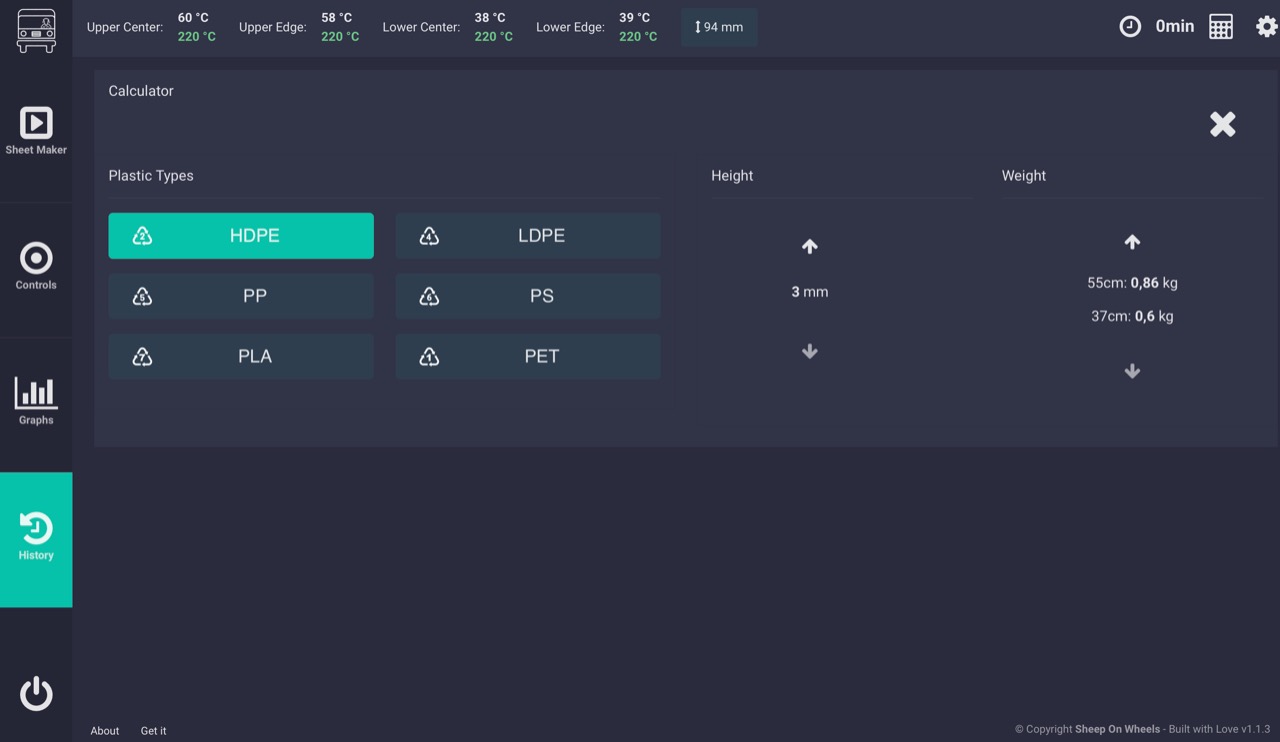
• The calculator function allows to prepare a following sheet while the machine is in use.
• The calculator function allows to prepare a following sheet while the machine is in use.
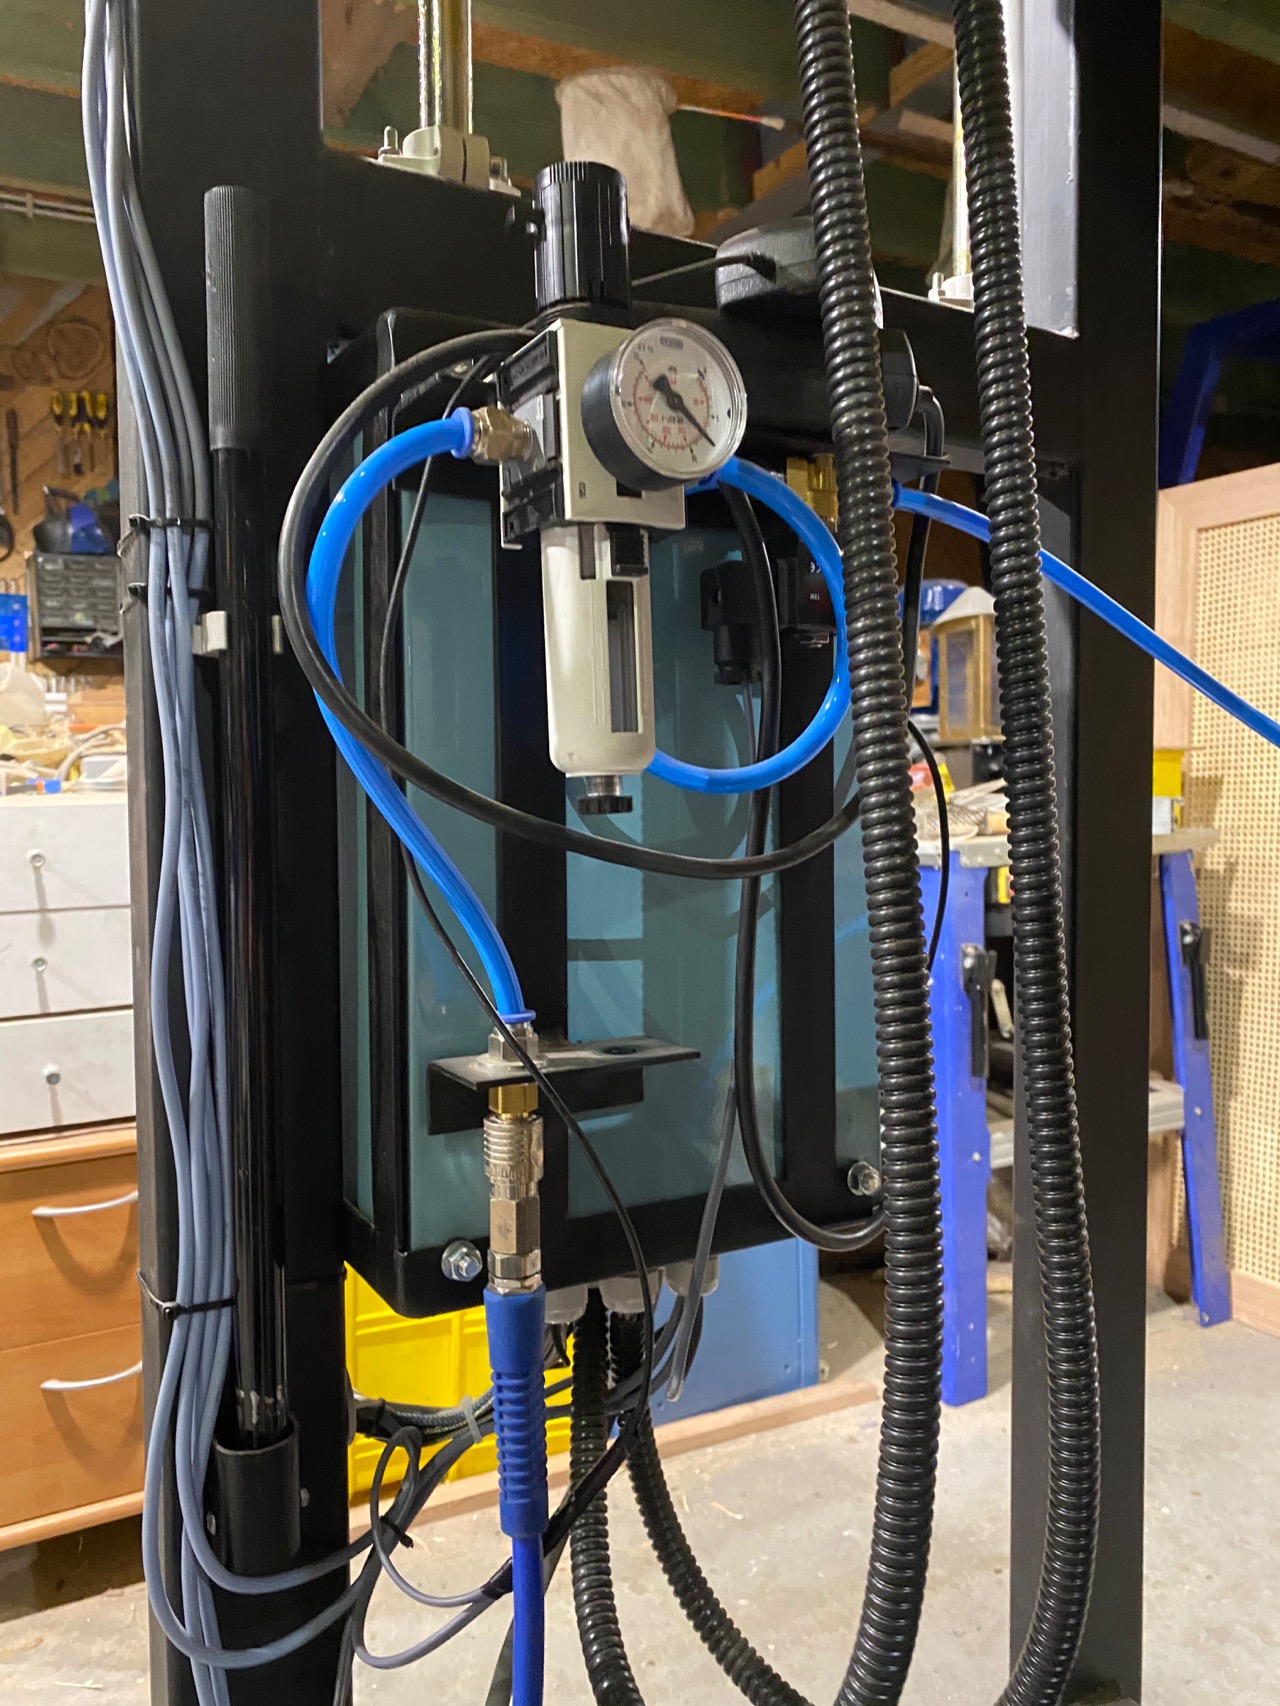
Step 11 - Pressing: pneumatic system
We use pneumatics to operate the jack. It was the cheapest option as we have an air compressor available. Other alternatives would be hydraulic systems. A pneumatic valve, controlled by the system controller let’s air go through when the press needs to be raised. To release the press we installed a servo that can open or close the valve to lower the press (it opens because of its weight)
When the timer runs out (sheetmaker) a signal sent by the Raspberry pi tells the Arduino to release the press. This can be manually overruled if needed.
When the timer runs out (sheetmaker) a signal sent by the Raspberry pi tells the Arduino to release the press. This can be manually overruled if needed.

Step 12 - pressing: height sensor
There is a sensor attached to the upper plate measuring the distance to a reflector mounted on the lower plate. The casing is a sliced PVC tube to limit interference. This measurement is sent to the arduino and allows the machine to know the position of the plates, when to add air and when to release. The sensor we used is a Time Of Flight Sensor vl6180.

—
—
—
Comments