Build brick structures
.jpg)
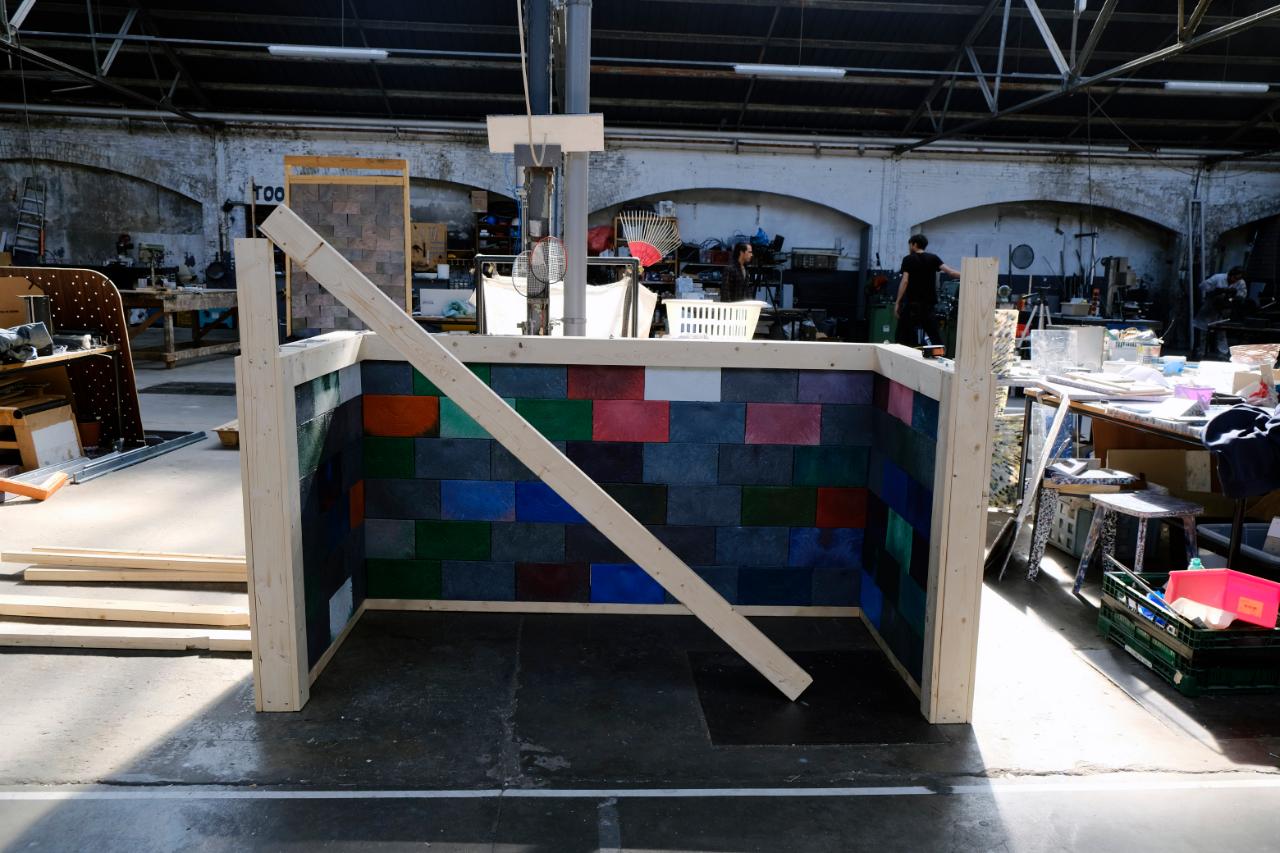
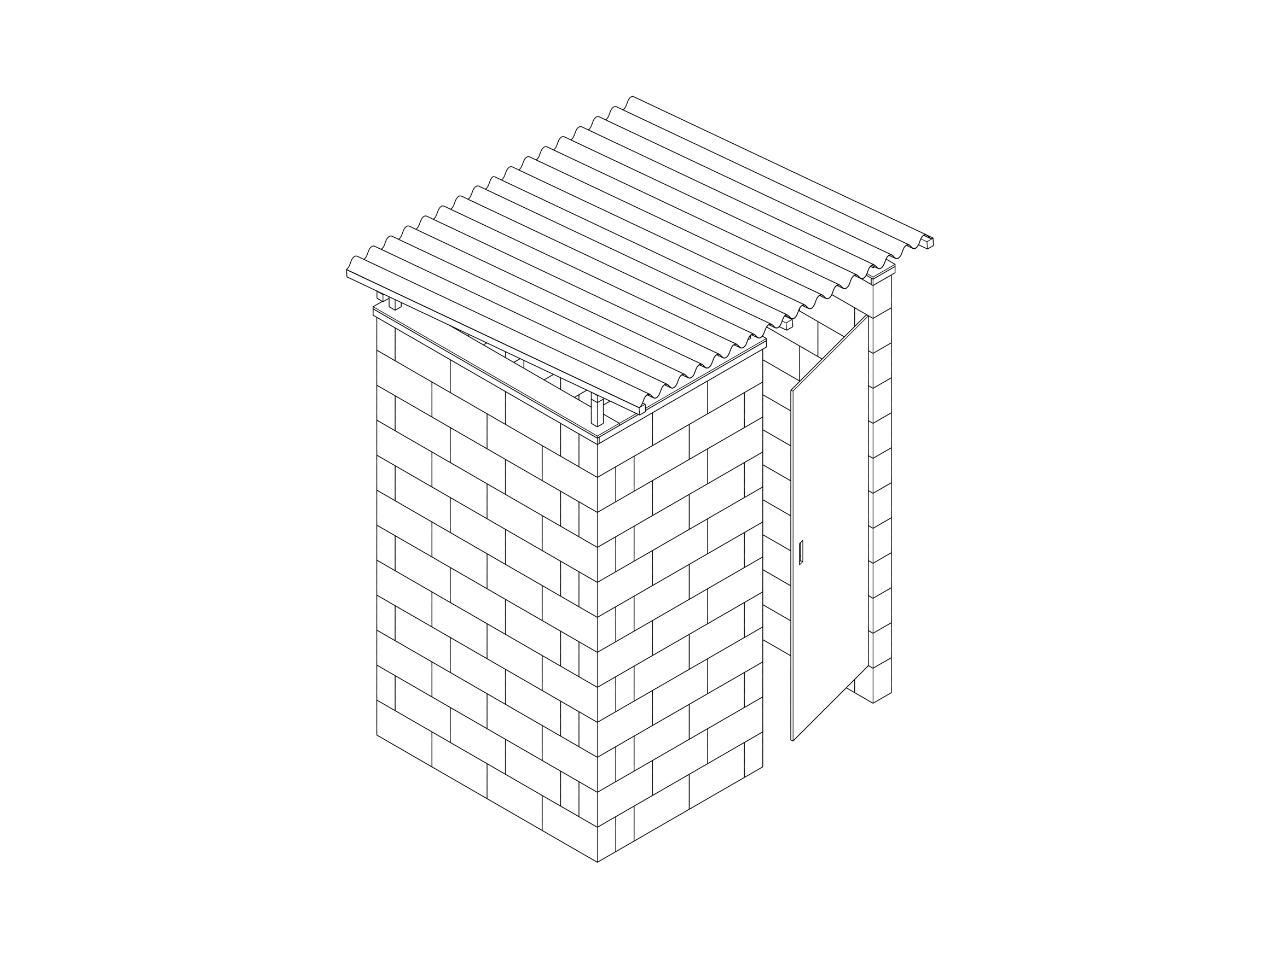
Recycled bricks are a great way of recycling large amounts of plastic. So what's better than building your own recycled plastic bike shed or another similar structure?
This How-to is split up into the following sections:
Step 1 - 2 Intro
Step 3 - 6 Fixed structure
Step 7 - 19 Build walls
Step 20 - 26 Make the roof
—
Attachments
Resources
Step 1 - Before you start
Before you start, this how-to pulls on a slightly different set of skills than some of the other guides and assumes you have a basic understanding of construction/building/architecture. If any of the elements of the guide are vague, we recommend you query the wider internet as most of these techniques are based on standard building methods.
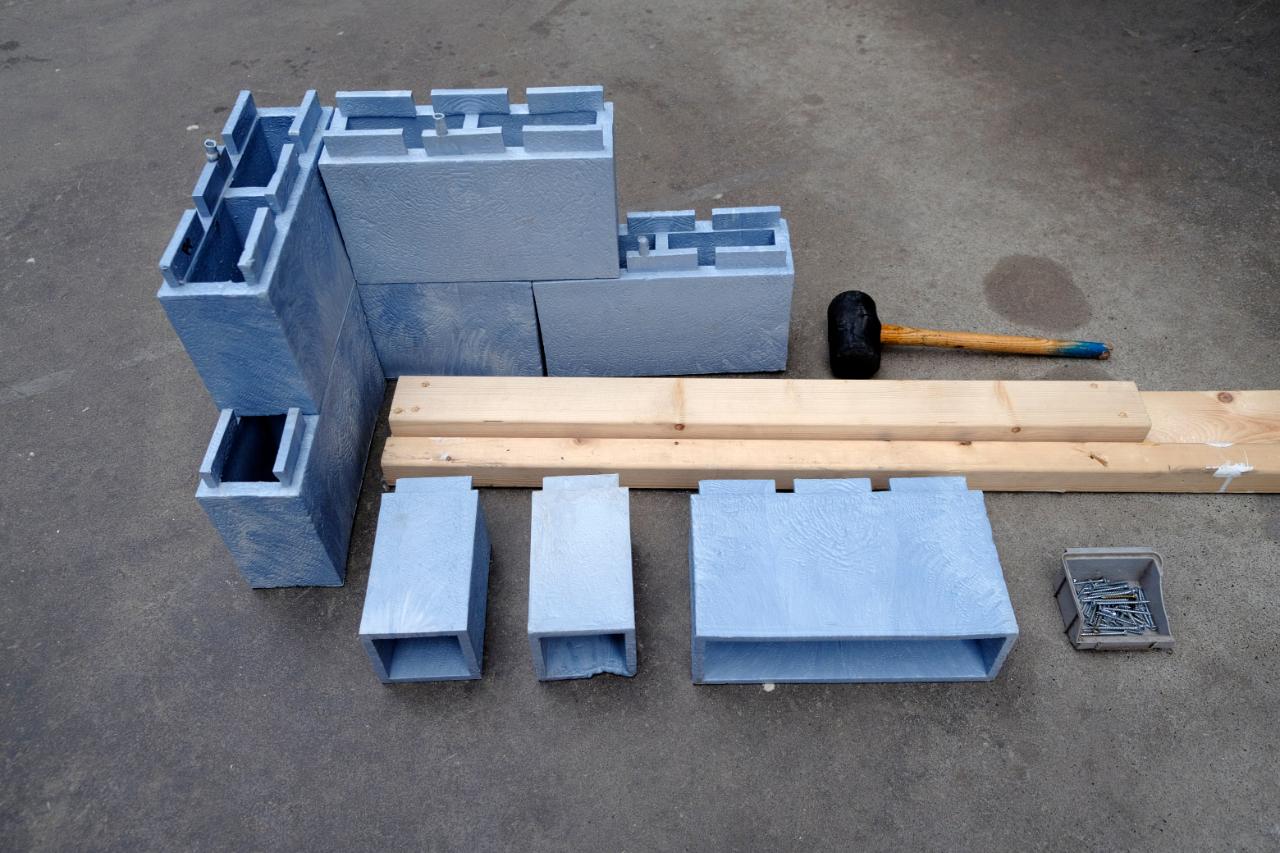
In this how-to, you are going to an assortment of materials, but the basics are plastic bricks, timber planks (of various dimensions), screws, expansion bolts and threaded bar. The main tools you will need are a drill, rubber mallet and saw.
If you have the capacity, you could also change the timber for plastic beams.
Step 2 - Fixed or mobile unit?
Recycled bricks are fairly lightweight, so in some cases, you may want to build a mobile/moveable object. Before starting you will need to decide this. If you choose a mobile structure you can skip Steps 2-6.
Learn here how to make the brick 👉 https://community.preciousplastic.com/how-to/make-extruded-plastic-bricks
Learn here how to make the brick 👉 https://community.preciousplastic.com/how-to/make-extruded-plastic-bricks
Step 3 - Locate a concrete slab (Fixed structure)
To ensure a strong foundation for our structure, we will need to locate or make a concrete foundation. We will not explain how to make one here but you should be able to find comprehensive guides online.
In this How-to we used the concrete slab of our workspace, which is at least 30cm thick. Depending on your structure 15cm could be utilised.
In this How-to we used the concrete slab of our workspace, which is at least 30cm thick. Depending on your structure 15cm could be utilised.
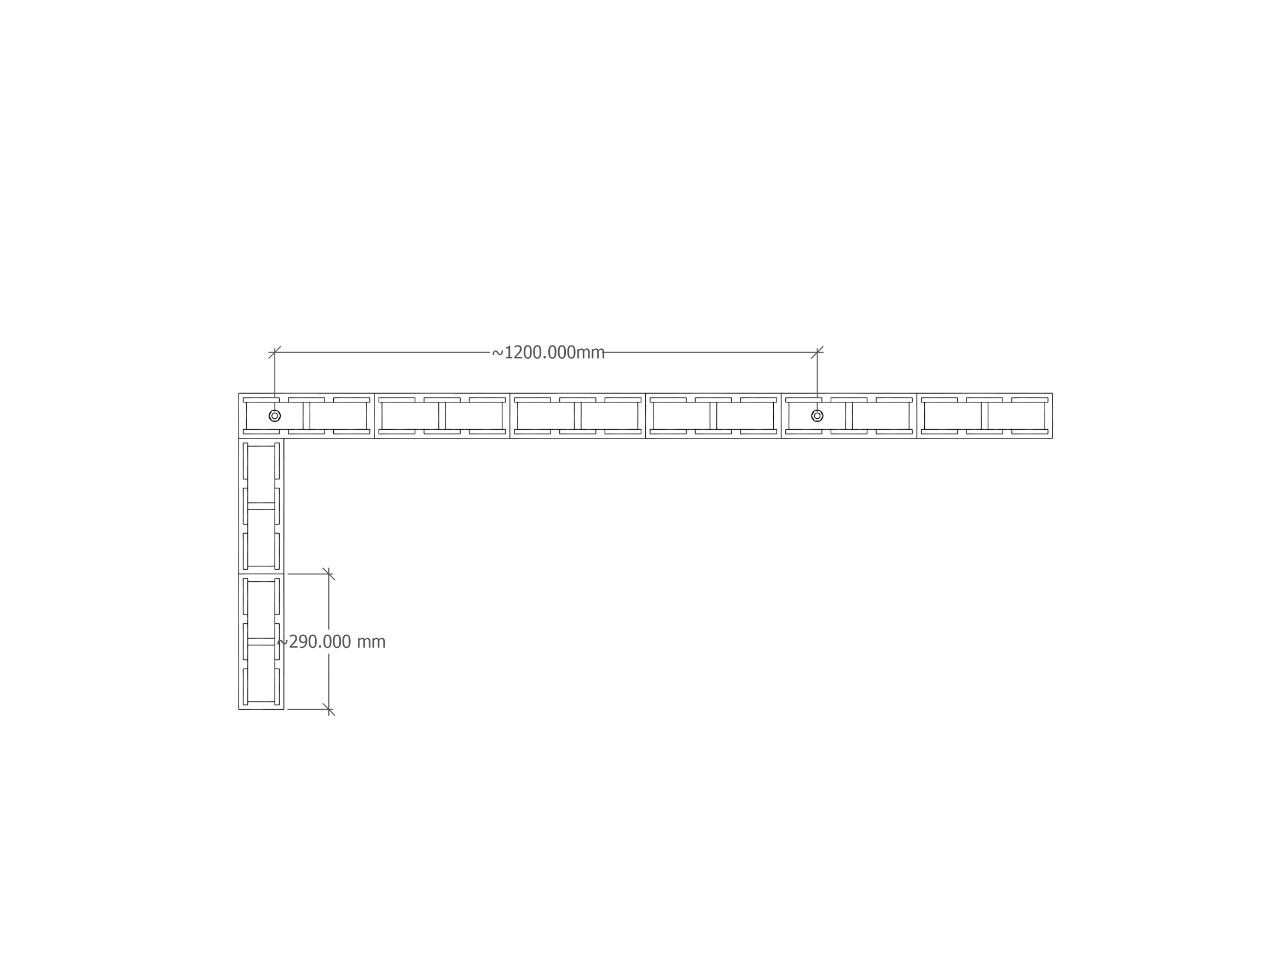
Step 4 - Marking holes
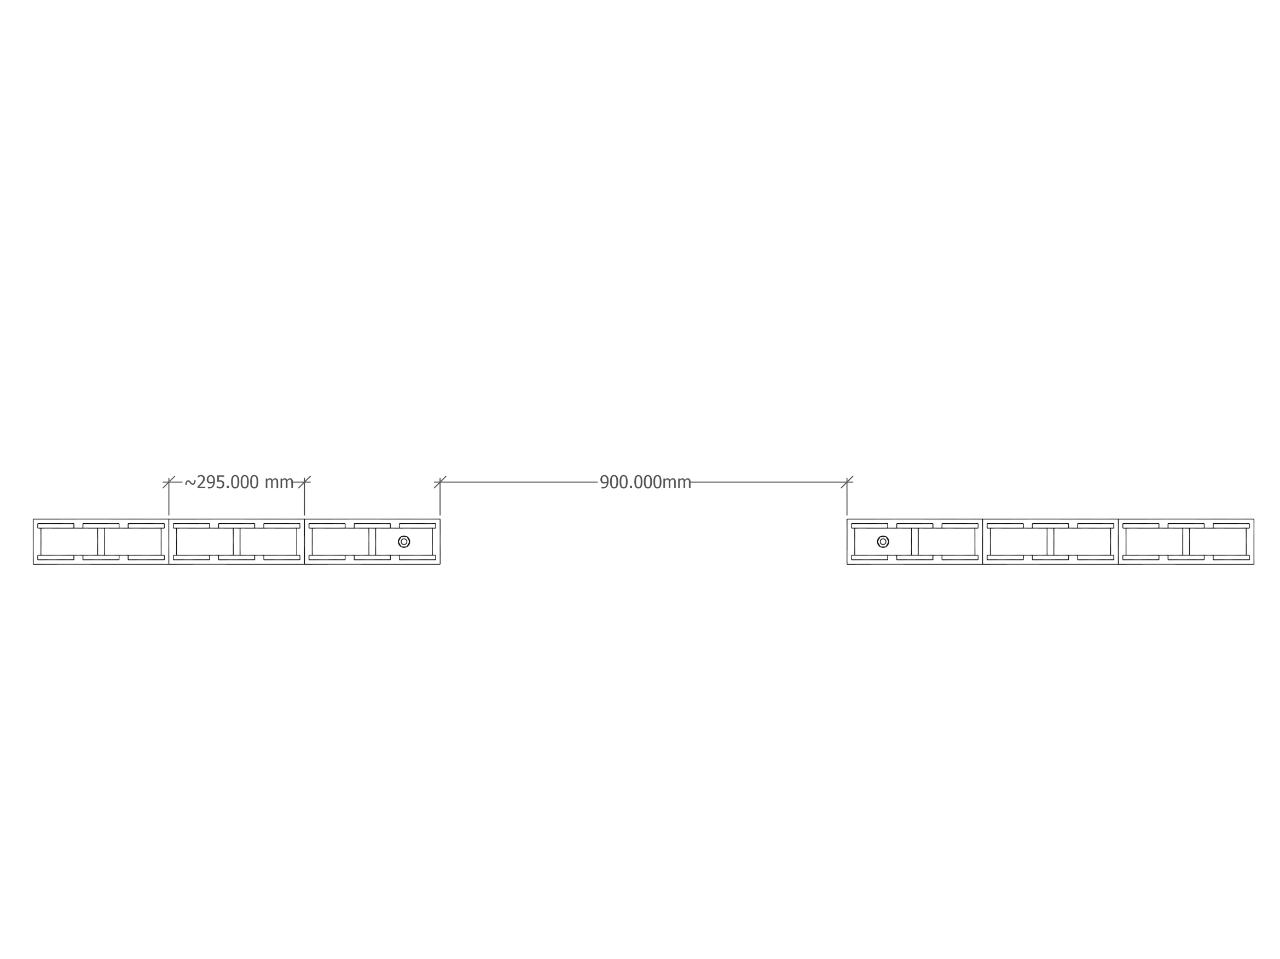
Before drilling the holes into the concrete, you need to know roughly where you are going to place your bricks. Each brick is approximately 29cm in length, and we need to place an anchor every 4 bricks (approx 1.2m apart), on corners and also at the ends of the structure. The holes also need to be located so that they go through the hollow section of the brick. The location of these holes depends on your final object, and cannot be moved halfway through the process so take extra time to make sure you get this step correct by maybe laying out your first layer before starting.

Step 5 - Drilling your holes
Drilling holes into concrete requires an impact hammer and a masonry drill bit. In this case, we used a 14mm drill bit for a 10mm bolt (next step). Make sure to wear respiratory protection if inside as this can potentially be a dusty job. Always wear protective glasses to protect your eyes.
The depth you drill is dependant on the size of your expansion bolt.
The depth you drill is dependant on the size of your expansion bolt.

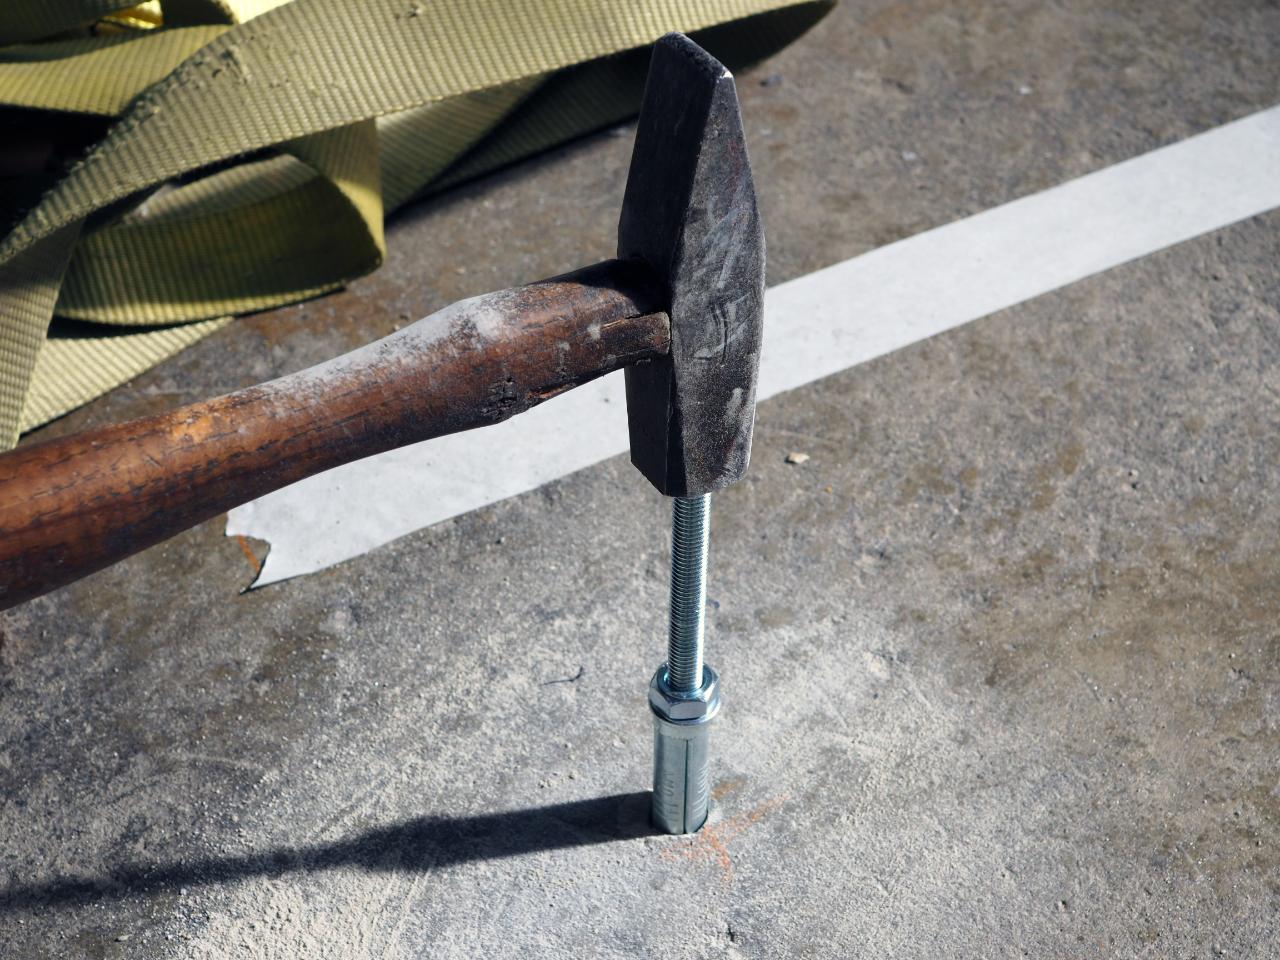
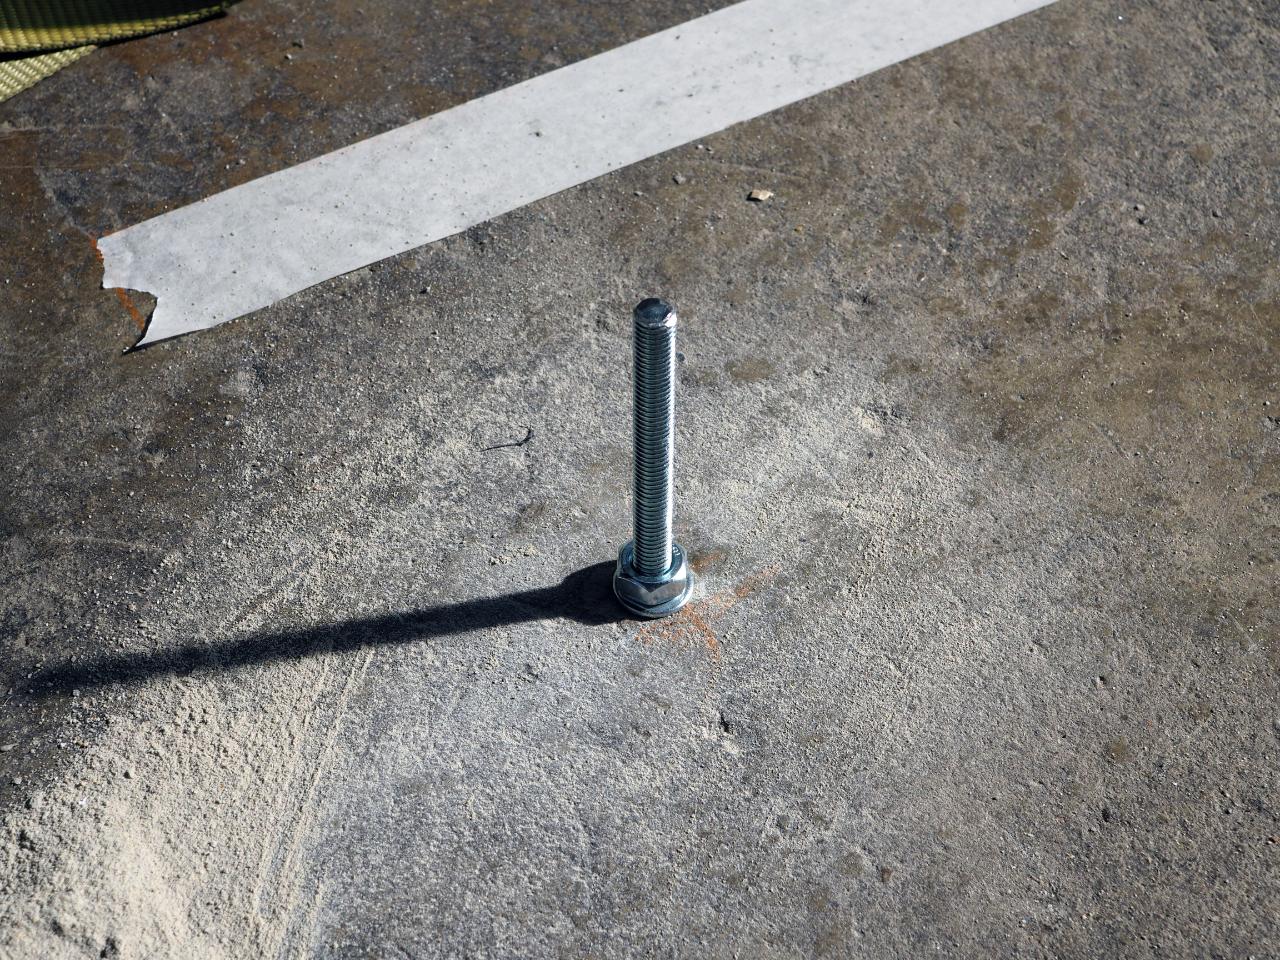
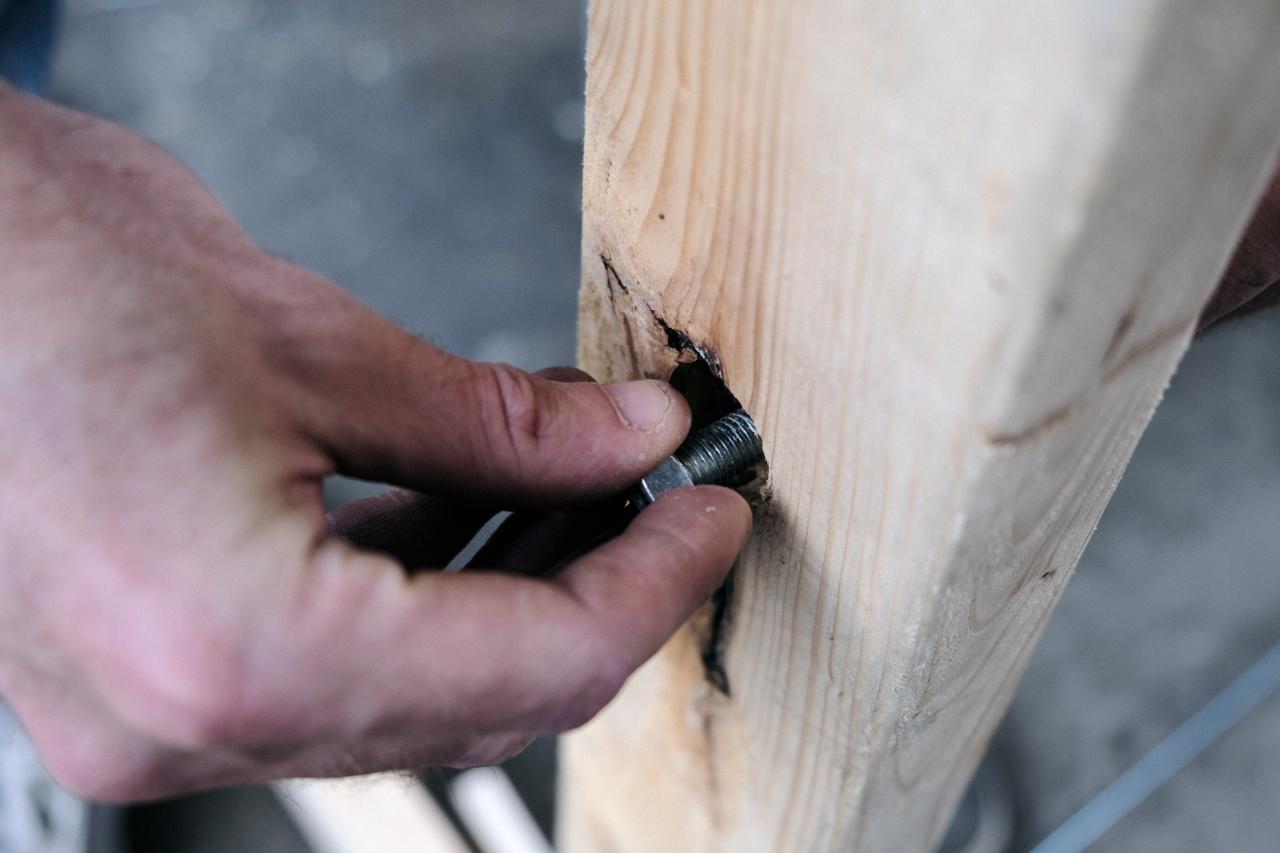
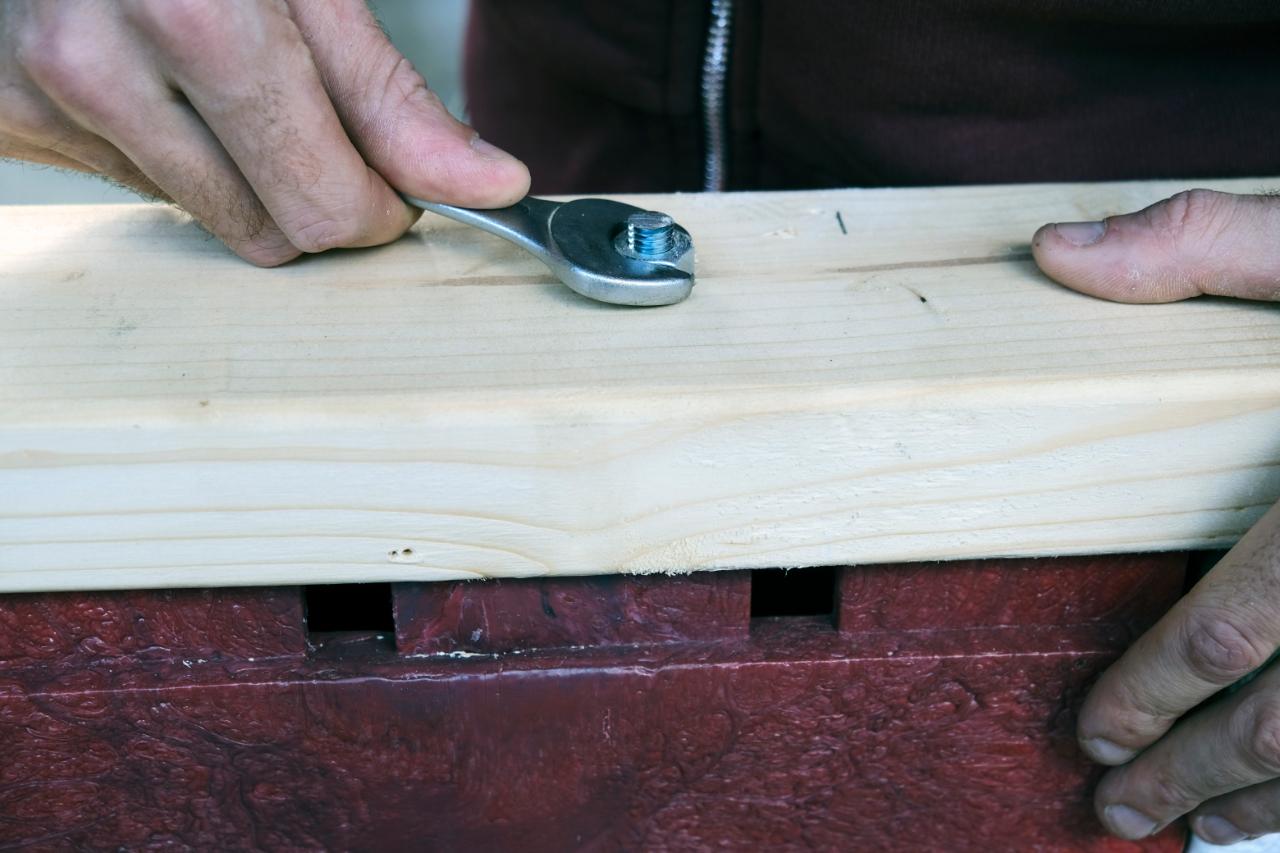
Step 6 - Inserting expansion bolts
Expansion bolts are what we use in this how-to guide, but there are other options available including epoxy.
With the expansion bolt, we gently hammer in the bolt until flush with the concrete and then tighten until it can no longer be removed from the hole.
After this point, the steps are the same as a mobile unit.
With the expansion bolt, we gently hammer in the bolt until flush with the concrete and then tighten until it can no longer be removed from the hole.
After this point, the steps are the same as a mobile unit.
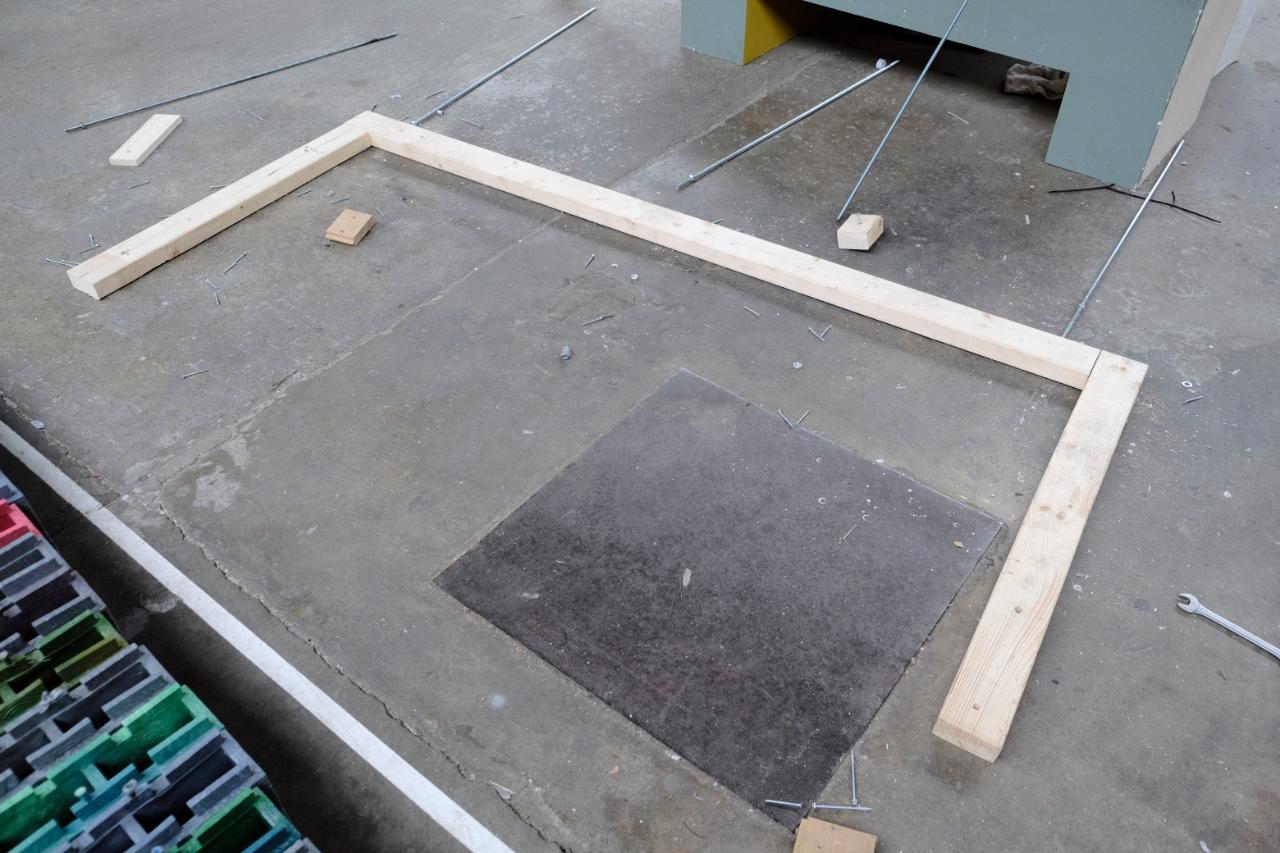
Step 7 - Layout your base (Mobile unit)
In this Step, you are creating the bottom layer that will be connected to the top layer holding the bricks together. If you have bolted your structure to the ground you can skip this step, unless you want to create a layer of wood between the concrete and the first layer of bricks. (Which we did for our 2019 Dutch Design Week exhibit: see photo).
This first layer of wood needs to be exactly the same length as your bricks on the first layer and screwed together to create a single unit.
This first layer of wood needs to be exactly the same length as your bricks on the first layer and screwed together to create a single unit.
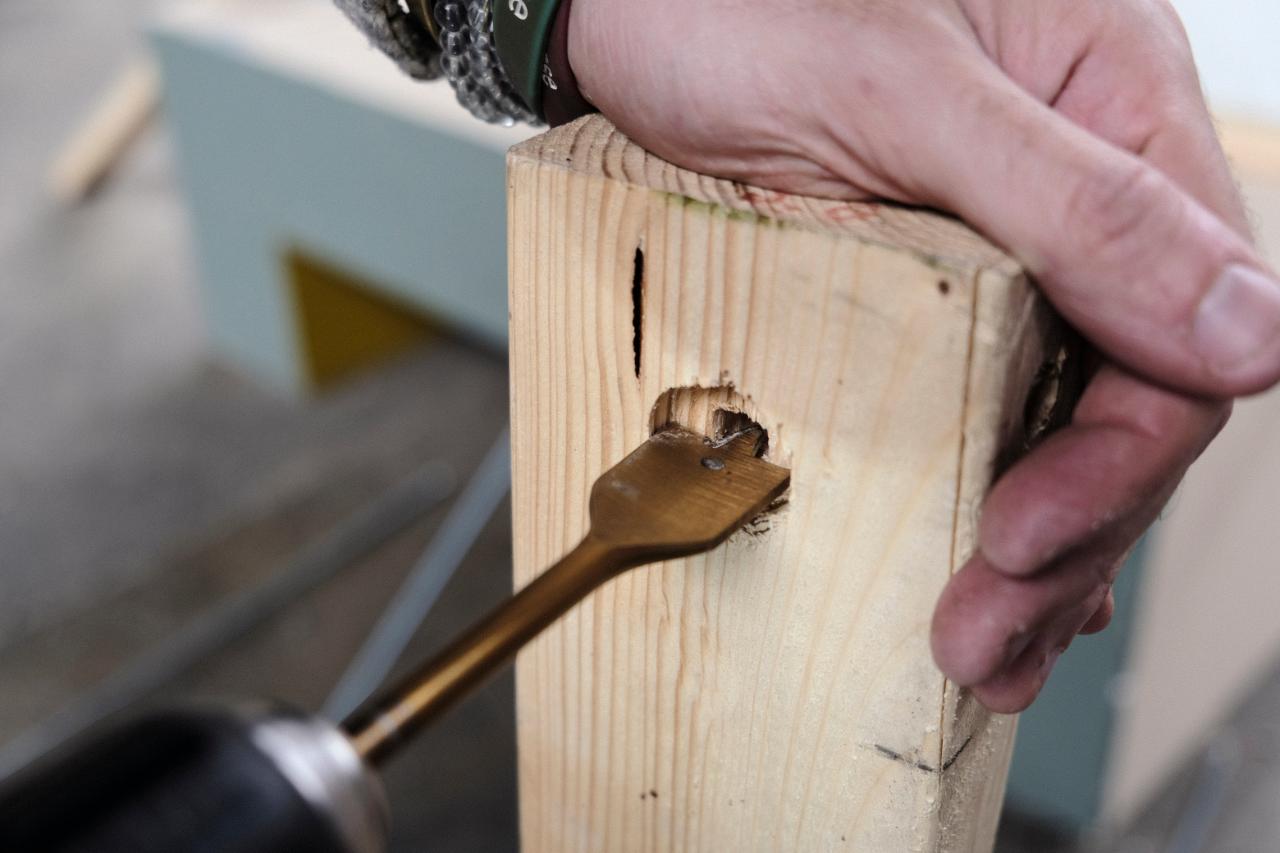
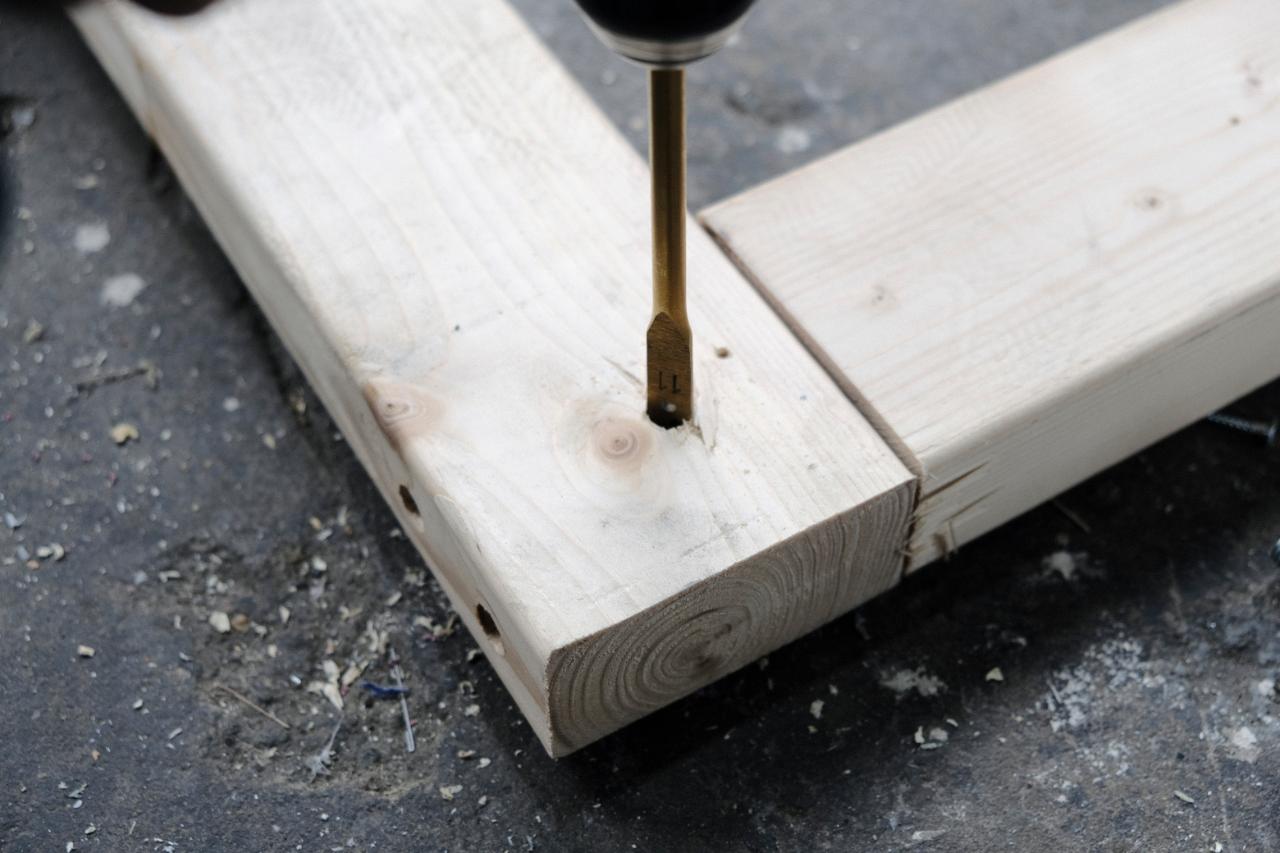
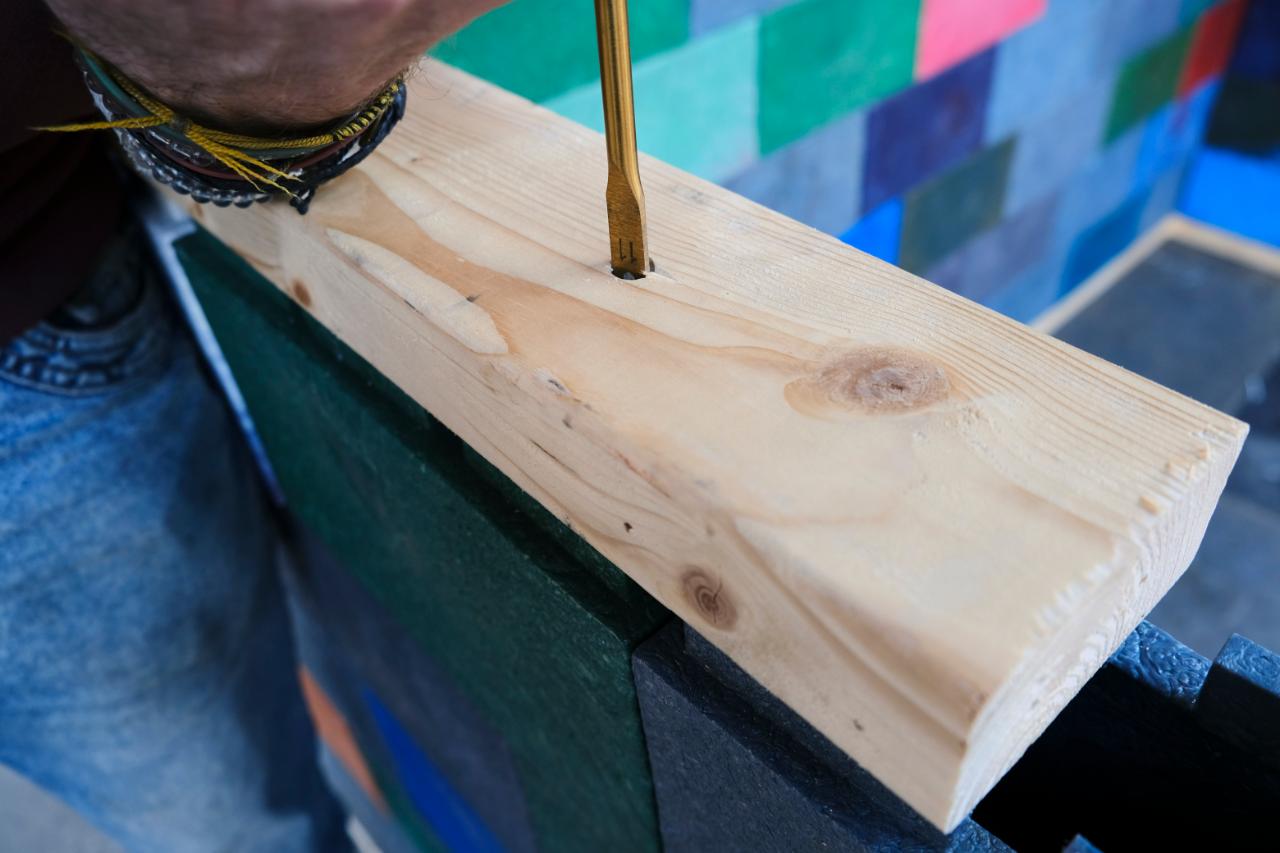
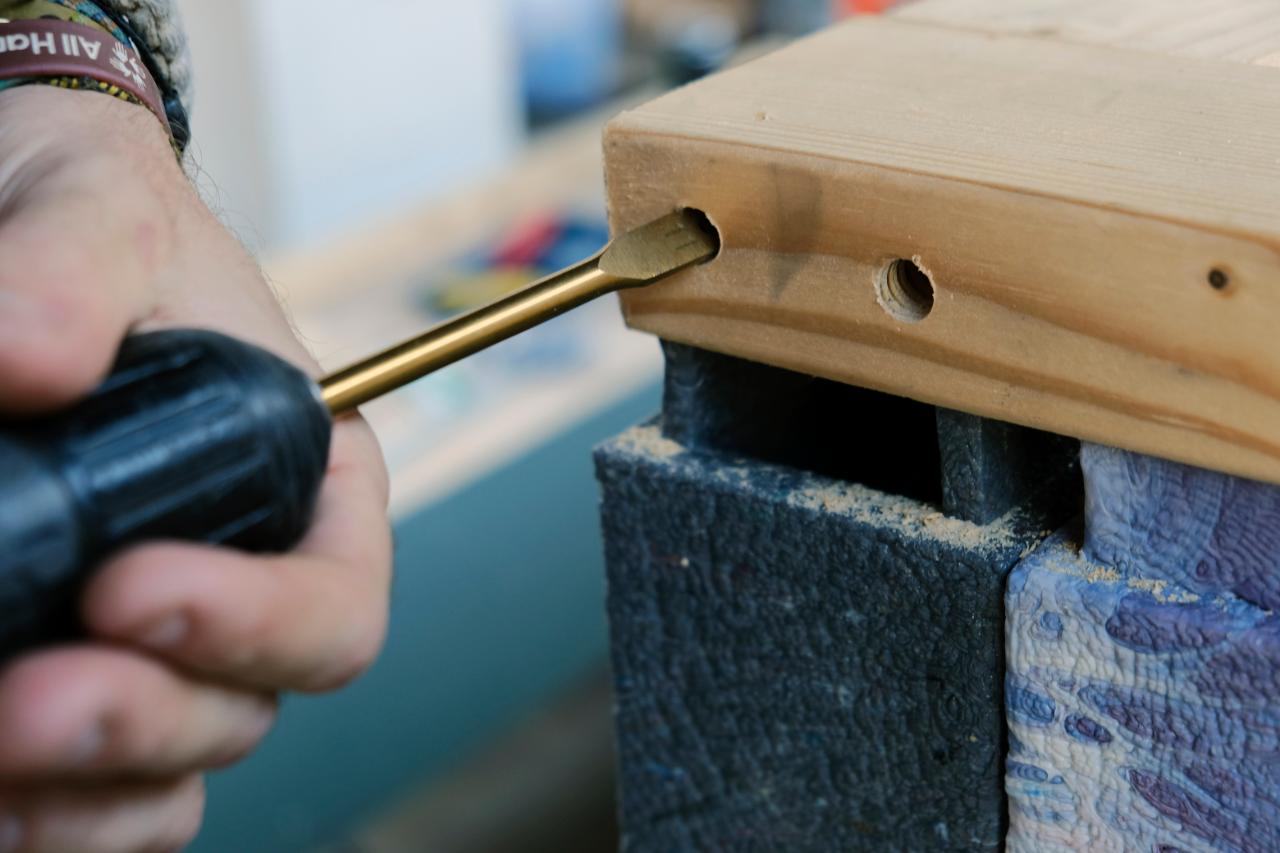
Step 8 - Drilling holes into the base
We now need to drill holes for our threaded bar, and counter sink the nuts into the base of the wooden frame at about 1.2m intervals, ensuring extras are placed at the corners and ends of the wall . To do this we use a spade head bit with the same diameter as our 10mm washers and then drill the 11mm holes for the threaded bar to pass through.
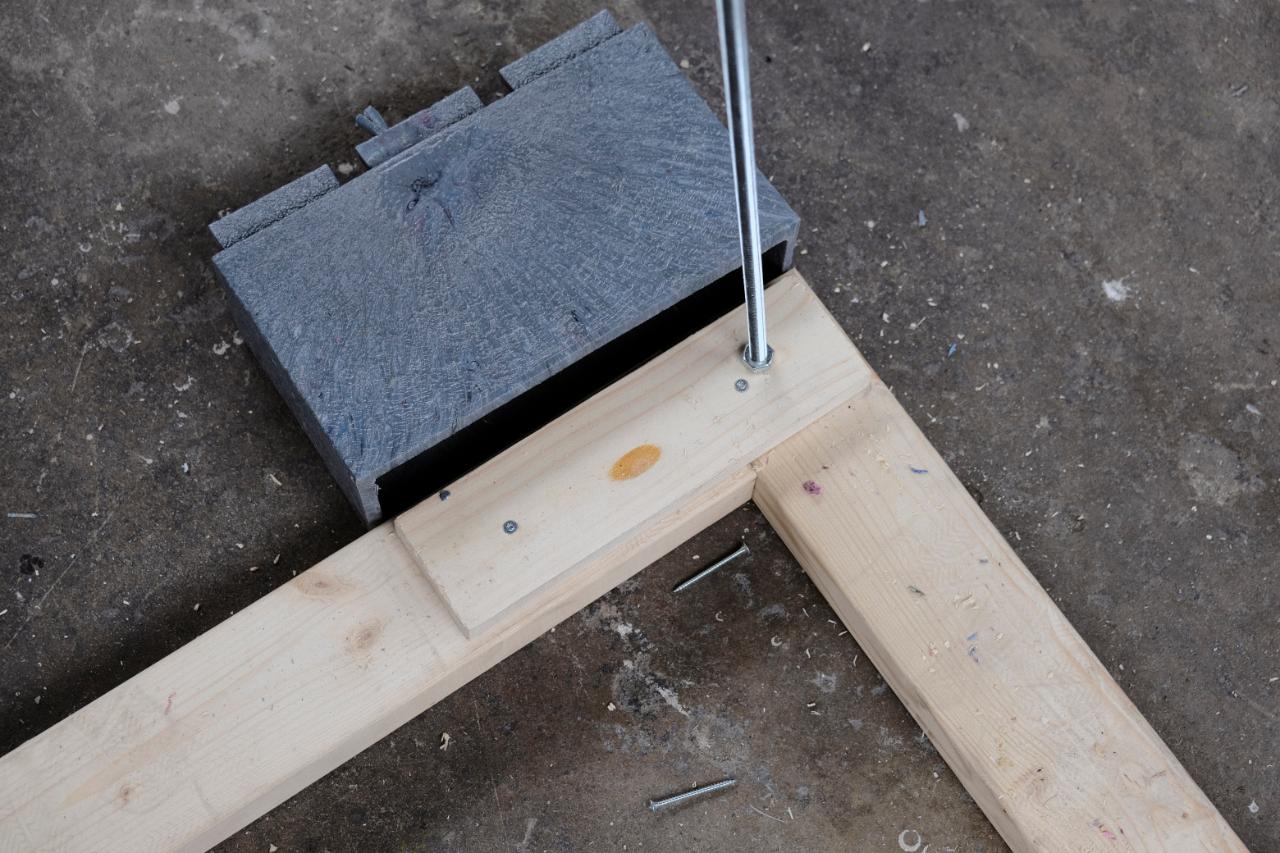
Step 9 - Placing threaded bar
Now we need to attach the threaded bar to our base structure. This threaded bar needs to be longer than planned wall height. You may need to weld multiple pieces together and if you have a bolt in the concrete, you will need to weld the threaded bar to your bolt.
For the timber, version place a nut and washer on both sides clamping the threaded bar in place.
For the timber, version place a nut and washer on both sides clamping the threaded bar in place.

Step 10 - Placing limiters
To ensure the bricks do not slip off the wooden substructure, we create small spacers which are exactly the same dimension of the base of the brick. These spacers should be located near/on bolts and near corners.
These can be screwed into place.
These can be screwed into place.

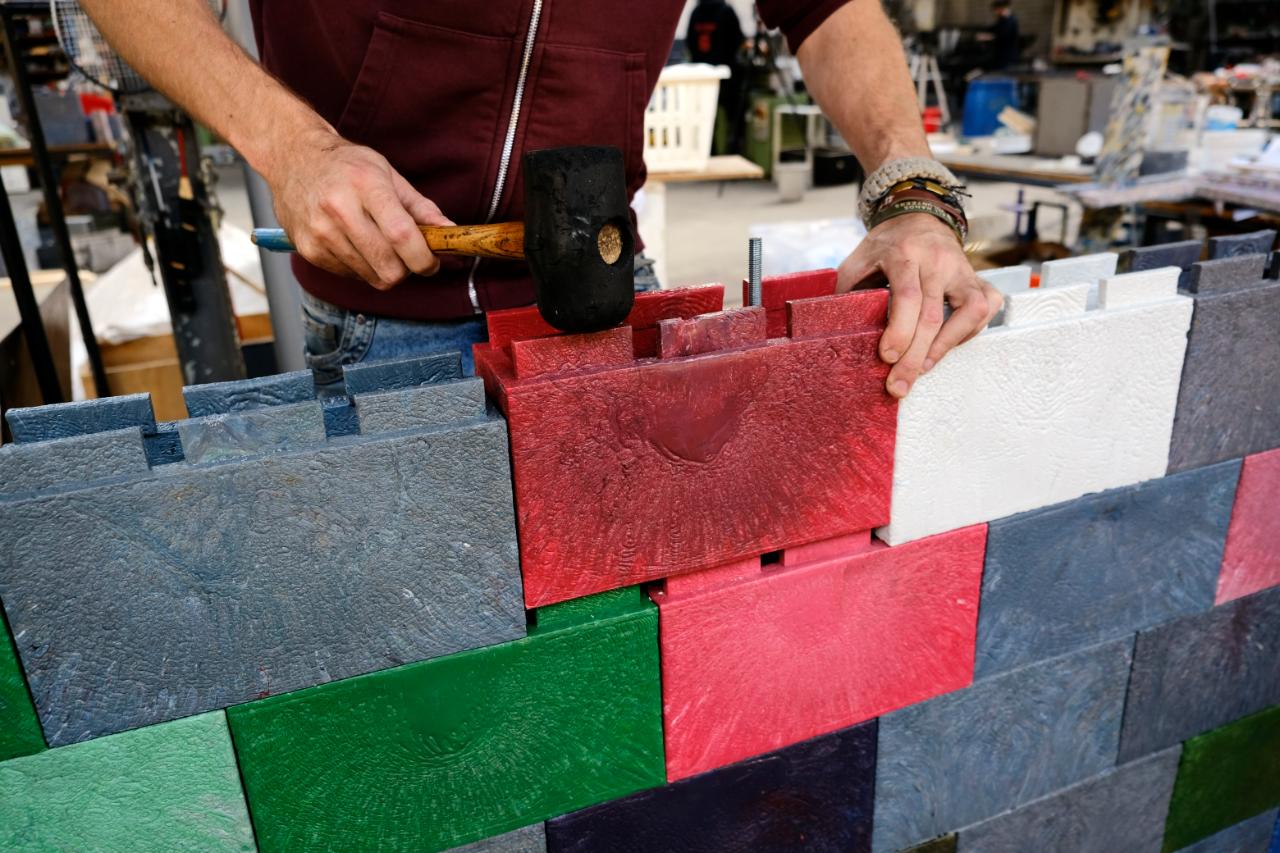
Step 11 - Placing bricks
Your first layer can now be placed in tandem with adding the second layer. It is easiest to start in one corner and go from there adding Limiters incrementally. Bricks can easily be hammered together and no special tool is required for this, but we recommend a rubber mallet to prevent damage to the bricks.
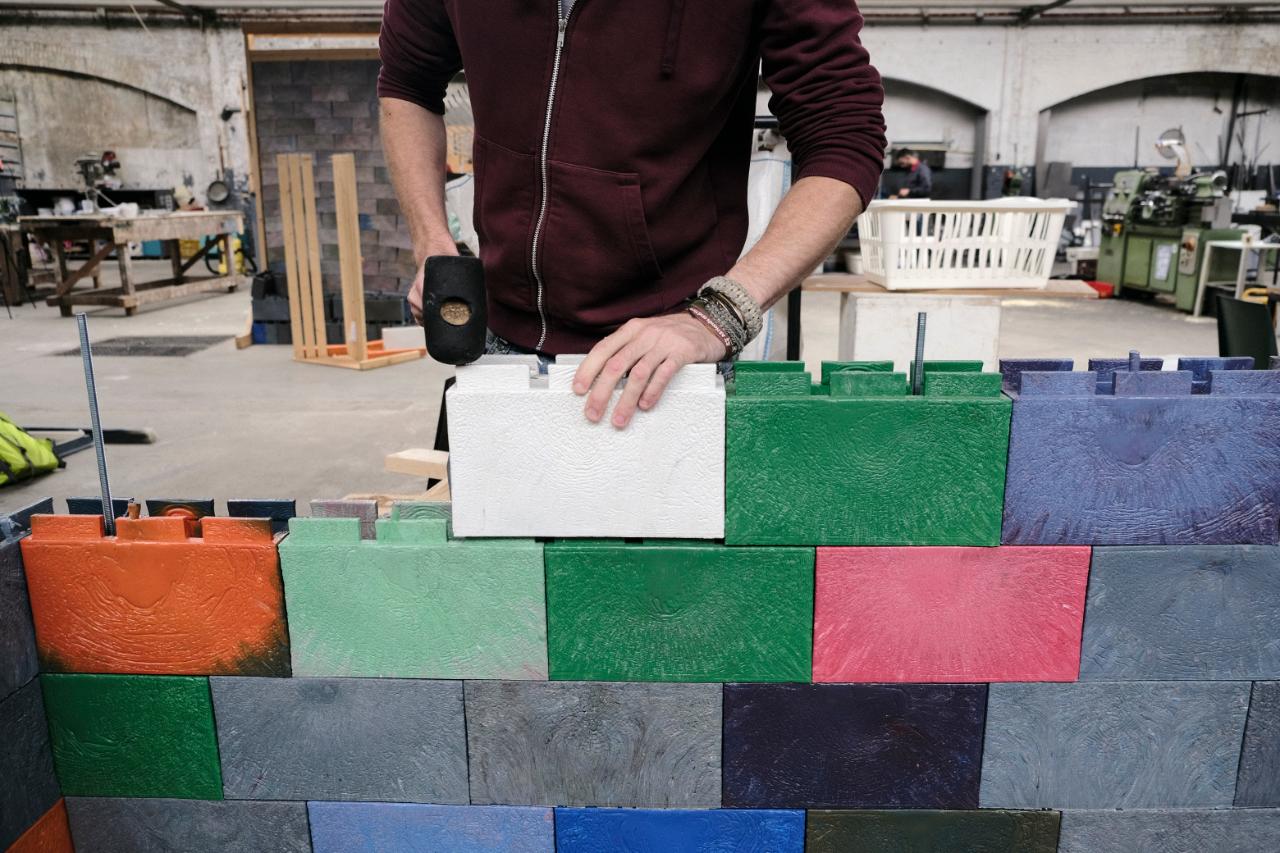
Step 12 - End bricks
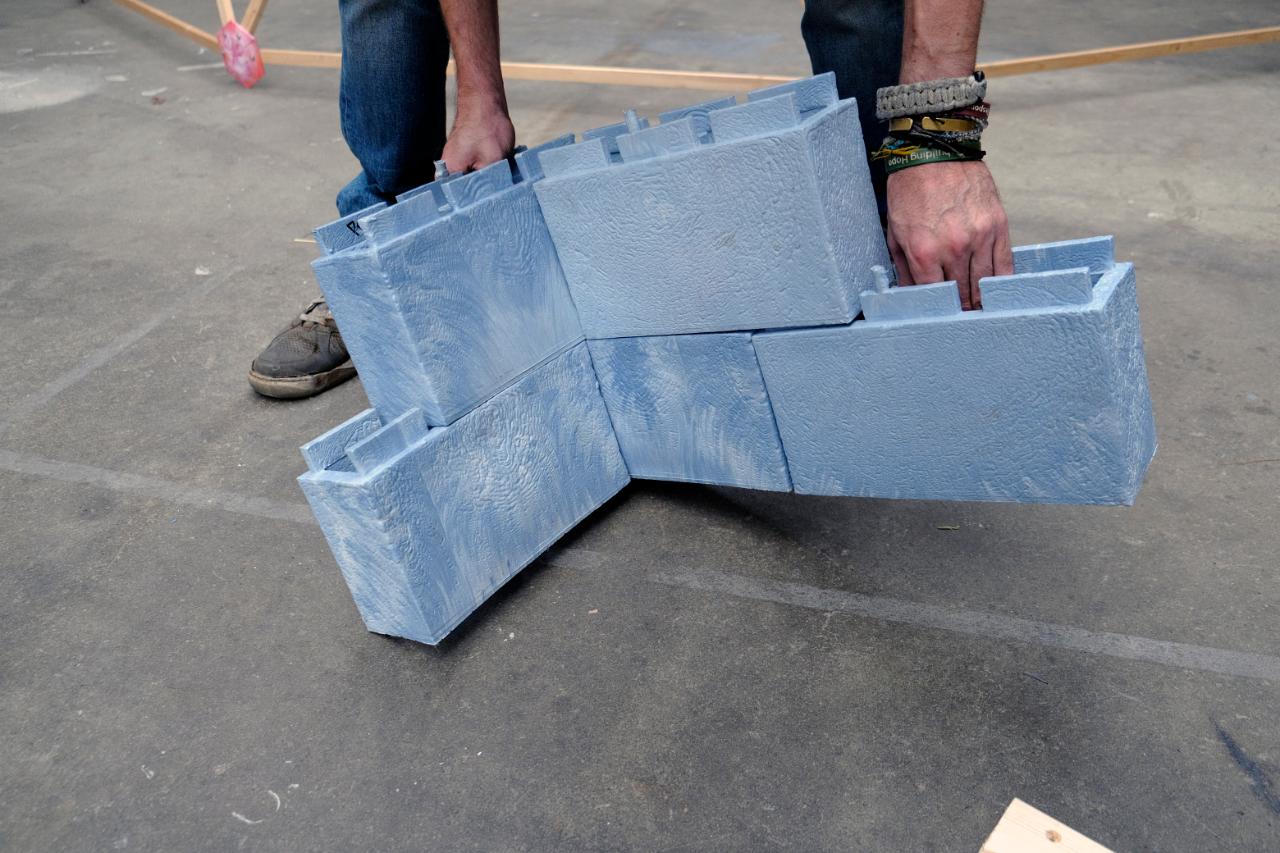
There are 2 types of bricks required to build a wall, and a 3rd optional giving you more control over your design: single, double and triple brick.
To create a straight edge you will need at least the single brick. this is placed just like all the other bricks.
To create a straight edge you will need at least the single brick. this is placed just like all the other bricks.


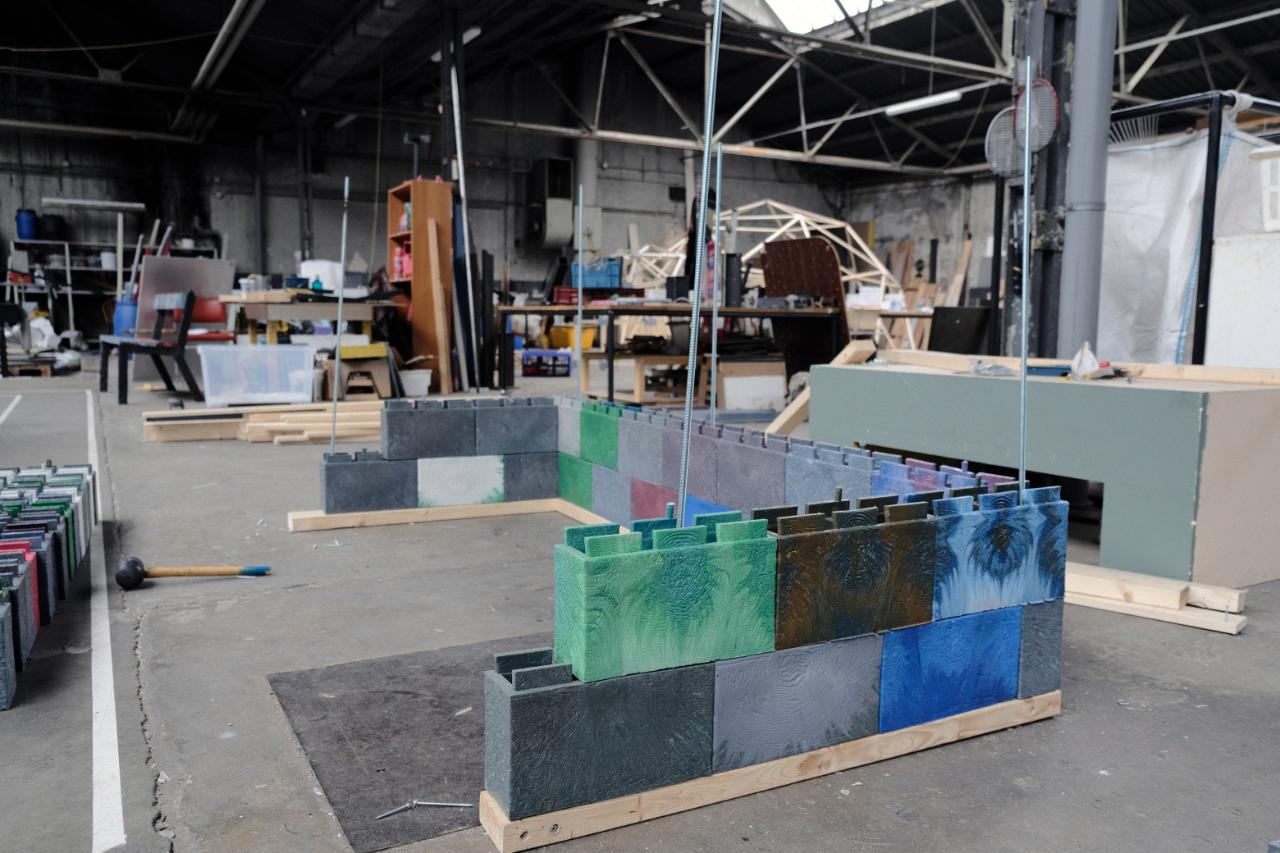
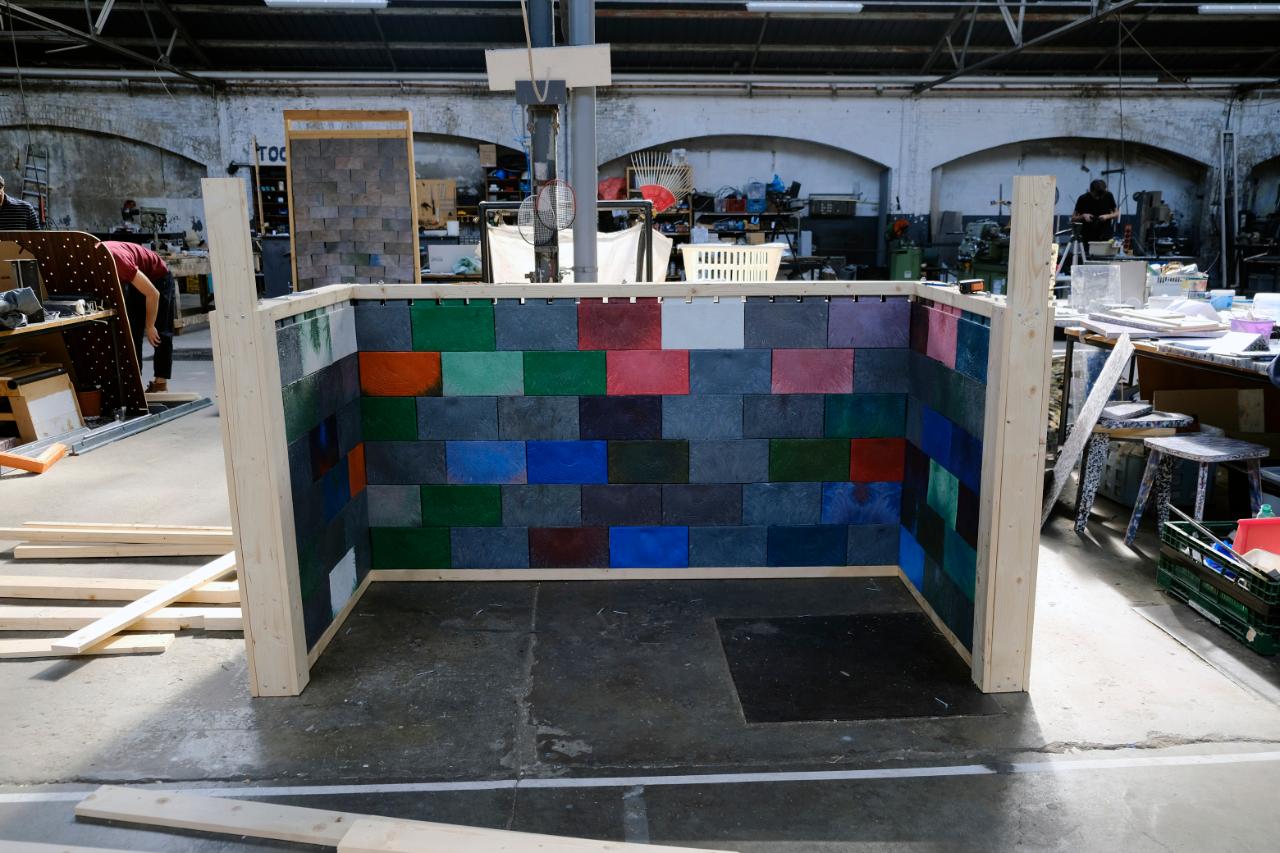
Step 13 - Build your wall
Now continue to build your wall, hammering bricks in place layer by layer, ensuring each brick is tightly hammered together.
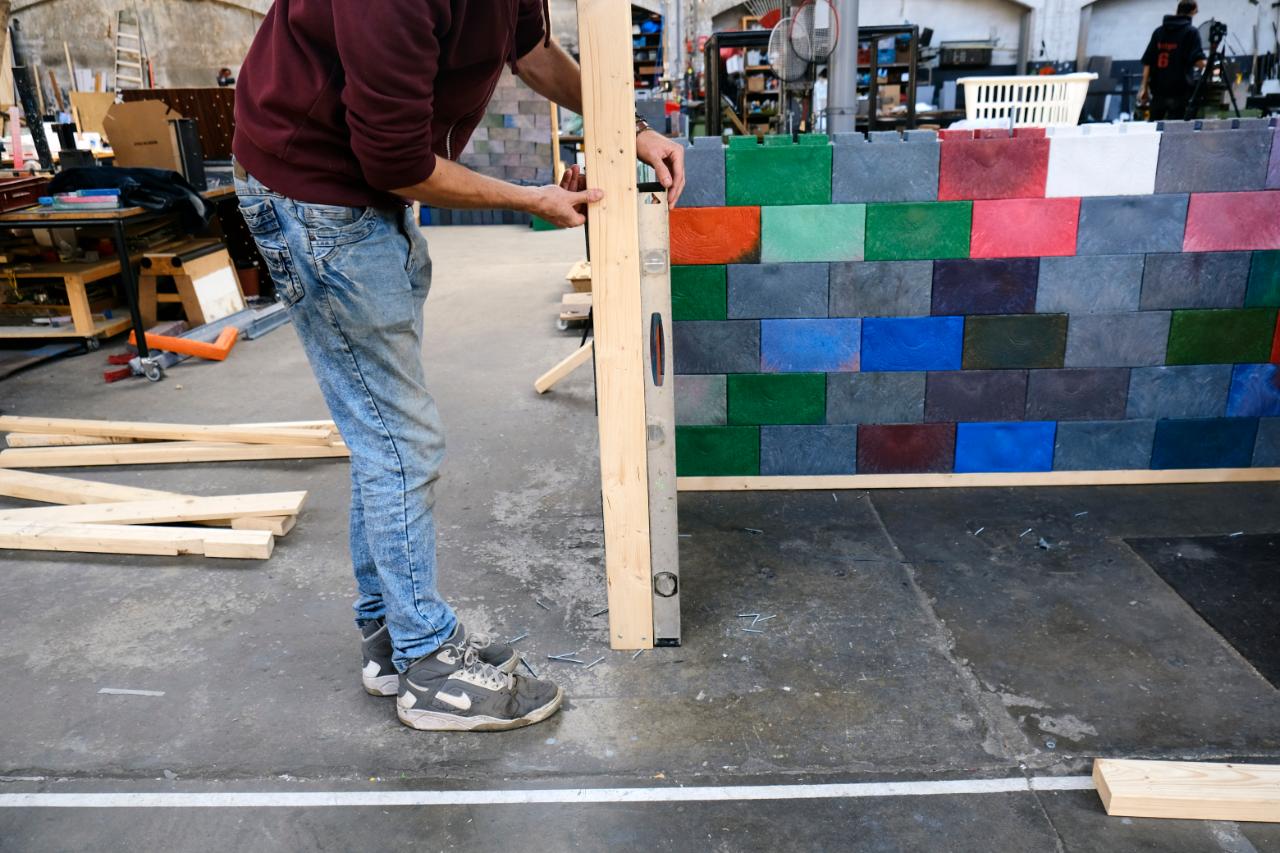
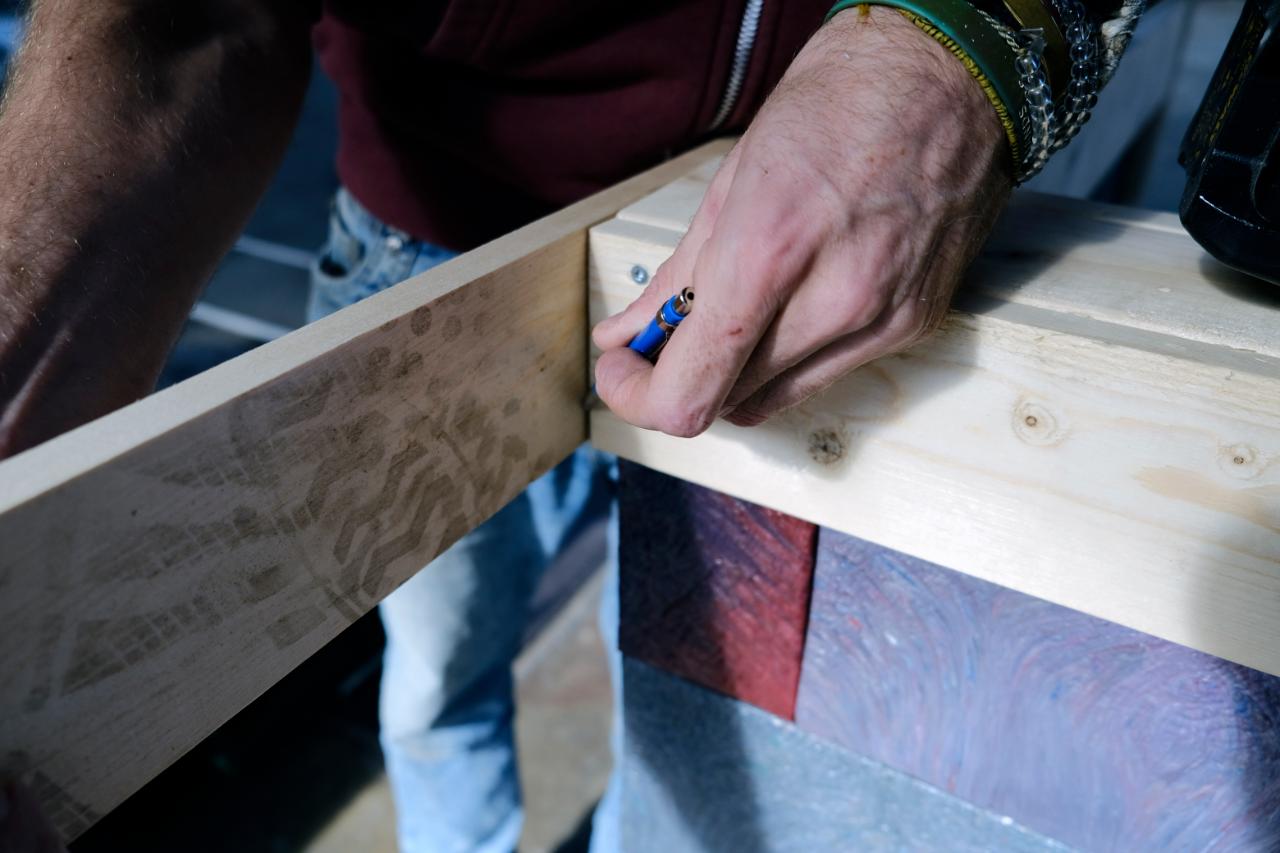
Step 14 - Framing the wall
Now that you have reached your desired height you may need to attach columns. To do this we cut the wood to a desired length and then screw to the timber base or bricks ensuring the column is straight with a spirit level.

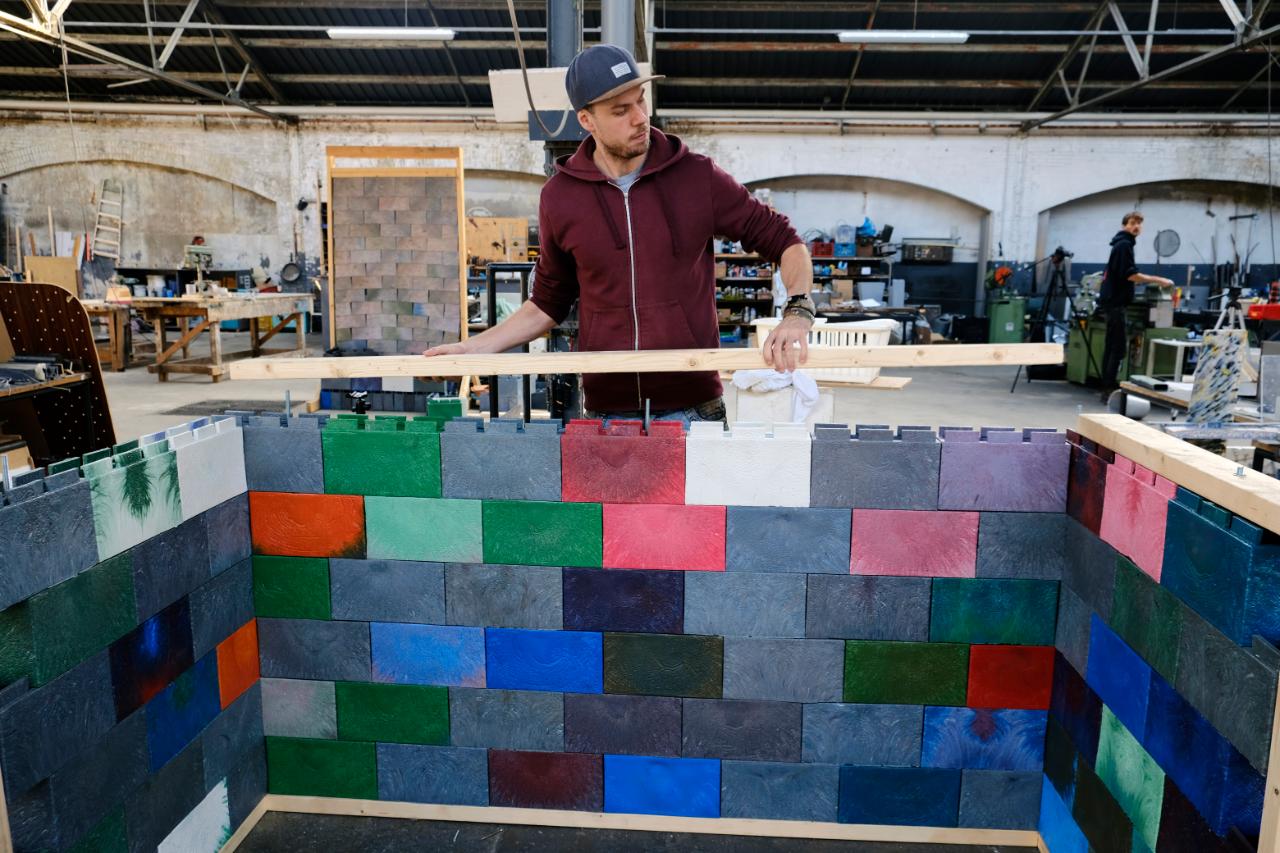
Step 15 - Topping the wall
Next, you will need to top the wall with timber. To do this drill 11mm holes at the same spacing as previously done to the concrete of bottom frame, sliding the timber over the exposed threaded bar.
Your dimensions for the timber should also be the same as the floor if your structure is even.
Your dimensions for the timber should also be the same as the floor if your structure is even.
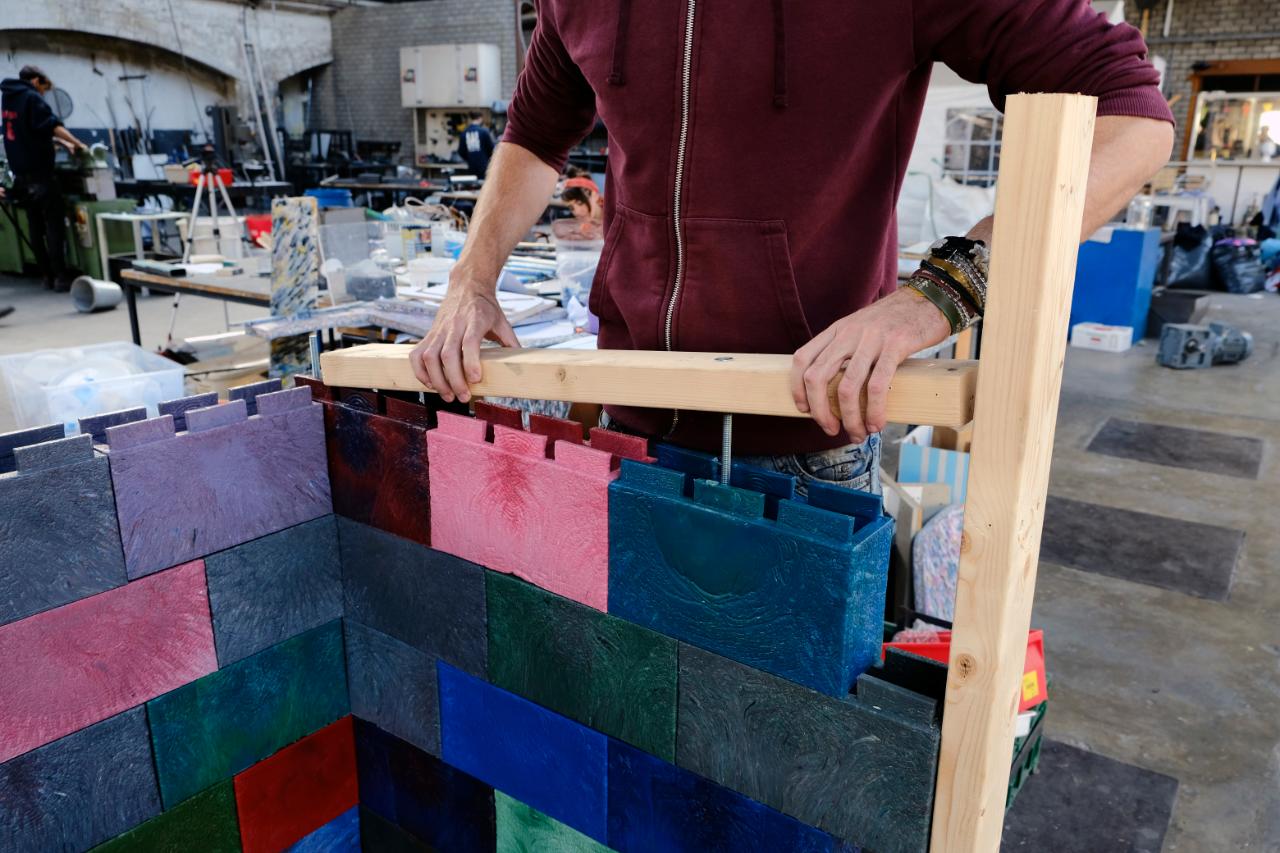
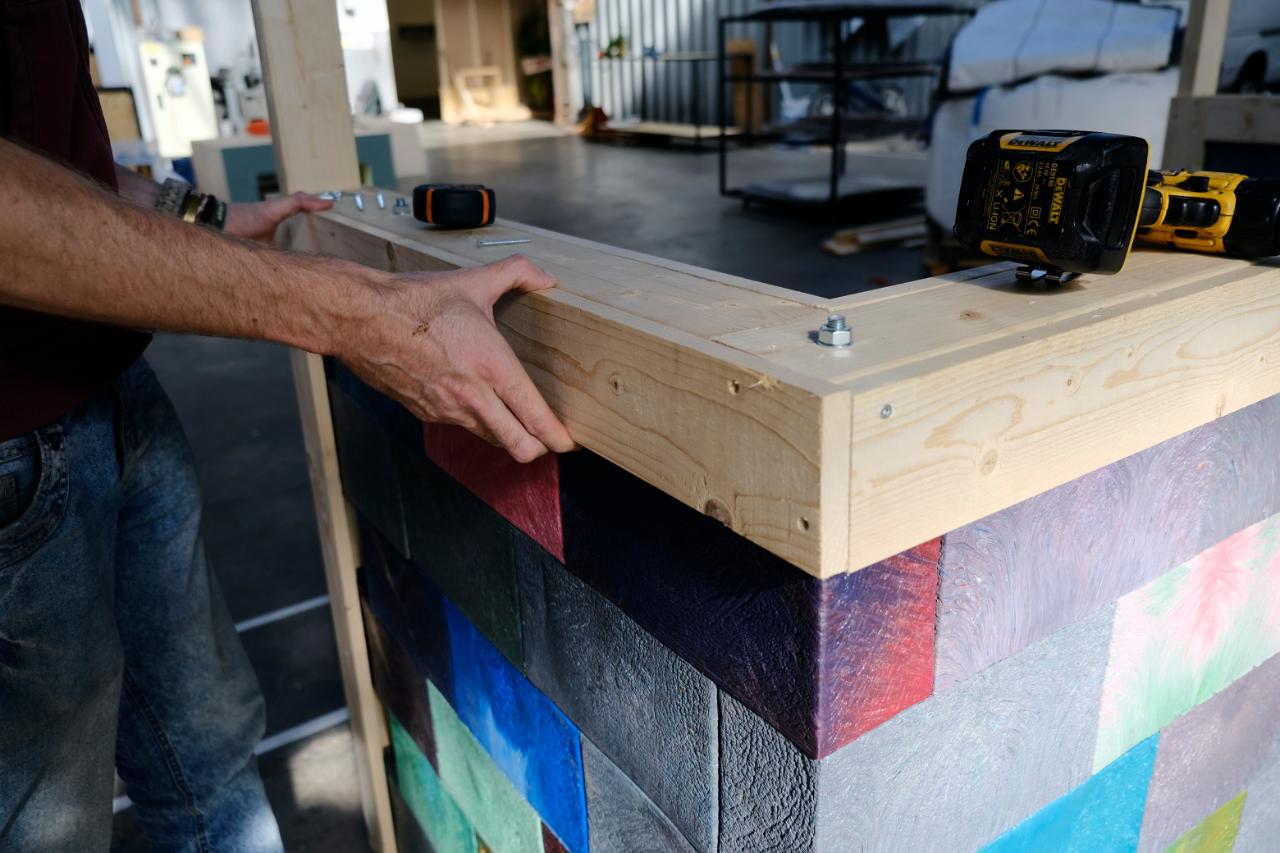
Step 16 - Connecting the top plate
Next you will need to connect the top plate together using screws and depending on the screw length you may need to drill a hole into the wood to allow the screws to join the wood. This will ensure the top plate acts as a single unit and will be strong enough when we tighten down the structure in the following steps.

Step 17 - Clamping the bricks together
Next step is to clamp the bricks together ensuring they cannot move. To do this you will need to add an additional washer and nut to the threaded bar, tightening the wood down until either the washer sinks into the wood or a good level of resistance is felt to the nut. This step should also increase the strength of the wall and its stability.
Step 18 - Attaching the top of the beams
Next step is screw in the tops of the columns to the newly added wood, now that we have bolted the structure down.

Step 19 - Framing & covering the brick teeth (sides)
Now that the man structure is clamped we need to add some framing. Here we are using 18mm by 100mm planks, screwed into our frame. Pilot holes were drilled first to avoid cracking.

Step 20 - Framing & covering the brick teeth (top)
We continue this method around the top, covering the exposed elements of the bricks, and aligning the timber clamping structure perfectly with the bricks. This work requires accurate measurements to look good, so take your time here.

Step 21 - Adding roof frame structure (top beam)
The reason we kept the columns longer than the rest of the structure is to allow us to attach a beam to support the roof. The length of this beam should be the same as the space between the columns at the floor (assuming your structure is square).
For this step ensure your beam is level and 2 screws are placed diagonally on each column to secure it.
For this step ensure your beam is level and 2 screws are placed diagonally on each column to secure it.
.jpg)
.jpg)
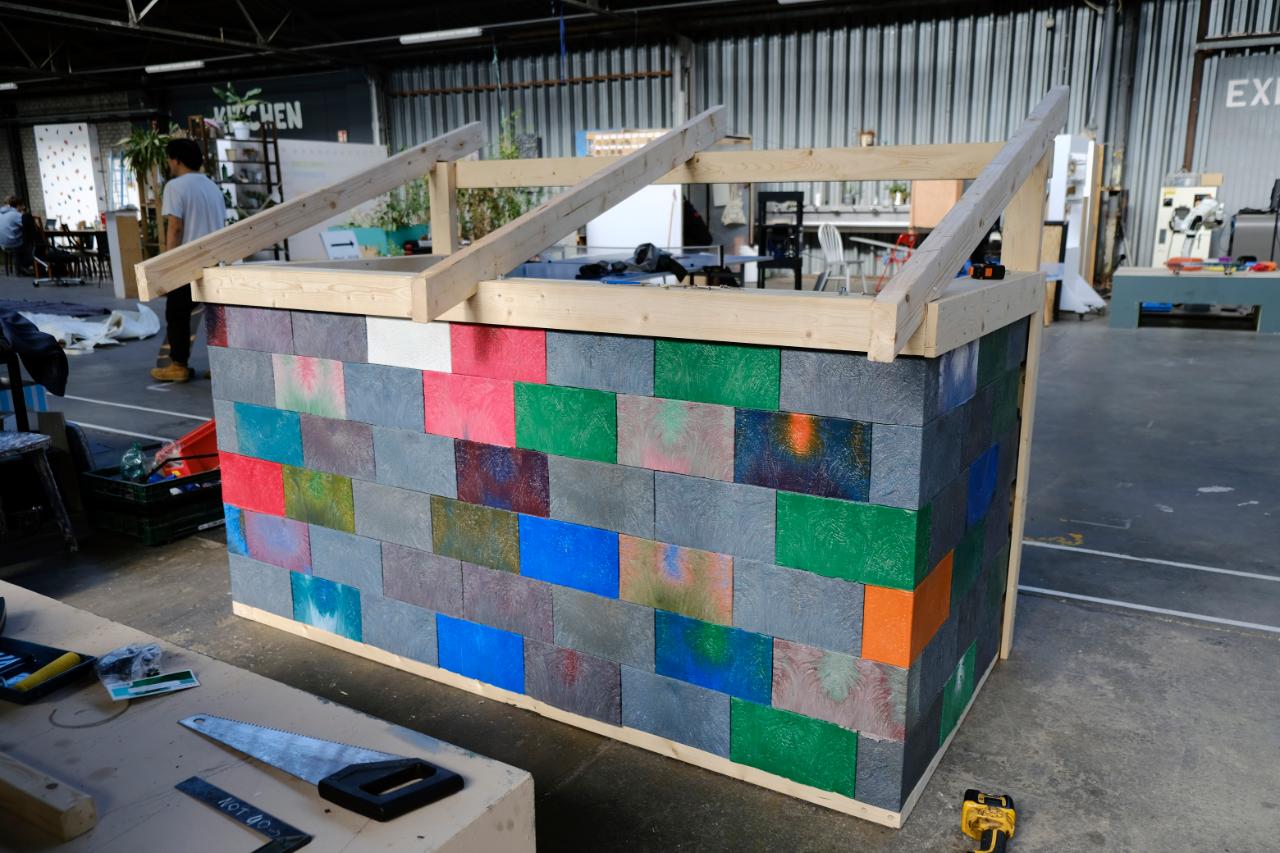
Step 22 - Make roof frame structure
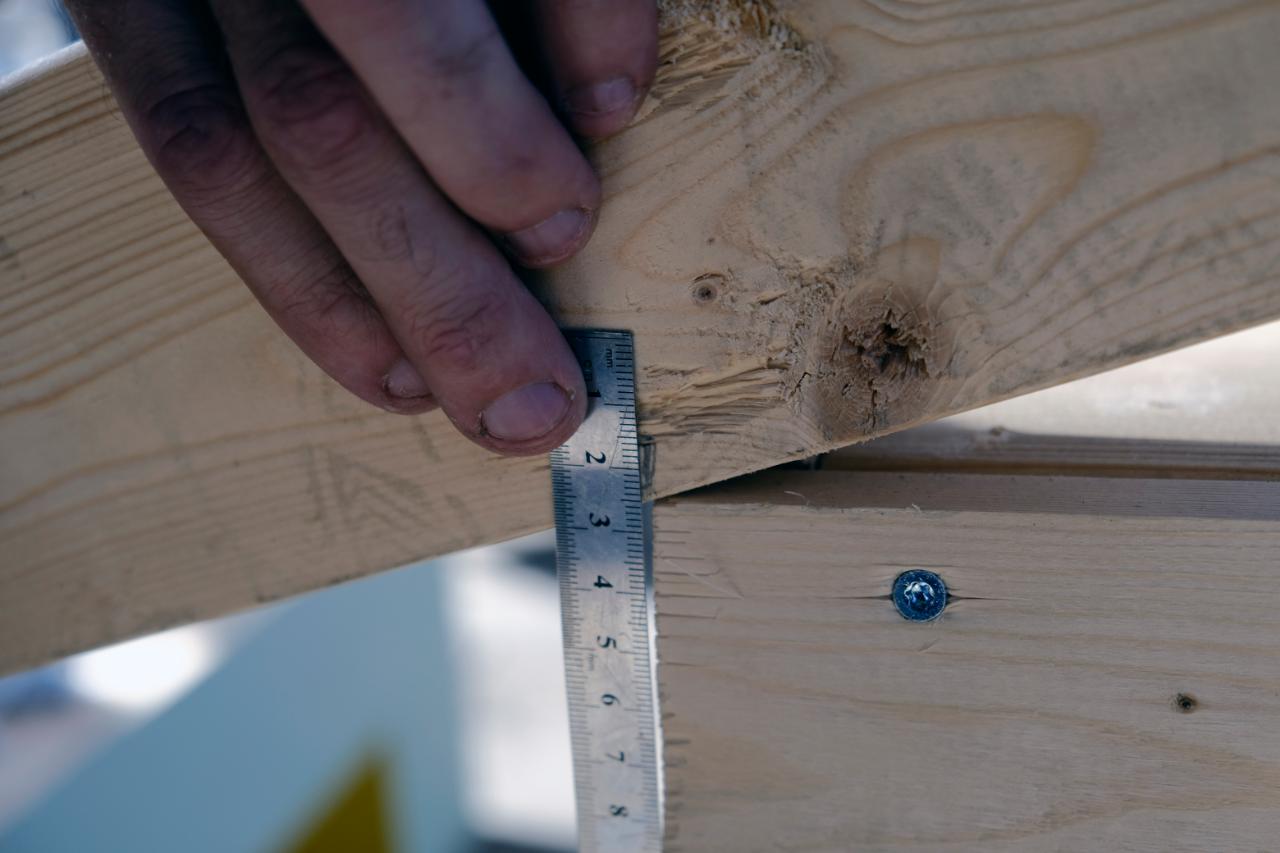
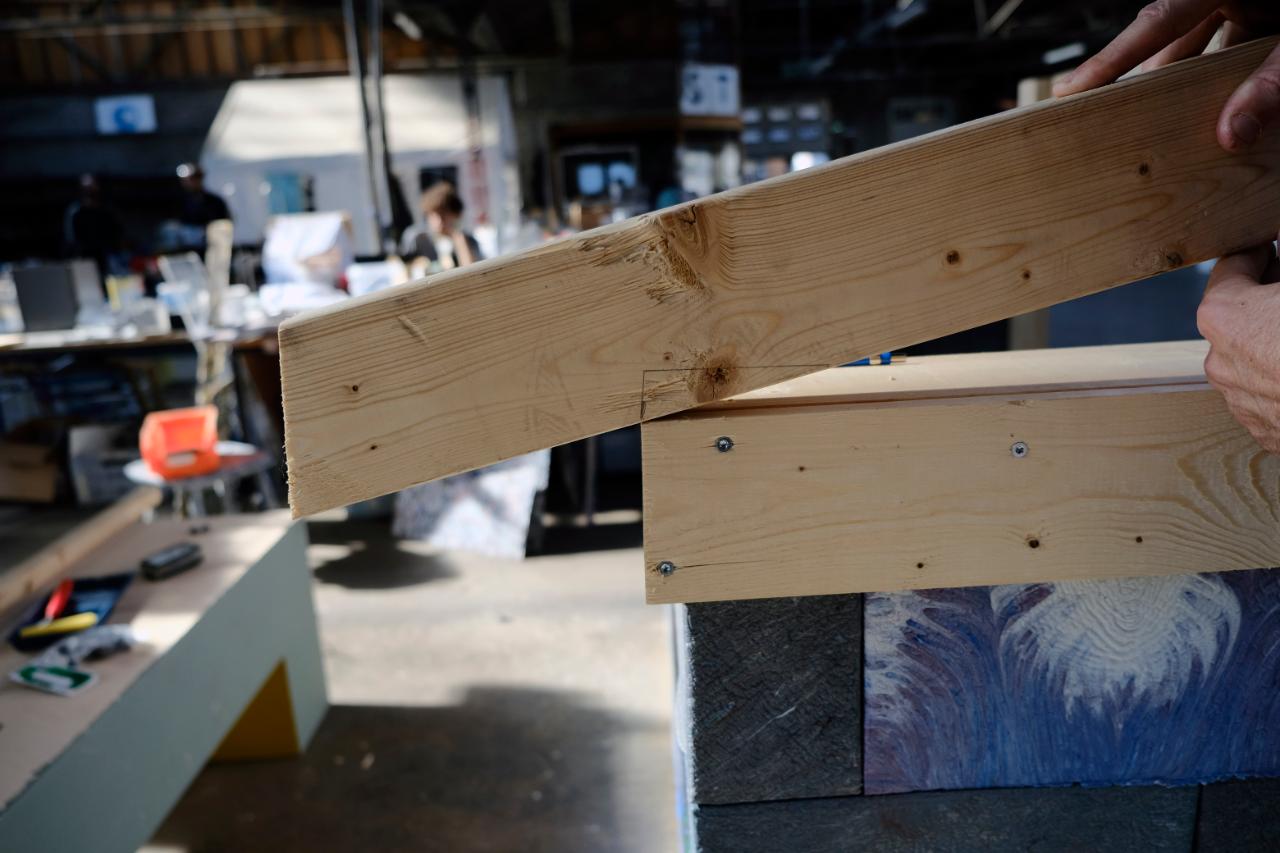
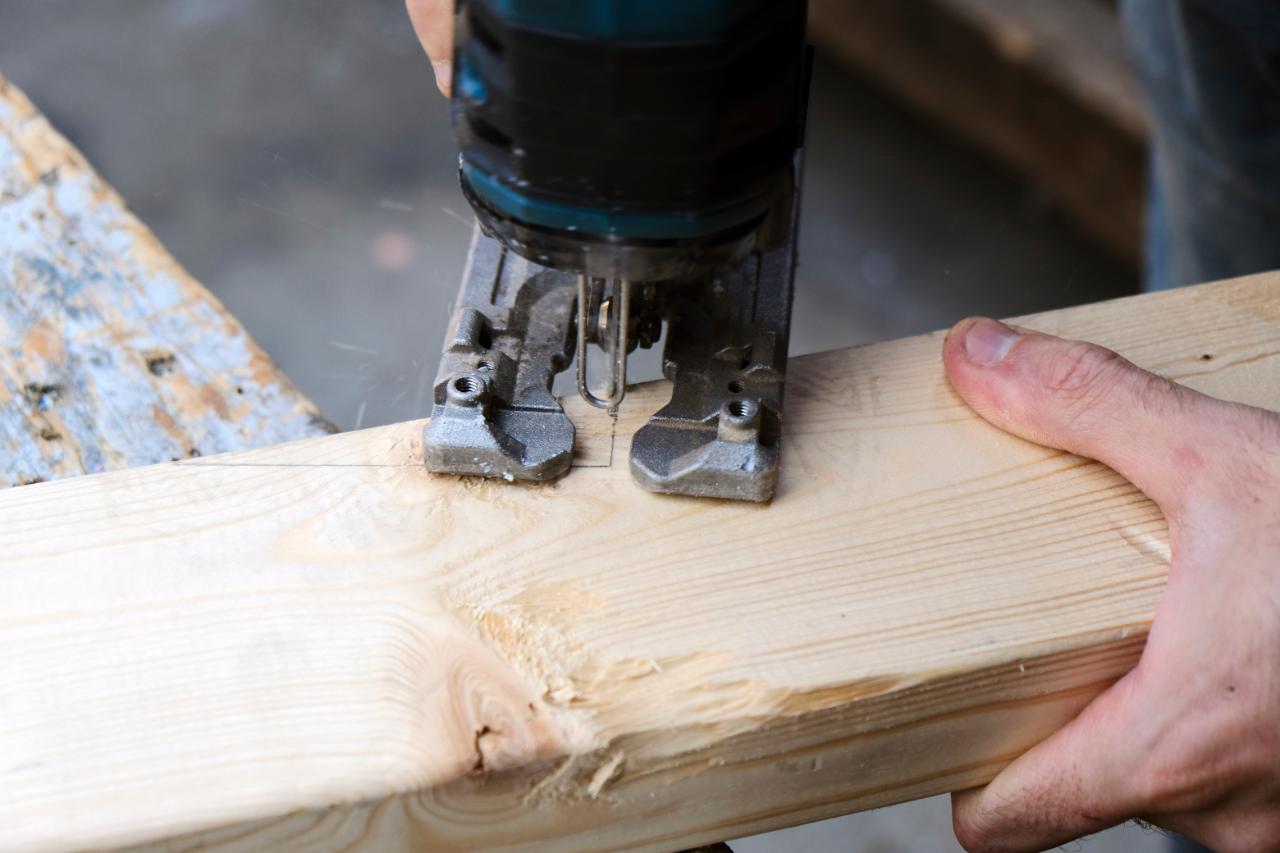
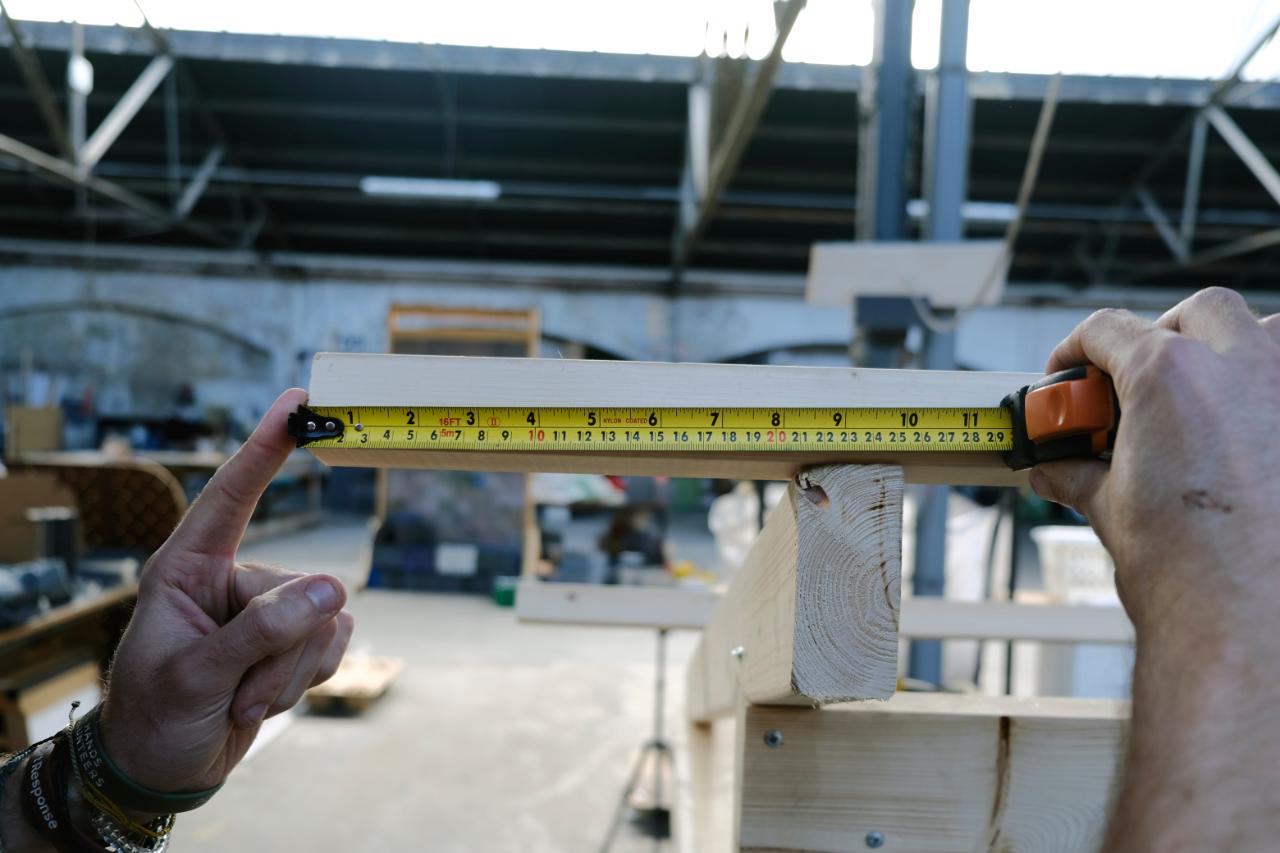
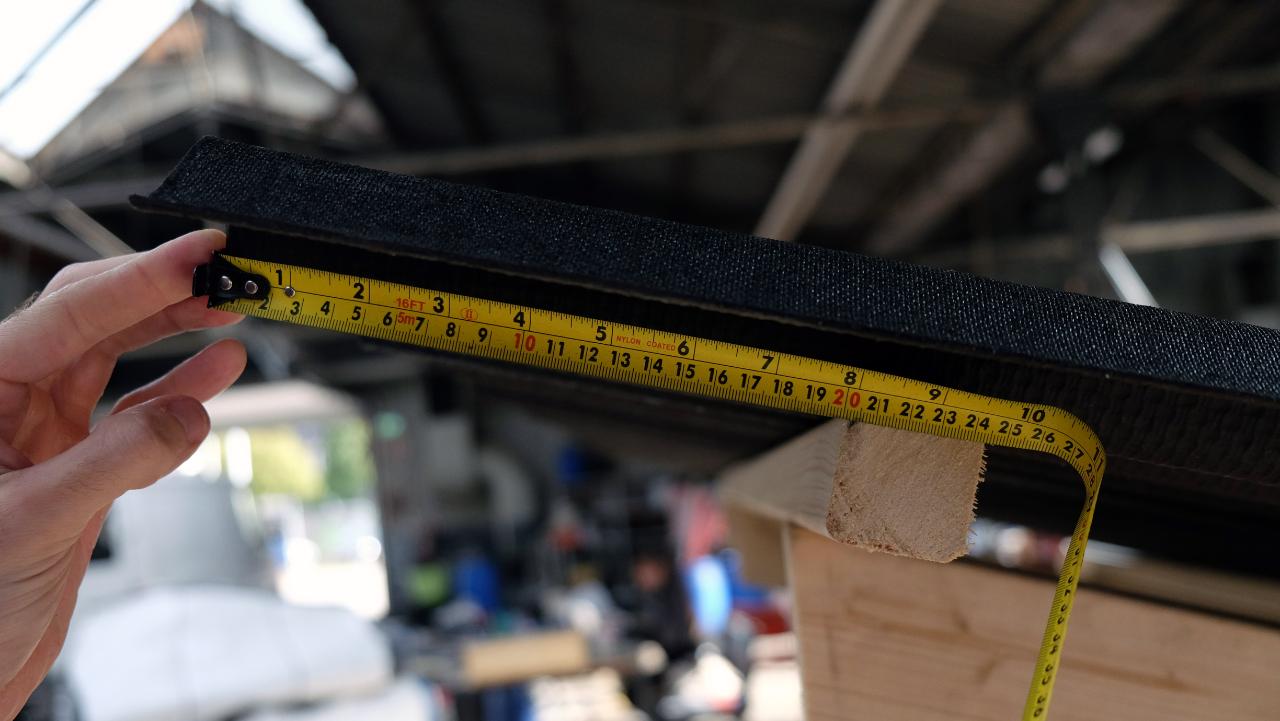
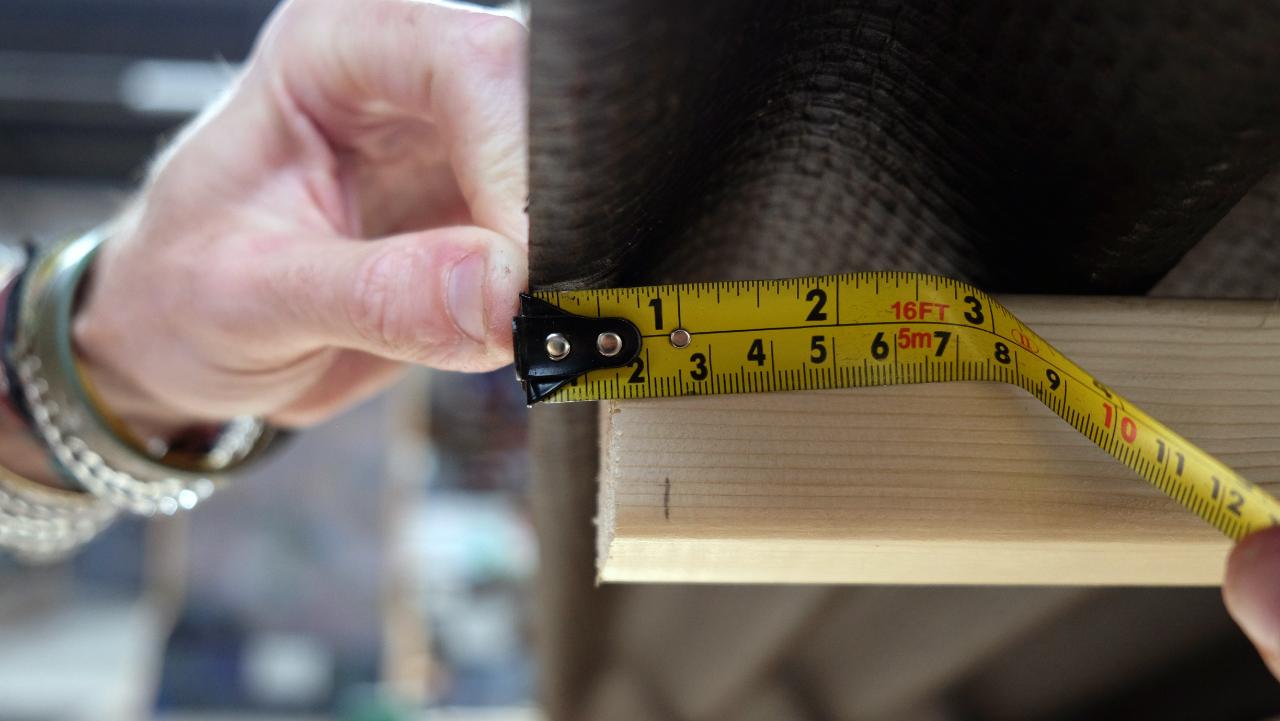
The newly installed beam will help support the roof trusses. These trusses should overhang the walls, but this will depend on your structure and roofing type. For the bike shed you will need 3, each with a notch cut to ensure good contact is made with the existing timber. To do this we used a ruler to create the desired cut and then cut it with a jigsaw. The end of the truss is also cut at an angle, this is an optional step.
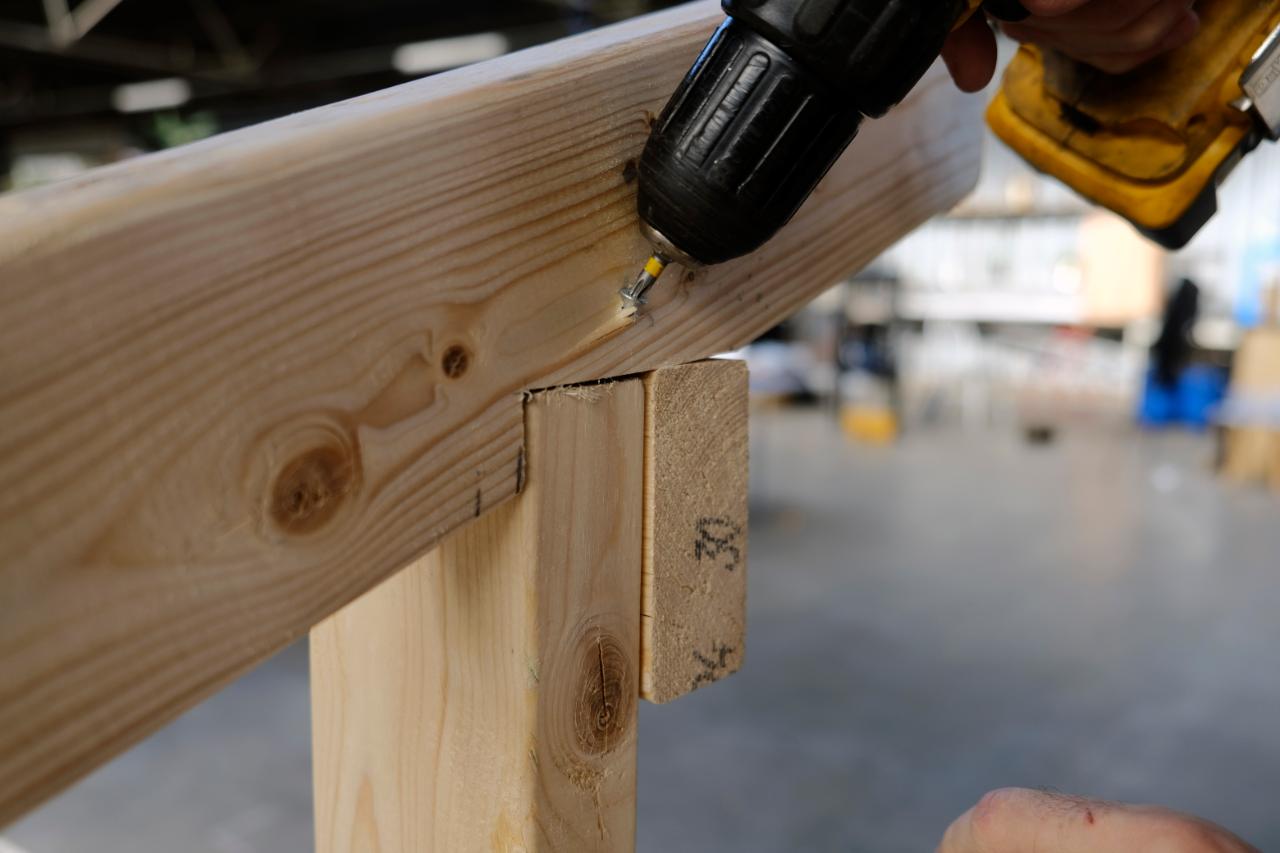
Step 23 - Attach roof frame structure
Each of the trusses need to be screwed in and evenly distributed. We screw in at an angle to lock the structure in place.
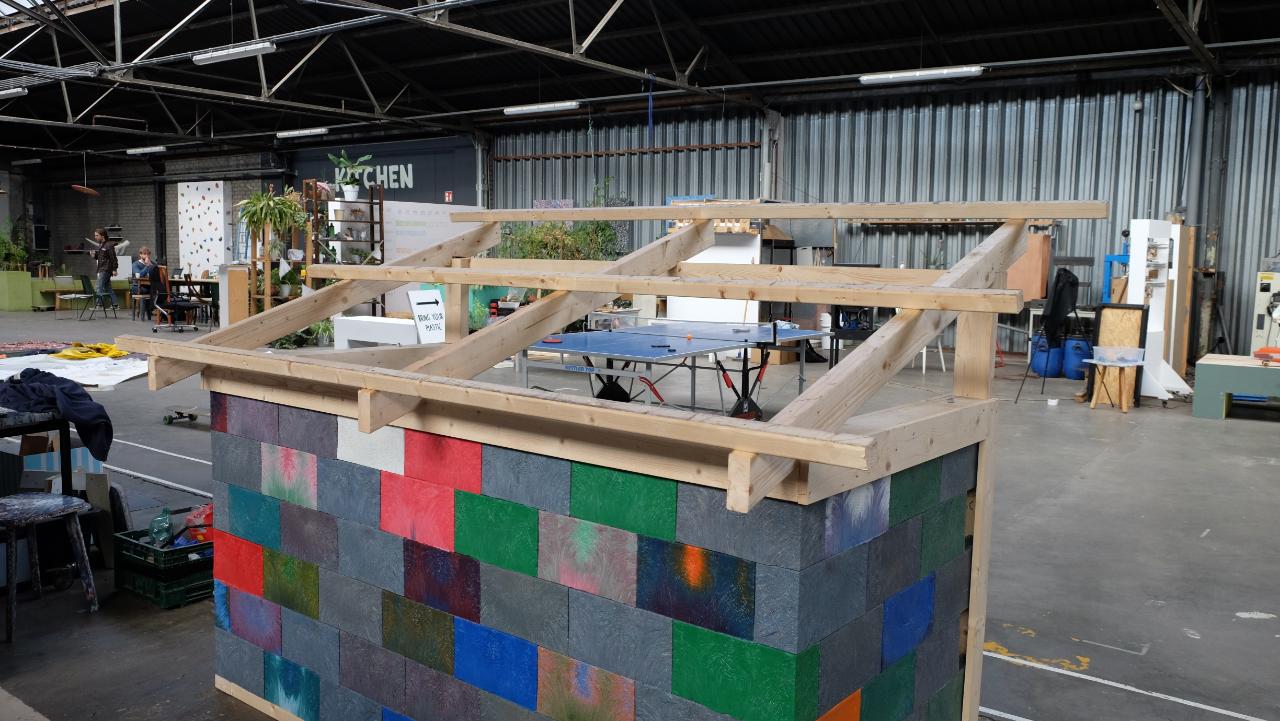
Step 24 - Attach roof frame structure - purlins
The purlins are 2 x 2 pieces of timber that will connect directly to the roofing material. Due to the length of timber, we had access to we had to join them in the middle. We overhung them from the trusses by 20cm.

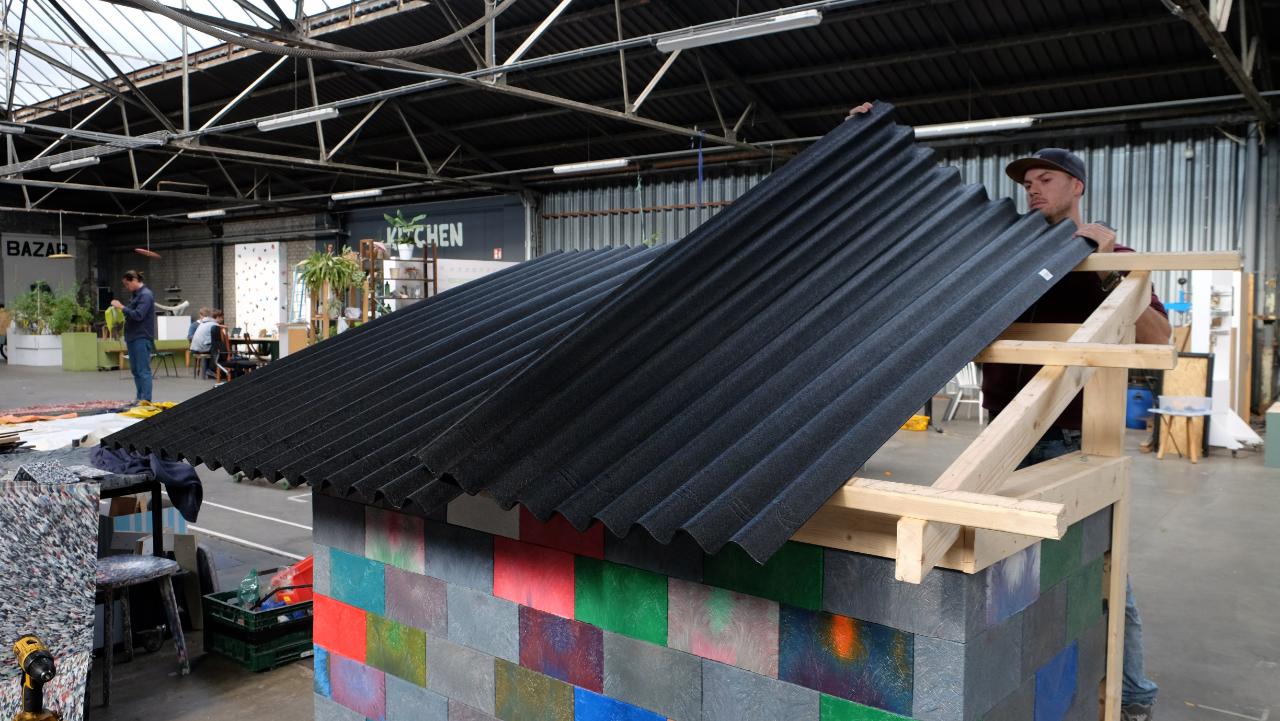
Step 25 - Adding roof sheets
Next, you will need to add the roofing sheets to complete the structure. In this how-to we used a recycled roofing sheet that is a little thicker than galvanized, but most other sheeting materials will work (But its best to be sustainable in your choice!).
To do this we lay the sheets overlapping them and making sure they are straight.
To do this we lay the sheets overlapping them and making sure they are straight.
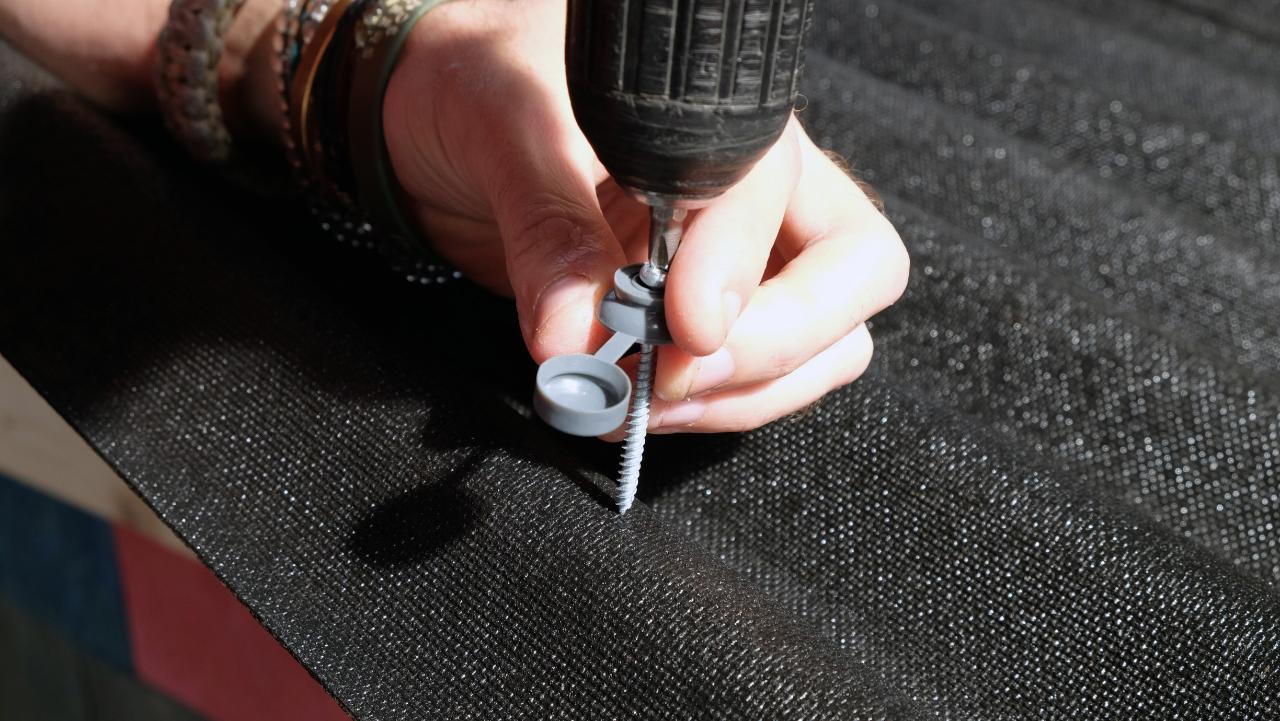
Step 26 - Fixing roofing sheet
Next, you will need to use the relevant roofing screws to attach the roof to the timber. The number of screws and locations depend on your roofing material type and it is best to consult with your roofing supplier on these details.
Step 27 - Finished!
Done, you are now finished!
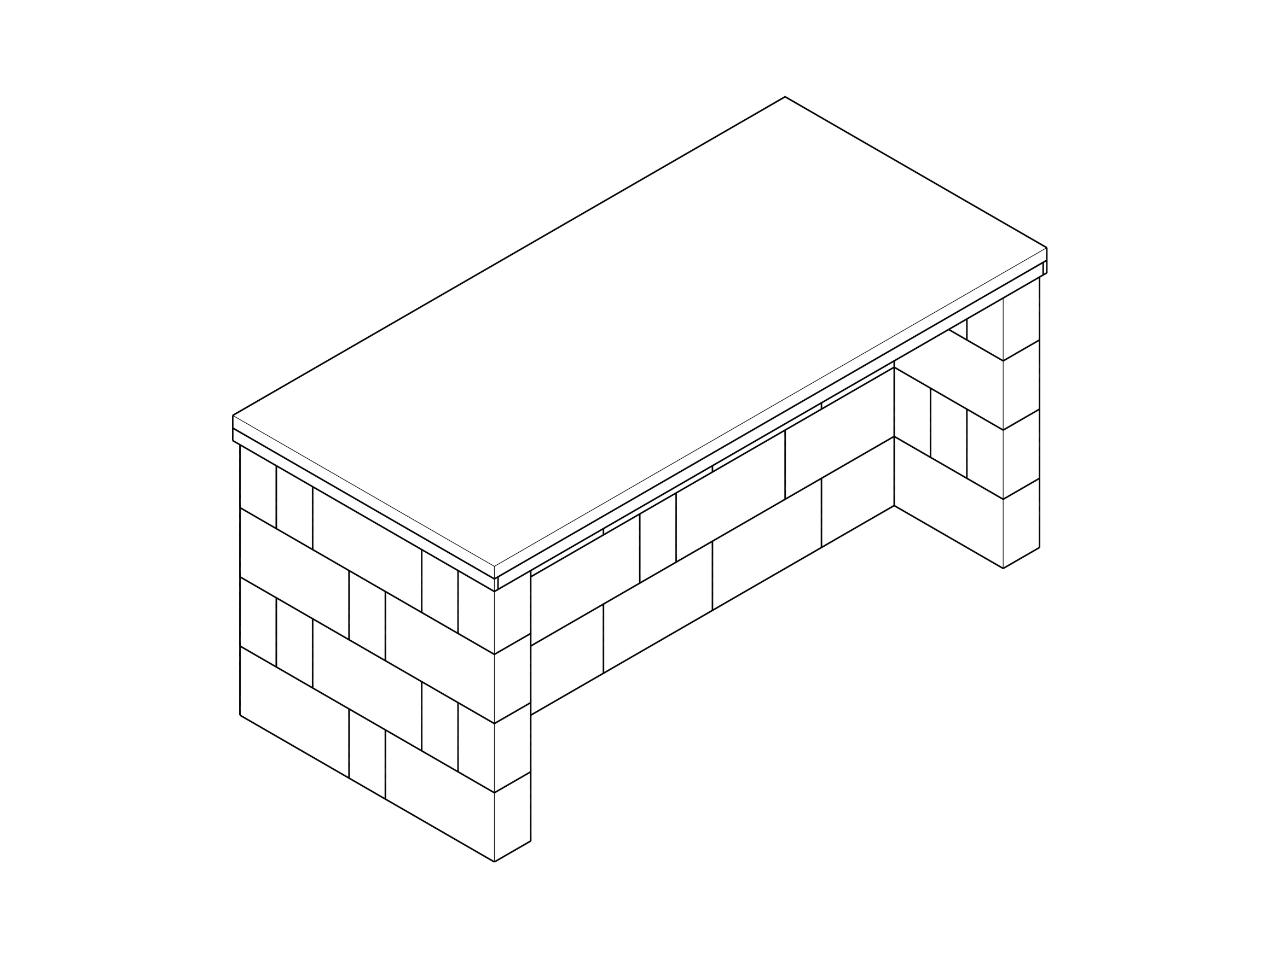
The best thing about the recycled plastic bricks, other than the fact they are made from precious recycled plastic, is the possibilities. We have attached a few images of options, and look forward to seeing your designs!
The best thing about the recycled plastic bricks, other than the fact they are made from precious recycled plastic, is the possibilities. We have attached a few images of options, and look forward to seeing your designs!
.jpg)
—
—
—
Comments