Create bottle top earrings

An easy technique to transform bottle tops into cool colourful earrings.
—
Attachments
Resources
Step 1 - Prepare your materials
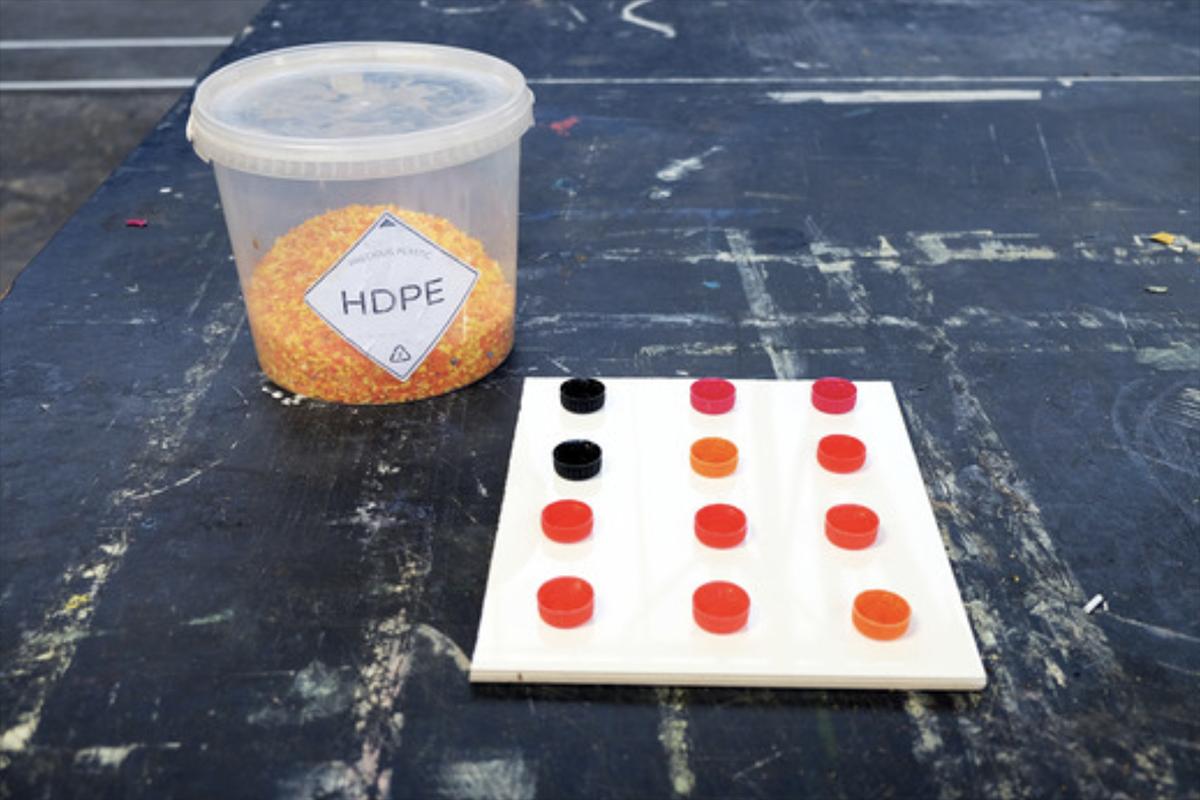
First off, you will need to source your plastic! You can find plastic bottles pretty much anywhere, and all you need are the lids. If you can get a pair of the same, so that you can make a nice matching set. You will also need some shredded plastic of the same material (generally HDPE, or PP) in a complementary colour to the bottle tops.
Materials needed (for one pair of earrings)
- 2 bottle tops
- some shredded plastic of the same material
- 2 earring hooks or rings (depending on your preference)
Required tools:
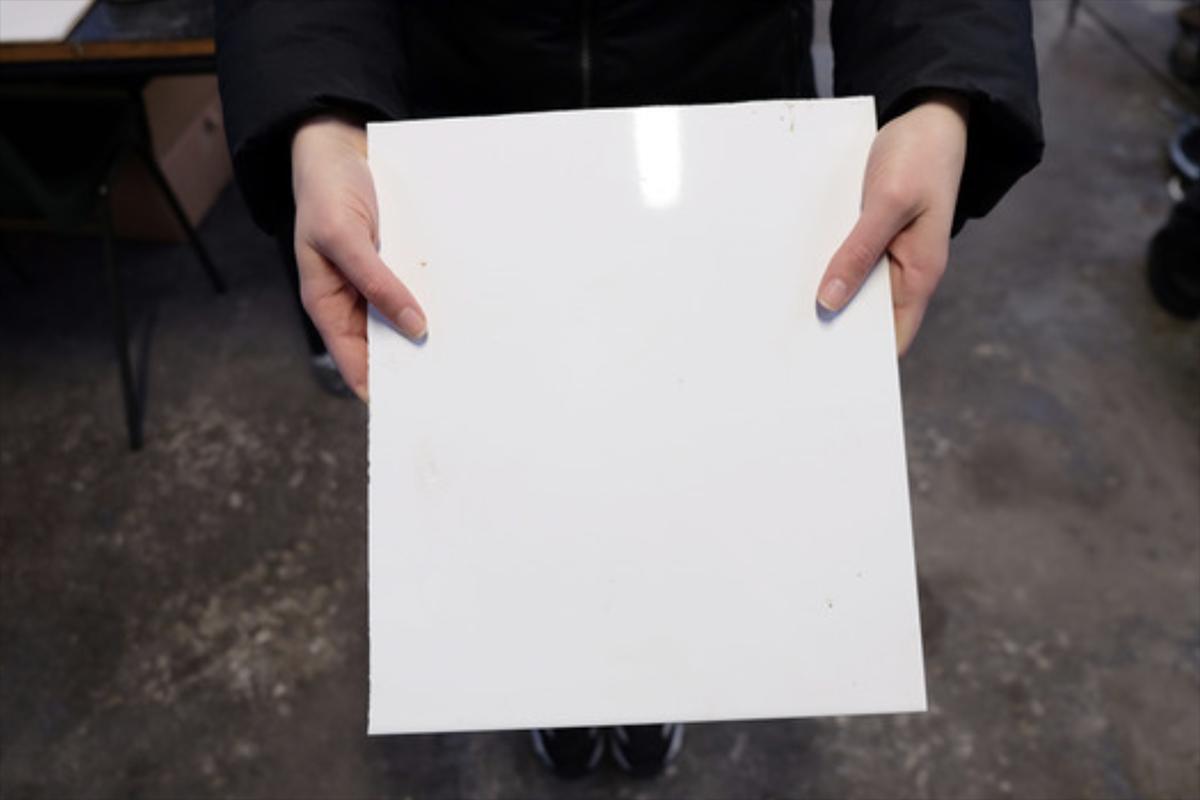
- 2 smooth tiles for melting the plastic
- oven
- drill (or another tool for making a hole in the material)
Safety recommendations:
- heat resistant gloves
- respirator mask
Materials needed (for one pair of earrings)
- 2 bottle tops
- some shredded plastic of the same material
- 2 earring hooks or rings (depending on your preference)
Required tools:
- 2 smooth tiles for melting the plastic
- oven
- drill (or another tool for making a hole in the material)
Safety recommendations:
- heat resistant gloves
- respirator mask

Step 2 - Get ready for melting
Set your oven to preheat at 170°C.
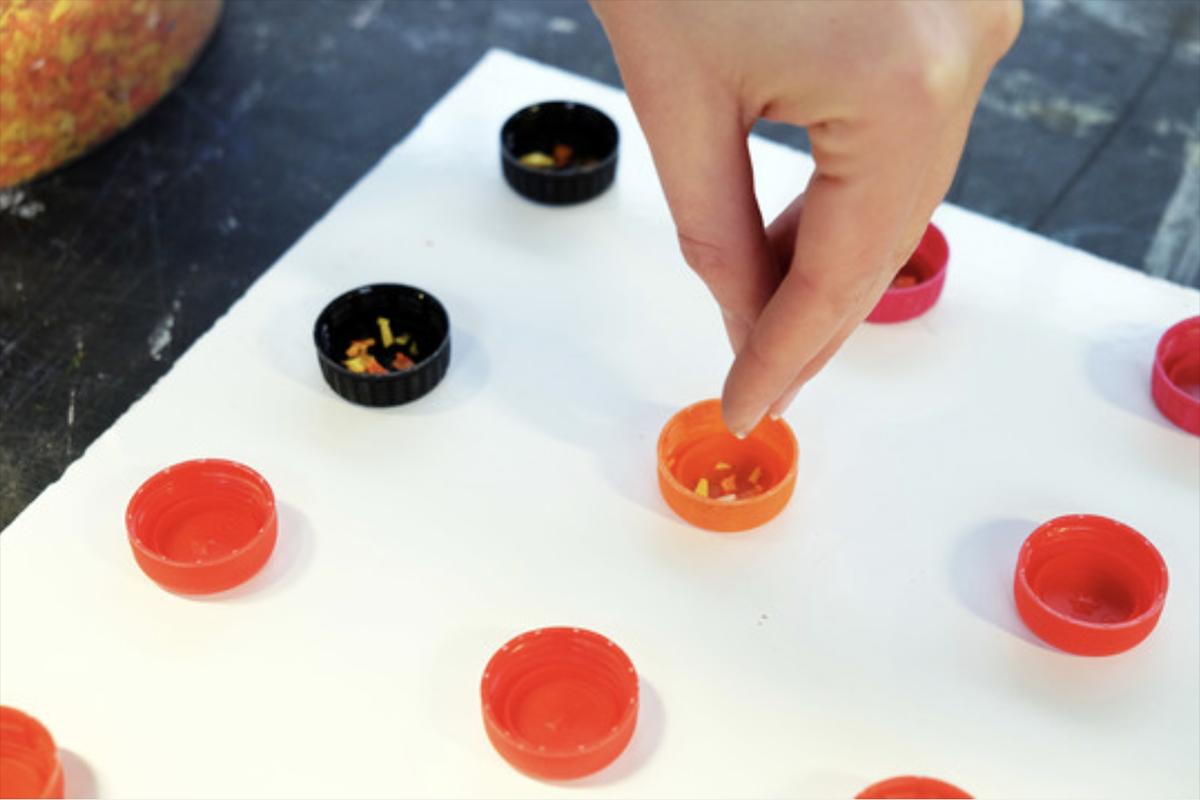
Whilst it’s warming up, set down one of your tiles and lay out the bottle tops with even and sufficient spacing to allow for the caps to melt without fusing to one another. With your coloured shreds, put a little sprinkling of plastic into each bottle top. This will create a nice aesthetic to the finish! You will not need to add much, as the pressed material should be relatively thin.
Whilst it’s warming up, set down one of your tiles and lay out the bottle tops with even and sufficient spacing to allow for the caps to melt without fusing to one another. With your coloured shreds, put a little sprinkling of plastic into each bottle top. This will create a nice aesthetic to the finish! You will not need to add much, as the pressed material should be relatively thin.
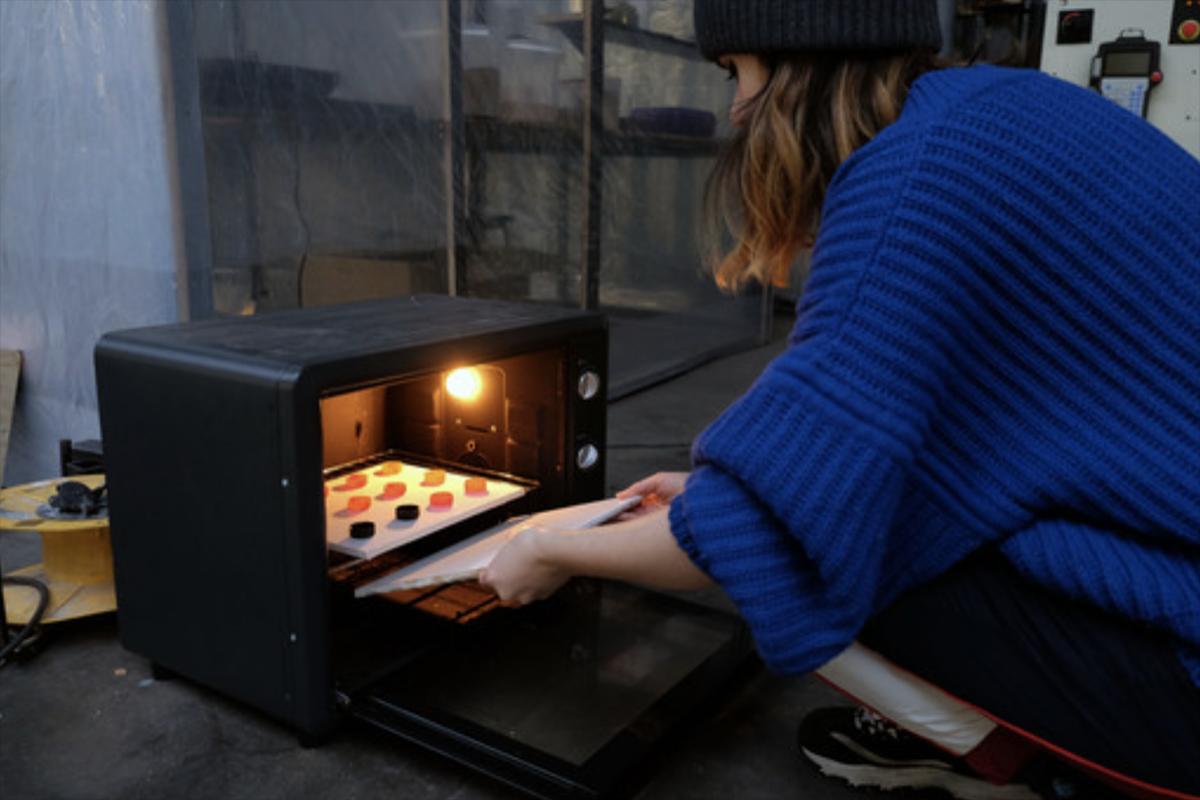
Step 3 - Transfer tiles to the oven
Once the oven is preheated, it’s time to put your tiles in and watch the plastic melt! Both tiles will need to be heated, one with the bottle tops prepared (as in the previous step) and the other should be heated for pressing.
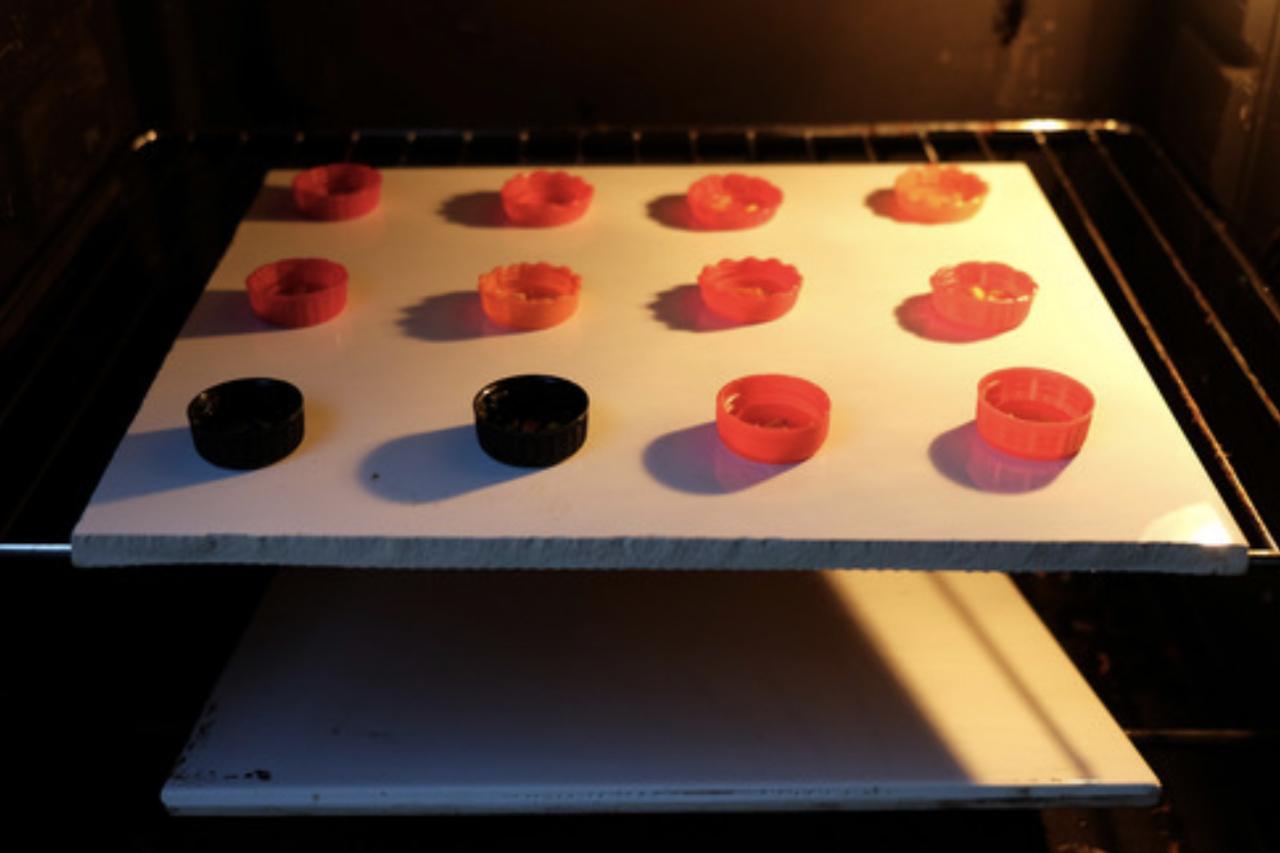
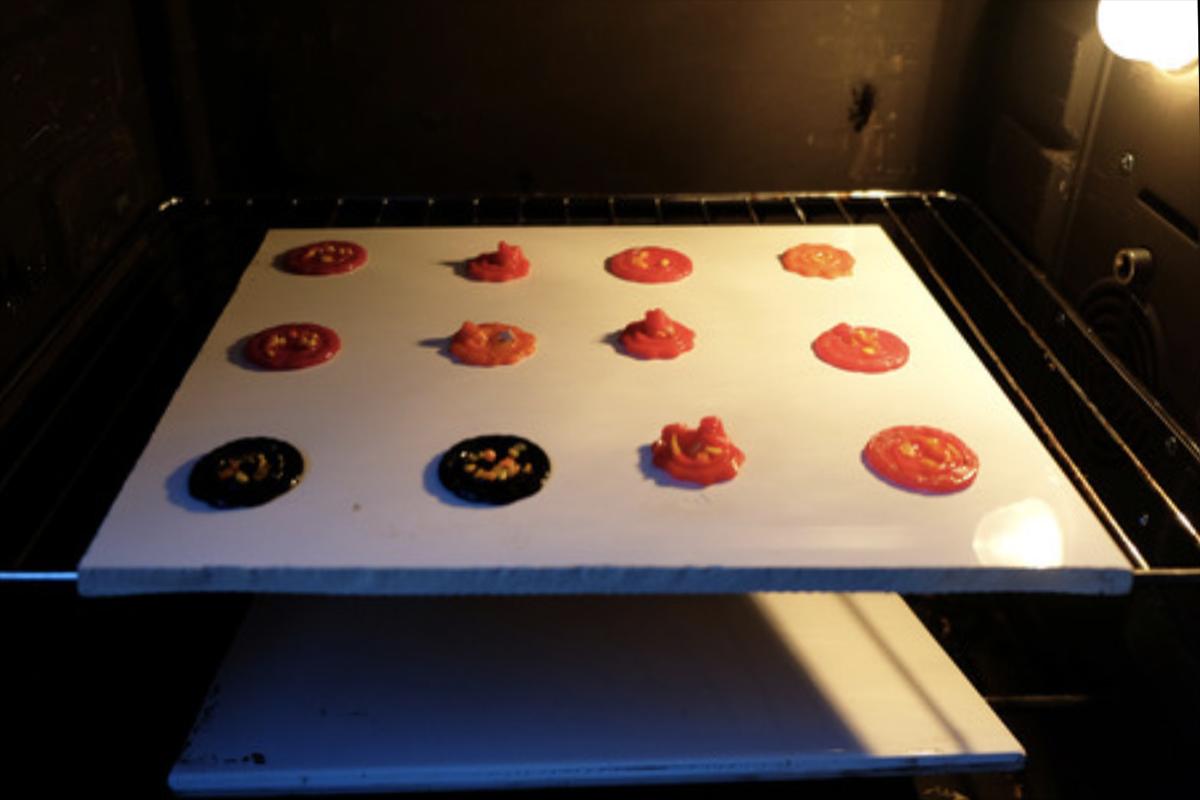
Step 4 - Check on the melting progress
Now your tops and tiles are heating in the oven, there is a little time to wait. With our oven we leave the tops for 30 minutes. During this time, you could already prepare another batch of earrings (see step 2). After 10 minutes, check on the melting progress of your bottle tops.
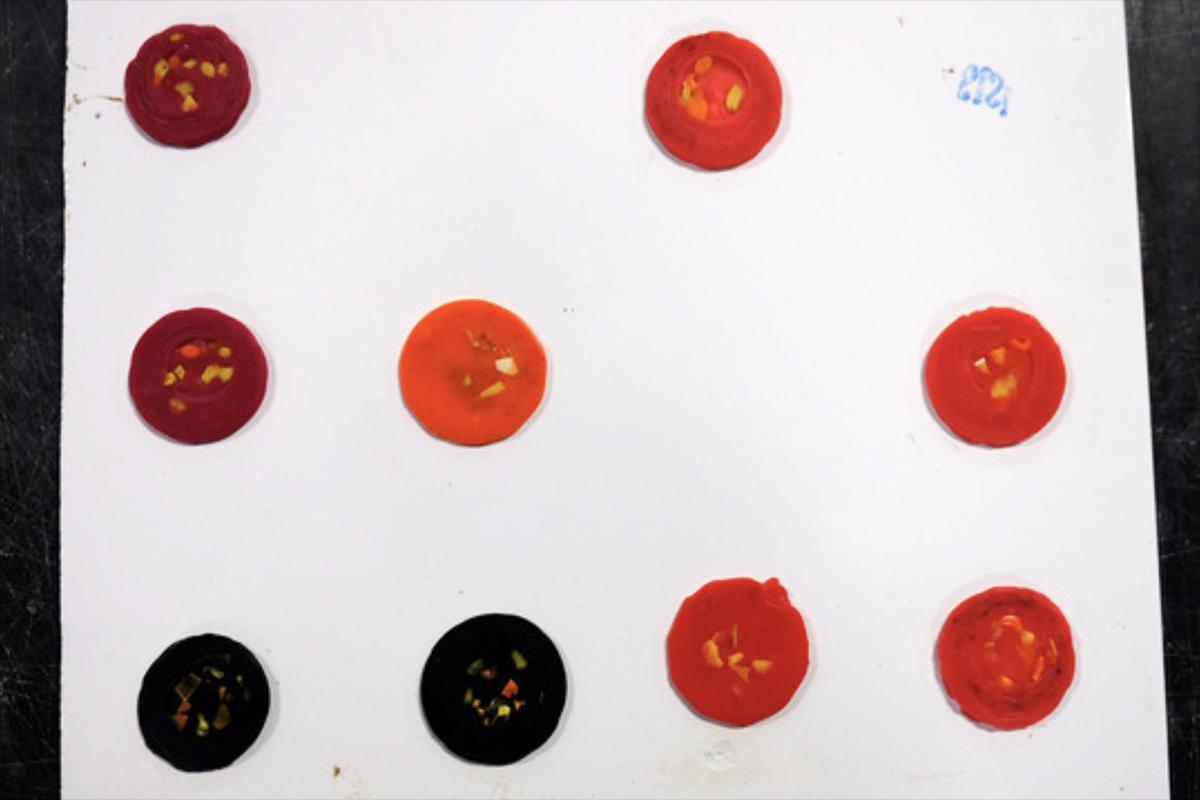
Some oven strengths vary, so you might need have to adjust the melting temperature or time for the best result. Below, you can see how the bottle tops looked after 10 minutes, and then how the looked when ready for pressing, after 30 minutes in the oven.
Some oven strengths vary, so you might need have to adjust the melting temperature or time for the best result. Below, you can see how the bottle tops looked after 10 minutes, and then how the looked when ready for pressing, after 30 minutes in the oven.
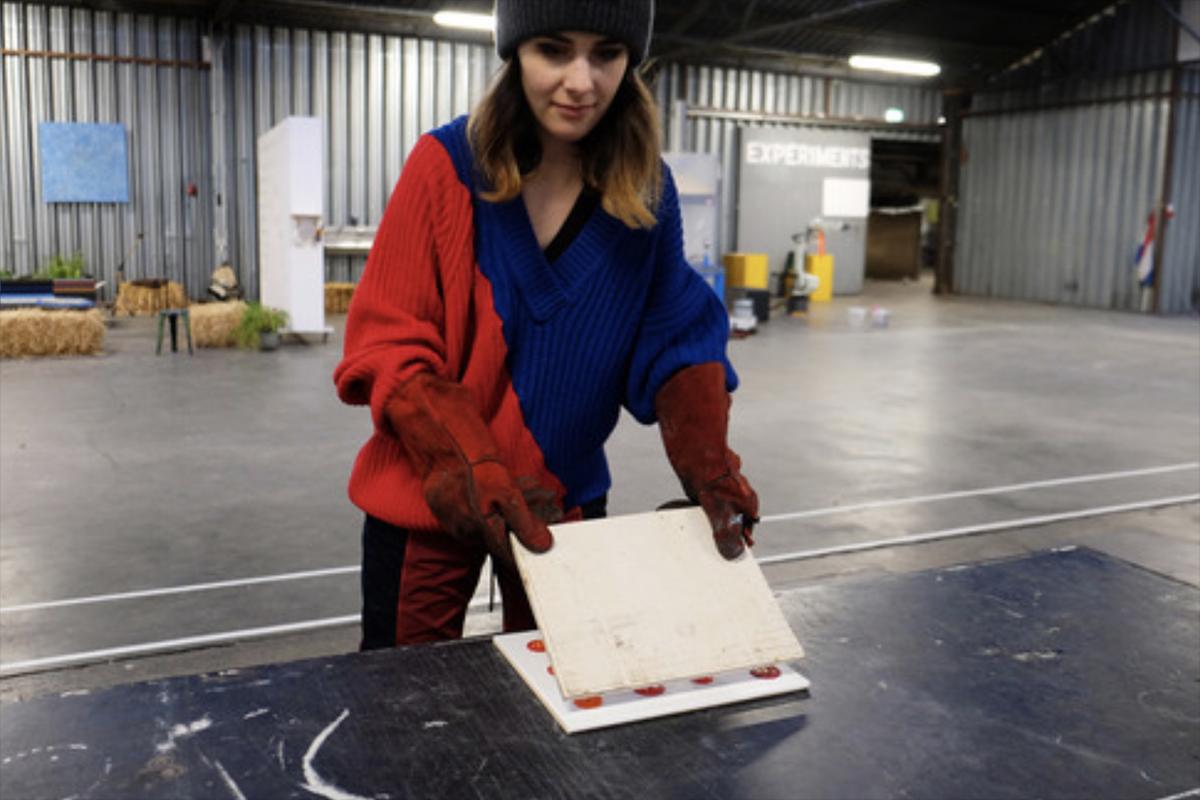
Step 5 - Press your earrings
After the bottle tops are sufficiently melted, put on your respirator mask, and heat resistant gloves. Remove the two tiles from the oven one by one. First, lay down the tile with your melted material on a flat and heat resistant surface, then immediately place the second tile on top of it, with the smooth side facing down.
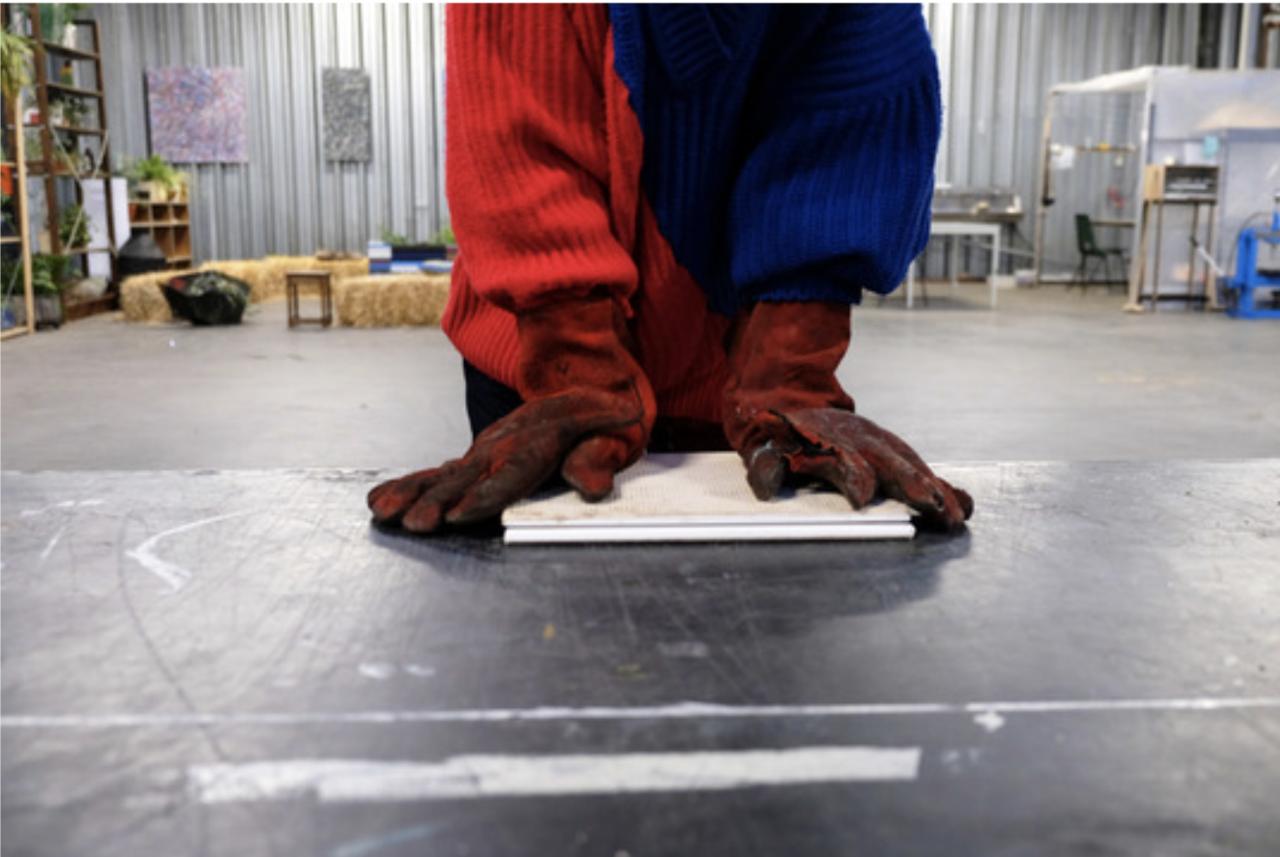
For pressing, you will need to give a little pressure to the tiles. But not too much, otherwise the material will become too thin, and the bottle tops may spread and fuse together. Be mindful of this and press carefully.
The plastic will need some time to cool, for this you should leave the two tiles as they are, one on top of the other. If you prepared another batch, now is the time to put it into the oven (step 3). If not, you have a few minutes to make yourself a cup of tea :)
Step 6 - Finish the plastic
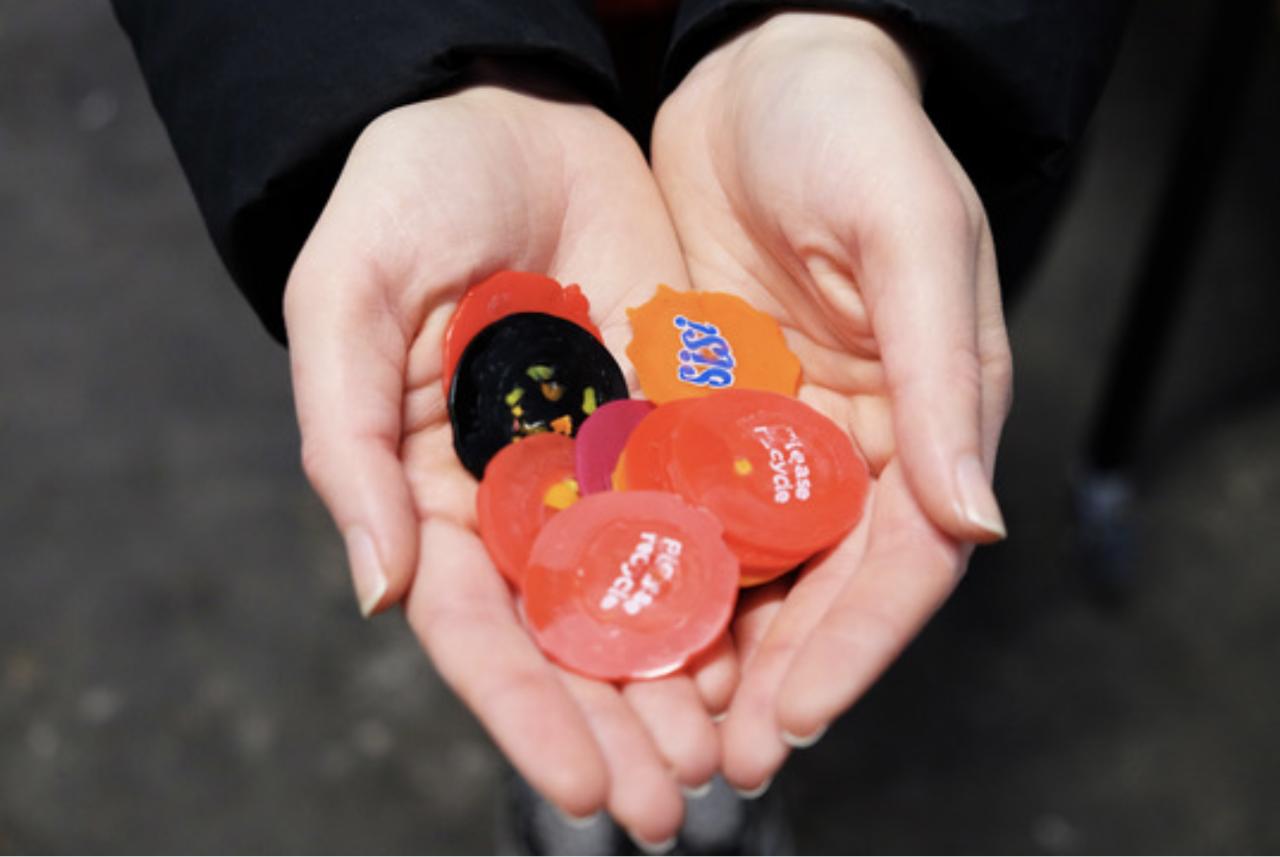
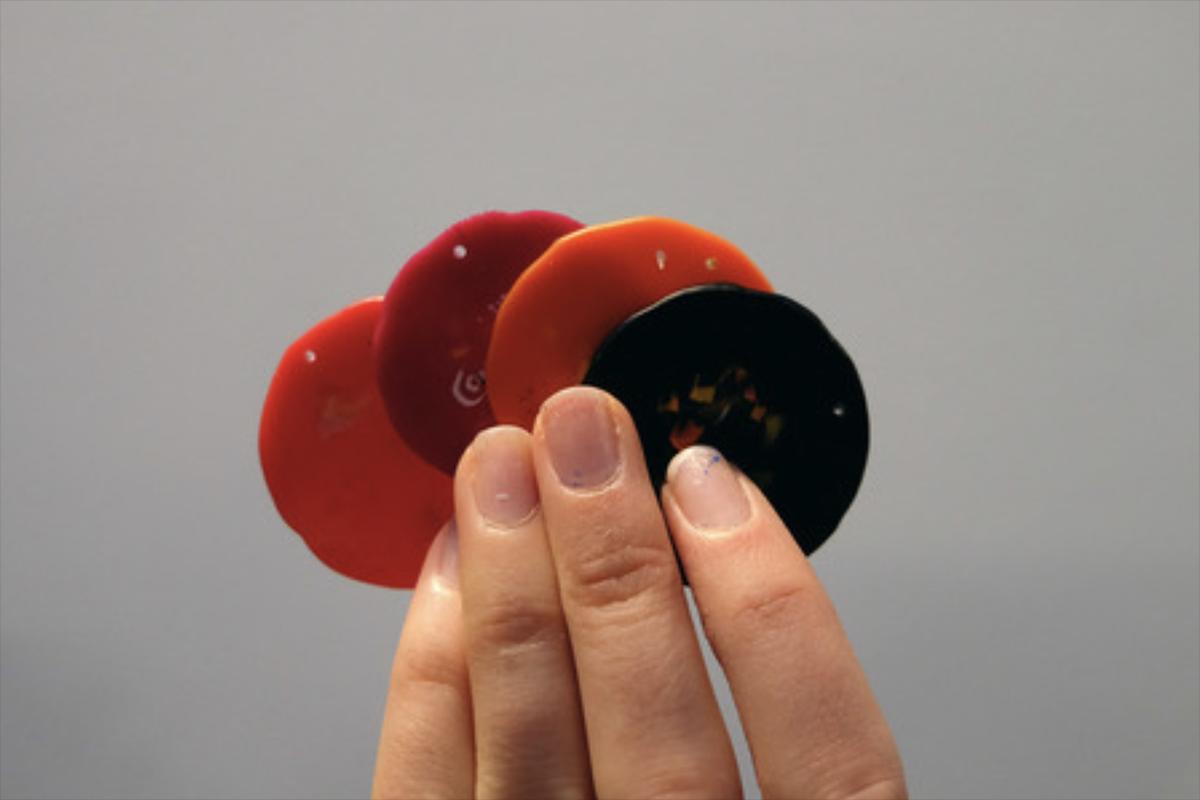
Once the tiles have cooled (around 10 minutes) you can separate them and reveal your freshly pressed plastic discs. With practice, they should come out nearly perfectly round, but if some don't have the desired shape, now is the time to finish them. This can be done by sanding or cutting to achieve the desired outcome. Alternatively, you can select the best and save the rest for re-shredding.
Step 7 - Finish the earrings
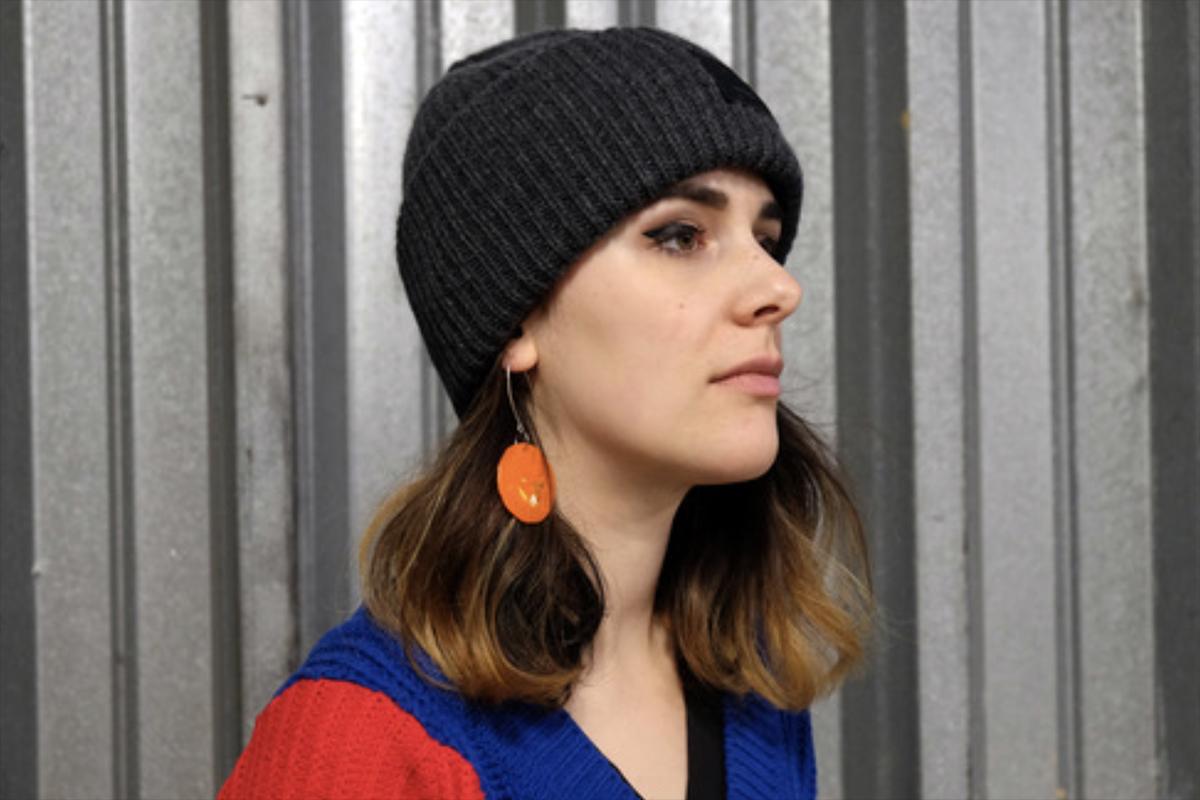
Now the discs are at the desired shape and size, all that’s left to do is to drill a hole and attach your earring hook or hoop. We used a drill press for this process, but you can use regular drill, or another tool to form a small hole in the plastic.

Step 8 - Finished!
Once the earring element is attached, these beauties are ready to wear! Simply put them on, and enjoy.
—
—
—
Comments