Design an injection mould
An experience review designing a broom hanger mold: These are some steps to design a mold for the injection machine.
—
Attachments
Resources
Step 1 - Measure existing dimensions
Be sure to get things accurate from the beginning! If your product is designed to fit with an existing object, take all of the measures from it, so that you start from the right point. For this broom hanger, I measured the diameters of different brooms and mops, ranging from 21-24mm. As the product will be a clamping system, I’ll use the smaller measurement of 21mm as a reference.
Step 2 - Sketch out your product idea
It can be difficult to get an idea down on paper in the beginning, but it’s equally hard to formulate your design without a drawing. Let’s start with your imagination. Register on paper all the details that you can think of to create a good design.
Especially consider important aspects like the wall thickness. Influencing factors for this will include
A) The required injection pressure,
B) required flexibility of the product itself, and
C) resistance and durability of the material
For this purpose, I use previous products I’ve developed to examine and compare the material.

Step 3 - “Mold” your idea
What will define your product shape? As this broom hanger will be made with the injection machine, I have to think in an enclosed mold. With the product idea I’ve drawn before, I start designing the mold, looking for the best solution for each of these 6 Mold Design
Criteria:
1) Define the product shape,
2) Use standard measures,
3) Receive the plastic and connect the mold,
4) Open after injection and eject the product,
5) Adjust and closure, and
6) Simplify the machining process.
I’ll explain each in the next steps.
Criteria:
1) Define the product shape,
2) Use standard measures,
3) Receive the plastic and connect the mold,
4) Open after injection and eject the product,
5) Adjust and closure, and
6) Simplify the machining process.
I’ll explain each in the next steps.
Step 4 - Define the product shape
This is thinking on what shapes are going to create the cavity inside the mold. For this product, there are basically three pieces:
A cylinder (part 1) for the space of the broomstick,
concentric with a circular tube (part 2) which contains the outside of the hanger,
and a block (part 3) to cut the inner space and create the opening.
With this, I’m starting to think in the standard bars and/or tubes I will use.
A cylinder (part 1) for the space of the broomstick,
concentric with a circular tube (part 2) which contains the outside of the hanger,
and a block (part 3) to cut the inner space and create the opening.
With this, I’m starting to think in the standard bars and/or tubes I will use.

Step 5 - Use standard measures
In my country (Colombia) the material dimensions mostly come in Inches (metal bar sections, steel planks thicknesses…), so are easier and cheaper to find. Adapting your measurements to the standard ones will avoid paying for excess material that you will then have to pay to remove.
So for the inner cylinder, I’ll use a ¾ inch rod (19,05mm), close enough to the 21mm of the broomstick. For the outer wall, I’ll use a 1 inch tube (25,4mm), so the thickness of the broom hanger will be approximately ⅛ inch (3.17mm).
Explore your local metal market and find which measures fit better for you!

Step 6 - Plastic flow and mold connection
Think about how the plastic will flow inside the mold. The path has to be as short as possible and with enough space for the plastic to flow throughout the entire mold.
For the entrance, I usually drill a ¼ inch hole with a maximum of 10mm height. The location should be in the center, so that the plastic can be distributed equally in each direction inside the mold. For the broom hanger, I chose to fill the mold from the center of its body.
To connect the mold to the injection machine, half of a standard ½ inch pipe nipple is used. Welded to a flange that can be attached to the mold (hopefully) with the closing screws.
Step 7 - Open after injection and expluse the product
As the plastic solidifies into the product, you have to be able to open the mold and take it out. This means that the mold must split into several parts to release the product. But, a less number of parts means an easier to assemble, more steady and cheaper mold. So keep it simple! For the broom hanger, as the product works as a hook, I’m thinking of three pieces: two to form the exterior of the hanger, which splits in half to release the product; and another one to form the interior that will receive the broomstick, and will be released at the end pulling it out just as it will release the broom.
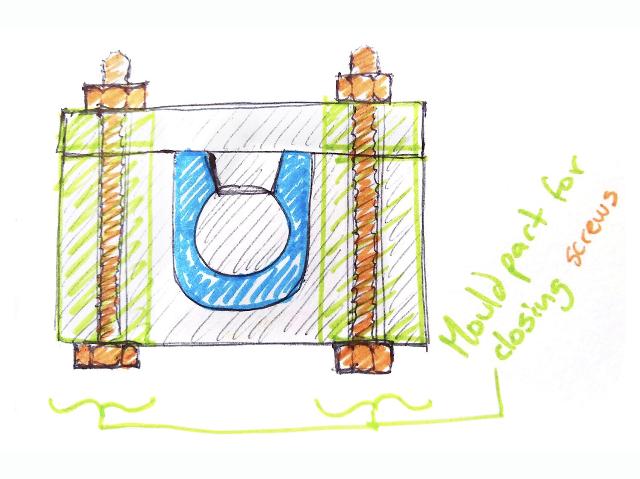
Step 8 - Adjust and close
One thing is to align the mold parts accurately and the other is to ensure that it withstands injection pressure without opening or displacing. To adjust and align, I use male/female guides between the parts so they will fit in place and support the injection pressure. Conic dowels are ideal and are a great help during the mold assembly to hold everything in place. To close the mould and bear the injection pressure, I use through screws that hold the mold parts tightly. I drill the mold holes a bit wider than the screws (for ¼” screws, I drill a 5/16” hole) so the disassembly will be easier even if a mould part gets displaced during the injection process. It is also a great idea to open the screw hole side, so the screw can be taken out by the side, only by loosening the bolts a bit and avoiding to have to loosen them completely.
Step 9 - Simplify the machining process
Design your products with basic shapes. Cubes, Cylinders, Cones and Straight Lines are shapes easy to create with manual lattes and mills. Concentric, aligned and perpendicular figures improve the machining process. Minimalism in the design results in minimalism in the process. Also, design with standard measures. Holes of the size of a drilling bit, canals of the width of a milling cutter can be done faster and with more precision. So the broom hanger product is going to be basically a straight plastic tube with an opening on one side. This means straight lines milling and circular holes to create all the mold parts.

Step 10 - Use the PC tools
We’re looking for more accuracy than we can create on paper, so to get the real dimensions of the cuts and machining, now we can model our mold using CAD software. At this point we are continuing on our process from the previous step, just with a different tool. Using CAD we can model different versions of the mold and shape new or improved versions, stemming from the 6 Mold Design Criteria.
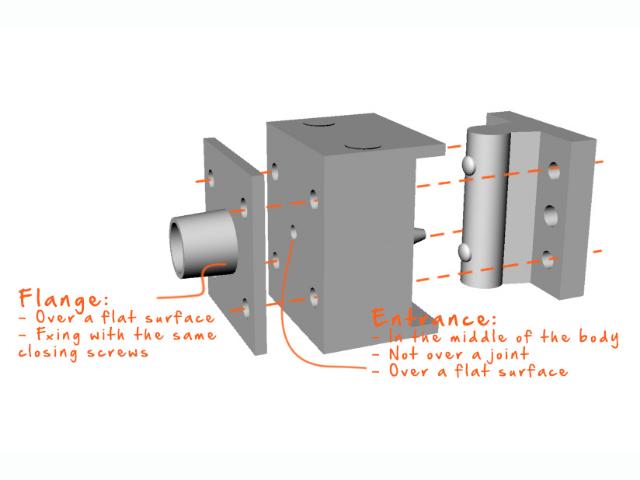
Here some of the decisions I made during the process and mold design:
- The best location for the injection point is in the middle of the body of the product.
- To avoid the risk of pressure opening the mold, the injection point is better in a solid part than at the joining of the mold.
- The flange with the nipple connector should be attached over a flat face of the mold with the same closing screws.

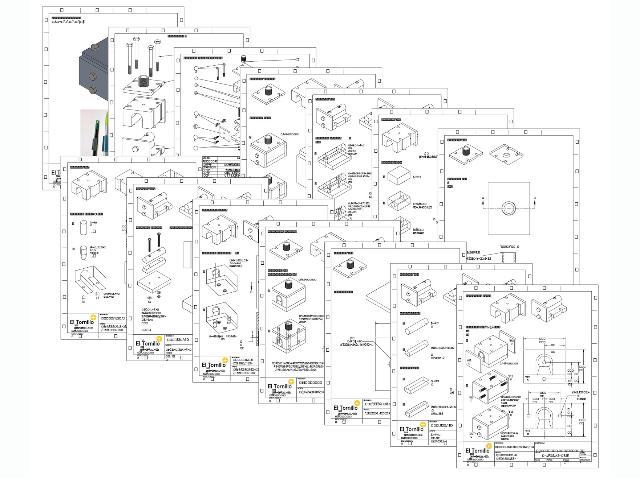
Step 11 - Document it
The design should conclude in drawings and a part list. Think on the step by step of the machining to identify the critical procedures (for example, when parts should be machined together to get an accurate fitting; or, how they will be fixed to the machine) and register all that information in the drawings.
Do the part list for all the raw materials to work as a shopping list. Include dimension and quantity. (Remember to buy the raw parts a bit longer than the final parts. Between 5 and 10mm will be enough to fix the parts in the machines and adjust to the final measure).
Do the part list for all the raw materials to work as a shopping list. Include dimension and quantity. (Remember to buy the raw parts a bit longer than the final parts. Between 5 and 10mm will be enough to fix the parts in the machines and adjust to the final measure).
Step 12 - Turn it into reality
Now that you have the design for your mold it's time to actually build it and make your product.
You can find the building process of this broom hanger in this How-to "Make a broom hanger" (https://community.preciousplastic.com/how-to/make-a-broom-hanger) or use these tips to come up with your own idea :)
You can find the building process of this broom hanger in this How-to "Make a broom hanger" (https://community.preciousplastic.com/how-to/make-a-broom-hanger) or use these tips to come up with your own idea :)

—
—
—
Comments