Make a flat nozzle for the Extrusion Machine
.JPG)
The flat nozzle is a great addition to the extrusion machine. It enables one to cover greater surface with less plastic, increasing production time and new avenues for larger, watertight products.
—
Attachments
Resources
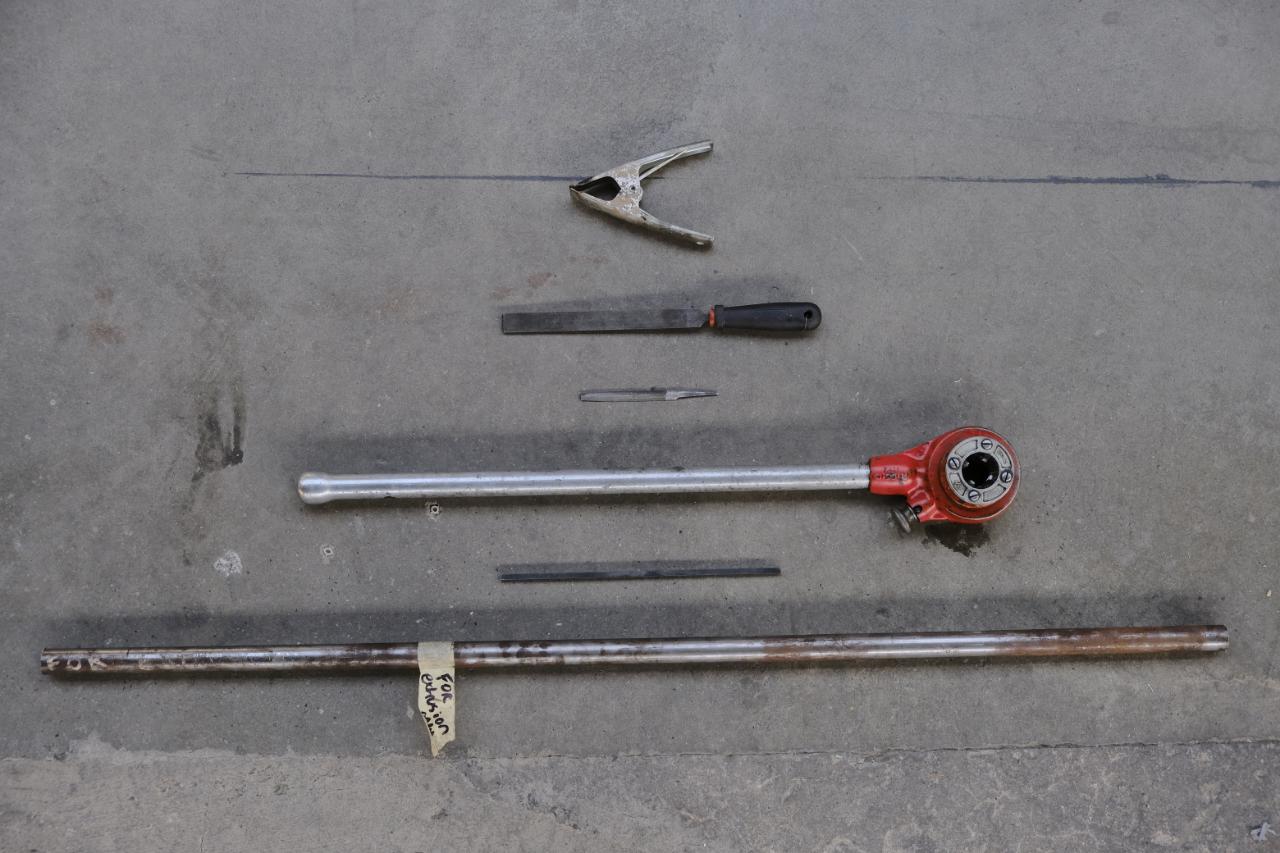
Step 1 - Gather materials and tools
To make a flat nozzle you will need:
- 26mm (1") Round Tube. *It must fit into your extruder head.
- 5mm x 5mm Square bar. 100mm will be enough
- File
- Sander
- Vise
- Angle grinder or Metal saw
- Welding machine
- BSPT Thread cutter
- 26mm (1") Round Tube. *It must fit into your extruder head.
- 5mm x 5mm Square bar. 100mm will be enough
- File
- Sander
- Vise
- Angle grinder or Metal saw
- Welding machine
- BSPT Thread cutter
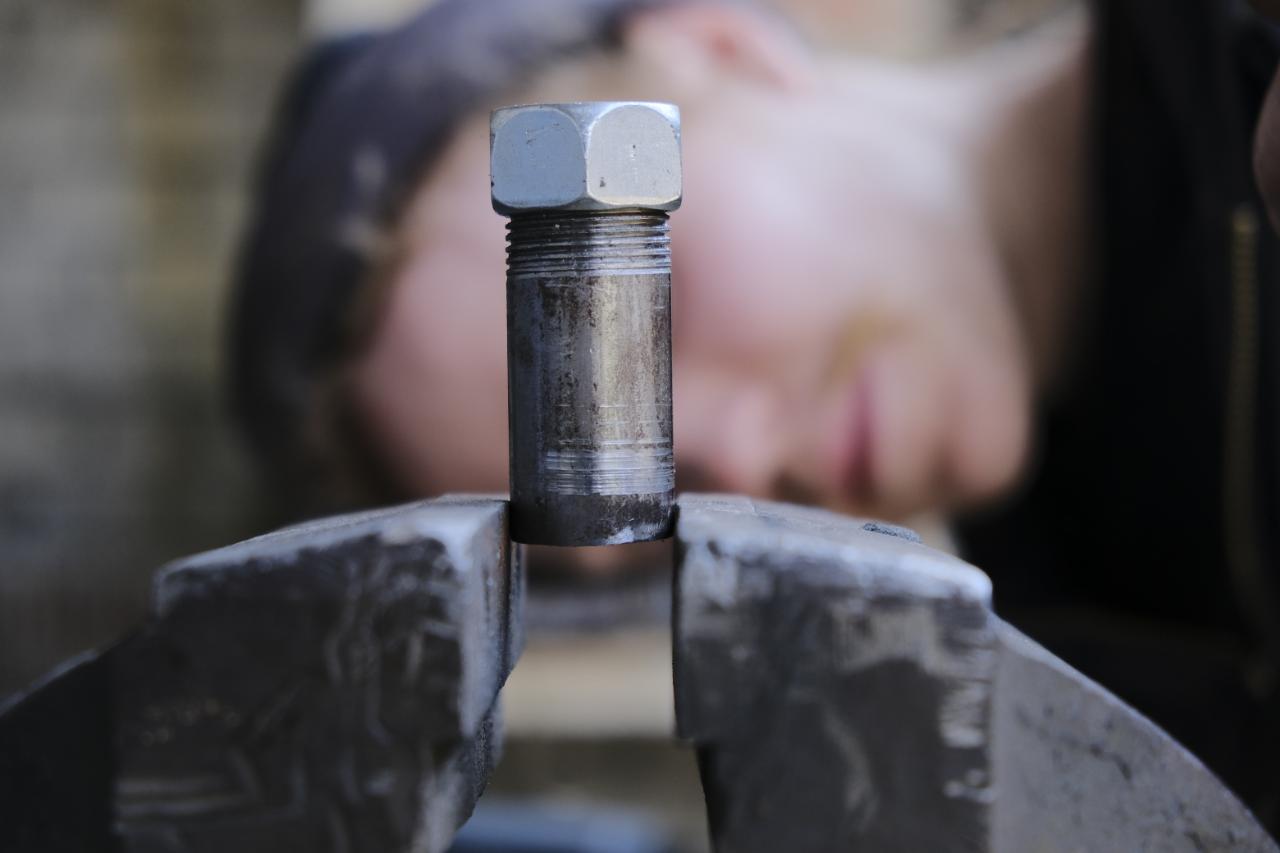
Step 2 - Thread your pipe
Now that you have your tools and materials ready, it's time to start making! To start the process we will need to clamp the length of pipe into a vise and make a thread with the thread cutter. Some pressure is needed to start the cut, so it can be useful starting in the vertical position so that you can use gravity to assist. Remember to use some oil to keep the cut smooth and your teeth sharp.
.JPG)
Step 3 - Cut pipe and bar
After threading the tip of pipe, we can cut it to a length that suites your machine. In this example 60mm was cut to allow room for the heating element and final sizing.
While we're at it, we can cut two pieces of the square bar that will be used to make the mouth of the nozzle. It's important to cut the bar slightly wider than the tube. Leaving ~5mm extra on either side.
While we're at it, we can cut two pieces of the square bar that will be used to make the mouth of the nozzle. It's important to cut the bar slightly wider than the tube. Leaving ~5mm extra on either side.
.JPG)
Step 4 - Bend the pipe
To get the plastic flowing smoothly into into its new flat shape, we'll need to taper the pipe from a circle into an oval. We do this by putting the edge of the nozzle into the vise and slowly apply pressure. It's easy to over-do it here, so take it slow and check regularly. Try to avoid bendnig on the seam if your pipe has one and it can help to put a nut over or some wood inside the thread area to avoid deformation of thread.
Step 5 - Soften the edges
During the cuts and bending your parts, they can get a bit rough. It's important to remove any excess material and round all your edges with a sander or a file. This will help your parts fit together well and make handling your nozzle more comfortable. A crucial spot to focus on is the section that has just been bent because it has most likely deformed. This is where the two pieces of bar will be welded, so getting it flat is a good idea!
.JPG)
Step 6 - Weld the mouth
This is the last step in the process and is crucial to do your best. You should choose how wide you want the nozzle to be and find an object to maintain that distance. In this example an old angle grinder disc has been used as a spacer. The two pieces have been held together with a clamp and tacked to the pipe on the short edges. Once you have those in place, you can then seal up the long edges and finish the nozzle.
.JPG)
Step 7 - 'Strude some flat noods
With your nozzle all finished, it's time to extrude around your meticulous mould and create those epic objects from your imagination.
.JPG)
—
—
—
Comments