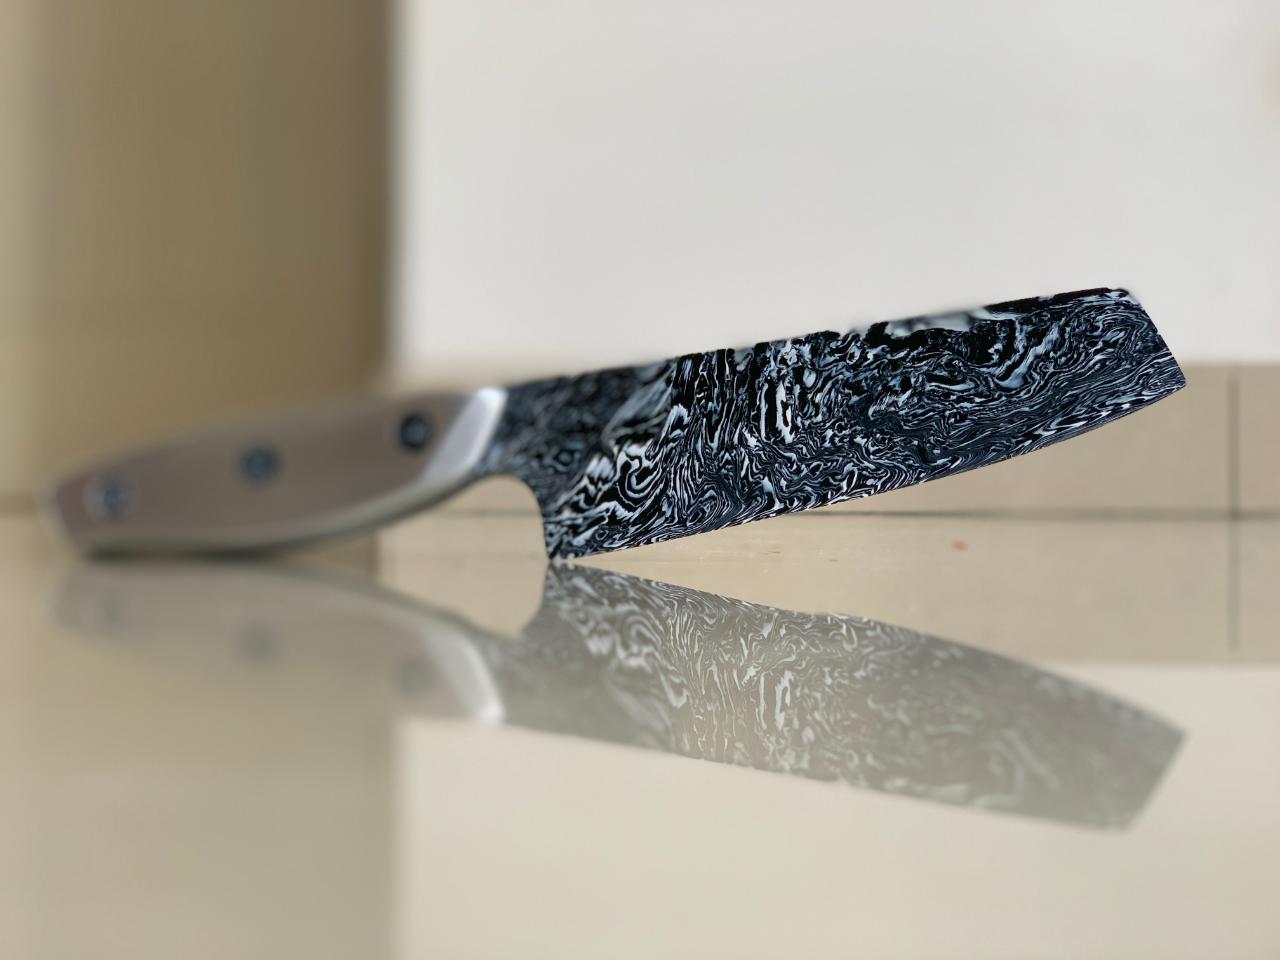
Make an HDPE Knife

We show you how to make this 'reverse knife' (metal scales and plastic blade) using at-home techniques and processes. The knife is 'sharpened' but cannot hold an edge the same way a metal blade can. However it works perfectly fine for cake, fruit and vegetables. A commenter on our YouTube video also said it would be perfect for cutting lettuce as metal knives make the cut edge turn brown quickly!
—
Attachments
Resources
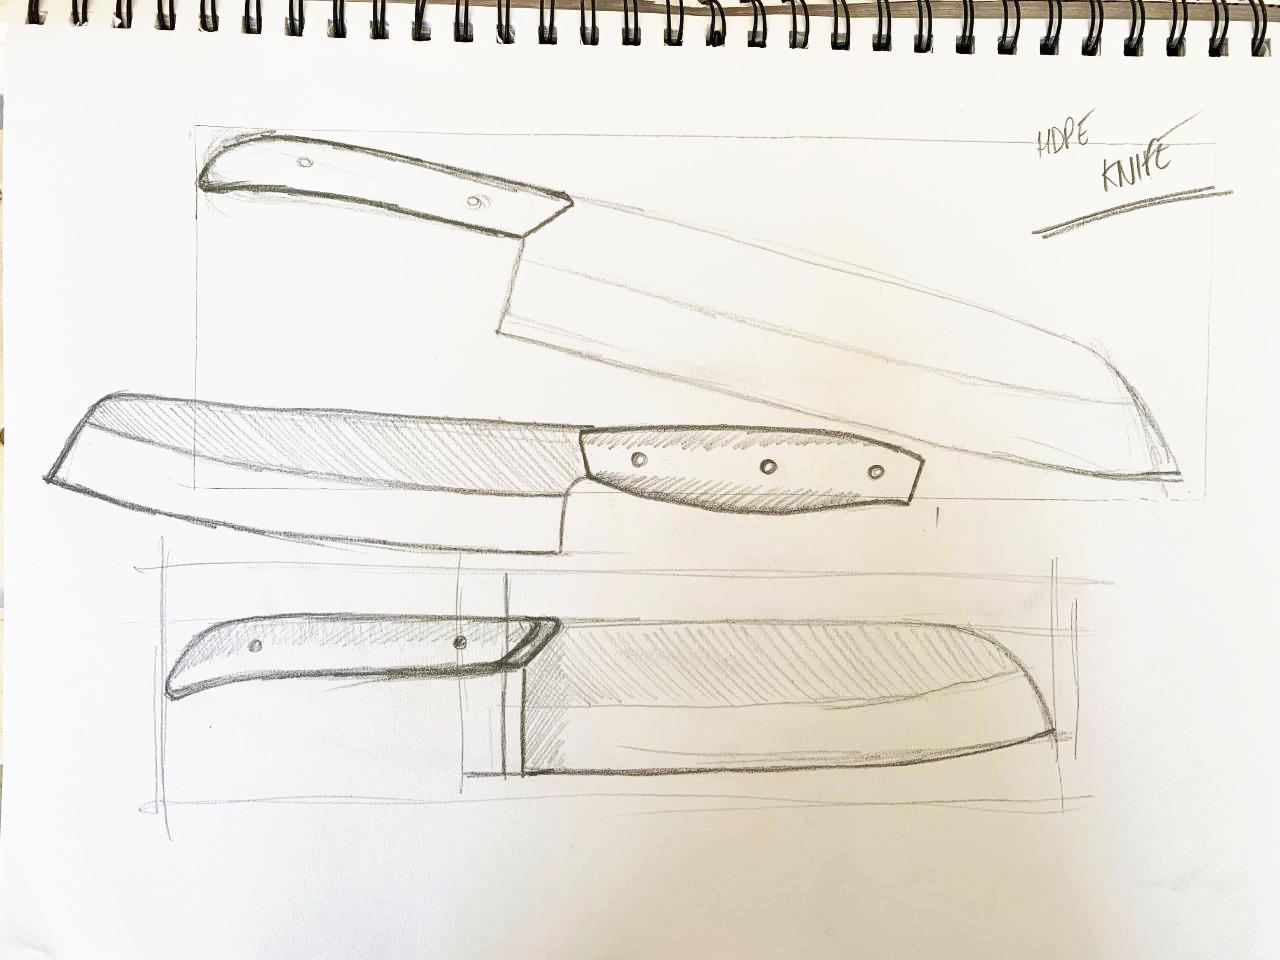
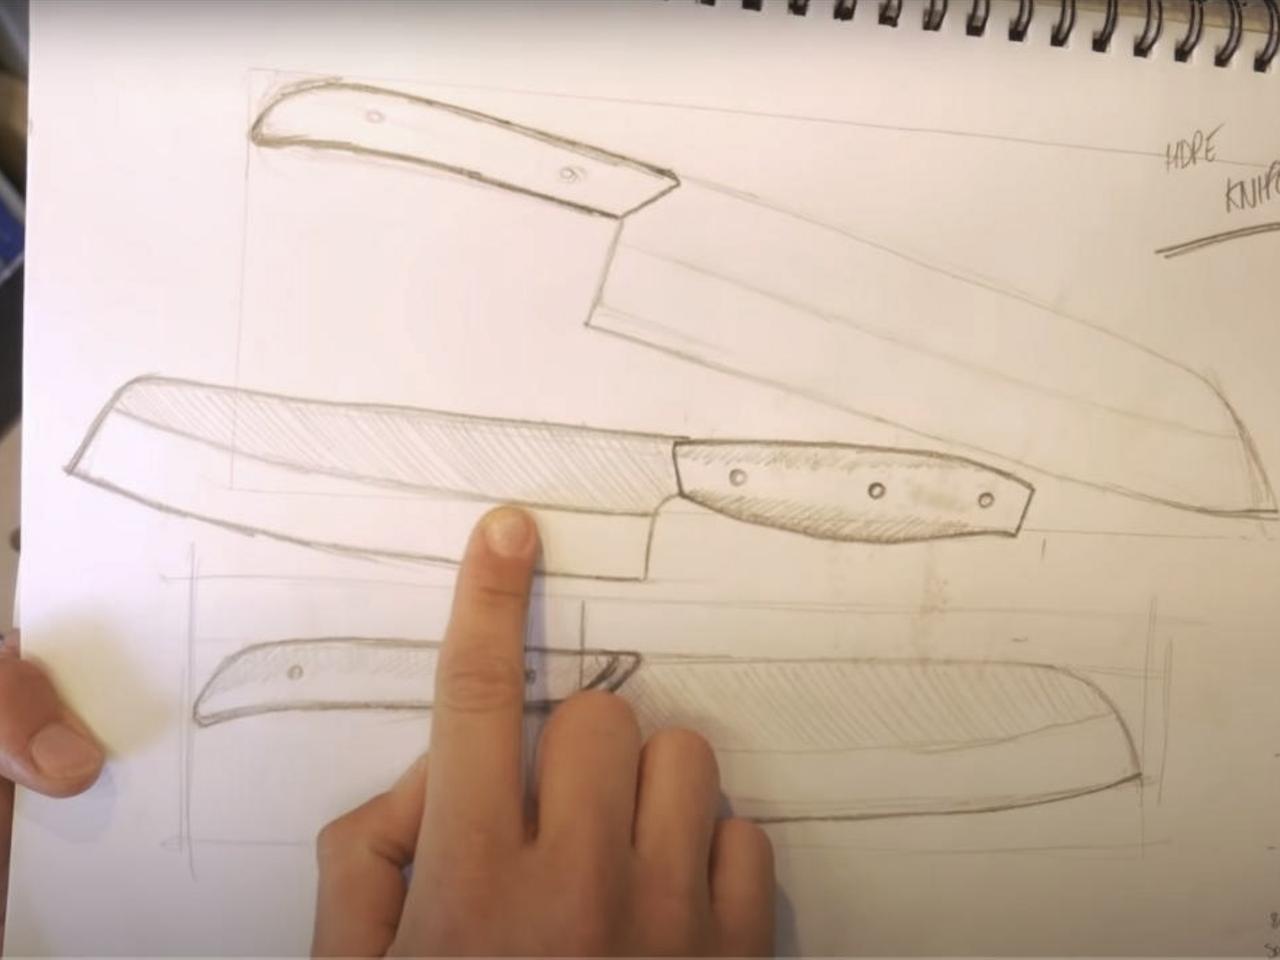
Step 1 - Knife Design
We aimed for a 'santoku' style knife and drew a few different designs out. We actually asked our Instagram followers to pick the one they liked the best!
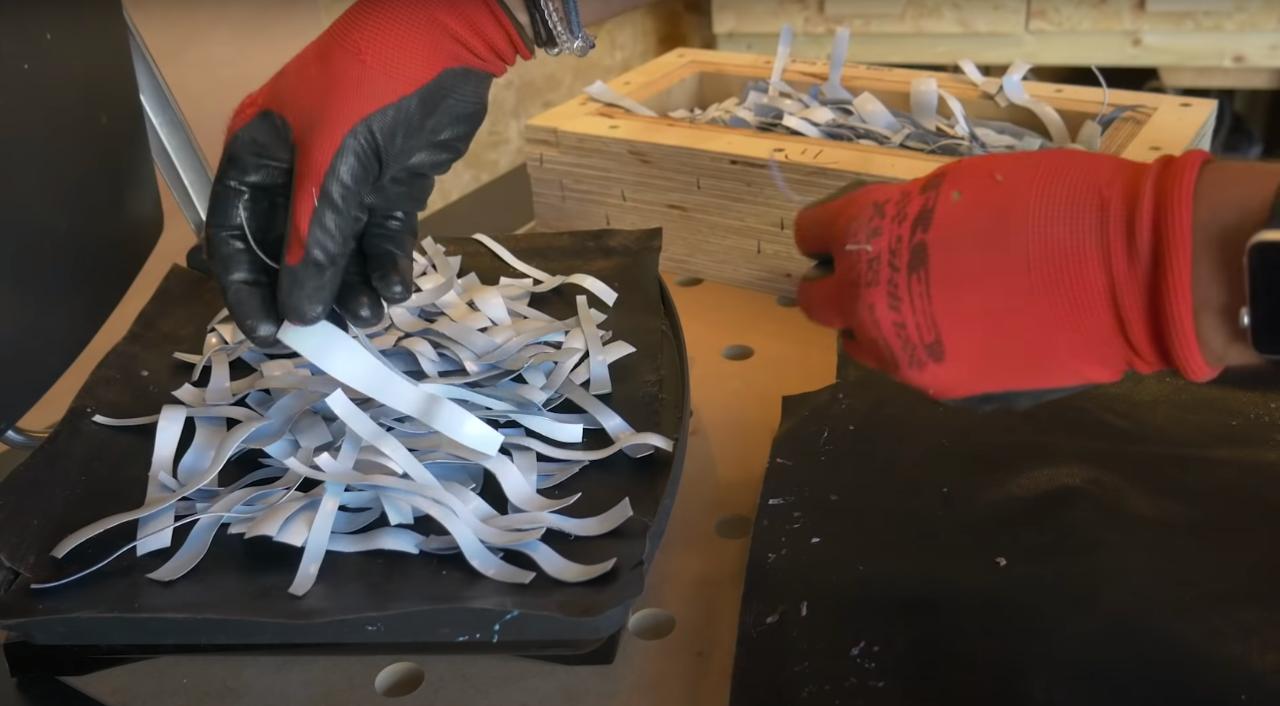
Step 2 - Prepare the Plastic and Mould
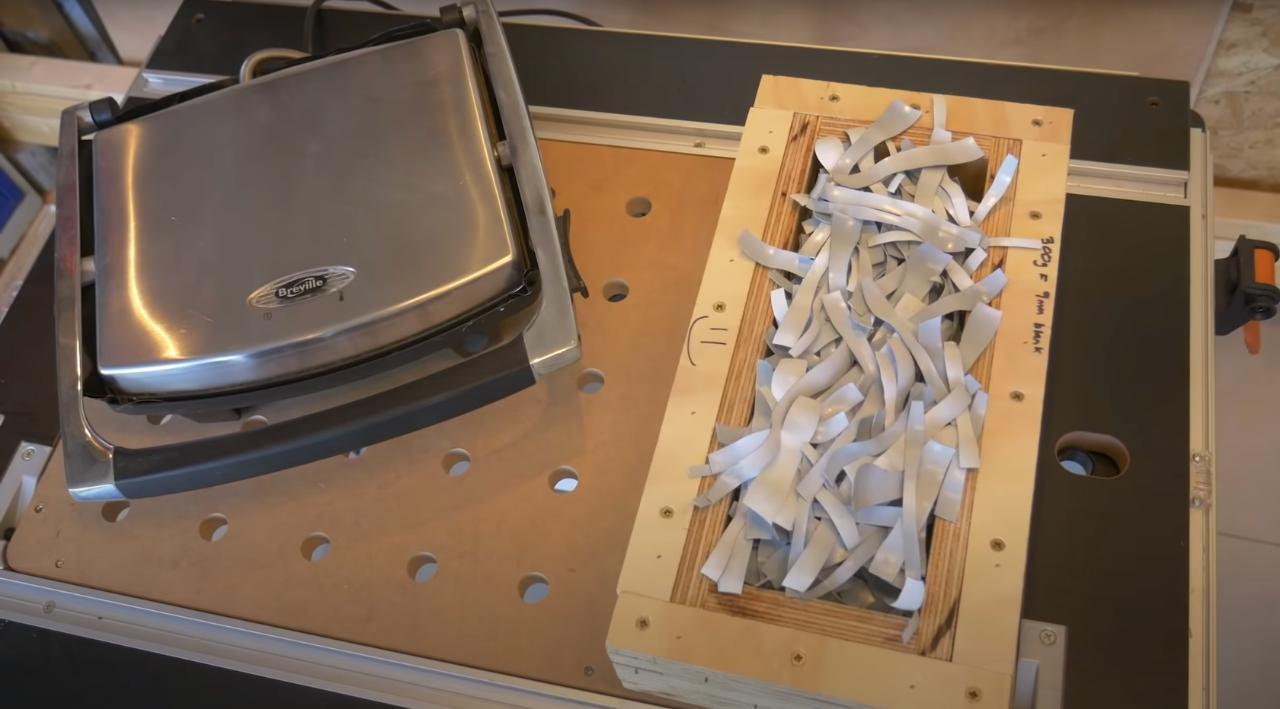
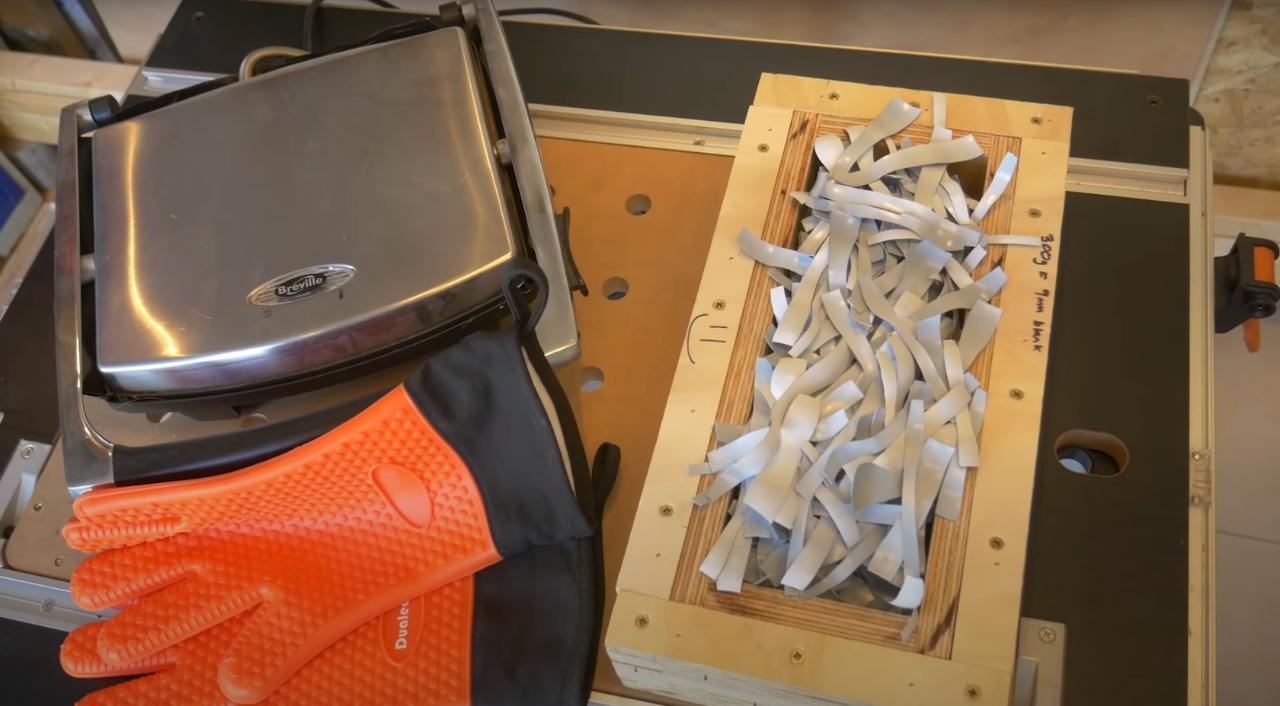
Fort this design we wanted a black and white marble effect so we used these bottles (the product is called 'Fortisip') which are white but with a black core. We cut them up into thin strips ready for melting (all the plastic we have stored has already been washed and dried).
The mould is a simple stacked plywood construction with varnished inner faces to prevent sticking. We don't go into detail about that here but check out our HDPE Stool video on our YouTube channel where we show the mould construction in more detail.
The mould is a simple stacked plywood construction with varnished inner faces to prevent sticking. We don't go into detail about that here but check out our HDPE Stool video on our YouTube channel where we show the mould construction in more detail.

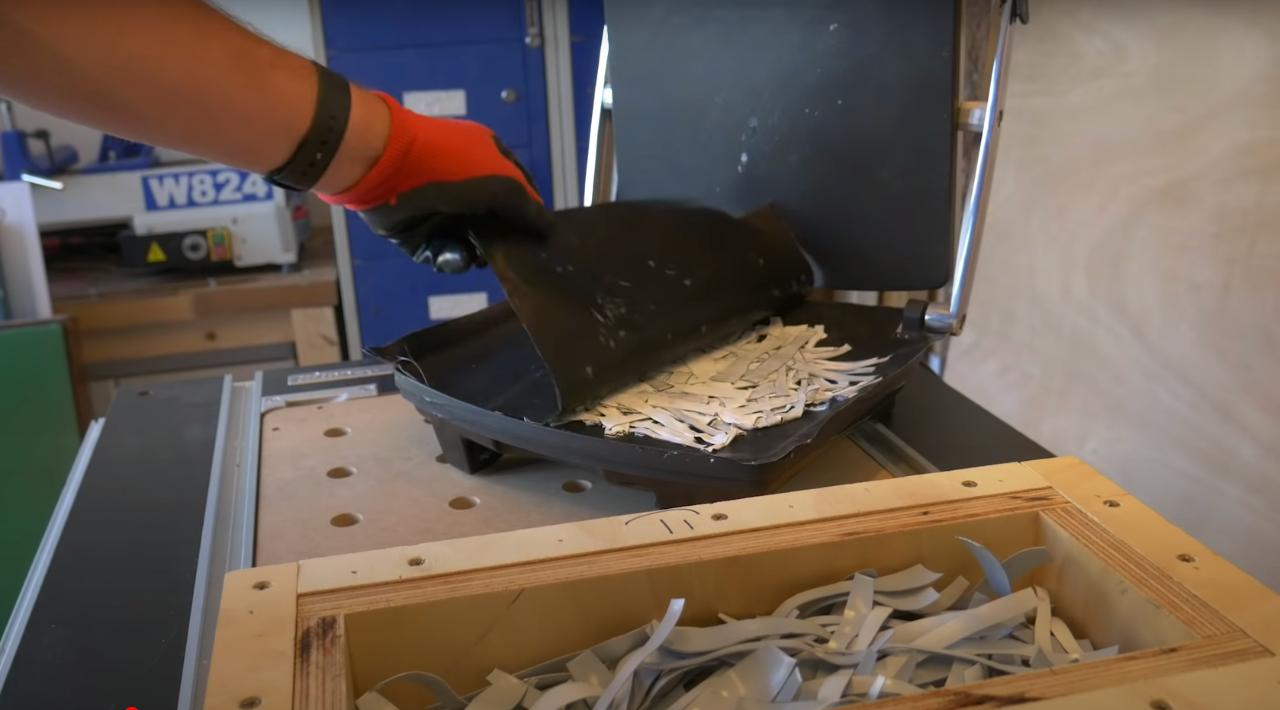
Step 3 - Melt the HDPE
We use a flat plate sandwich toaster to melt HDPE. We will occasionally use a small toaster oven as well, but this is mostly for larger melts where we need to keep a bigger mass of plastic hot. For this project we were aiming for around 8mm in thickness for the blade so the sandwich toaster can cope fine on its own.
When melting, the plastic will shrink a lot so keep adding more every few minutes, taking care not to introduce any air bubbles.
When melting, the plastic will shrink a lot so keep adding more every few minutes, taking care not to introduce any air bubbles.

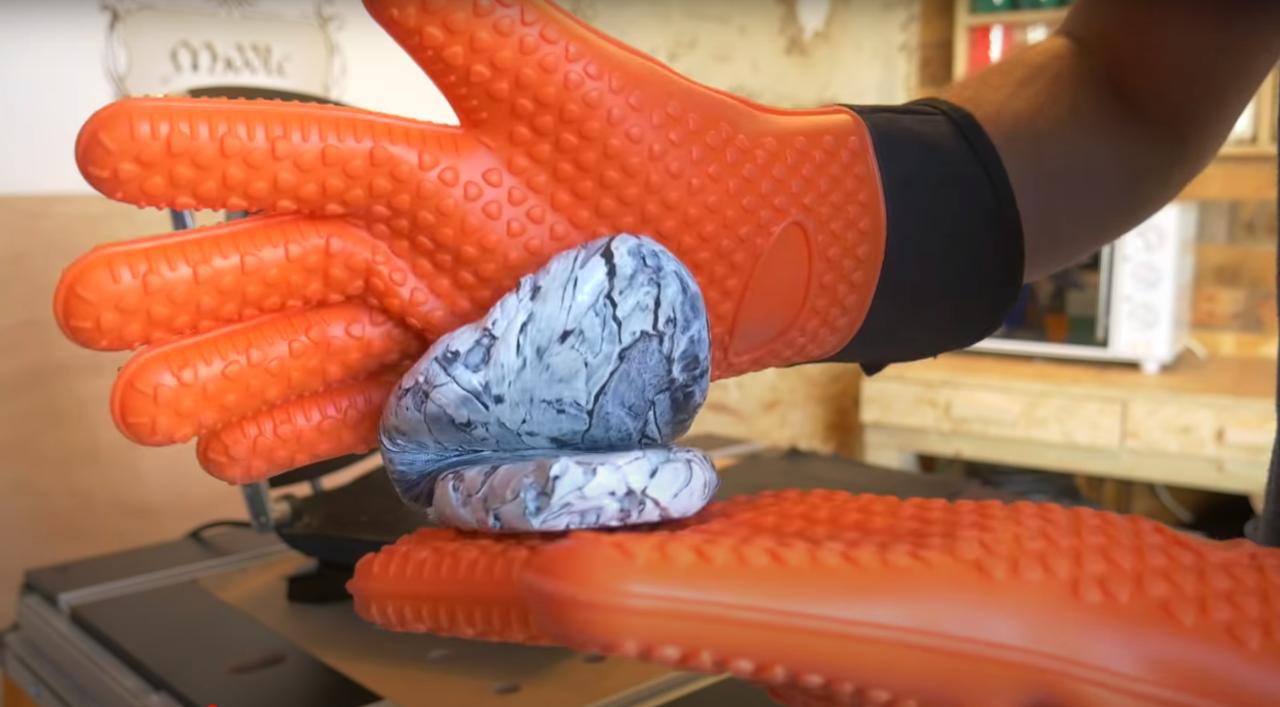
Step 4 - Fold and Twist
To maximise the marbling effect and to further reduce air bubbles, we like to pick up the plastic so that we can fold and twist it. Be extremely careful whenever handling molten plastic. We wear 2 pairs of gloves when doing this. The outer pair are called 'silicone oven mitts' and are the best gloves we have tried for doing this.
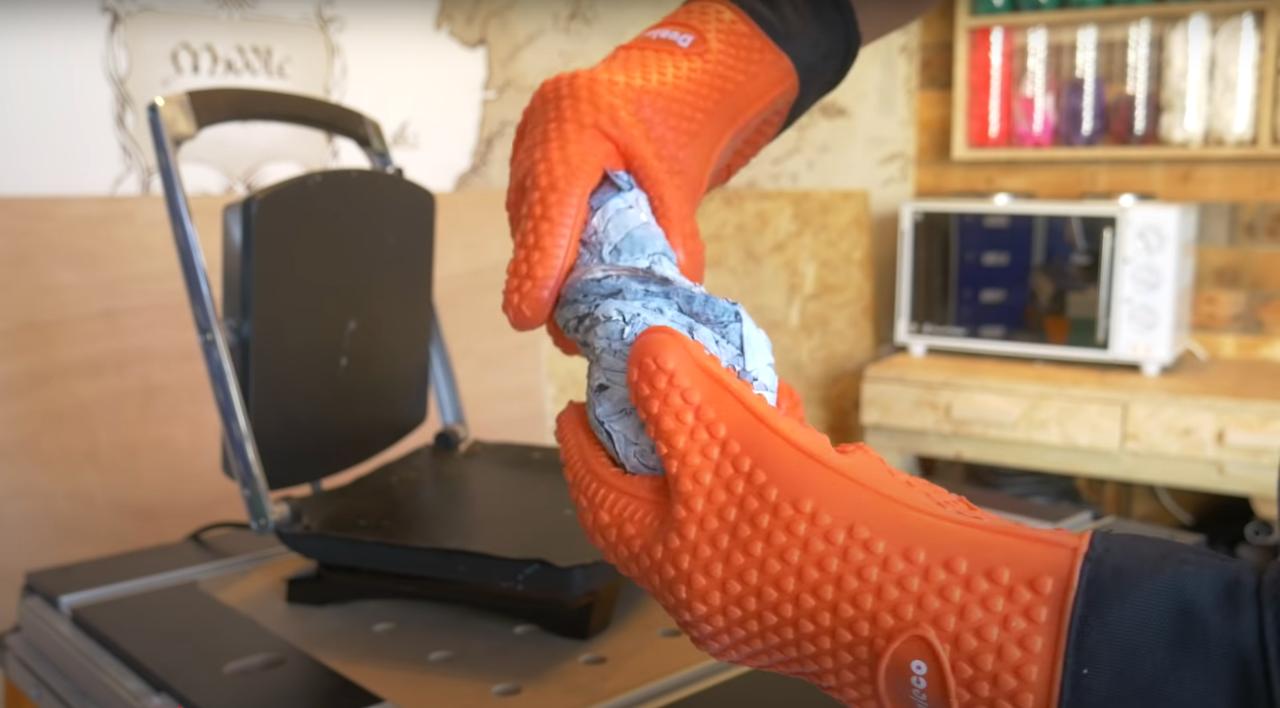
When folding and twisting be very careful make sure you are not introducing any more bubbles. Once you are happy, put it back in the sandwich toaster (HDPE cools rapidly and it needs to be as hot as possible before transferring to the mould!)
When folding and twisting be very careful make sure you are not introducing any more bubbles. Once you are happy, put it back in the sandwich toaster (HDPE cools rapidly and it needs to be as hot as possible before transferring to the mould!)
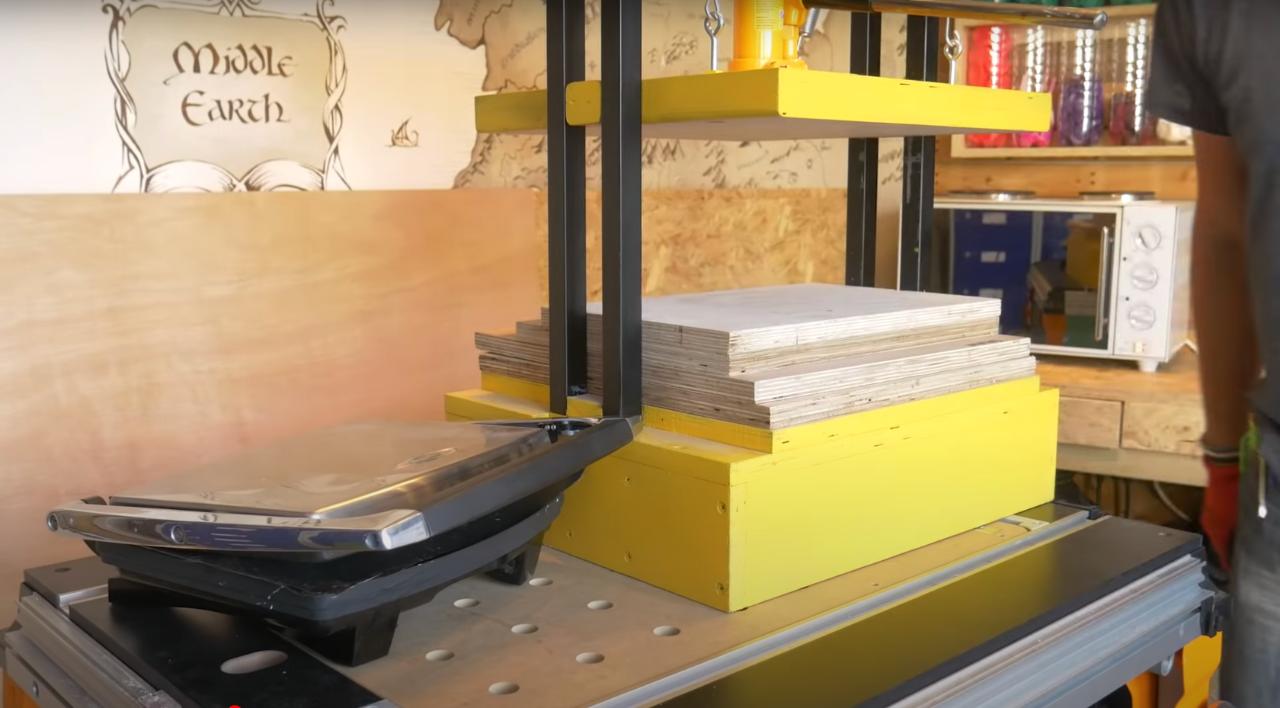
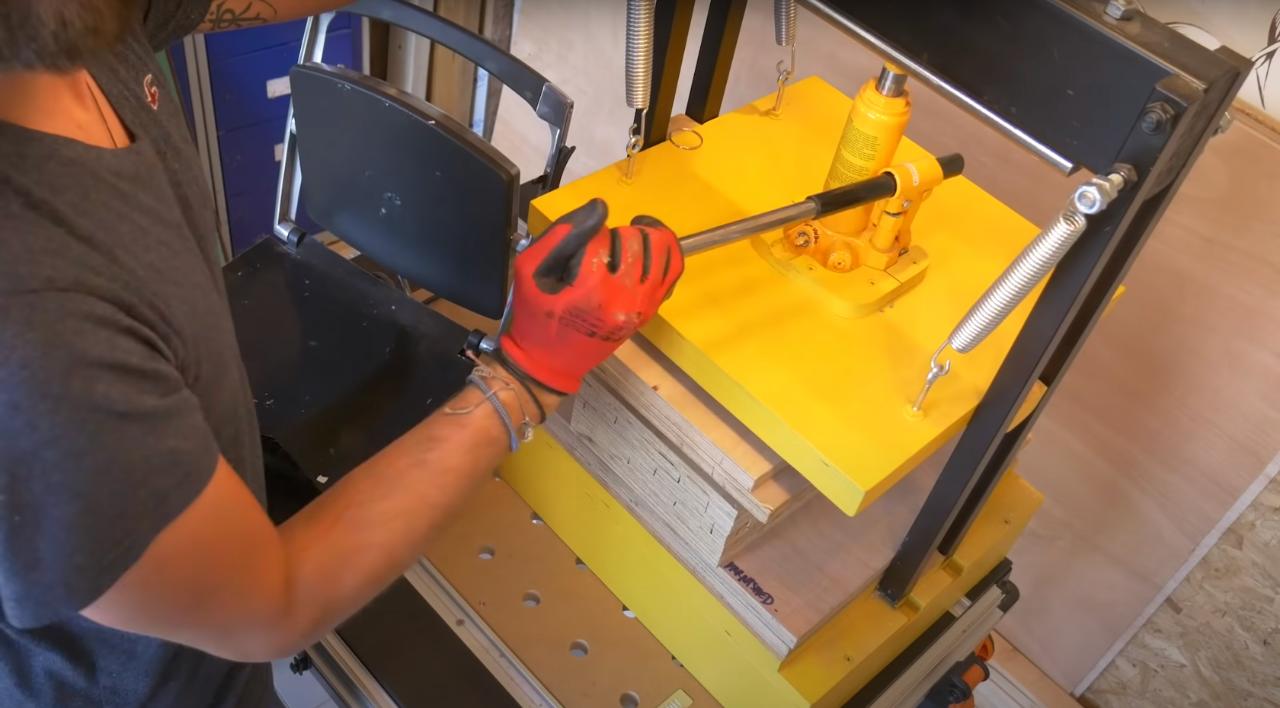
Step 5 - Press the Sheet
Once the plastic is hot enough, transfer it into the mould, put on the top plate and get it into the sheet press. We are using our DIY 2-tonne bottle jack press. We also have a video of how to make this on our YouTube channel.
Leave to cool overnight. The HDPE will shrink as it cools so we like to come back every 5-10 minutes to add more pressure for the first hour or so. That way you will end up with the flattest sheet possible with no warping.
Leave to cool overnight. The HDPE will shrink as it cools so we like to come back every 5-10 minutes to add more pressure for the first hour or so. That way you will end up with the flattest sheet possible with no warping.

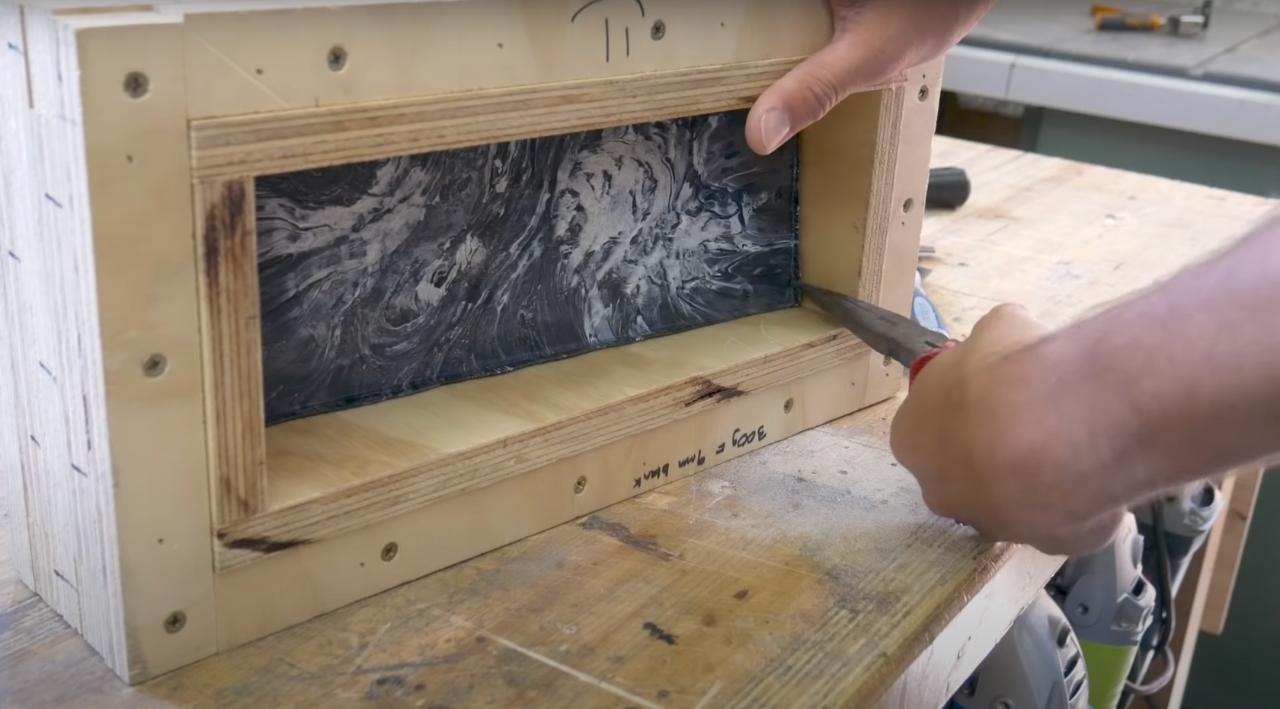
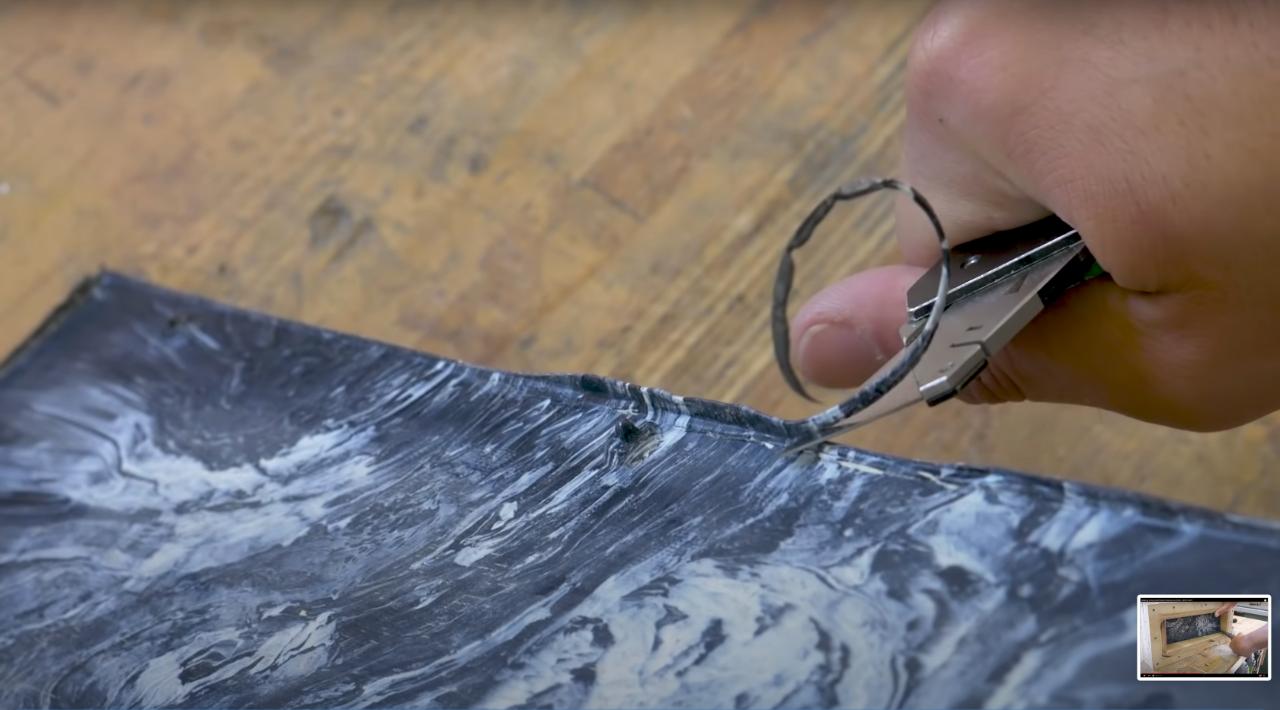
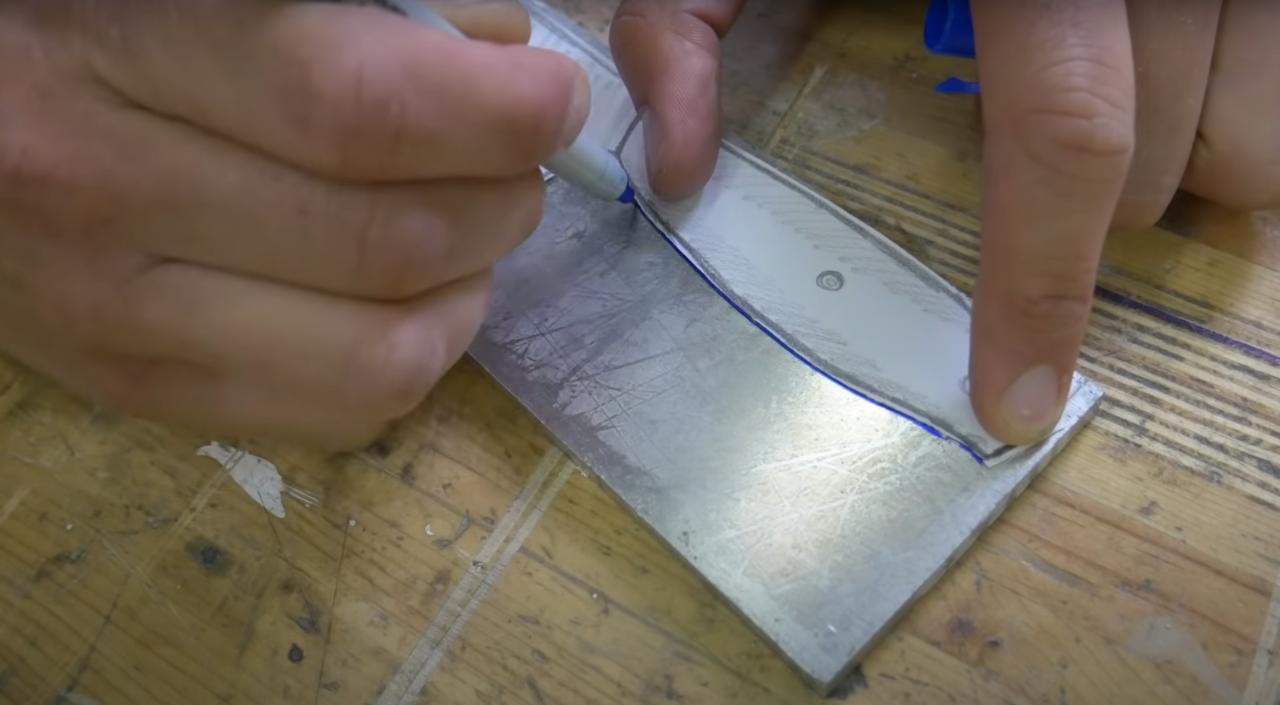
Step 6 - De-Mould and Apply Template
The sheet often pops right out of the mould but occasionally we need to gently persuade it with some pliers. Once the sheet is out we cut off any flashing (saving to reuse again of course!) and stick on the chosen template design.
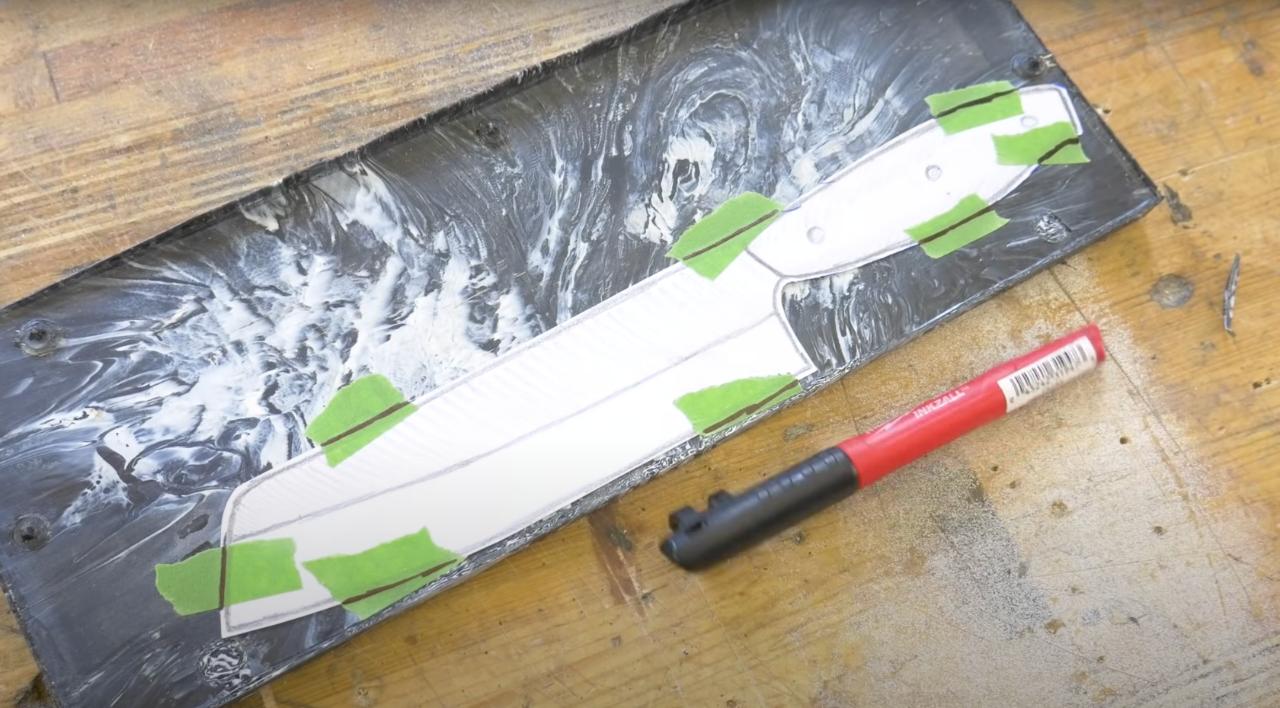
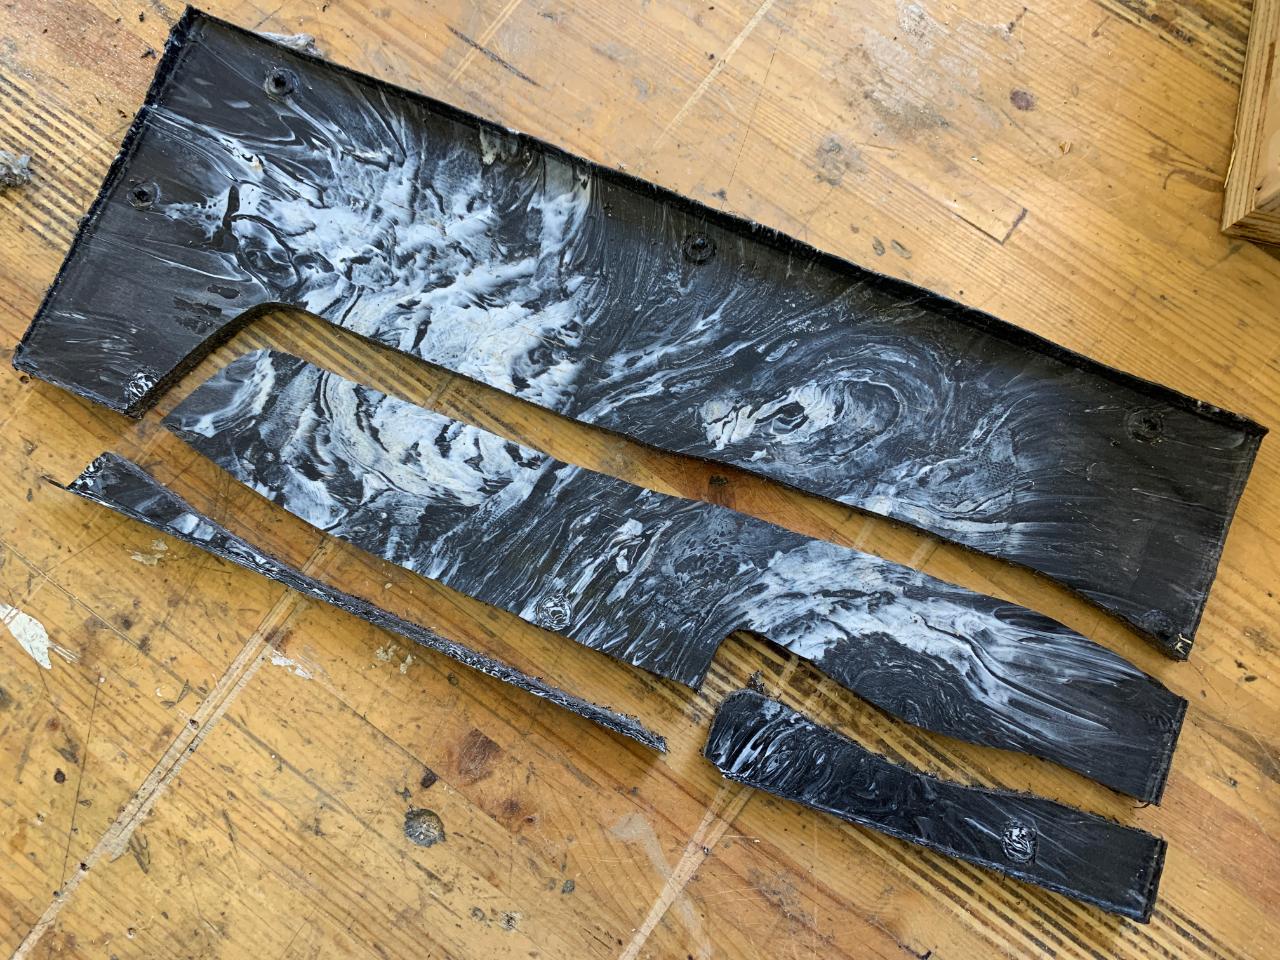
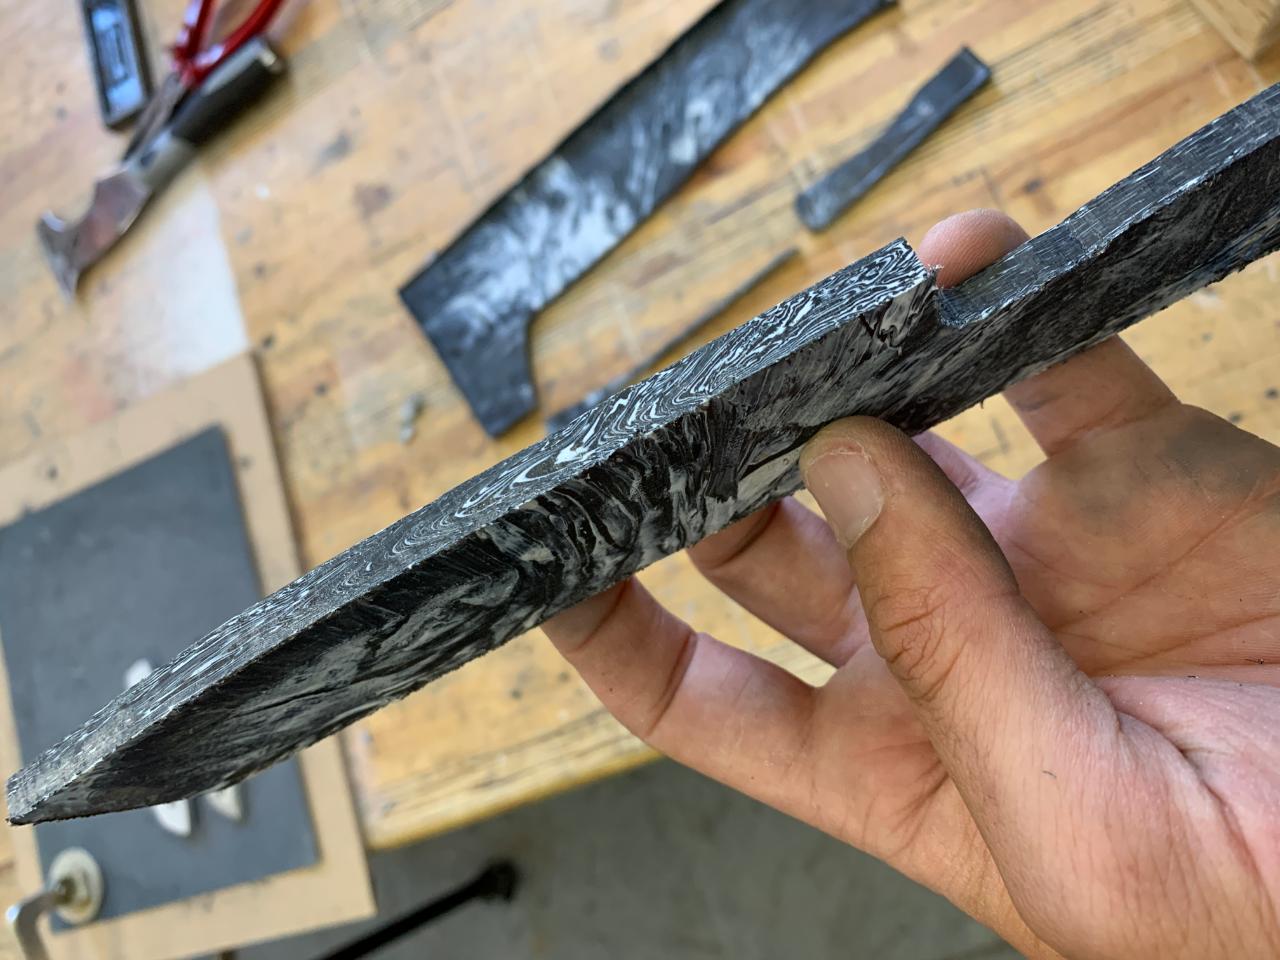
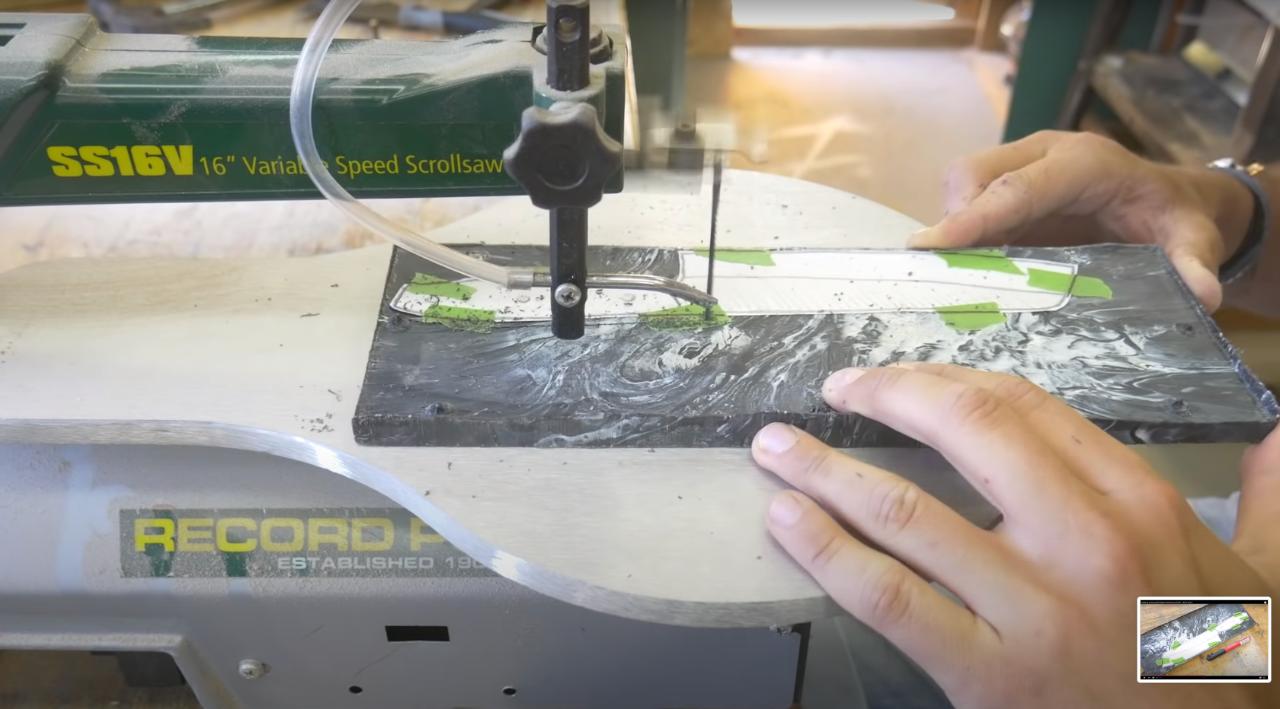
Step 7 - Cut out the Blade
We like to use the scroll saw for this as it creates much less waste. Wherever possible we keep as much of the waste produced for future projects. The cut edges gives a glimpse of the marble effect on the blank!
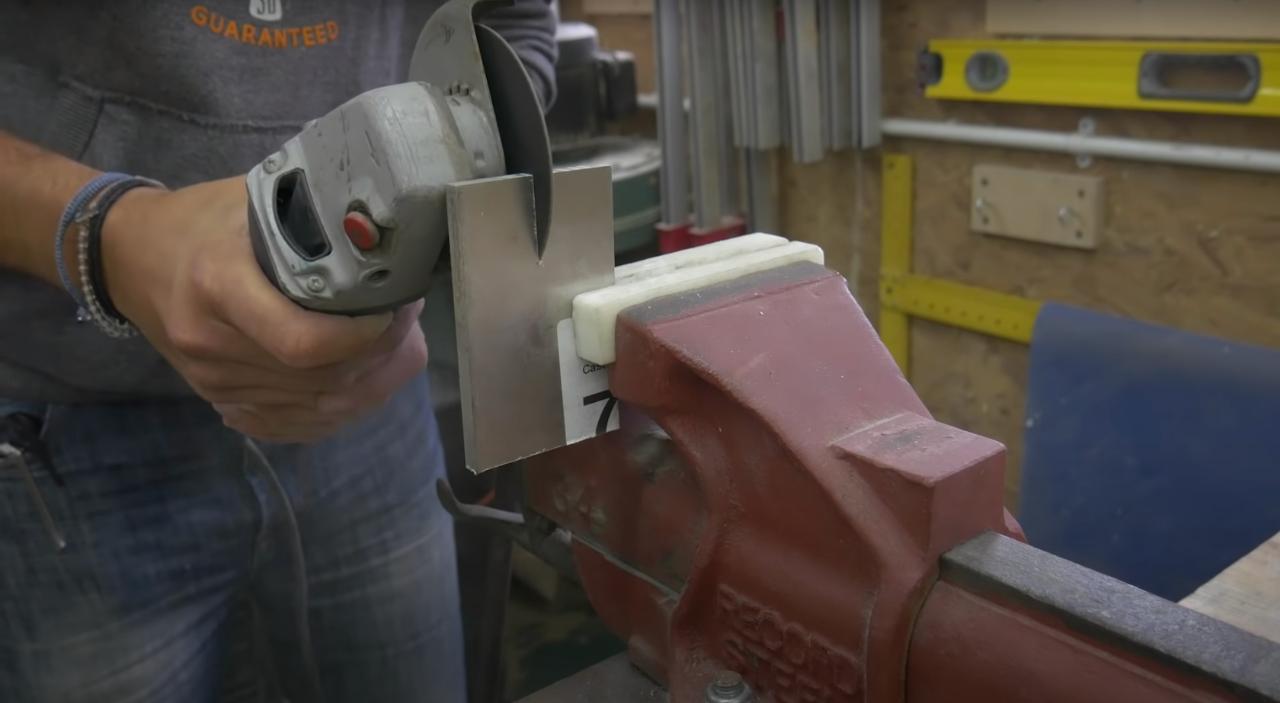
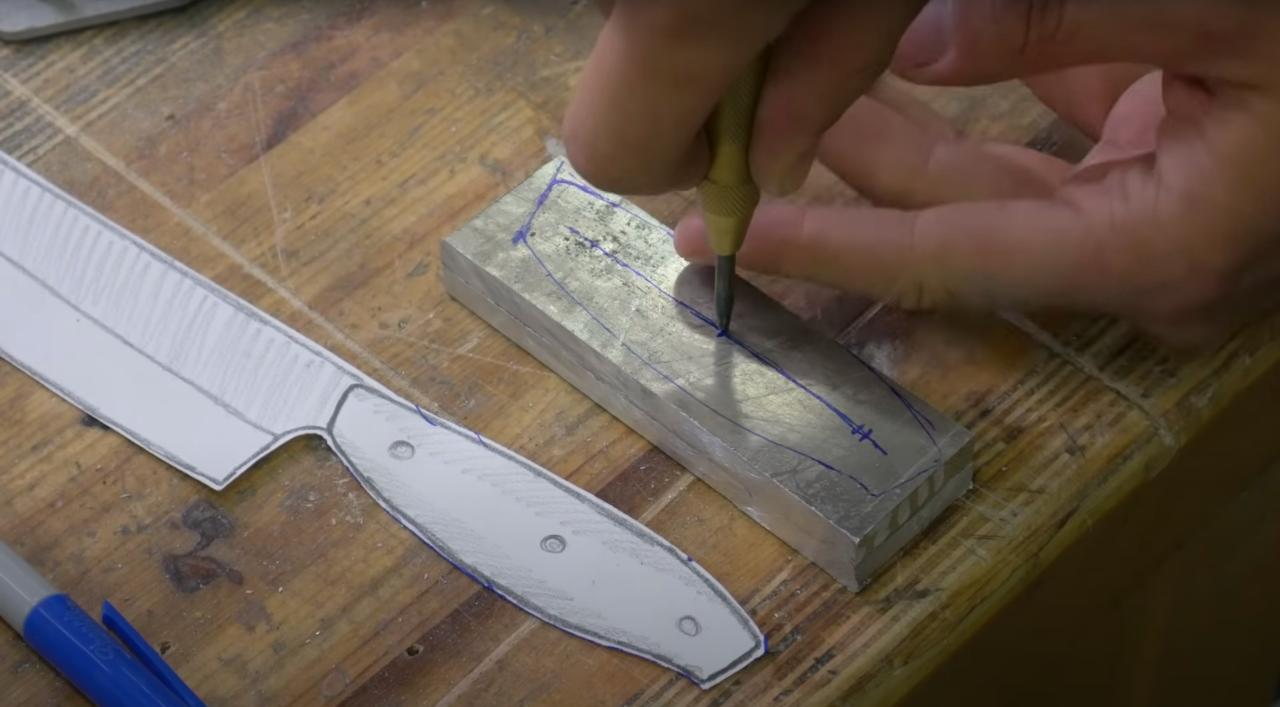
Step 8 - Start the Aluminium Scales
We used 8mm aluminium plate for the scales. We traced the template onto the metal and cut out 2 pieces with an angle grinder. We also marked out the 3 hole positions for the pins and centre-punched these.
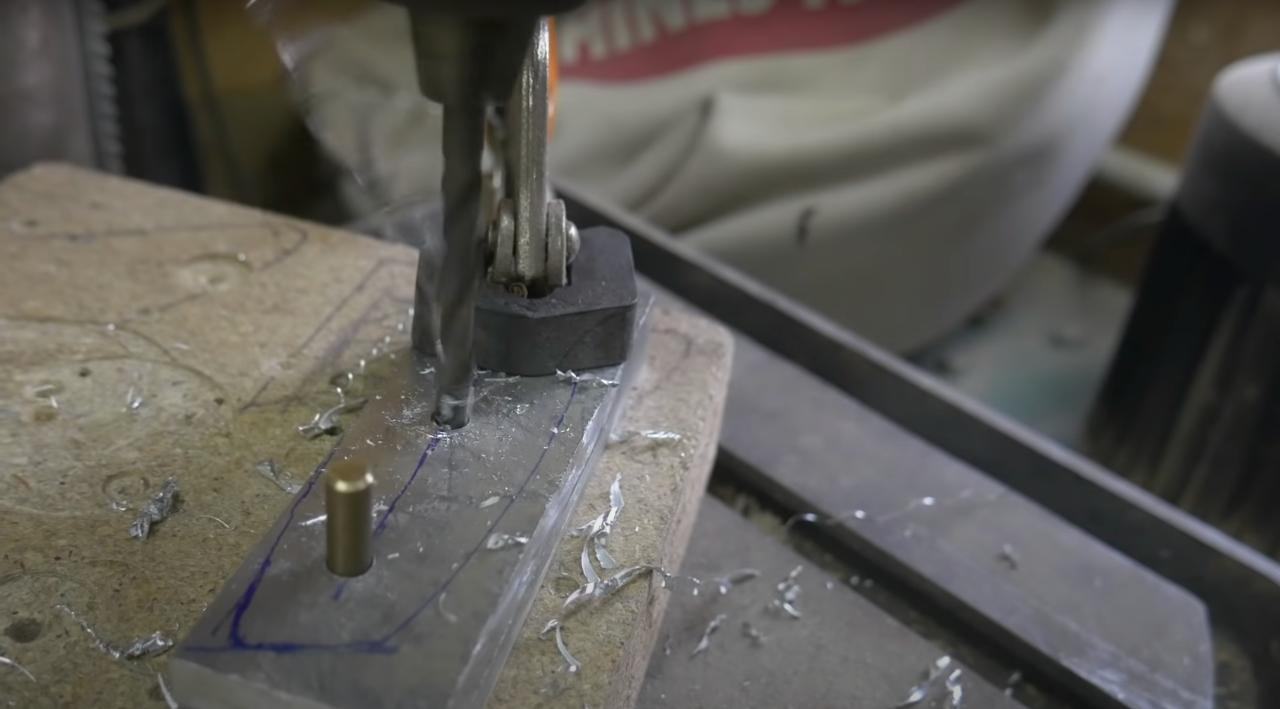
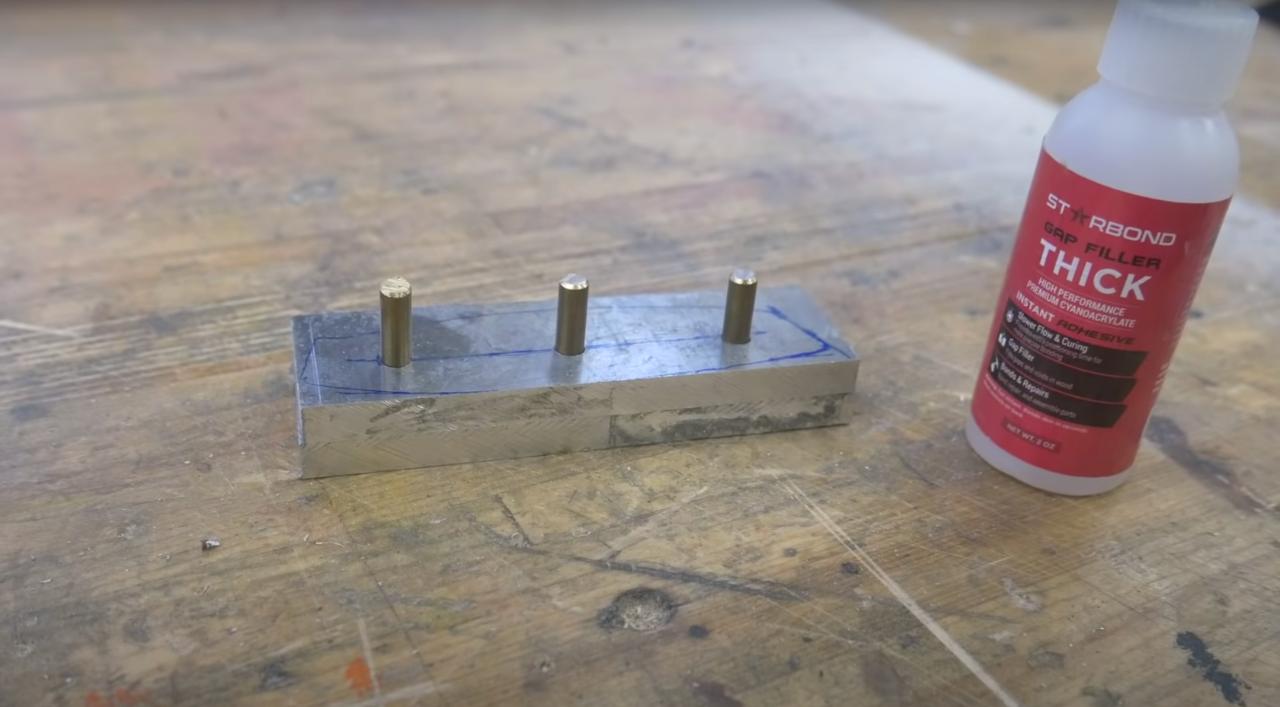
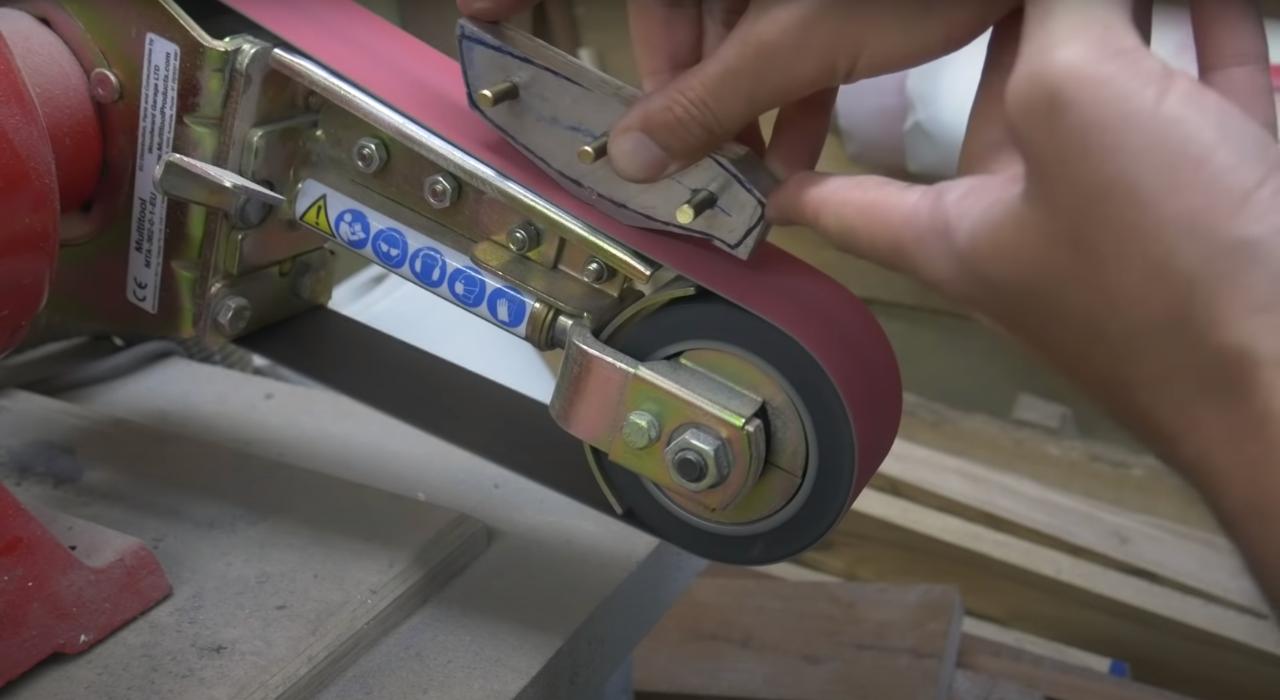
Step 9 - Drill and Shape the Scales
We drilled the 3 pin holes and used some brass rod with a small amount of superglue to hold the 2 scales together. This way when we are shaping on our grinder they both come out exactly the same.
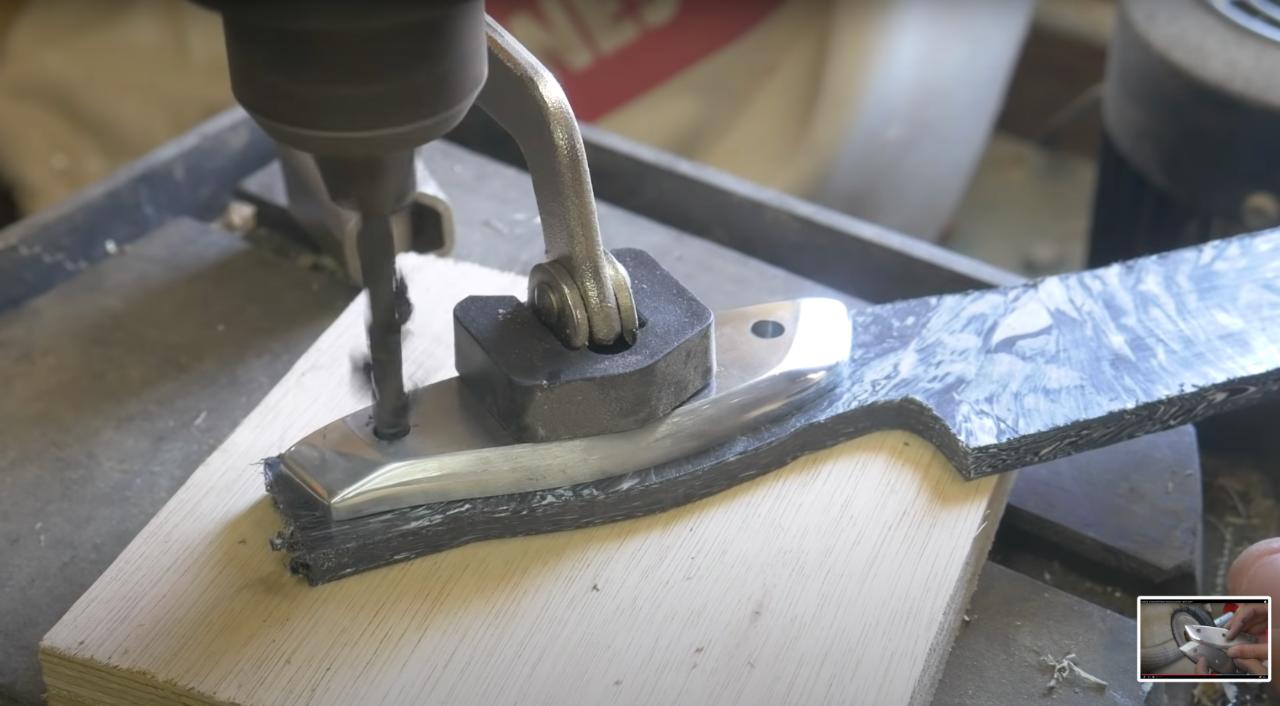
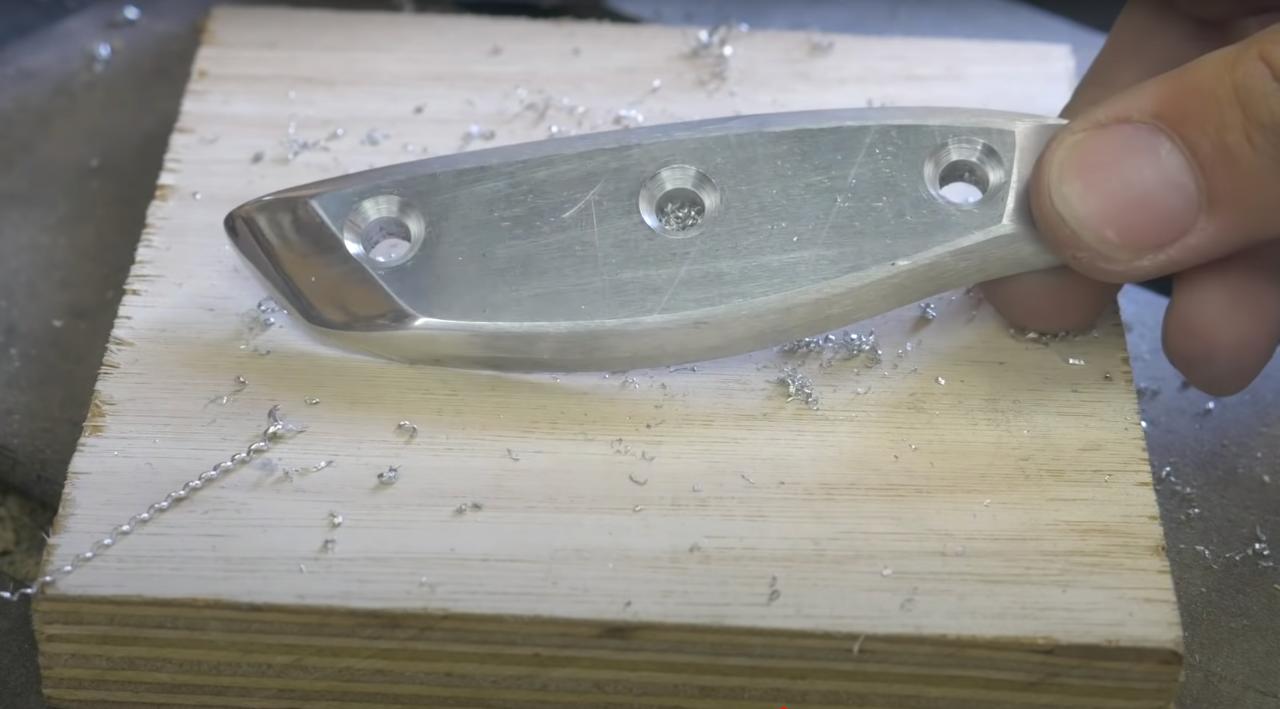
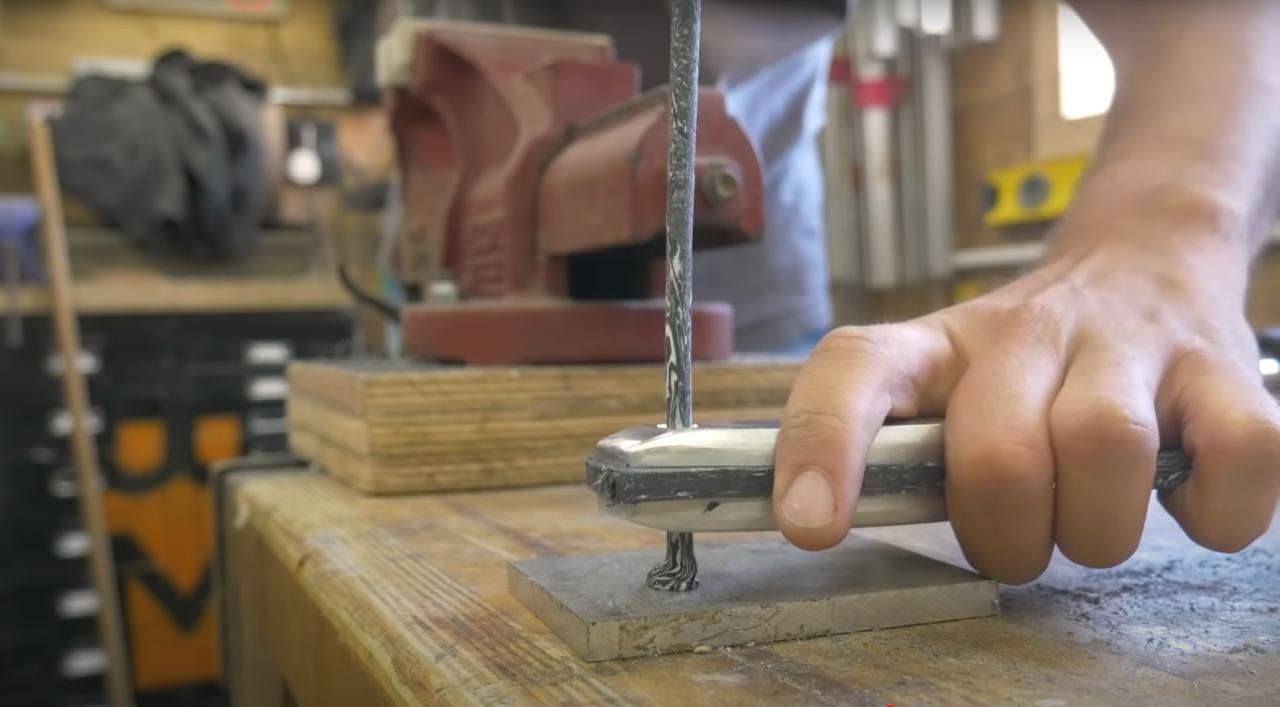
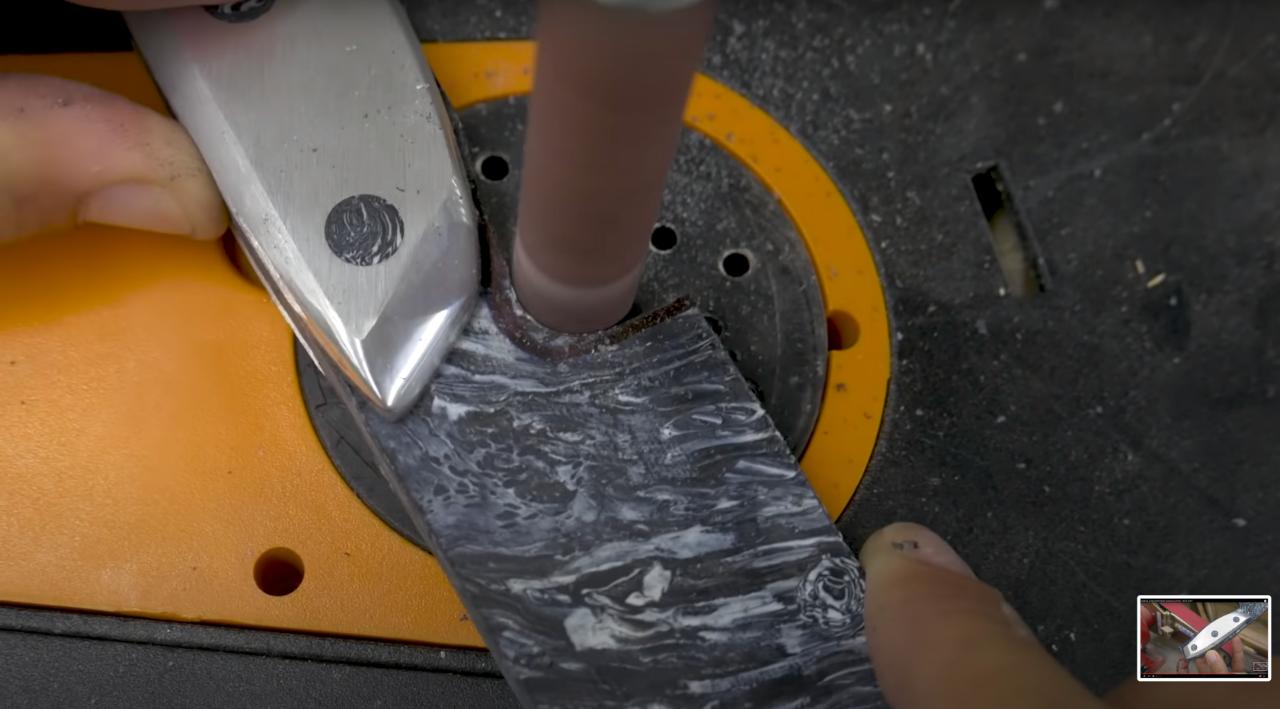
Step 10 - Transfer the Holes to the HDPE
Once we were happy with the shape of the scales, we tapped out the pins and carefully lined up the handles with the plastic blade. This was clamped in position and we then drilled through to get the exact locations onto the plastic. We also added a deep countersink to the outer faces of each of the aluminium scales.
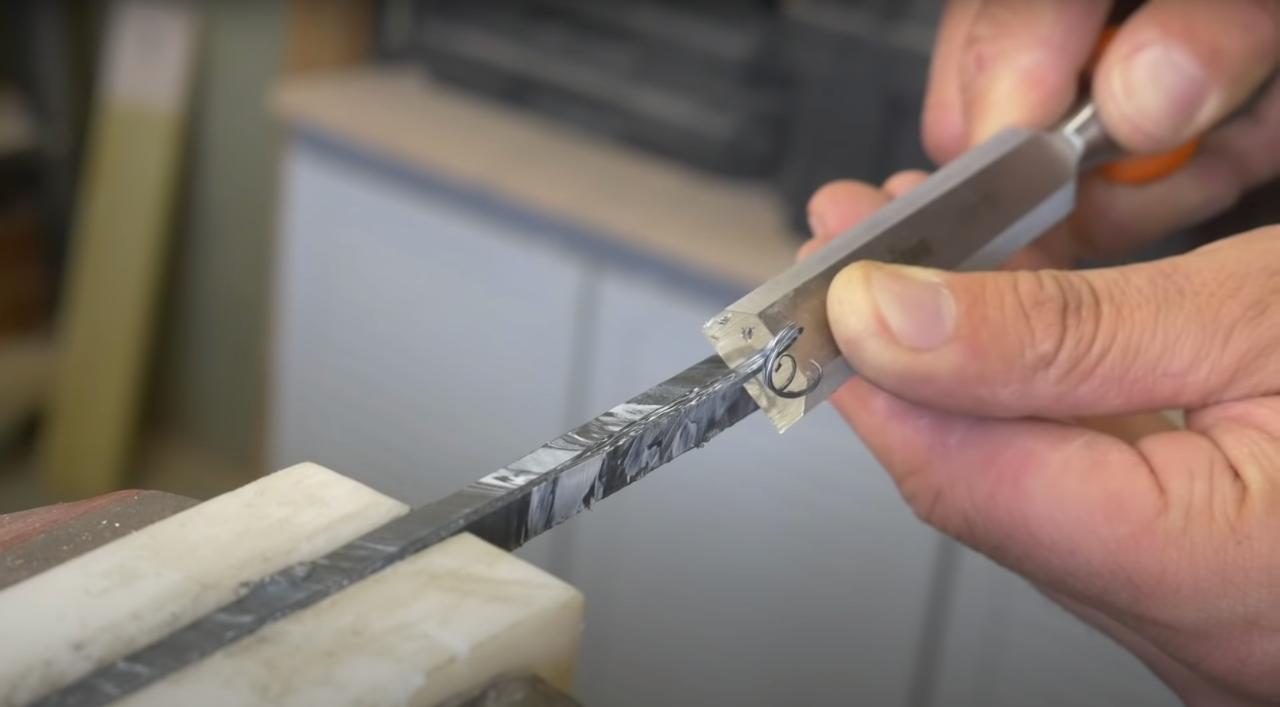
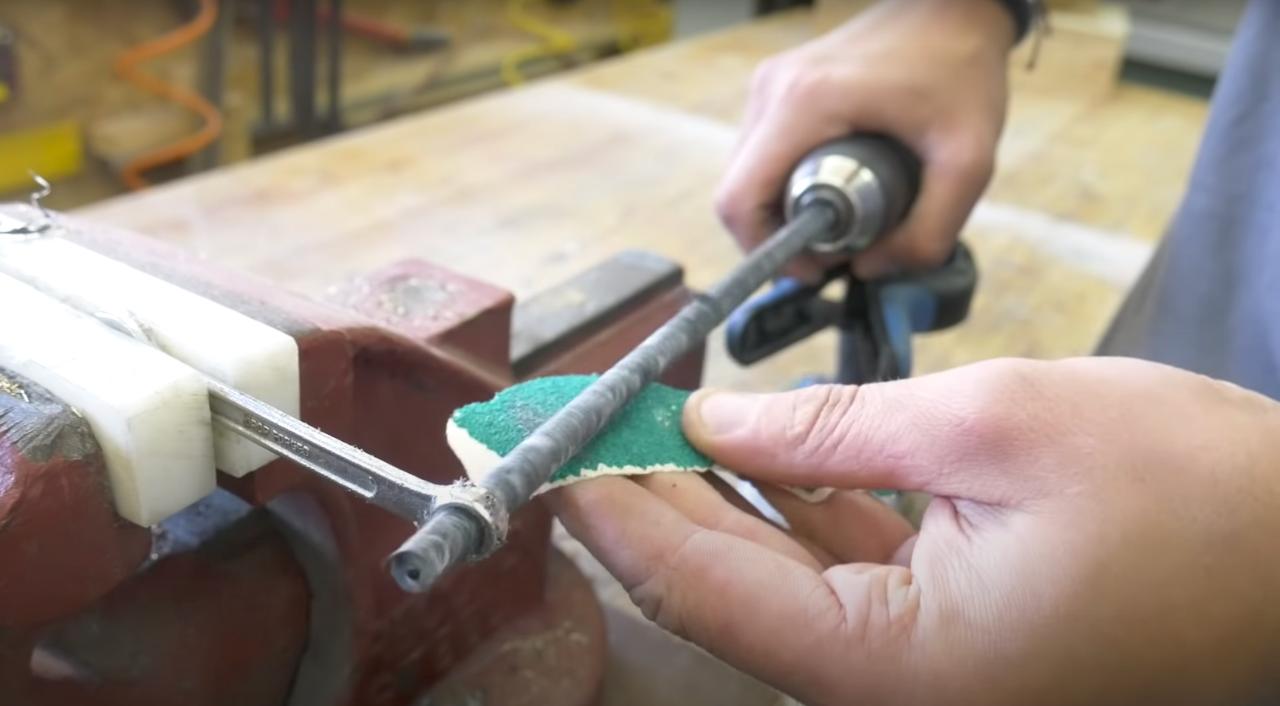
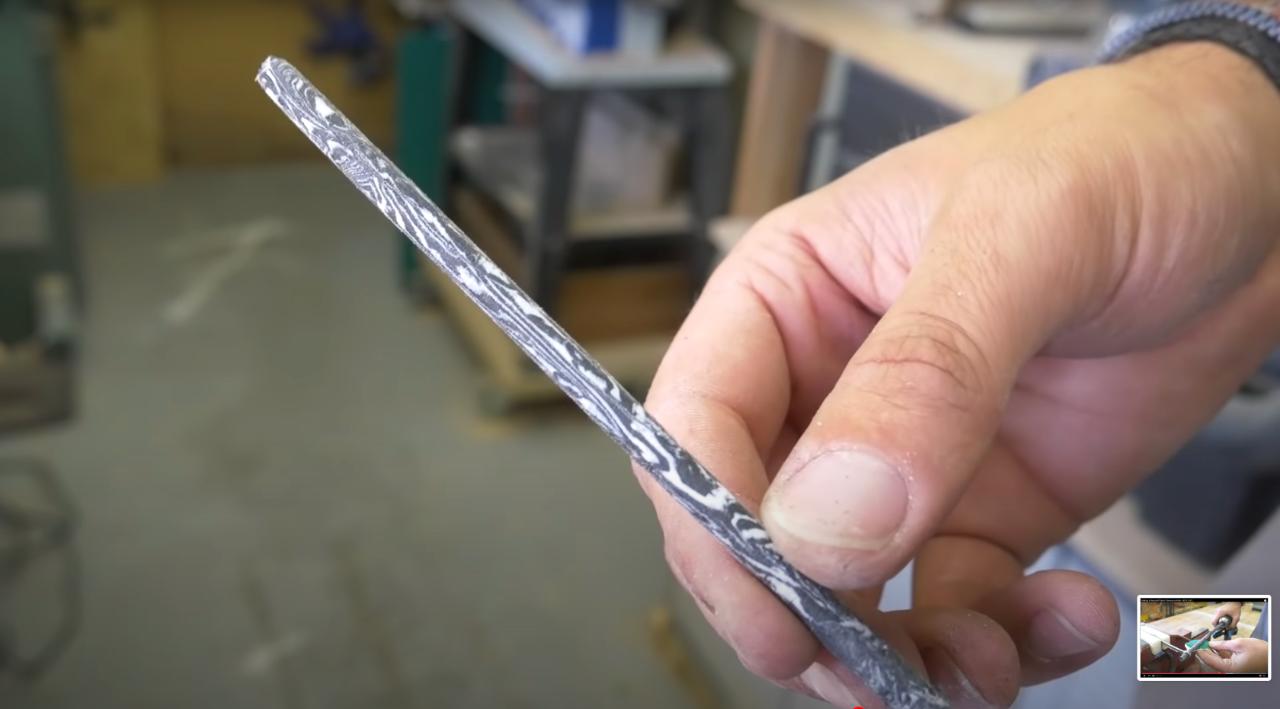
Step 11 - Making HDPE Pins
We wanted the pins to match the blade, so we figured we would try and make out own out of some of the leftover HDPE. We cut a long, thin piece and then used a chisel to take off the corners. We then held this in our drill and used some sandpaper to turn this into a long dowel that we could then cut into pieces for our pins.
It was the first time we tried this and it worked great!
It was the first time we tried this and it worked great!
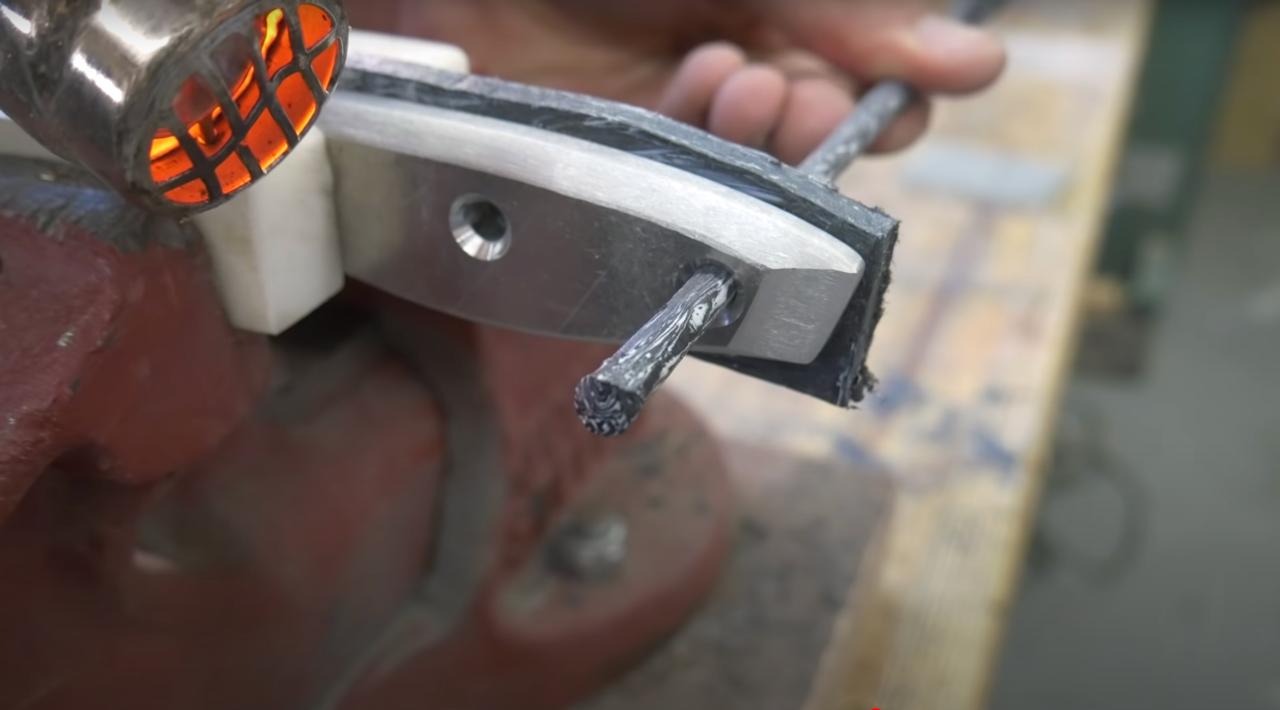
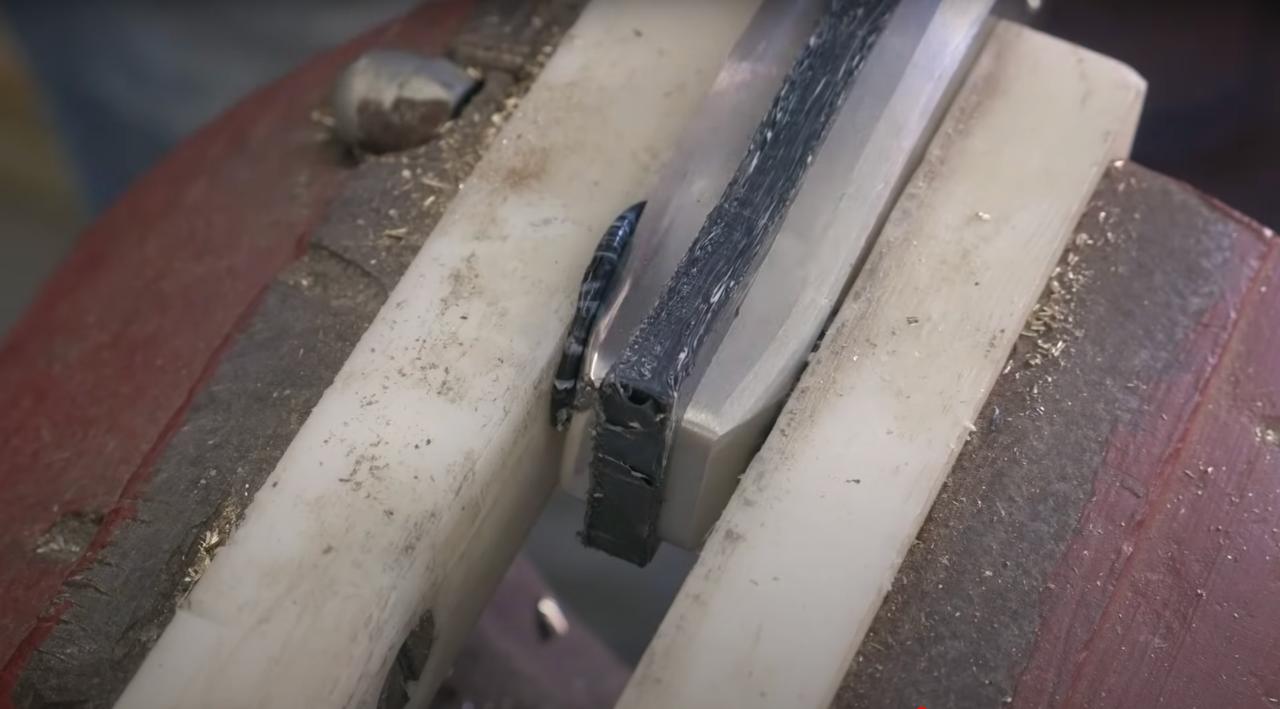
Step 12 - Fixing the Pins
We inserted the pins into the handle and used a heat gun to soften the plastic until it could be pressed firmly against a hard surface. This was to get it roughly in place so it didn't matter if it wasn't perfect. Once we had done this for all 3 pins, we gently heated up both sides of each of the 3 pins (being VERY careful not to heat up the plastic blade!) and clamped it as tight as possible in a vice. Remember it will shrink as it cools, so keep tightening it every 5-10 mins!
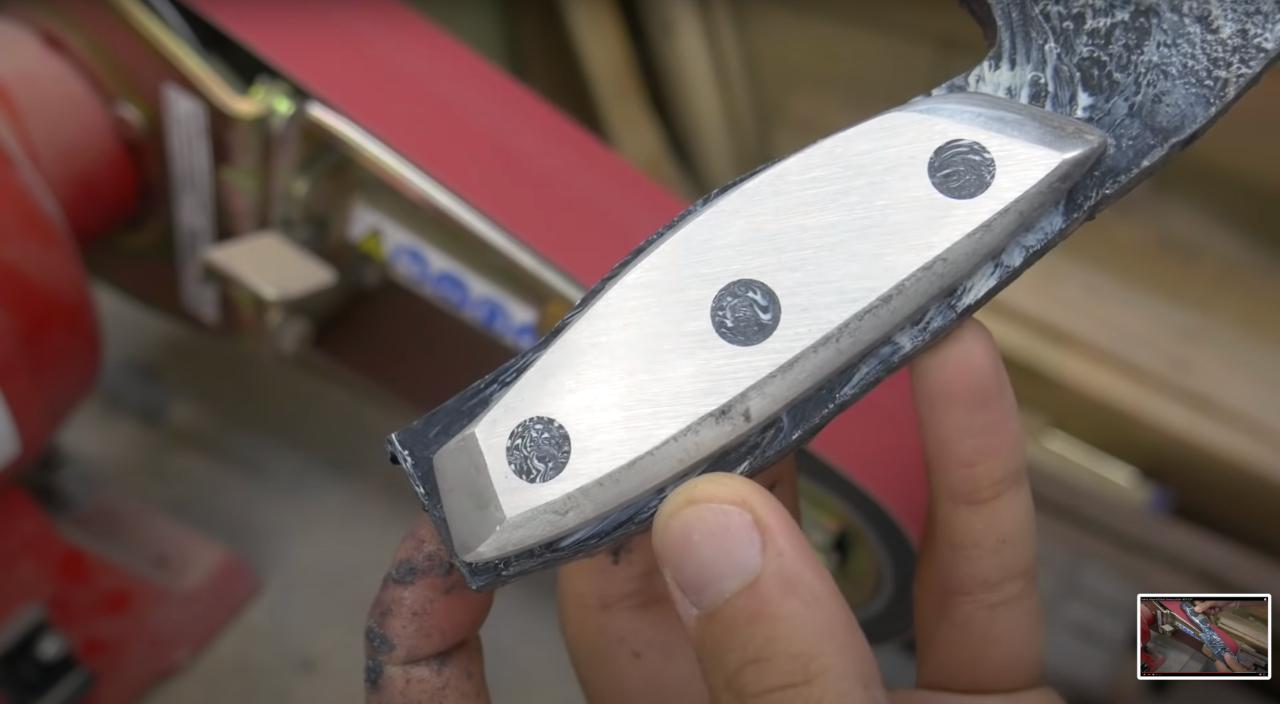
Step 13 - Sand the Pins Flush
We VERY carefully sanded the pins flush to the surface of the aluminium scales. The low melting temperature of HDPE means that it warps incredibly easily so we kept is cool by dunking it in a bucket of water every few seconds. The pins turned out awesome though!
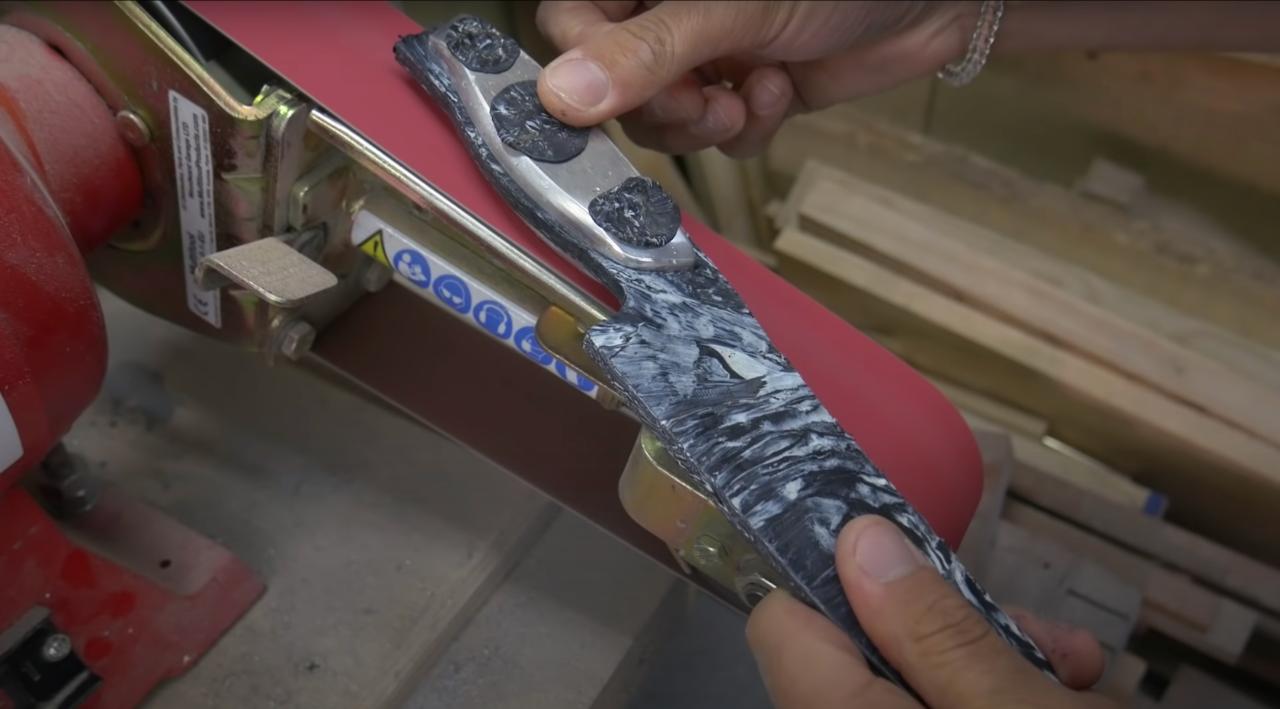
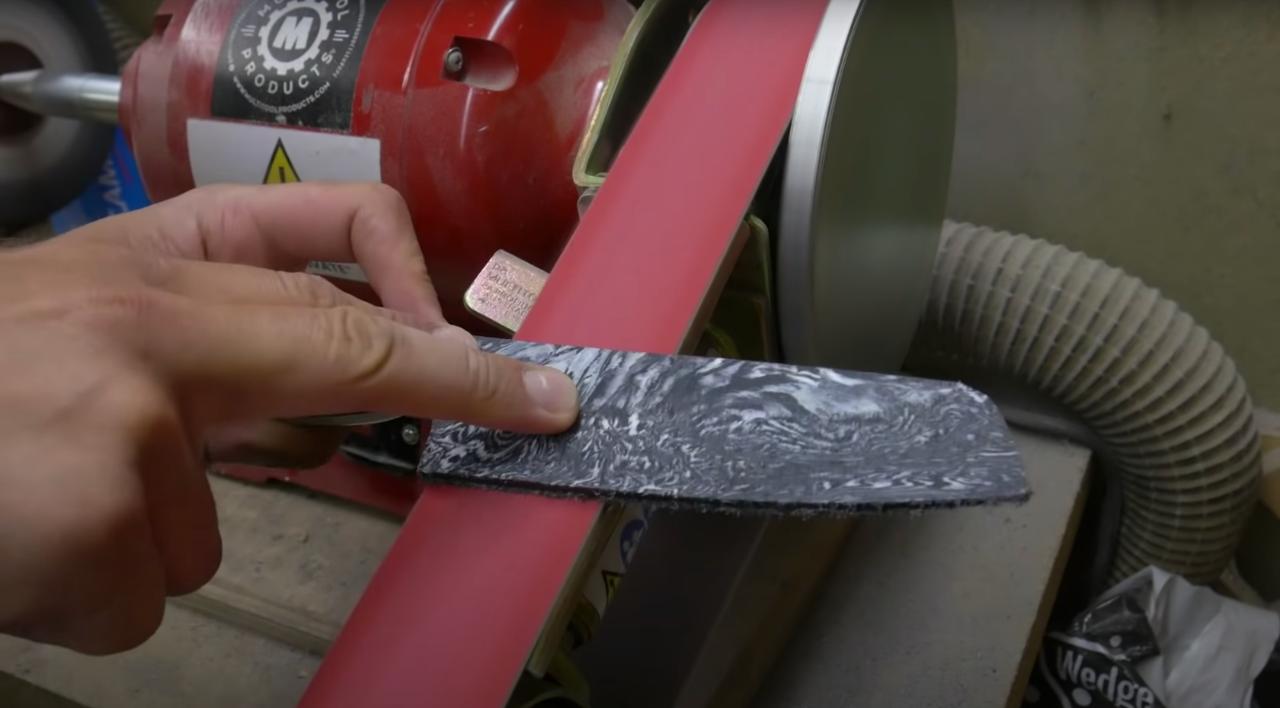
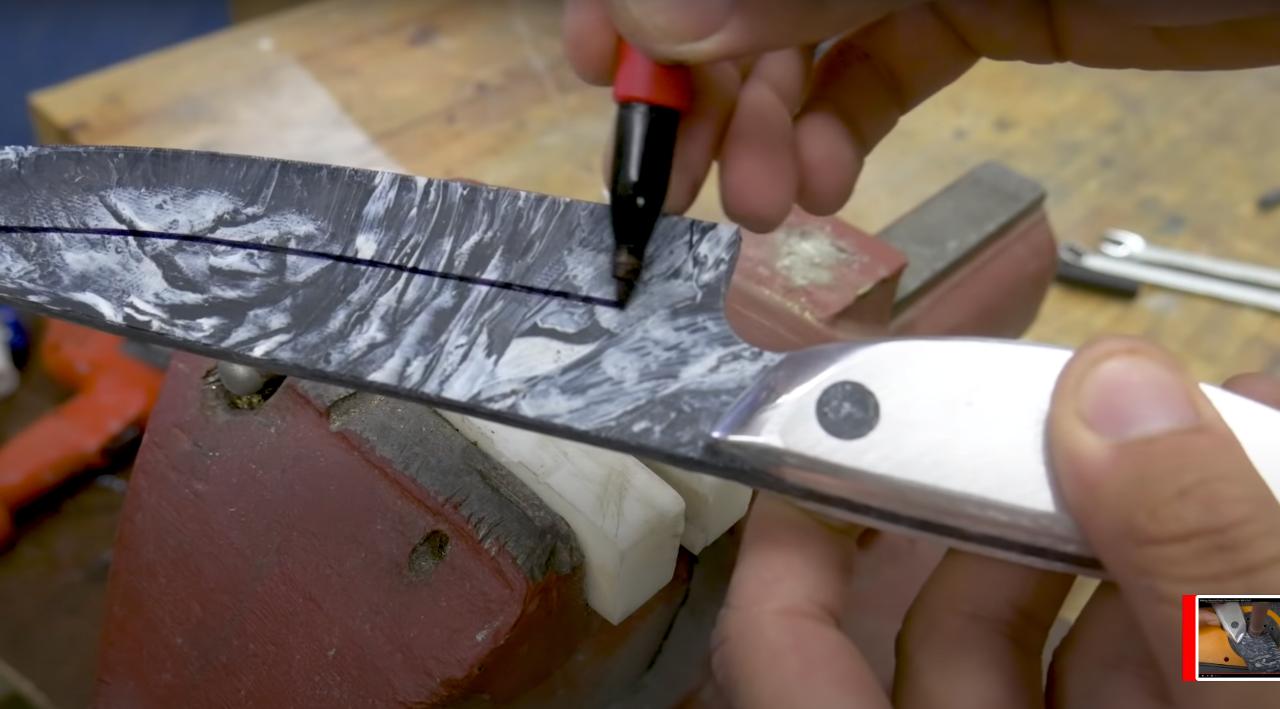
Step 14 - Final Shaping on the Blade
We refined the shape of the plastic blade using the belt grinder and spindle sander. We also draw on our bevel line and sanded to this using the belt grinder.
This was tricky as the plastic turns very 'paper-y' as it gets towards a sharp point. So we didn't try to make it too thin otherwise it could have potentially split on the very edge.
This was tricky as the plastic turns very 'paper-y' as it gets towards a sharp point. So we didn't try to make it too thin otherwise it could have potentially split on the very edge.
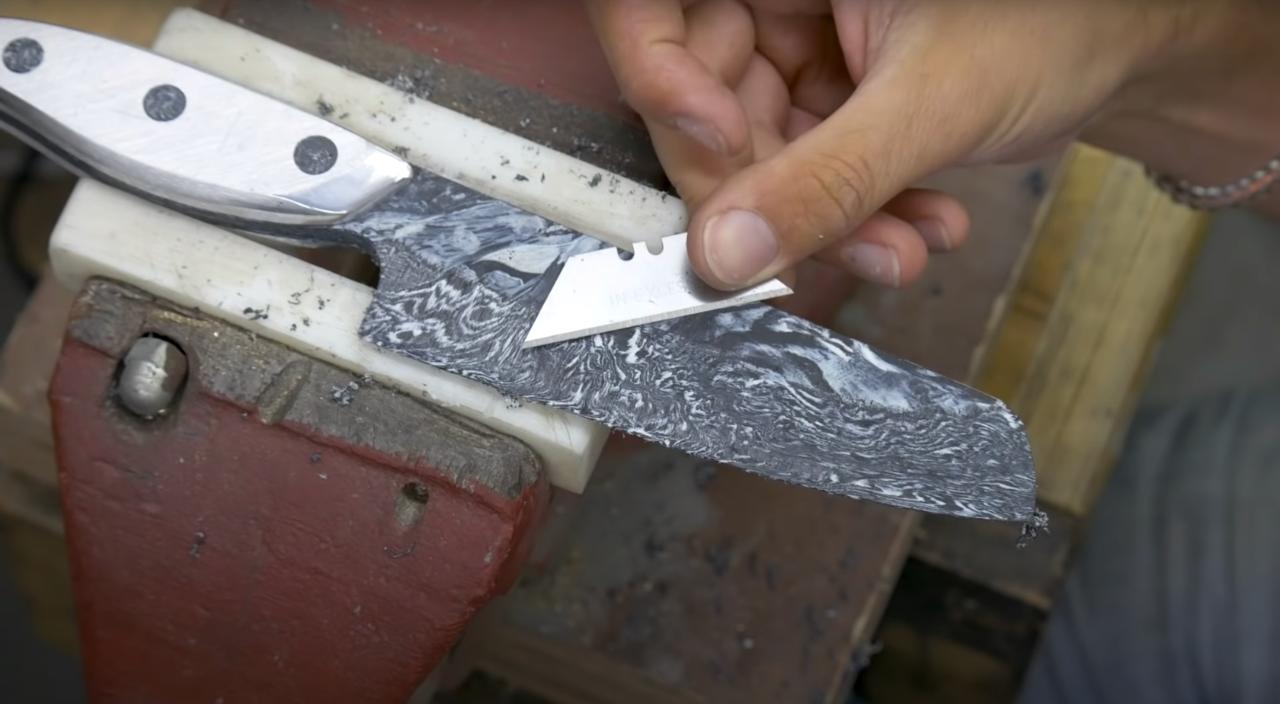
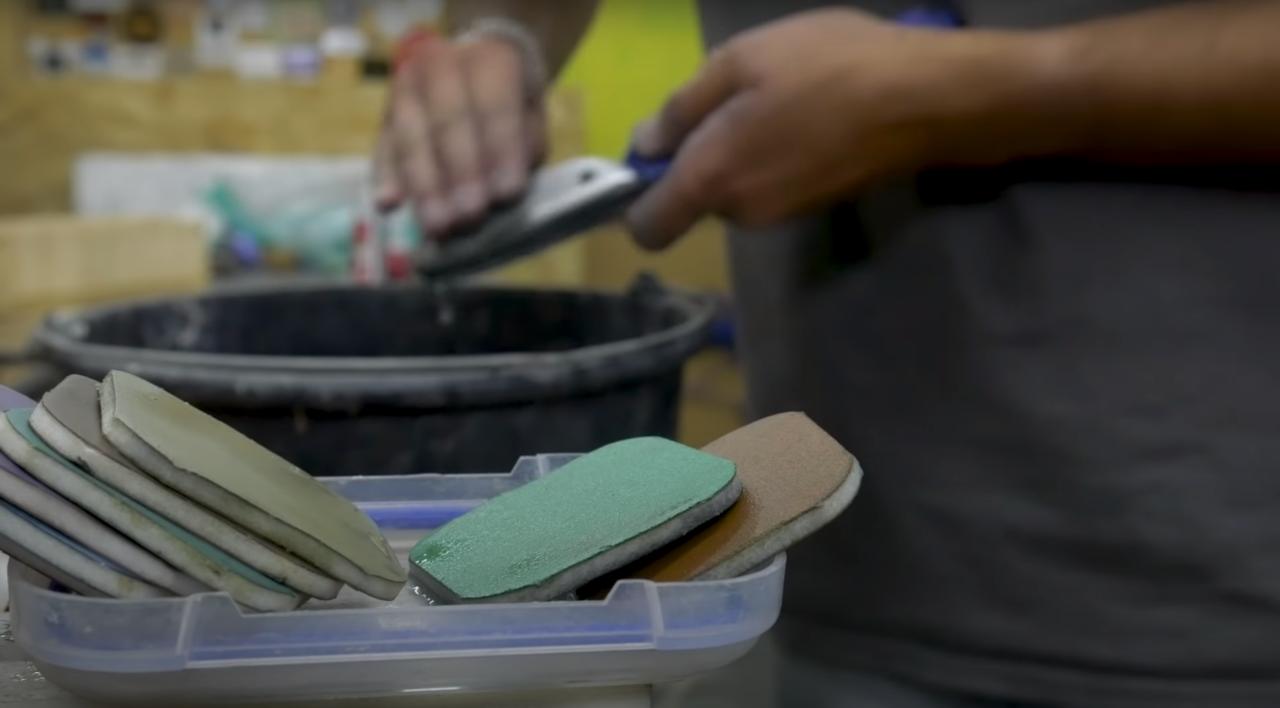
Step 15 - Final Finishing.
HDPE finishes really well straight off of a sharp tool. To really bring out the marble effect, we took a razor blade to 'scrape' the surface of the plastic. This left a great finish and required no more sanding.
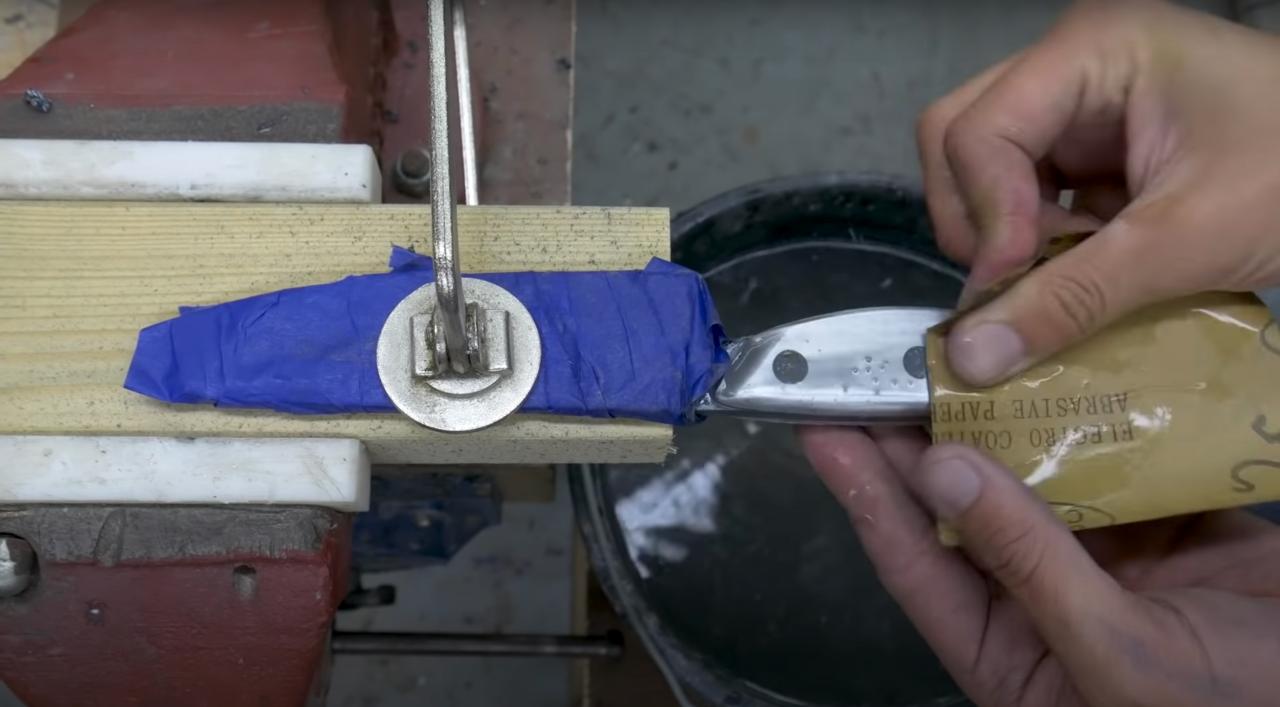
To finish the handle we wet sanded up to 2,000 grit with wet and dry paper. We then used a product called Micro Mesh to take it from 2,000 to 20,000 grit which gave it a great finish.
To finish the handle we wet sanded up to 2,000 grit with wet and dry paper. We then used a product called Micro Mesh to take it from 2,000 to 20,000 grit which gave it a great finish.
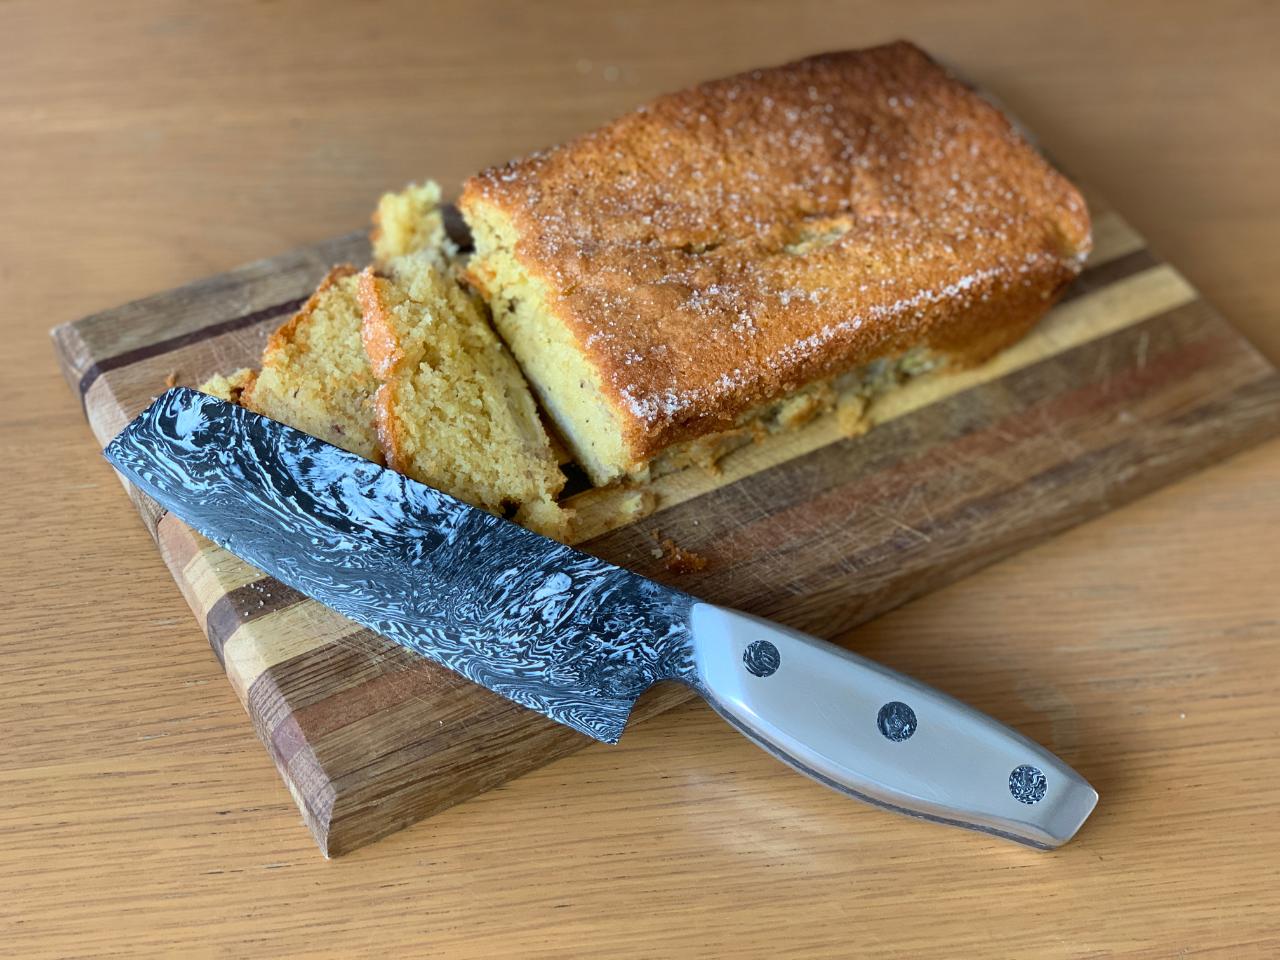
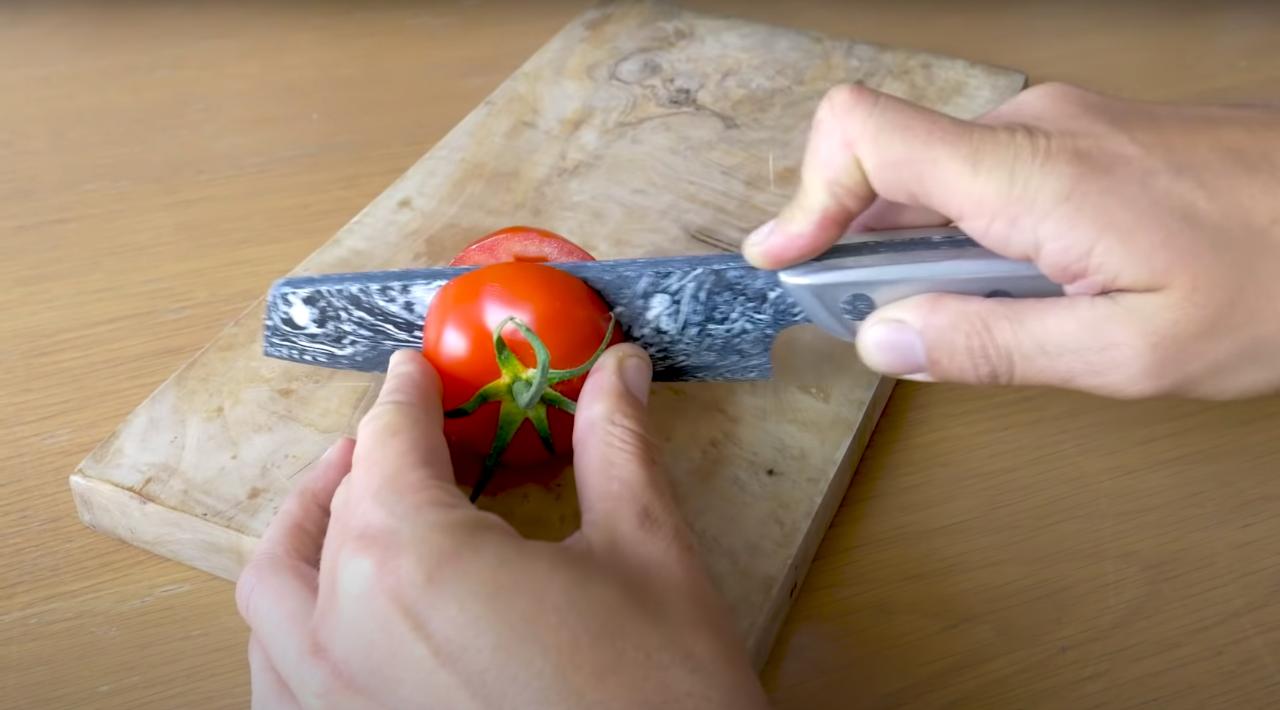
Step 16 - Test it out!
We asked our Patrons what they would like to see us cut with the knife and the 2 overwhelming responses were CAKE and A TOMATO! So that's exactly what we did! The blade actually cut them both surprisingly well, however it did struggle to get through the sugary crust on the banana cake (it tasted great though!)
Step 17 - Watch the Video!
Most of the images were taken as screen captures from the video we produced. If you want to watch it then it is linked below. Would be great to hear what you think!
We hope this How-To was helpful!
Matt & Jonny
Brothers Make
We hope this How-To was helpful!
Matt & Jonny
Brothers Make
—
—
—
Comments