Make angled beams

Beams make great use of the extrusion machine as they can be used for a big variety of objects and purposes. Adding an angle to the mould offers a strong and time saving solution to produce pieces with corners.
Here we will show you how to make the mould.
To learn the basics about making regular beams first, have a look at the How to “Make a mould for extruding beams”
(https://alpha.onearmy.world/how-to/make-a-mould-for-extruding-beams)
—
Attachments
Resources
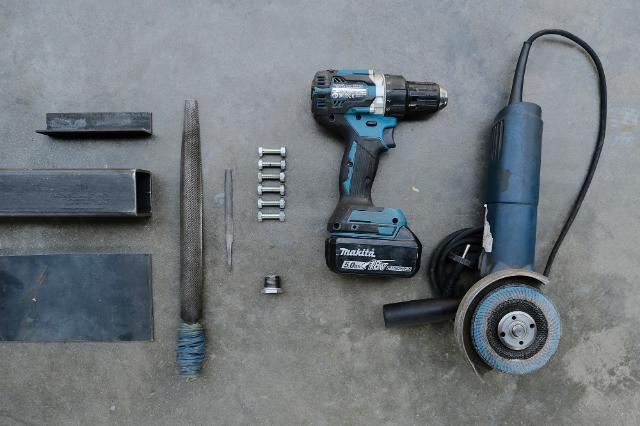
Step 1 - Gather materials and tools
To make a beam mould you will need:
- Metal tube (wall thickness preferably 3mm or more)
- Angle iron
- Metal sheet (3mm or more)
- Threaded pipe or fitting (BSPT size of your nozzle)
- Angle grinder or metal saw
- Welding machine
- File
- Drill
- M8 or M10 nuts and bolts
- Metal tube (wall thickness preferably 3mm or more)
- Angle iron
- Metal sheet (3mm or more)
- Threaded pipe or fitting (BSPT size of your nozzle)
- Angle grinder or metal saw
- Welding machine
- File
- Drill
- M8 or M10 nuts and bolts
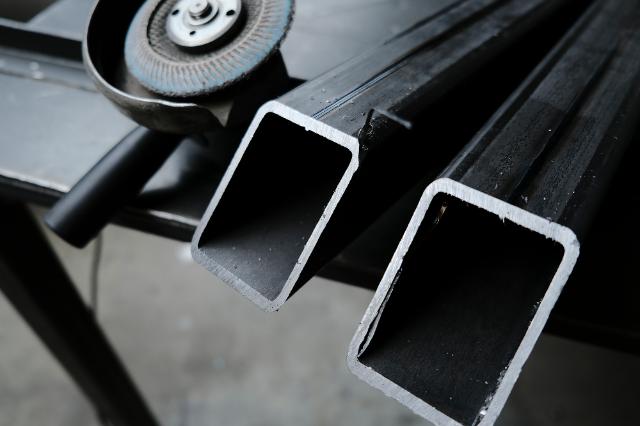
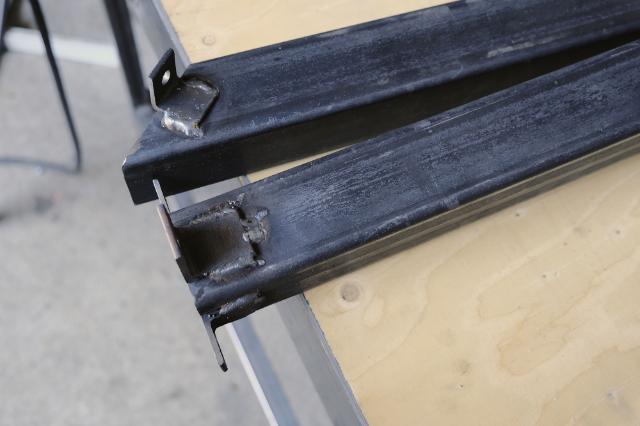
Step 2 - Cut tubes
In this technique you cut the mould in the same way as you would cut beams for a mitre joint: i.e. if you want an angle of 90° for your beam, make two 45° cuts.
Once you know which one you need, it’s time to cut your metal tubes to your desired angle. It’s important to make the cut as clean and straight as possible to avoid big gaps when the mould is assembled. Finish up your cuts with a file to ensure your edges are smooth for the next steps to come.
Tip: Consider where the weld seam is on your piece of metal tube as it will l leave a mark on your plastic beam.

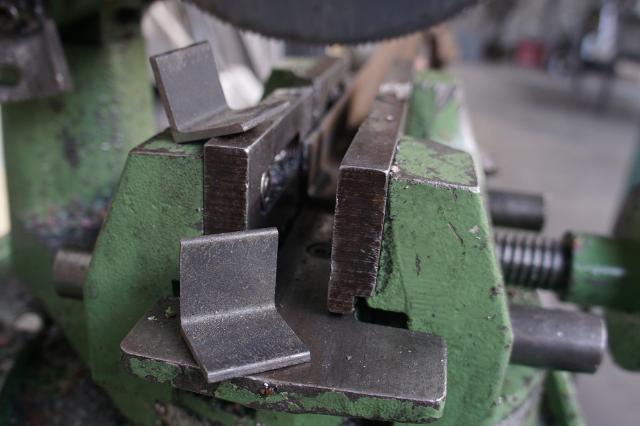
Step 3 - Make connecting brackets
Now we will need brackets to connect the two tube pieces with each other as well as the mould to the mounting plate.
(This is where you’ll be thanking yourself if you already prepared extra ones in earlier mould productions.)
All you need to do is cut your angle iron into sections of 30-40 mm and drill a hole in one side to fit your bolts. For larger beams use bigger, thicker angle iron.
(This is where you’ll be thanking yourself if you already prepared extra ones in earlier mould productions.)
All you need to do is cut your angle iron into sections of 30-40 mm and drill a hole in one side to fit your bolts. For larger beams use bigger, thicker angle iron.
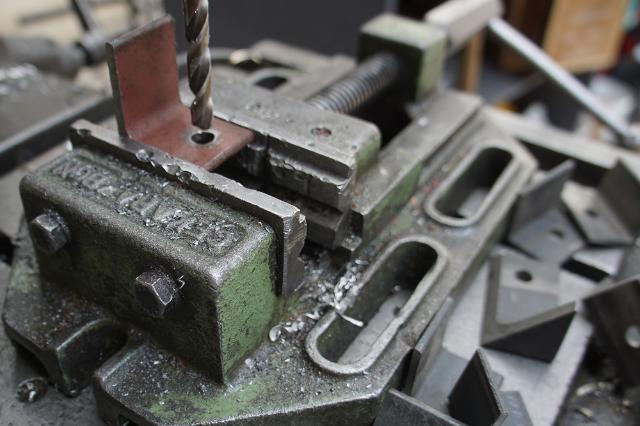
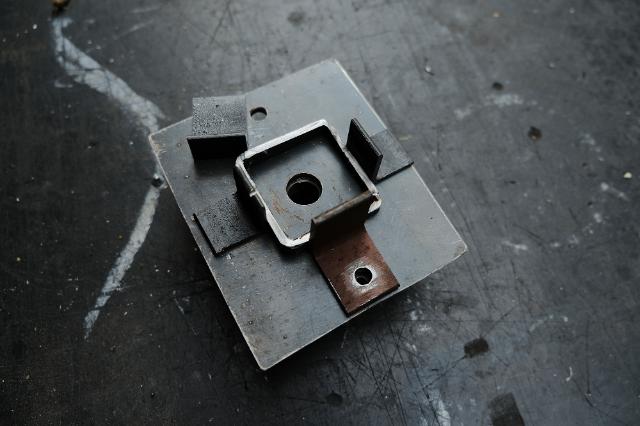
Step 4 - Cut a mounting plate
To connect the mould to the nozzle, we need a mounting plate. If you don’t have a fitting size handy, cut a metal sheet to a size that will fit your beam mould as well as the brackets you prepared in Step 3, and drill the holes for your brackets.
Tip: Use a tube offcut from Step 2 to plan the position of your brackets and their holes.
Tip: Use a tube offcut from Step 2 to plan the position of your brackets and their holes.
Step 5 - Weld mounting brackets
With your parts cut and ready, it’s time to weld.
As described in Step 5 of Make a mould for extruding beams, weld together the brackets to the beam mould and the nozzle to the mounting plate.
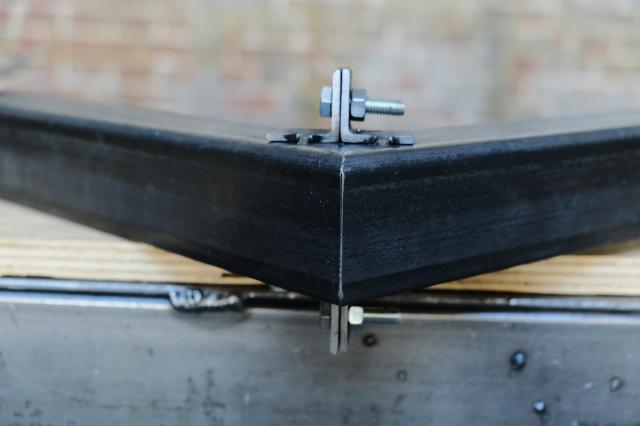
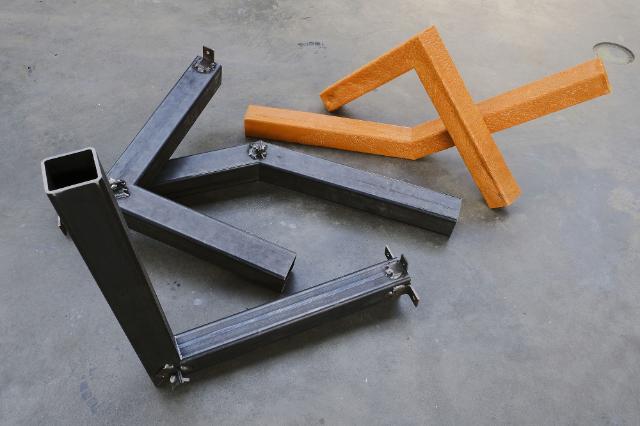
To the attach the brackets that will hold together the two parts of the angled beam, lay both parts on a flat surface and plan where you want the brackets to sit. It can be helpful to start with the brackets bolted together and overlay one side (as shown on the image), so that they can function as an alignment.
Once everything sits in the right position, tack the brackets to the beam and repeat the process on the other side. Once all your parts are tacked into position, weld it all up!
Tip: By aligning the brackets with the angle of your cut, and adding a bit of space between the brackets you can achieve a well sealed joint.
As described in Step 5 of Make a mould for extruding beams, weld together the brackets to the beam mould and the nozzle to the mounting plate.
To the attach the brackets that will hold together the two parts of the angled beam, lay both parts on a flat surface and plan where you want the brackets to sit. It can be helpful to start with the brackets bolted together and overlay one side (as shown on the image), so that they can function as an alignment.
Once everything sits in the right position, tack the brackets to the beam and repeat the process on the other side. Once all your parts are tacked into position, weld it all up!
Tip: By aligning the brackets with the angle of your cut, and adding a bit of space between the brackets you can achieve a well sealed joint.
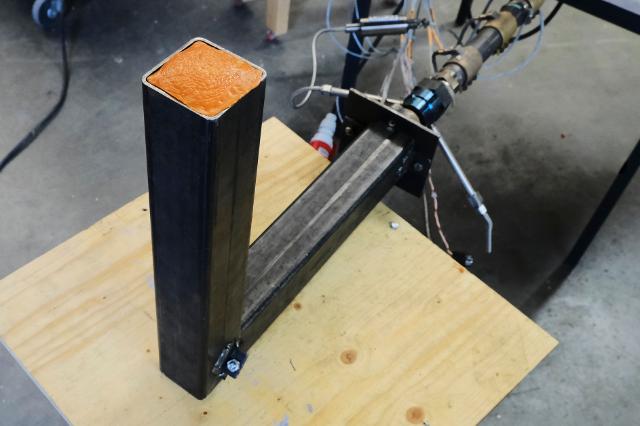
Step 6 - Make it ready to extrude
Alright, your mould is basically ready to go. Bolt it all together and have a look inside to make sure that there are no large gaps.
Then you can start shooting that plastic inside!
Tip for extruding: Stop your plastic before it erupts out the end. If there is too much plastic overflowing, it will be hard to demould later.
Then you can start shooting that plastic inside!
Tip for extruding: Stop your plastic before it erupts out the end. If there is too much plastic overflowing, it will be hard to demould later.
Step 7 - Explore new possibilities
This technique opens up a new world of possibilities. It can be especially valuable in cases when being used instead of joining two pieces with a screw or another mechanism. Saves time and materials, and enables an easier disassembly and recyclability. :)
—
—
—
Comments