Make Bike Pedals & Grips
by OSR-Plastic

In this How-To I describe how I made the mold.
Injecting the pedal is fast but making the mold takes time. I suggest you to mill the mold if you have the possibility because I welded the mold and this is time consuming. You can download the 3D model and make your own version.
—
Attachments
Resources
3D Files
- 3D Step File: /pedal.STEP - Preview
Step 1 - Tools
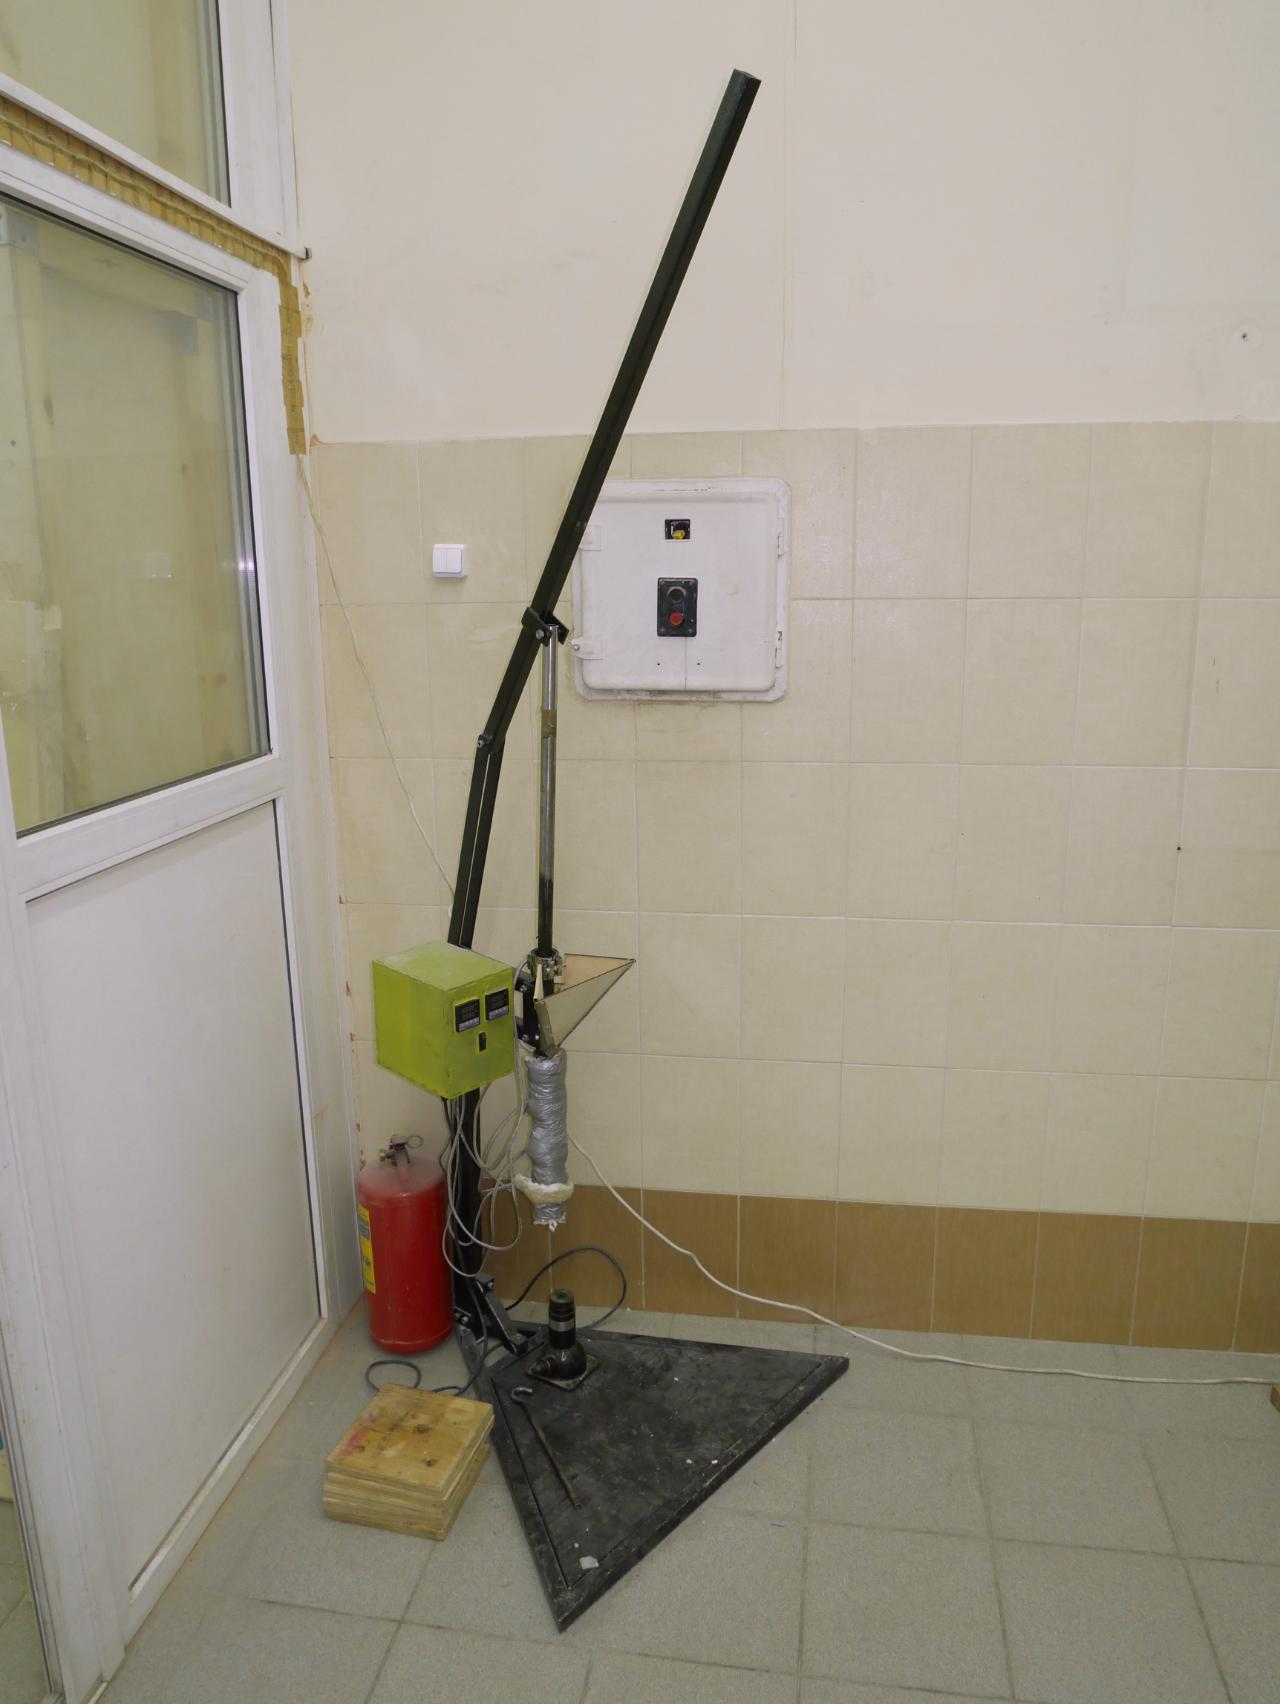
- Injection machine
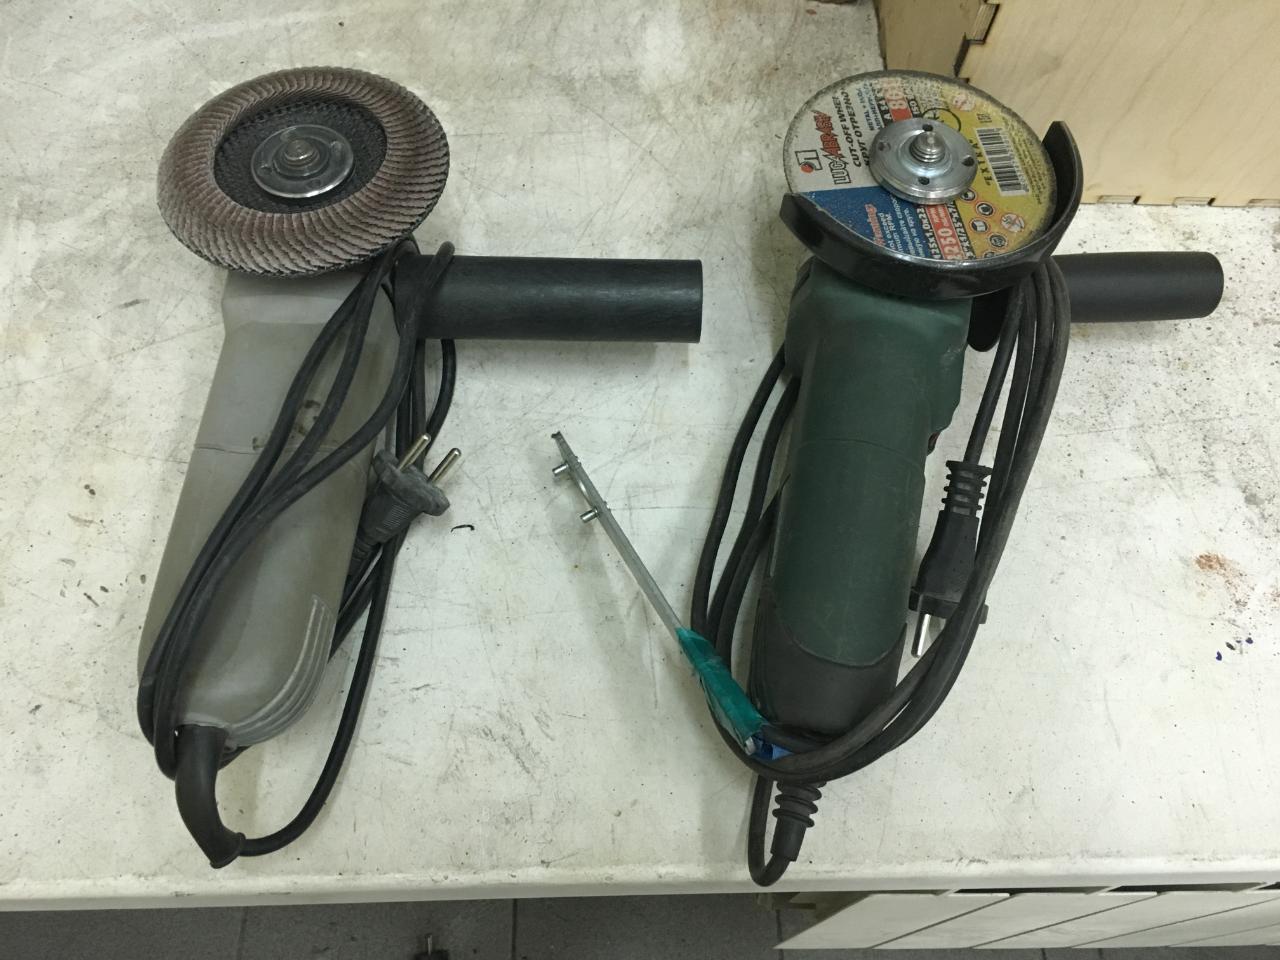
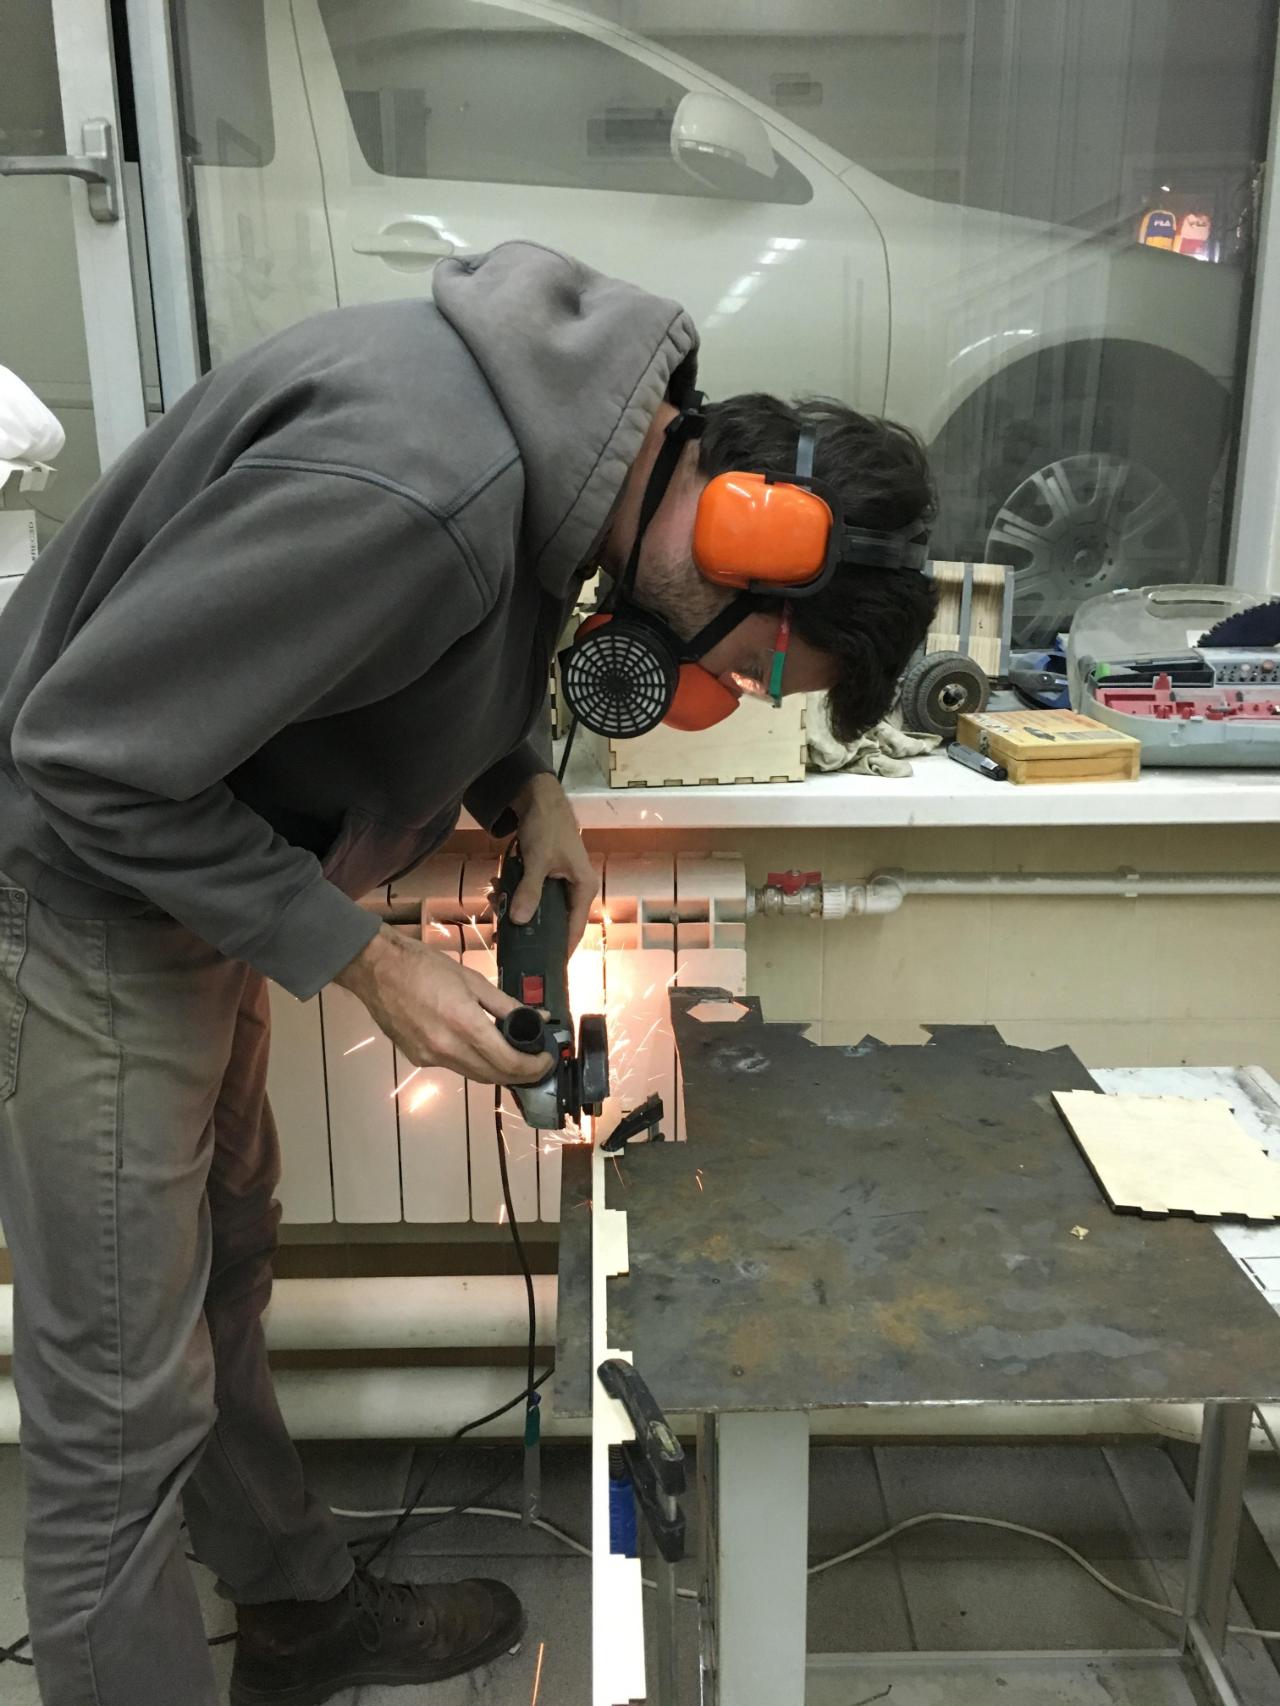
- angle grinder (cutting and grinding discs)
- vise
- flat file, round file (opional: small grinder rotary tool like Proxxon or Dremel)
- drill press
- clamps (at leaste 3)
- welding machine (only for pedals) & welding clothes
- radius scriber (a marker works well too)
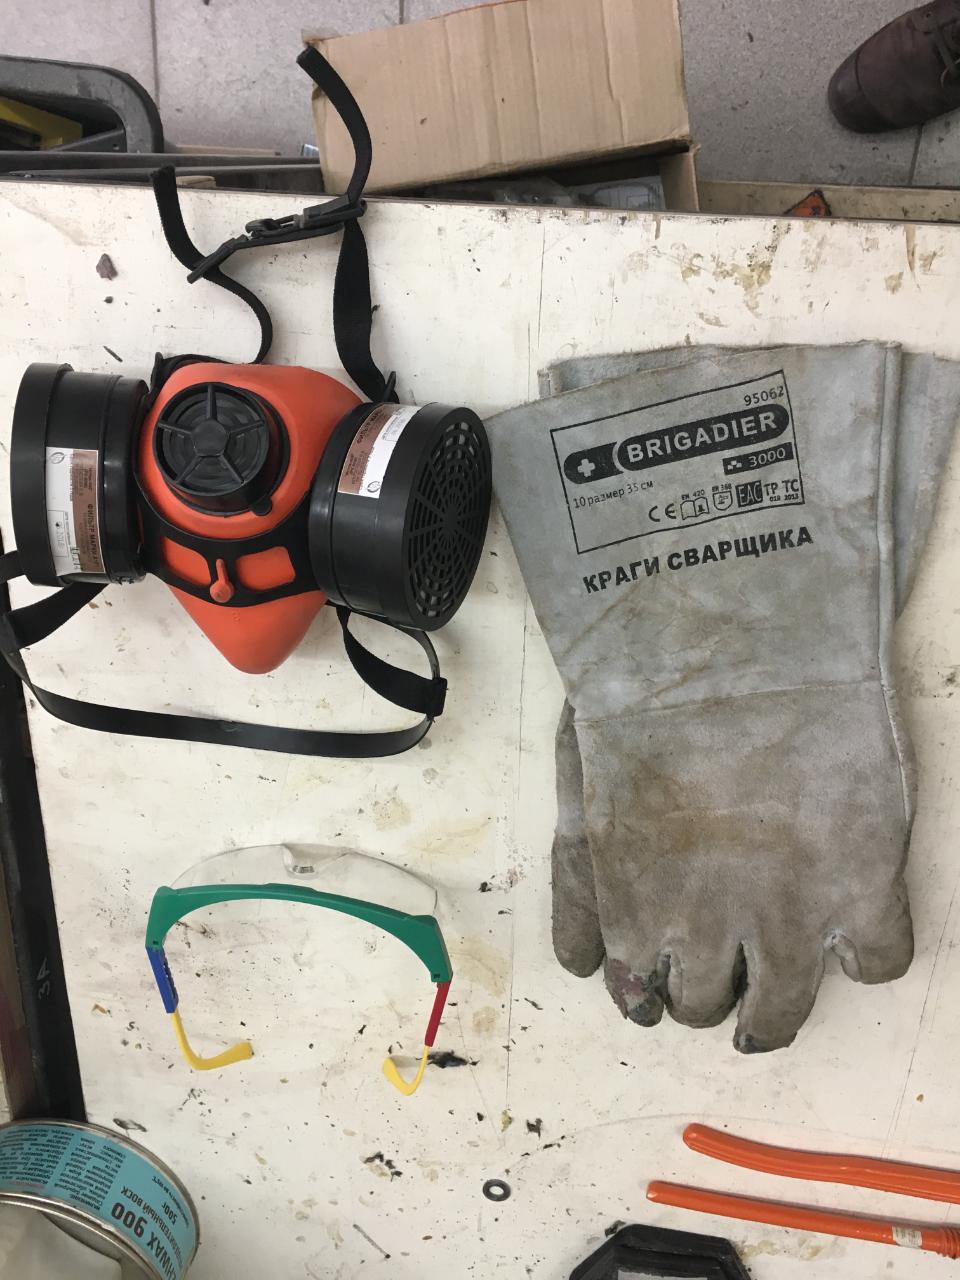
- protection glasses
- respirator with A1 P1 filter (hot plastic fumes and particles filter)
- safety gloves
- ear protection
- sanding paper (grit size around 80) (optional: electric sander)
- measuring tape
- square edge
- M6, M8 thread tap
- drill bit 4.3; 6.4; 6.8; 8.4; 11; 20 ; 22.5 mm (if you don't have the 22.5, use your round file like I did)
- tweezers (optional, for ball bearings assembly)
- angle grinder (cutting and grinding discs)
- vise
- flat file, round file (opional: small grinder rotary tool like Proxxon or Dremel)
- drill press
- clamps (at leaste 3)
- welding machine (only for pedals) & welding clothes
- radius scriber (a marker works well too)
- protection glasses
- respirator with A1 P1 filter (hot plastic fumes and particles filter)
- safety gloves
- ear protection
- sanding paper (grit size around 80) (optional: electric sander)
- measuring tape
- square edge
- M6, M8 thread tap
- drill bit 4.3; 6.4; 6.8; 8.4; 11; 20 ; 22.5 mm (if you don't have the 22.5, use your round file like I did)
- tweezers (optional, for ball bearings assembly)
Step 2 - Material for the grips
Plastic waste: I made experiments with polystyrene (PS) and polyethylene (PE). PS looks more strong but I had only black one so the presented objects are made of PE. The pedal volume is 145 cm^3 and the grip 84 cm^3.
For the grips:
- metal tube (internal diameter = diameter you want for the grips, big ones are more comfortable. I chose 35mm. Lenght = lenght you want for the two grips - 3 mm. I have 2 x 130 mm so my grips are 127 leght)
- metal sheet (steel 4 mm thick; 180 x 60 mm)
- threaded rod (M6 x 450; M8 x 150 mm)
- 6 nuts M6
- metal cylinder (diameter 22.3 length 111 mm) (standard handlebar have diameter 22 mm so take just a little bit more)
- 1 bolt M8 x 20
- 1 washer M20
- 1 nut M8
Step 3 - Material for the pedals
- metal sheet (steel 4mm thick; 120 x 240; 26 x 700 mm)
- welding rod (2 or 3 mm)
- 3 bolts M6 x 10 (any size would works but you need the corresponding drill bits)
- 2 pedal axles with ball bearings, washers and nuts
- wood (for positioning during welding, optional) (pedal size)
- 4 bolts and nuts M4 x 40 (only length matter)
- 24 setscrews M6 x 8
- welding rod (2 or 3 mm)
- 3 bolts M6 x 10 (any size would works but you need the corresponding drill bits)
- 2 pedal axles with ball bearings, washers and nuts
- wood (for positioning during welding, optional) (pedal size)
- 4 bolts and nuts M4 x 40 (only length matter)
- 24 setscrews M6 x 8

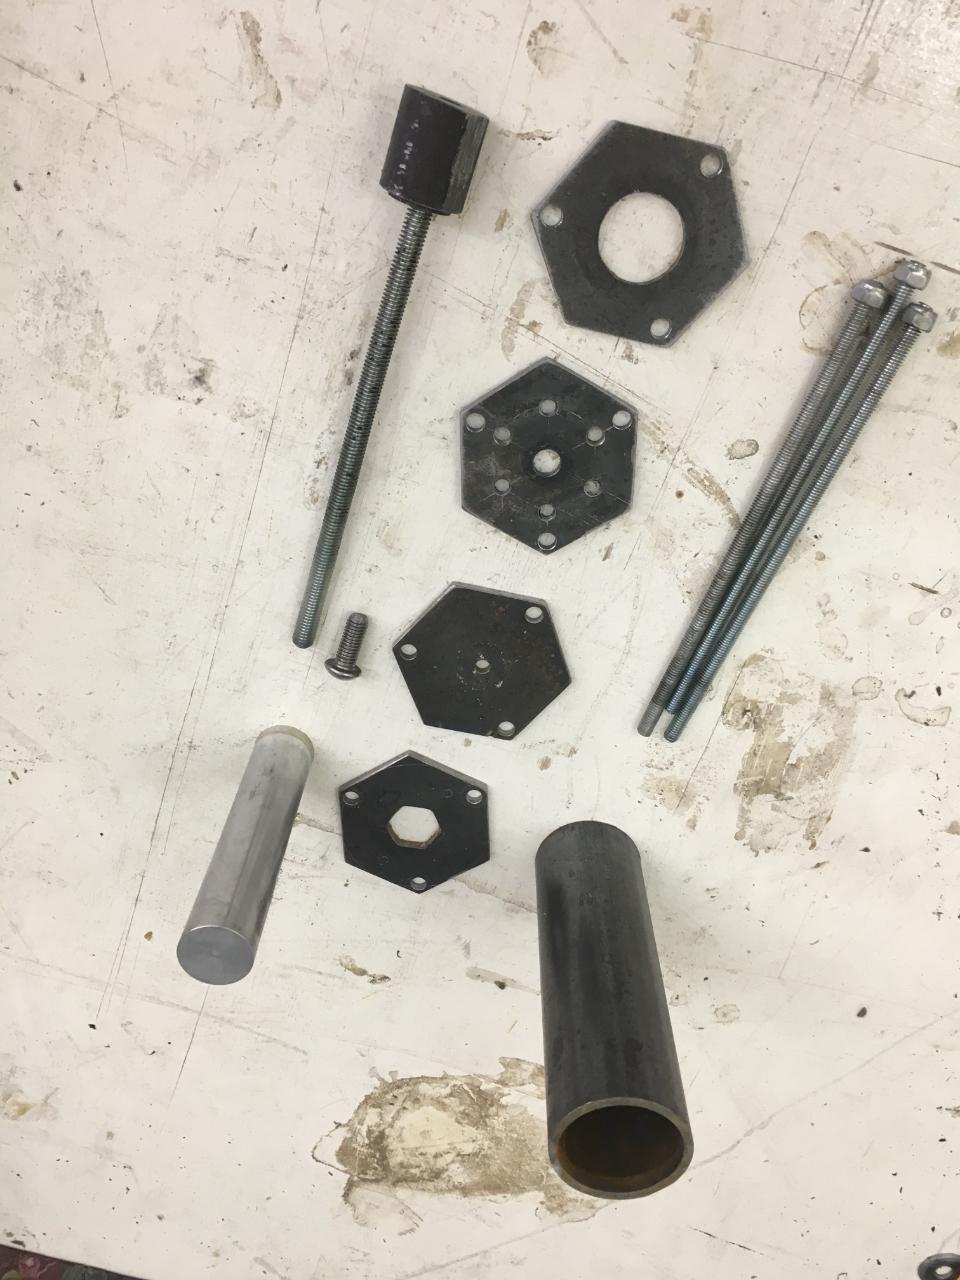
Step 4 - Grip mold: cut the parts
Cut the tube at the length you want for your grips (mine are 130 mm).
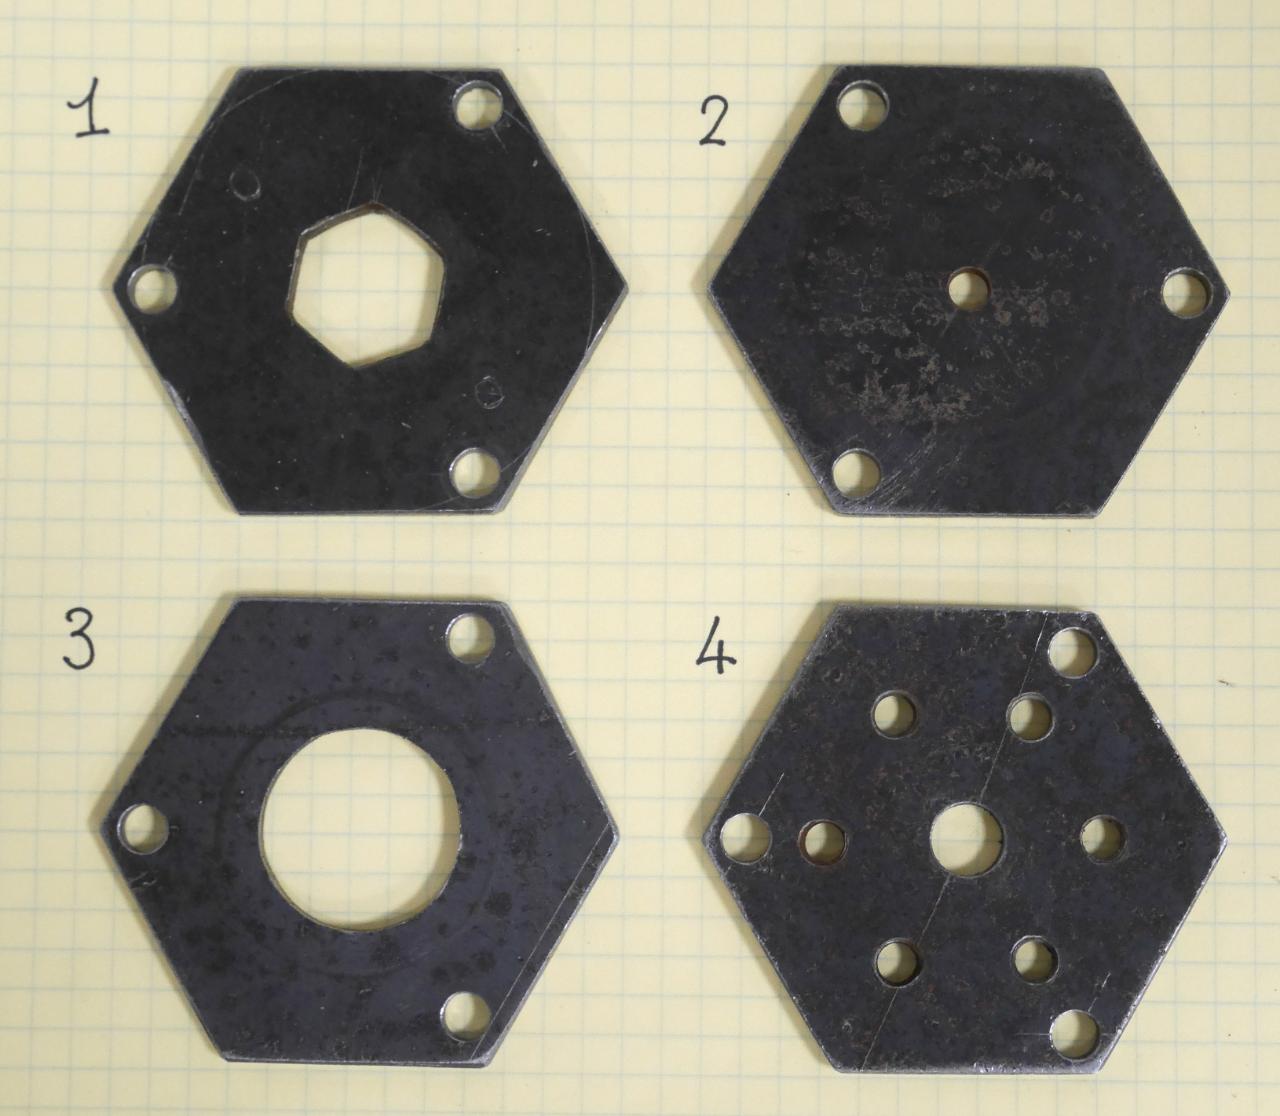
Cut four hexagones with side length 33 mm.
In each of them, drill three holes in the corners.
In the first one, drill another hexagone with 10 mm side length in the center.
In the second one, drill a 5 mm hole in the center.
In the third one, drill a 22.5 mm hole in the center.
In the fourth one, drill a 8 mm hole in the center.
Cut three M5 and one M8 threaded rods at 150 mm.
Cut the cylinder at the length you want (111 mm for me).
Make a M8 x 20 threaded hole at the center of one cylinder side.
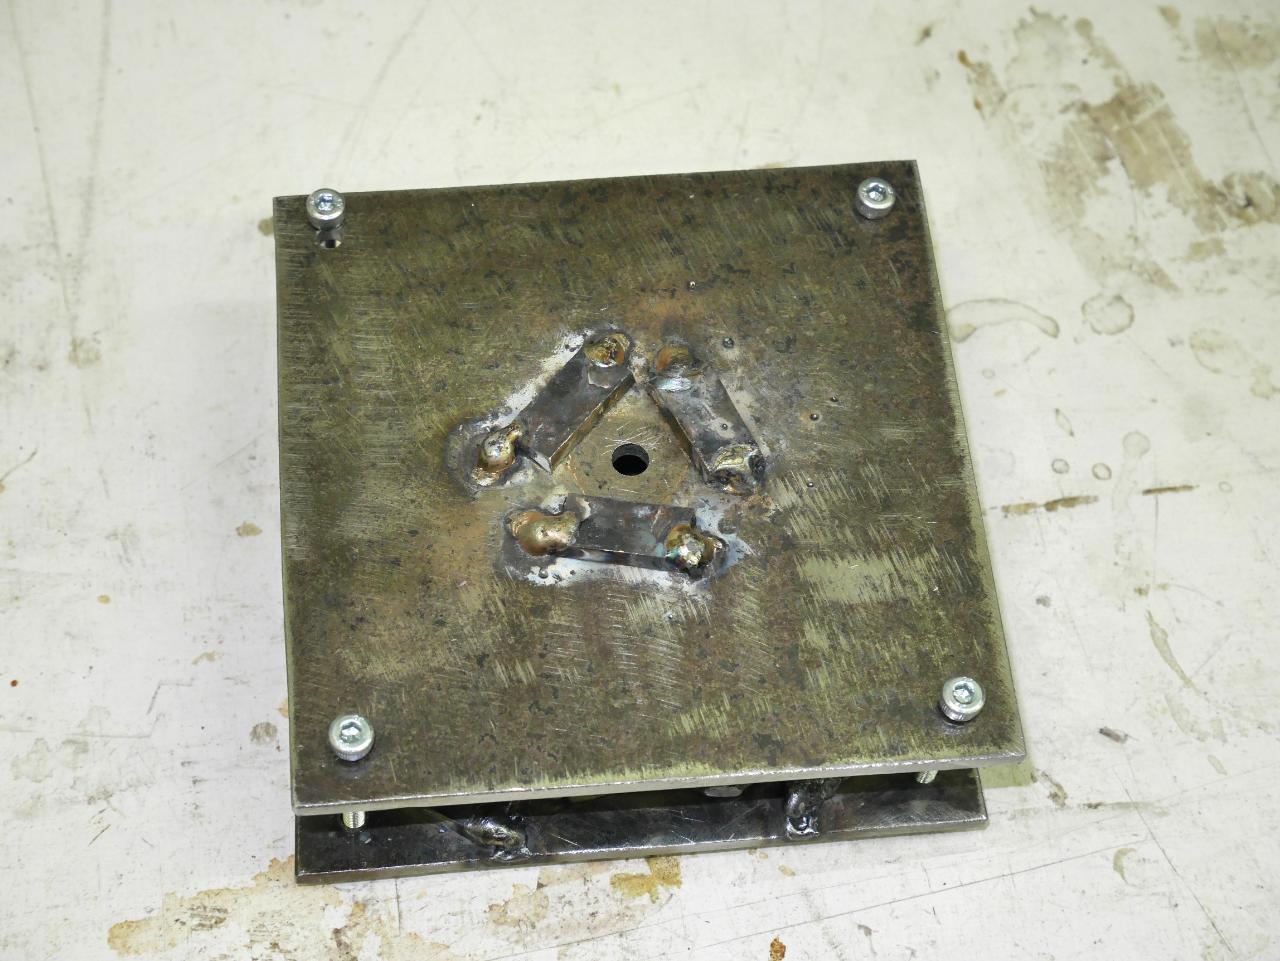
Step 5 - Pedal mold: cut the parts
Cut two squares 120 x 120 mm in the metal sheet.
Make holes in the four corners (4.3 mm in my case).
Scribe the pedal shape on one square face.
Drill the injection hole where you want it(I chose diameter 5, in the center).
Cut a band of 26 mm height and at least 300 length and another of 26 (precisely) x 340 (at least).
Cut the 300 band in 15.6 (2x); 24 (2x); 18 (2x); 33 (2x); 25 (2x); 43.4 (1x).
Cut the 340 band in 40 (2x); 56 (4x); 27.7 (1x).
Cut also six small pieces in order to wedge the mold part together (5 x 10 mm).
Cut three more to make the triangle and trapeze center (25 x 7 (2x); 4 x 35 (1x)).

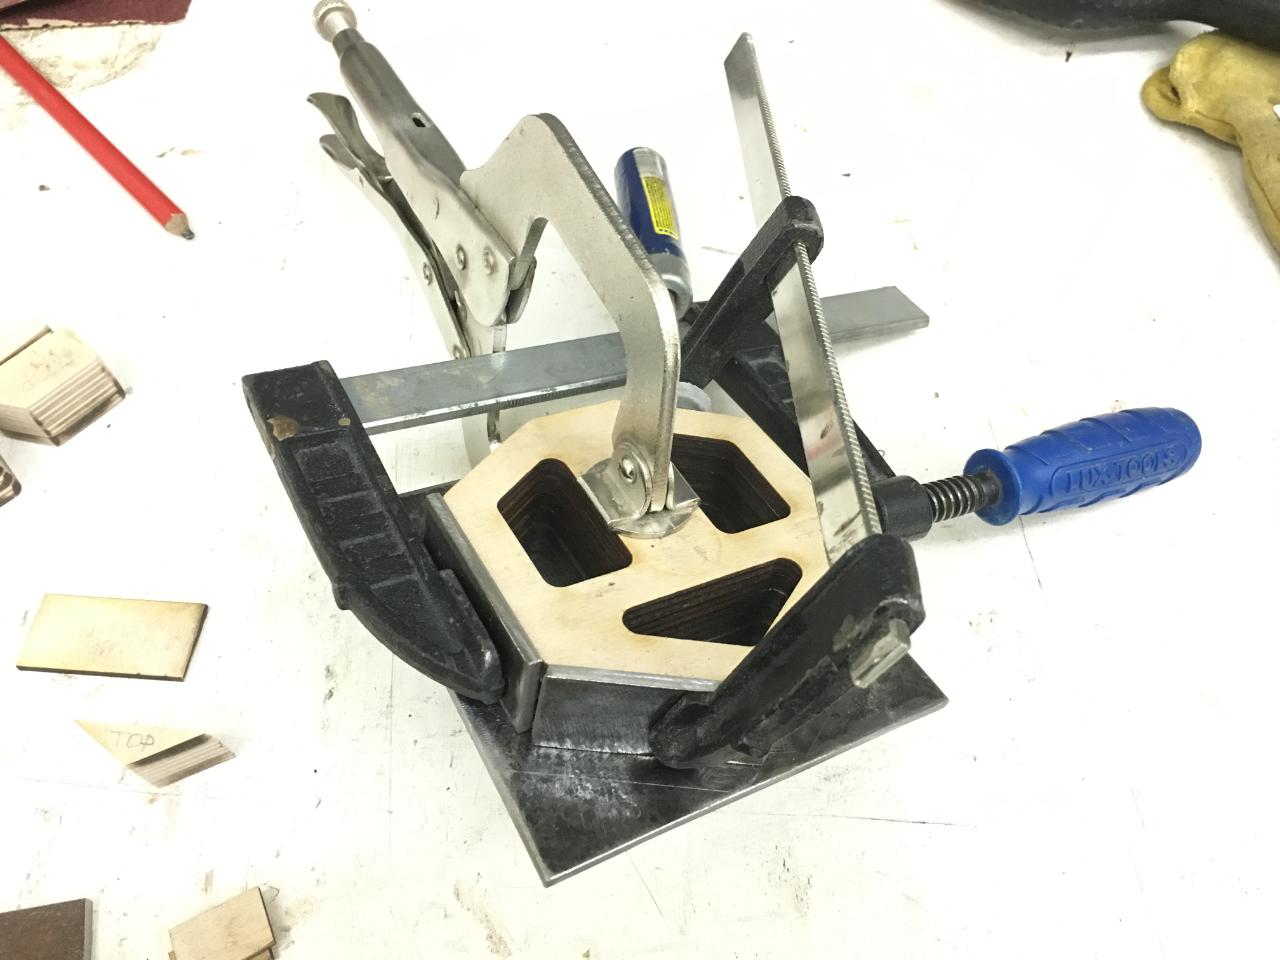
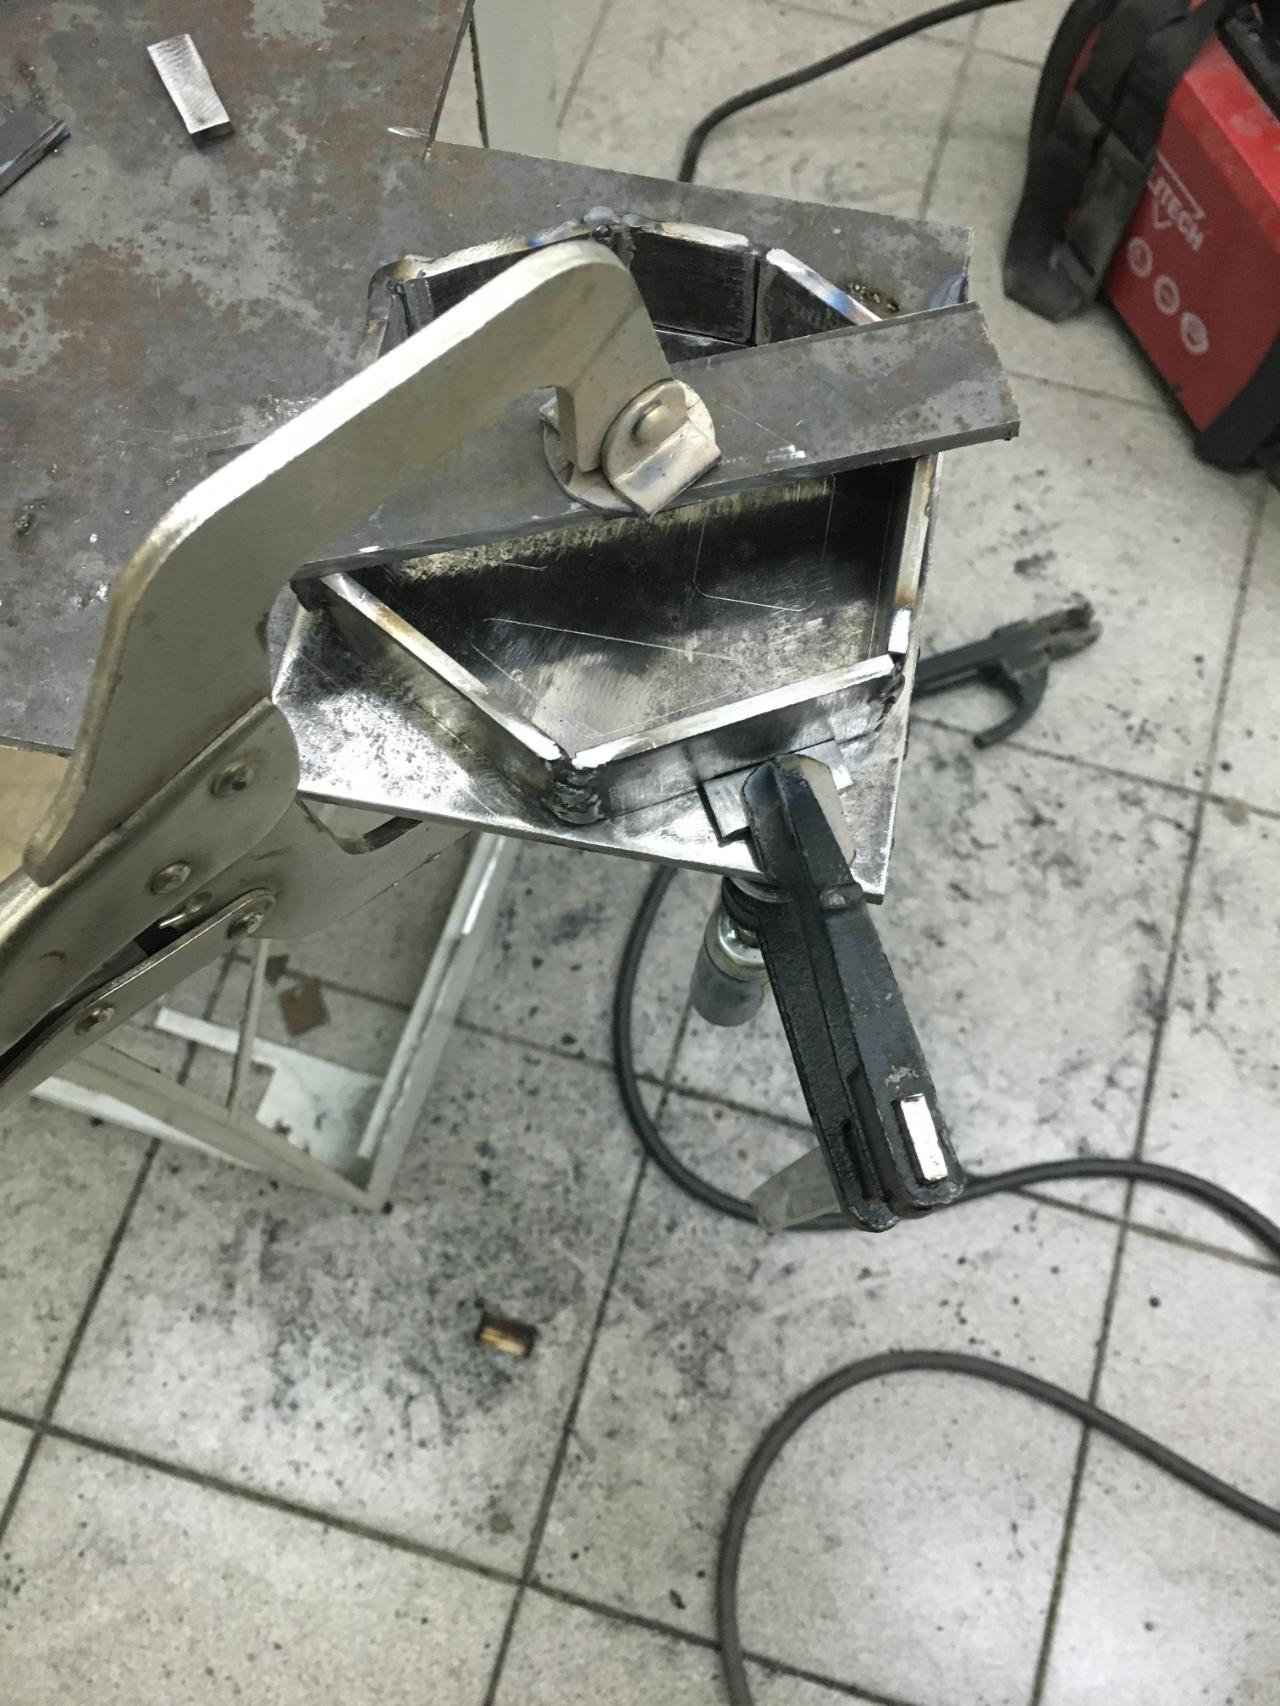
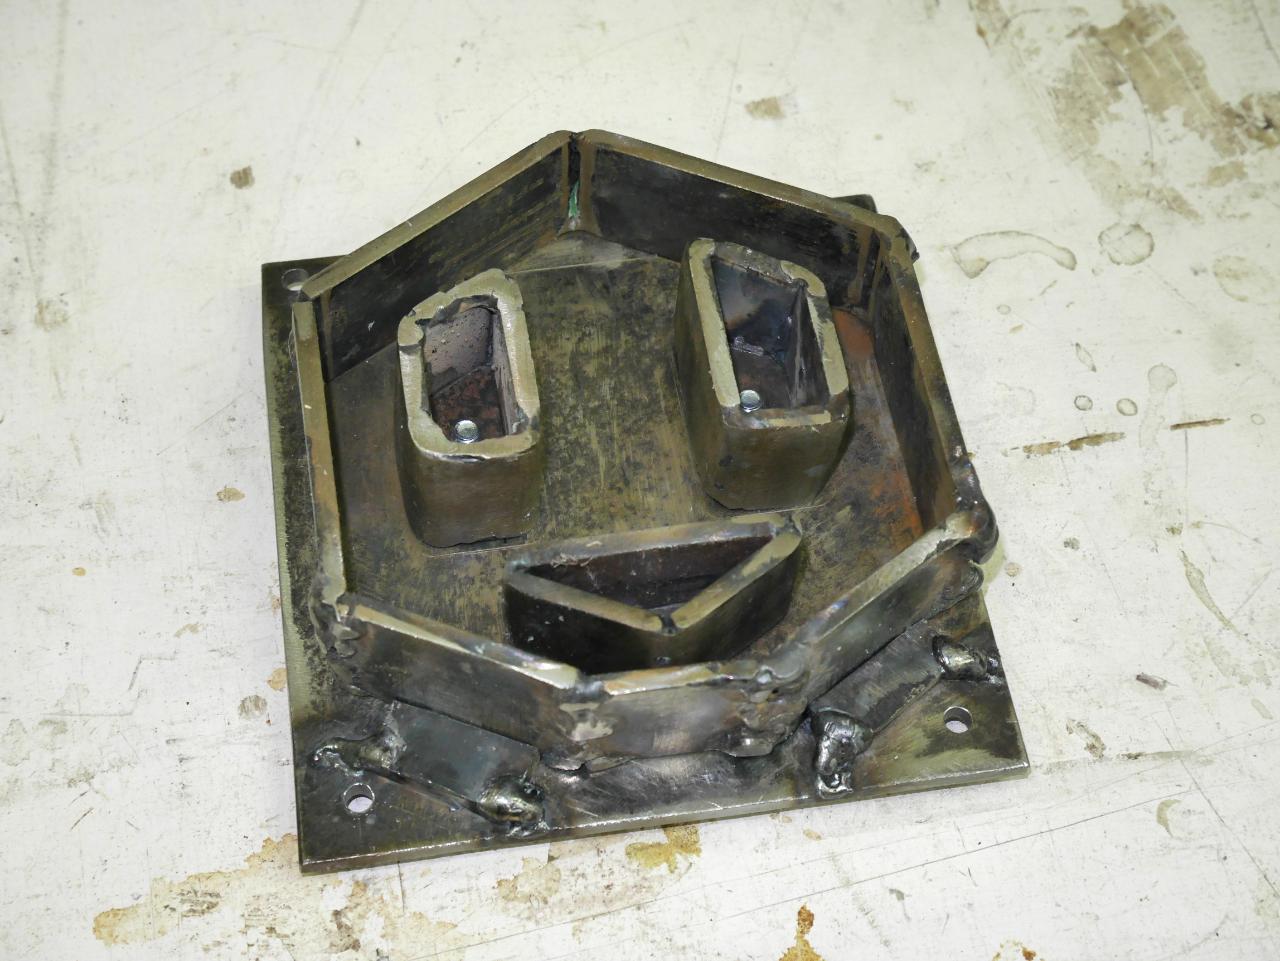
Step 6 - Make the Pedal Mold: Weld It
Before welding you need to add an angle (around 2 degrees) on each vertical face of the wooden parts (triangle, trapezes and pedal). This will ease the extracting process. I accomplished this with the sanding machine.
Weld the pedal perimeter: Clamp the wooden pedal on your welding surface and clamp the edges you want to weld (cf. picture). Continue with the other parts always ensuring that your parts are well against the ground. It was my first arc welding job and you can notice the poor result but it doesn't matter, it just extend the grinding time.
Weld the pedal perimeter: Clamp the wooden pedal on your welding surface and clamp the edges you want to weld (cf. picture). Continue with the other parts always ensuring that your parts are well against the ground. It was my first arc welding job and you can notice the poor result but it doesn't matter, it just extend the grinding time.
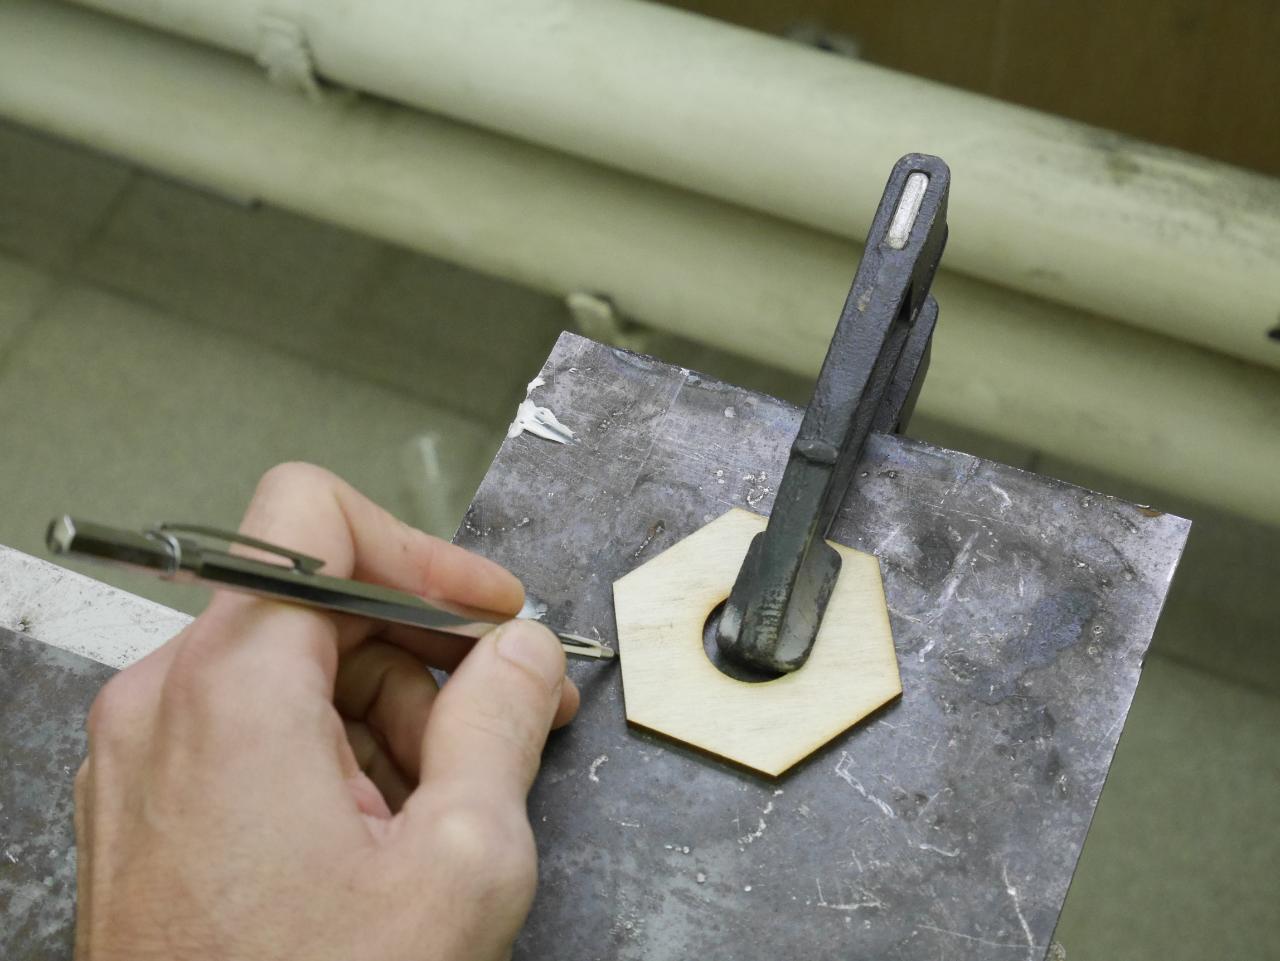
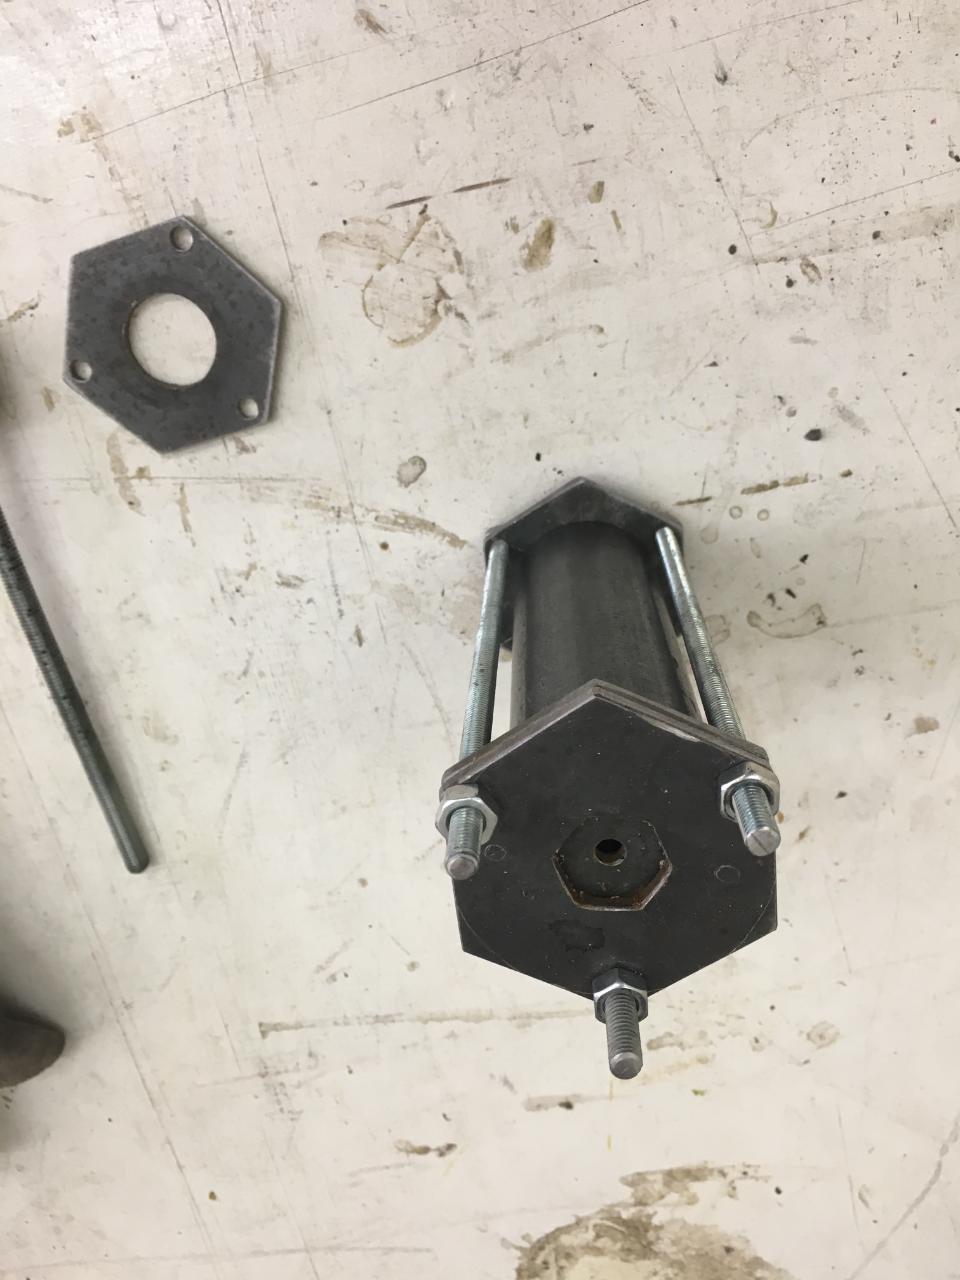
Step 7 - Inject the Grips
Turn the heater on.
Assemble the cylinder with the basis hexagon (Nbr. 4).
Add the three threaded rod.
Add the washer around the cylinder.
Add the tube.
Add the top hexagon with the injecting hole (Nbr. 2).
Add the top hexagon with the hexagonal hole (Nbr. 1).
Secure it with the nuts.
Start filling the machine with plastic.
Wait 5 min.
inject.
Remove the grip using the M8 threaded rod and nut.

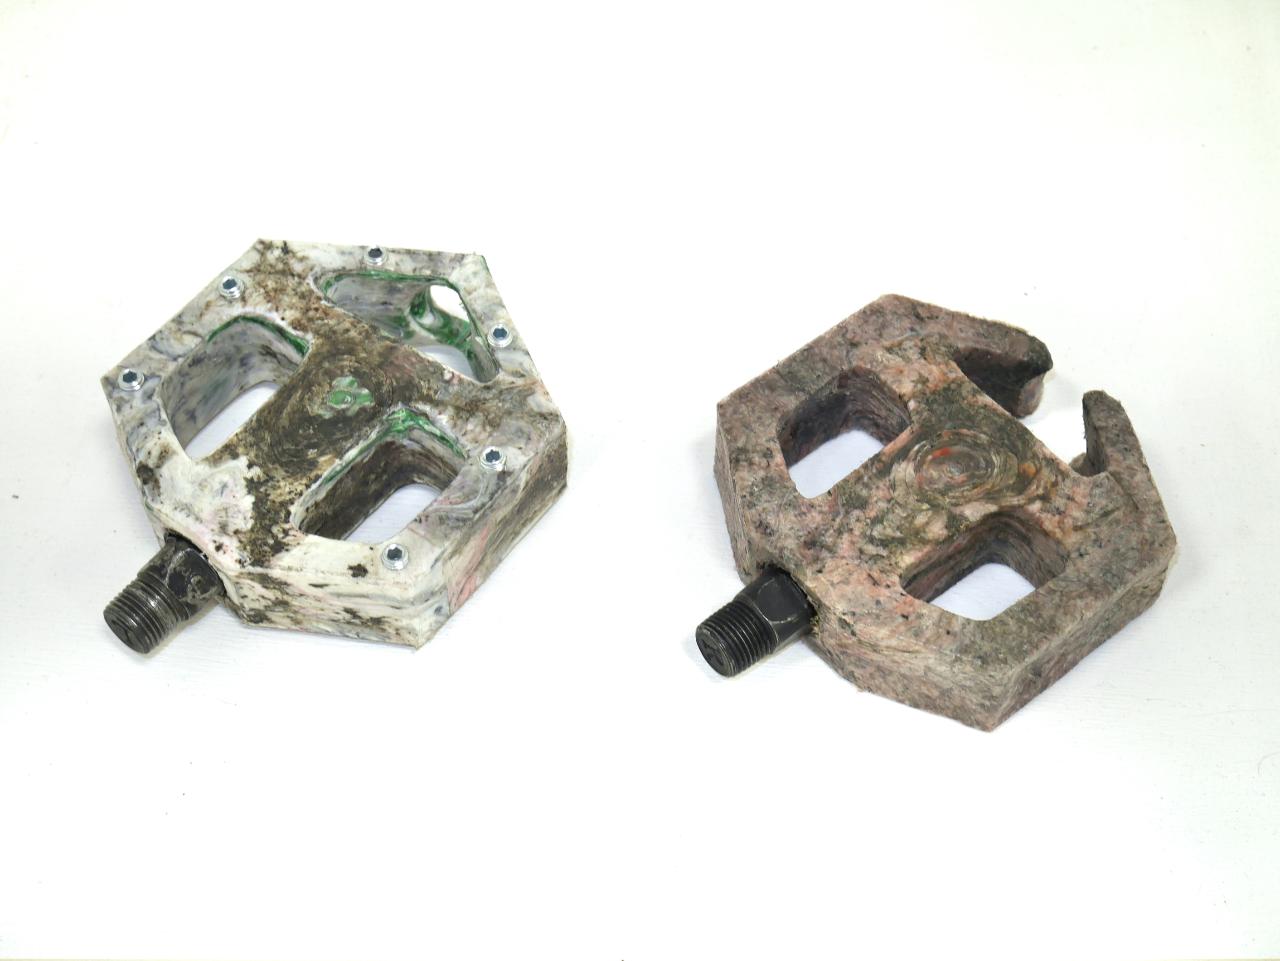
Step 8 - Inject the Pedals
Heat the machine.
Fill with old plastic.
Inject.
Open the mold.
Fill with old plastic.
Inject.
Open the mold.

Step 9 - Finish and Assembly
Secure the pedal in the jig.
Mount the 11 mm drill bit and align it with the pedal center.
Secure the jig to the drill.
Drill through all the pedal.
Mount the 20mm drill bit.
Drill the bike side of the pedal 8 mm depth.
Flip the pedal.
Drill the outer part of the pedal 15 mm depth (measured from the flat face, not the top triangle).


—
—
—
Comments