Wash Plastic: Washing Machine
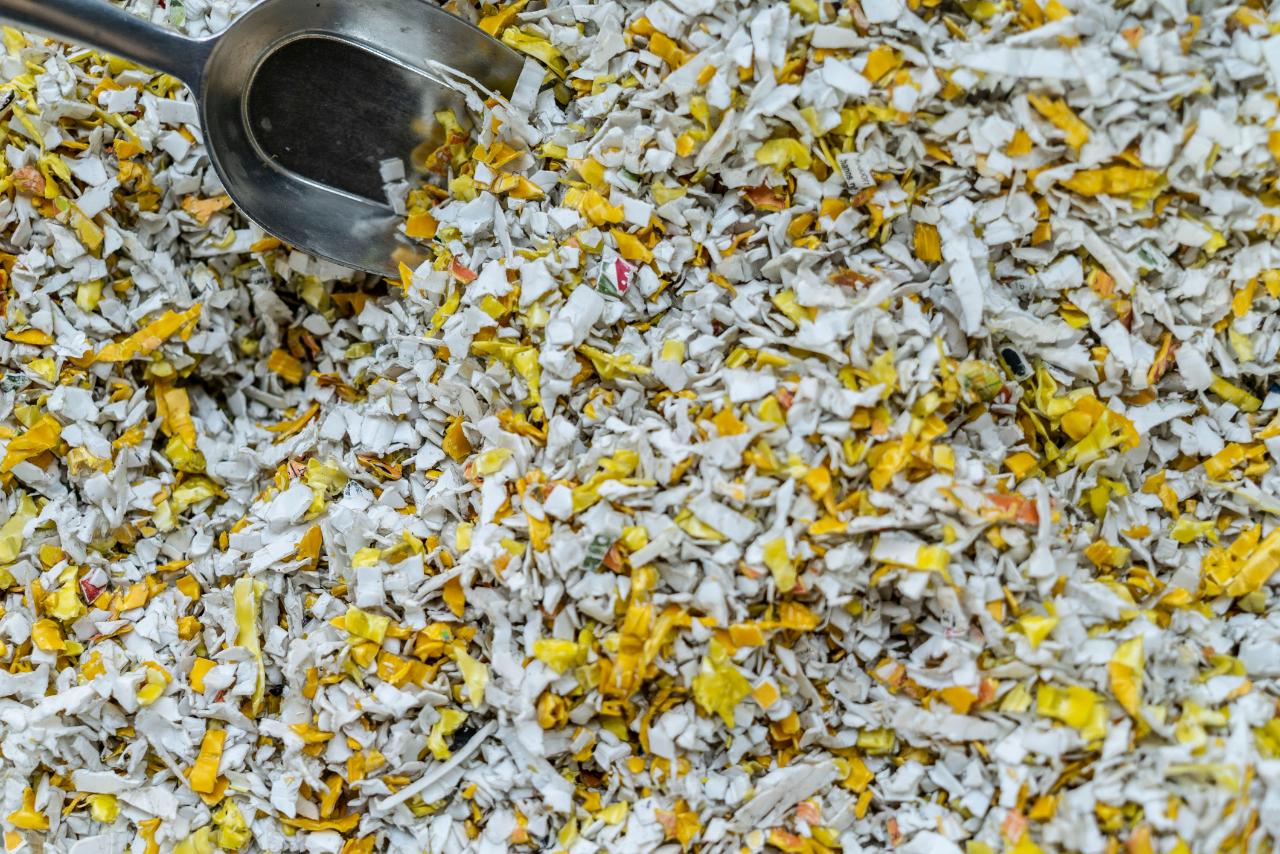
Different steps are necessary to make plastic clean. First is the prewashing after the plastic can be shredded, but it will still contain some oils, glue remains or even paper. To get rid of this we need water, soap, heat, and friction. Building a machine, which can do all of this takes time and costs a lot of money. So instead we are going to use a washing machine. It is accessible, cheap and integrates with a few modifications perfectly in an existing sand filter system.
—
Attachments
Resources
Step 1 - Why a washing machine?
A washing machine offers a commonly available machine with functions we can make use of. It provides heated water, which helps to remove oils and dissolves many contaminants. It creates friction through spinning, which scrubs plastic against each other and takes of dirt. It has multiple flushing cycles to get out of the old water and centrifugation helps to dry the plastic. Though we need to shred the plastic before because unshredded plastic has a huge volume and a washing machine has only a little space.
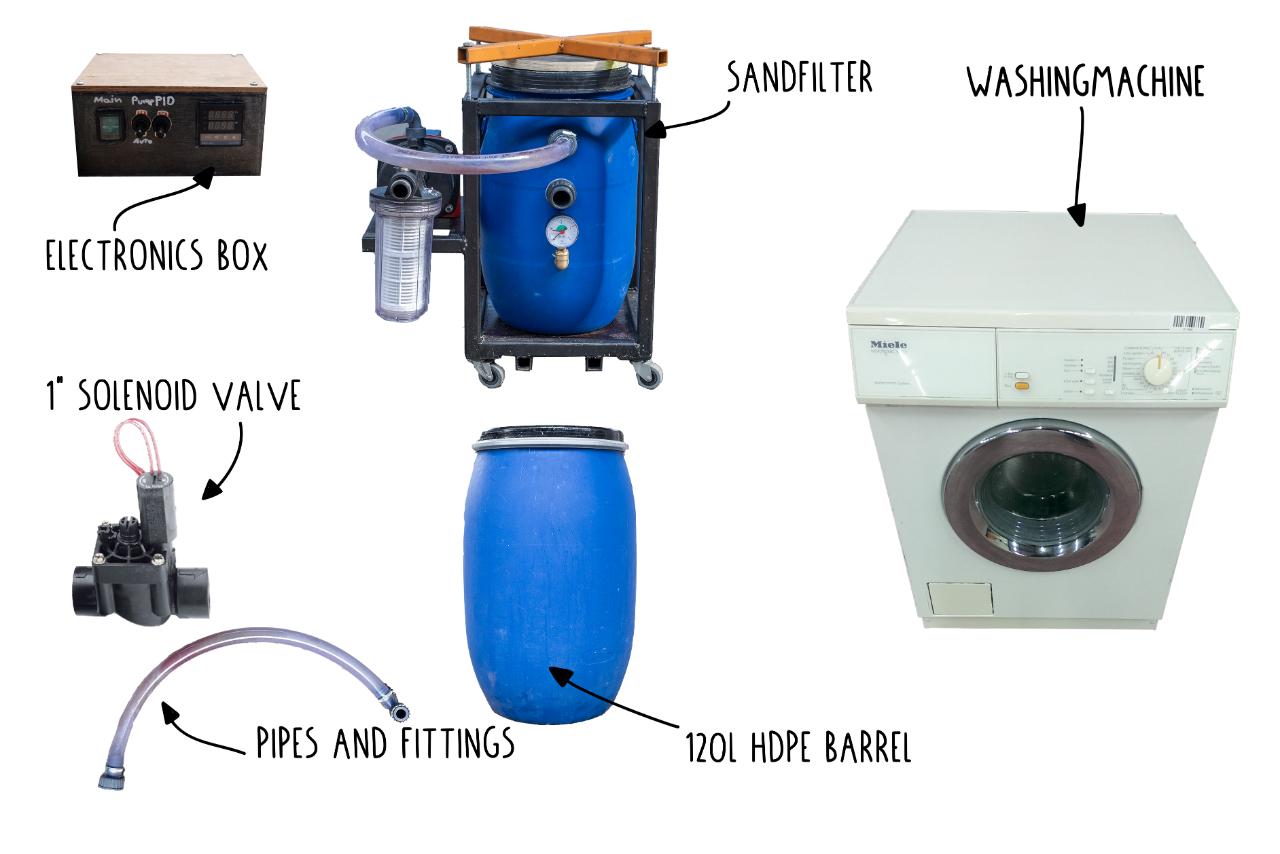
Step 2 - Get your materials
For the washing machine, we are going to need:
- a 120 liter HDPE barrel
- a washing machine with a rather big drum capacity
- a sand filter 👉 https://community.preciousplastic.com/how-to/wash-plastic-sand-filter-
- 1” 24V solenoid valve
- flexible pipes (also according to the sand filter)
- relay 240V
- 240V to 24VAC Trafo
- 3 Switches
- cables etc.
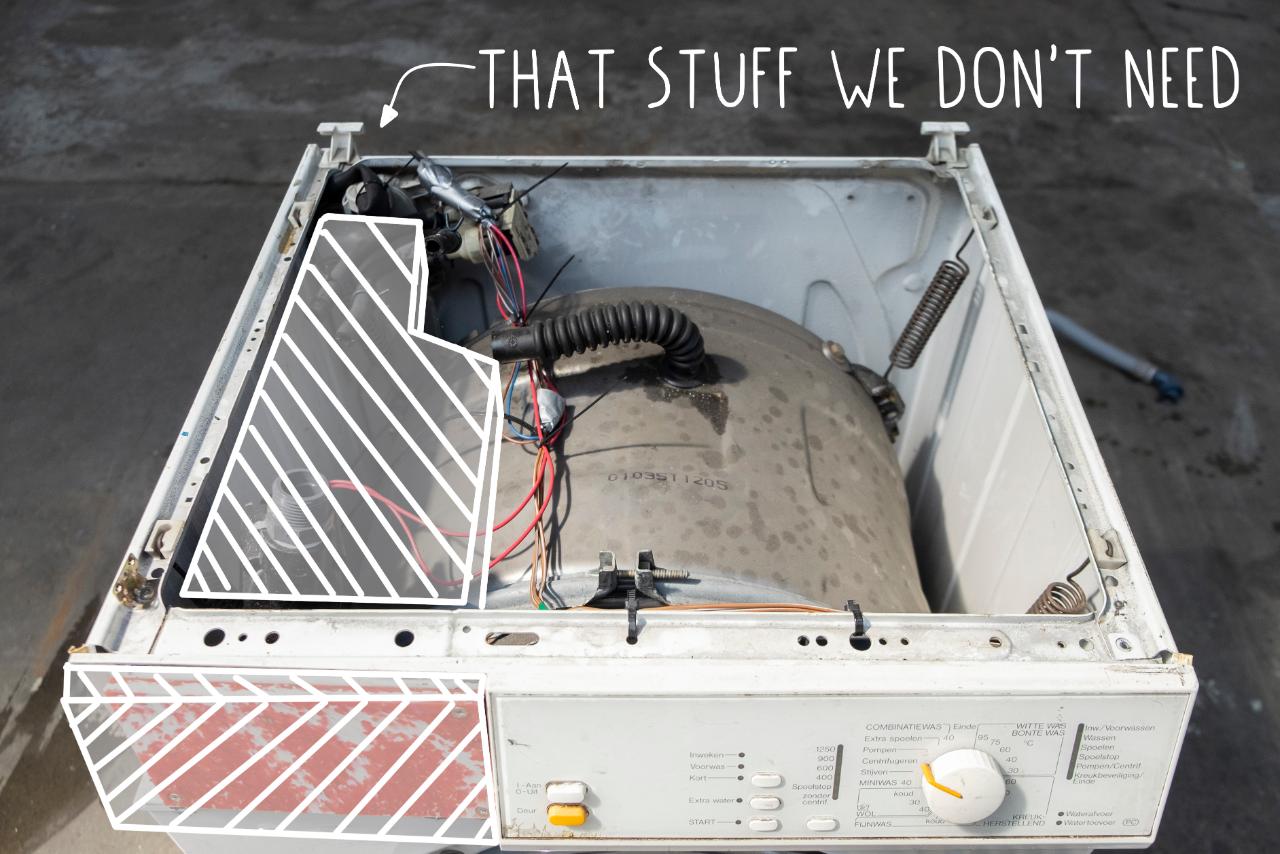
Step 3 - Removing everything we don’t need
We pump water straight into the drum with our own pump, which means we will not need any of the mixers and can remove everything until the connection to the drum. The process depends on your machine but should be doable with basic tools.
Step 4 - Modifications on the machine
After clearing up the machine, we can start with our modifications.
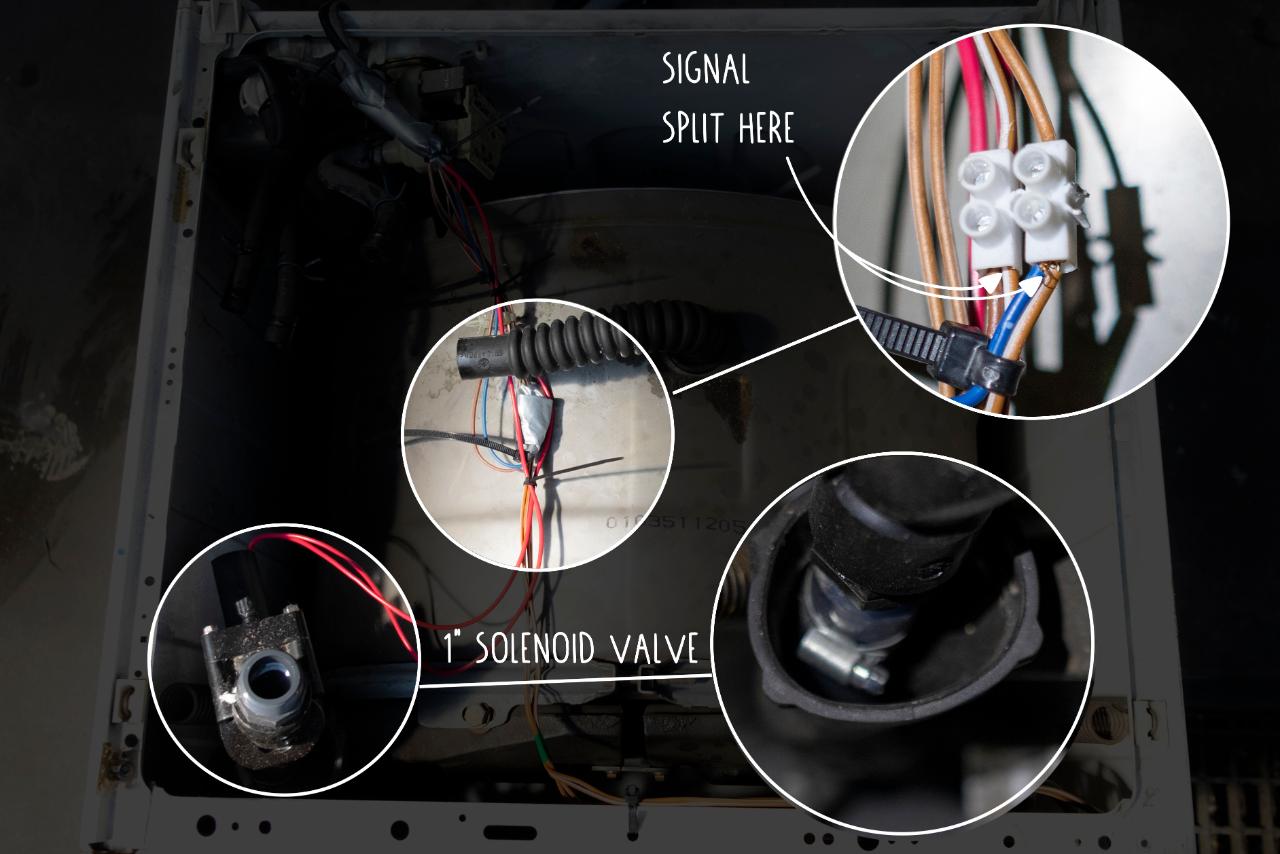
First, attach the solenoid valve to the drum inlet and tighten it well. Here we will later connect the water pump.
Second, we need to connect to a signal from the machine to control when the pump will turn on and off, so it doesn’t have to run nonstop. In this case, we found the signal in a cable going to the machine’s small solenoid valve. Split the cable and connect your own.
❗Careful here, this signal can be 220Volt! 💀
Now we guide out the cables from the valve and signal so we can connect it later to our electronics box. Once that’s done we cut a hole in the lid of the machine and put it back on.
Step 5 - Electronics
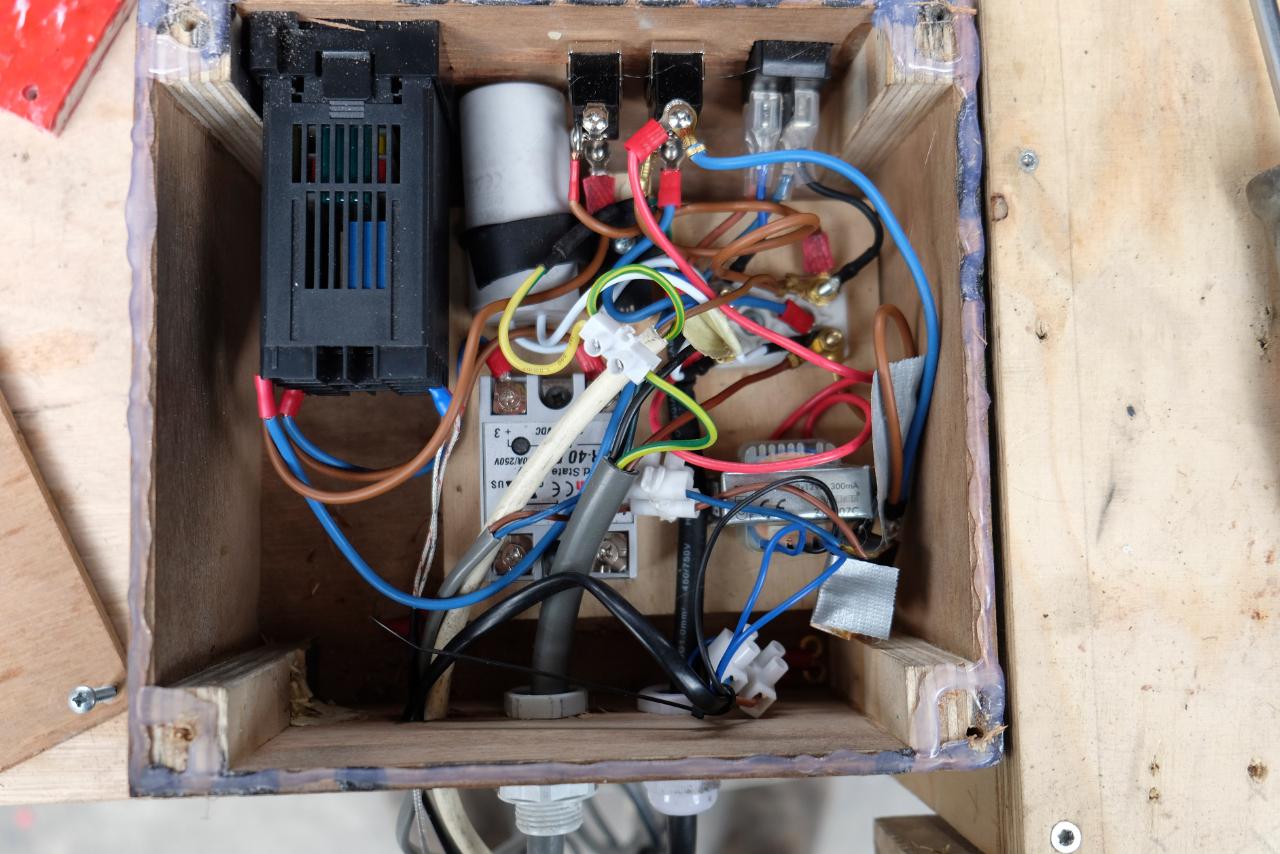
This step is still under development and has to be taken fully on your own risk. In our case, it worked but the box would need a better layout design to make it safer.
What we are doing is:
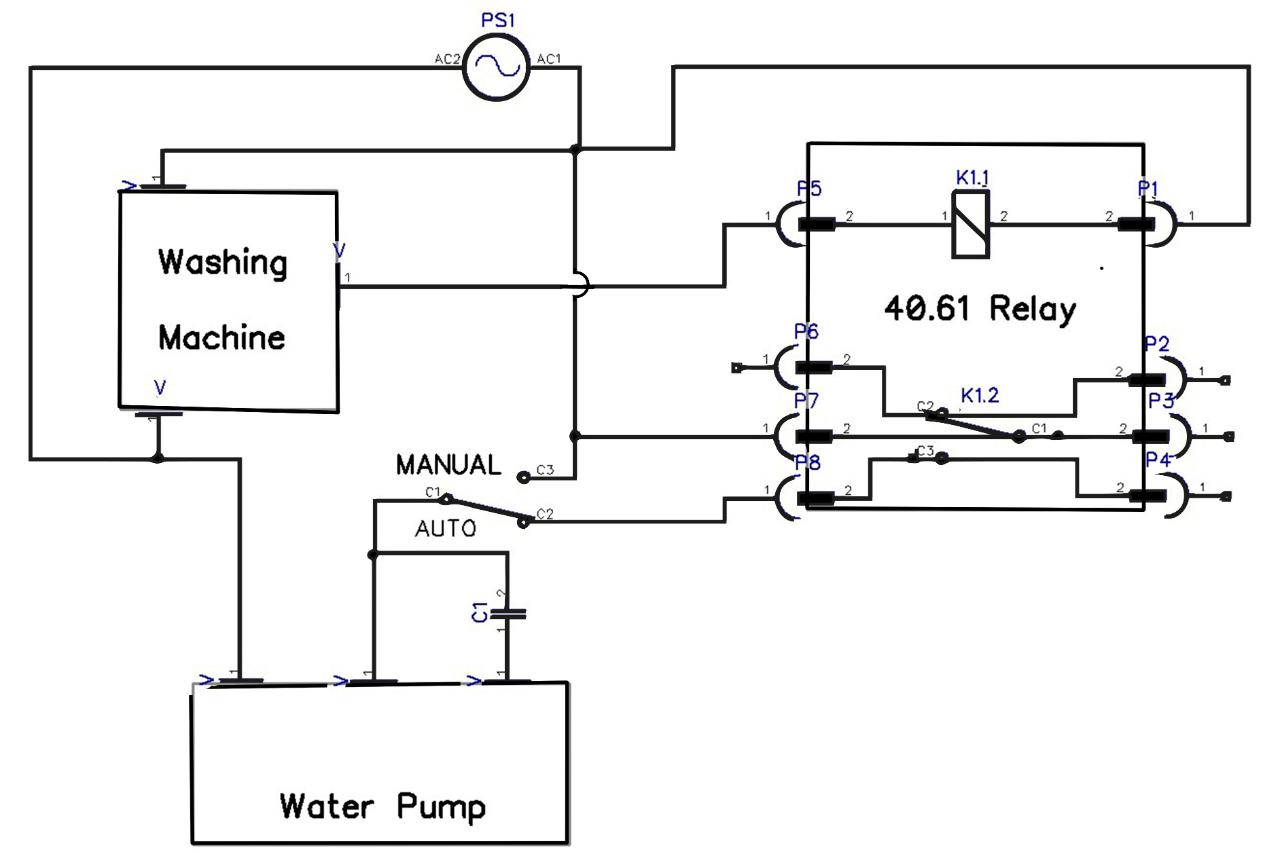
The main switch which turns on/off everything, this means we also lead the power cable from the washing machine into this box. We have a switch that changes the state of the pump between always on and on on-demand. When the pump turns on, also the solenoid valve needs to open, so we reach that with a 220V to 24VAC transformer, which also interacts with the relay. It doesn’t open when the pump is in the function always on. I also moved the electronics from the pump into my box, to keep everything together.
If you also have a Pre-Washing Station with a heated water barrel going, then you should also move the PID controller and a switch for it into this box.
❗Again to emphasize, this is not a professional setup and you should act with care and knowledge.
What we are doing is:
The main switch which turns on/off everything, this means we also lead the power cable from the washing machine into this box. We have a switch that changes the state of the pump between always on and on on-demand. When the pump turns on, also the solenoid valve needs to open, so we reach that with a 220V to 24VAC transformer, which also interacts with the relay. It doesn’t open when the pump is in the function always on. I also moved the electronics from the pump into my box, to keep everything together.
If you also have a Pre-Washing Station with a heated water barrel going, then you should also move the PID controller and a switch for it into this box.
❗Again to emphasize, this is not a professional setup and you should act with care and knowledge.
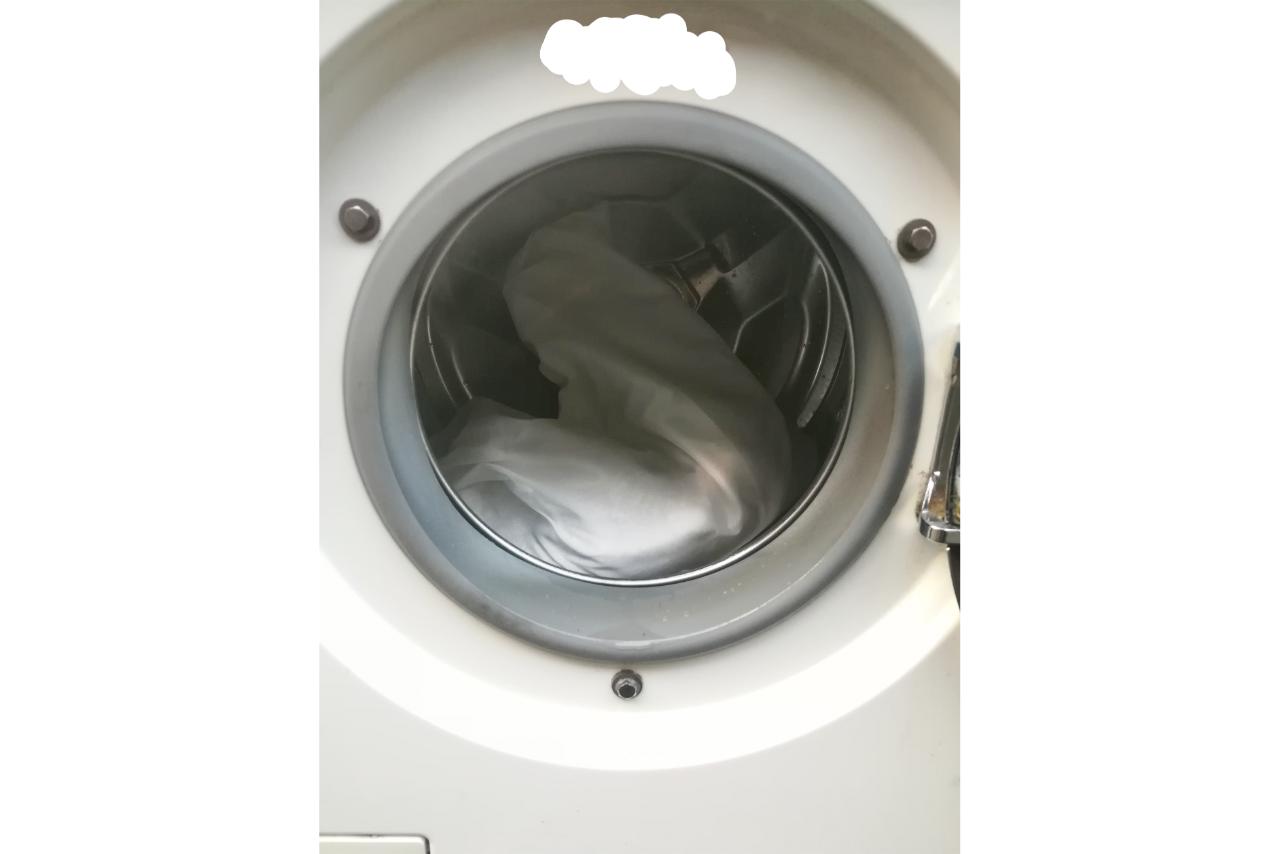
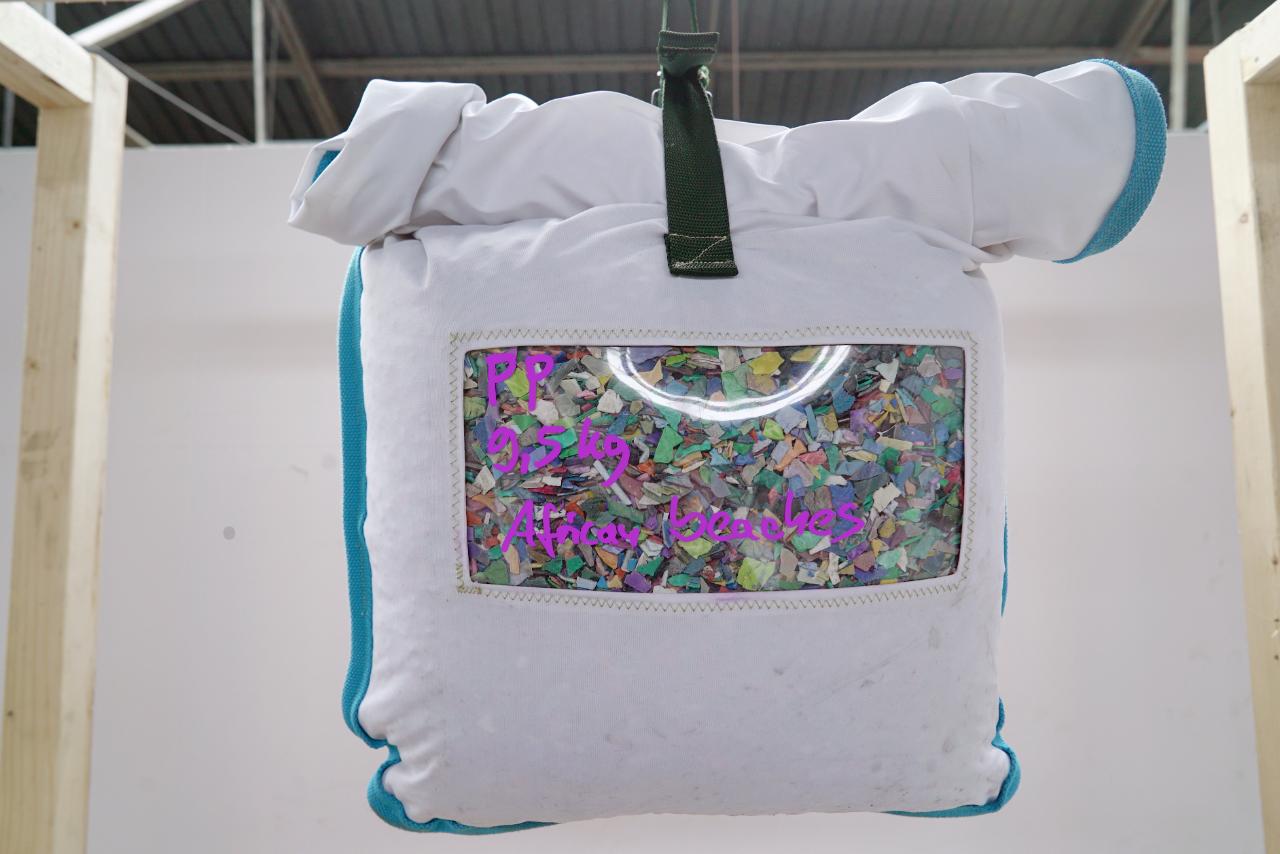
Step 6 - The washing bag 1
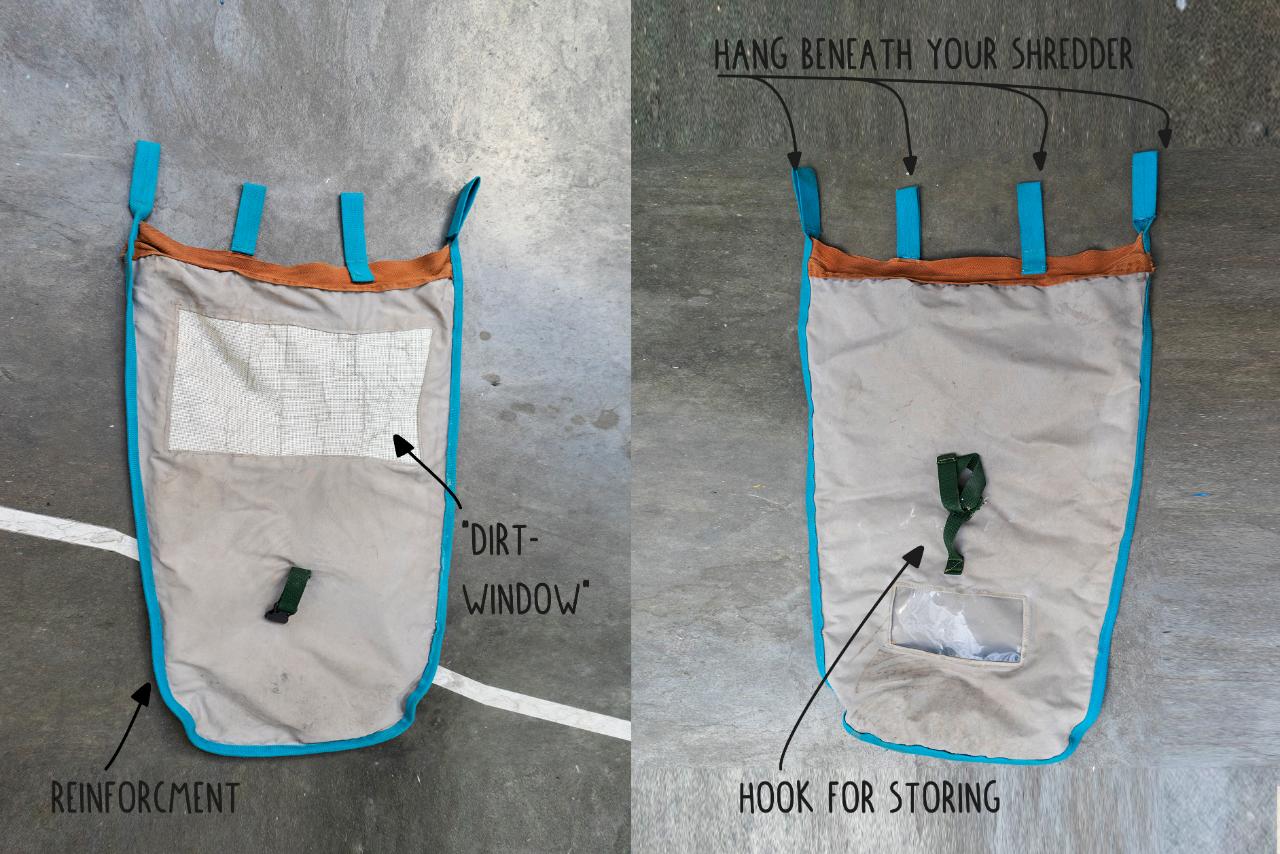
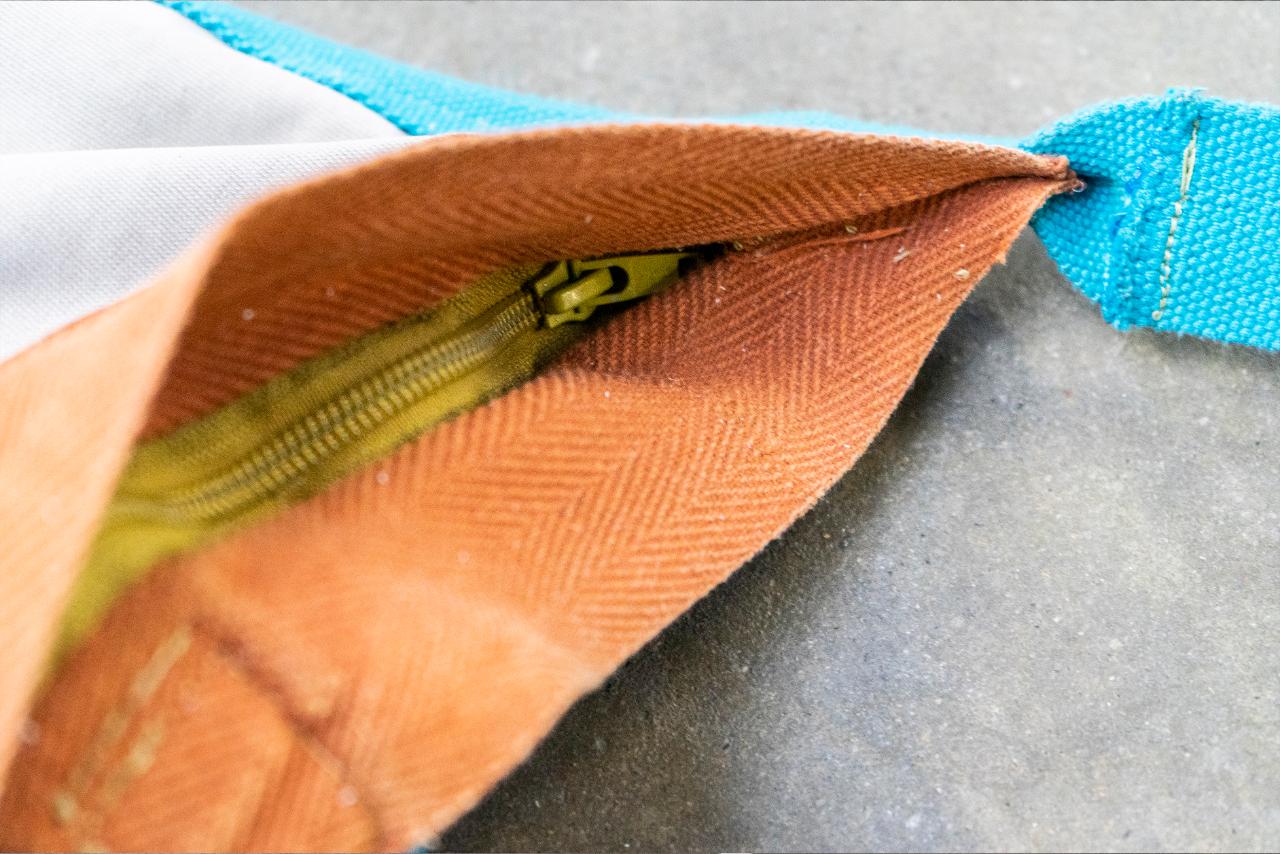
We use shreds in the washing machine because this way we can process way more material at the same time. But just putting the shredded plastic in the drum would result in blocked pumps and create chaos. So we experimented with bags. Our design is made of a strong polyester textile, with strongly reinforced stitches and a good quality zipper. We recommend making it rather long so it is easier to stuff it into the machine when filled with shreds. Also, we added a strong mash in the bag so dirt and small particles can leave, to reach a better result.
Step 7 - The washing bag 2
Our bag is designed so you can just hang it straight beneath your shredder and put it in the machine afterward. The zipper is zipped up into a little pocket so it doesn’t open up while washing.
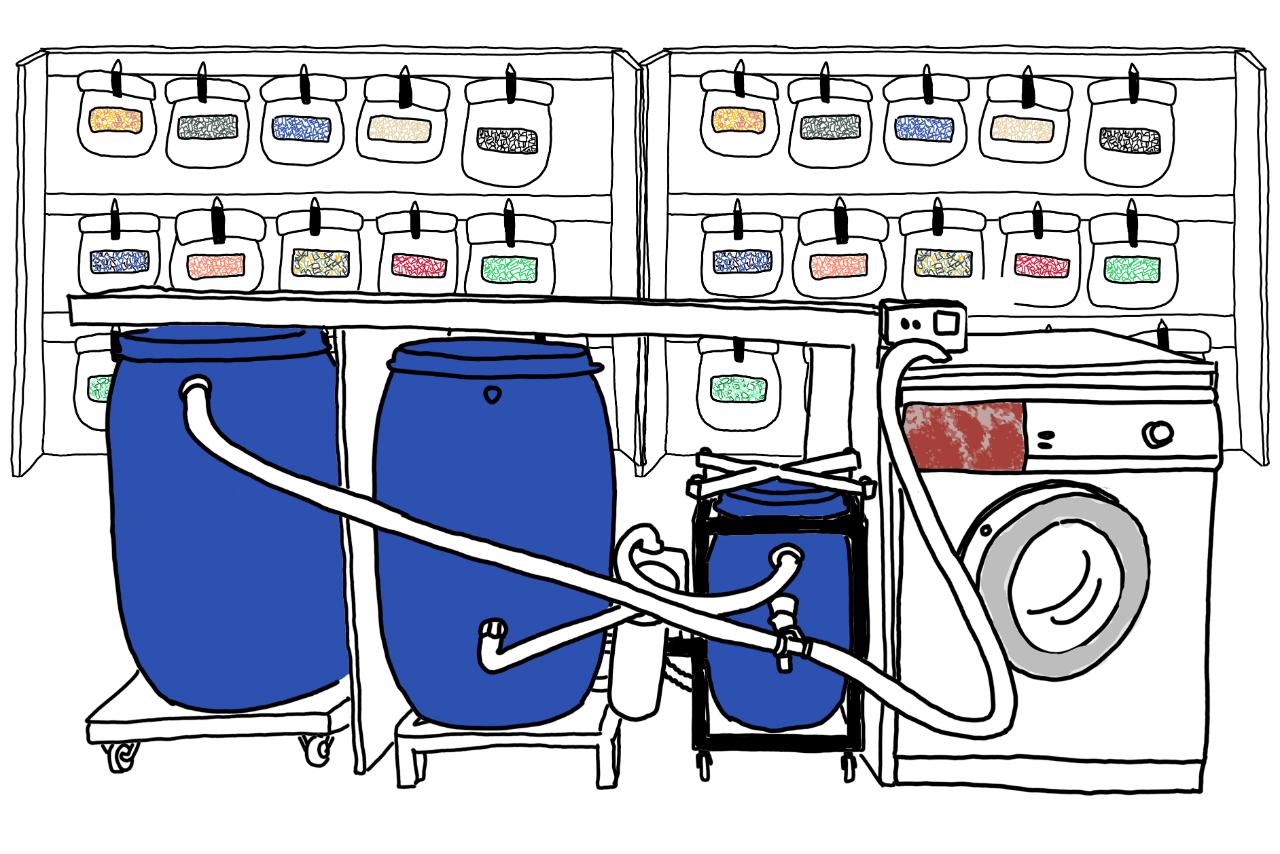
Step 8 - Put everything together
Now you connect the machine with the sand filter and your barrel system. The machine has an inlet, where you connect the sand filter and an outlet which leads to the reservoir barrel, that’s it.

Step 9 - Run your washing system
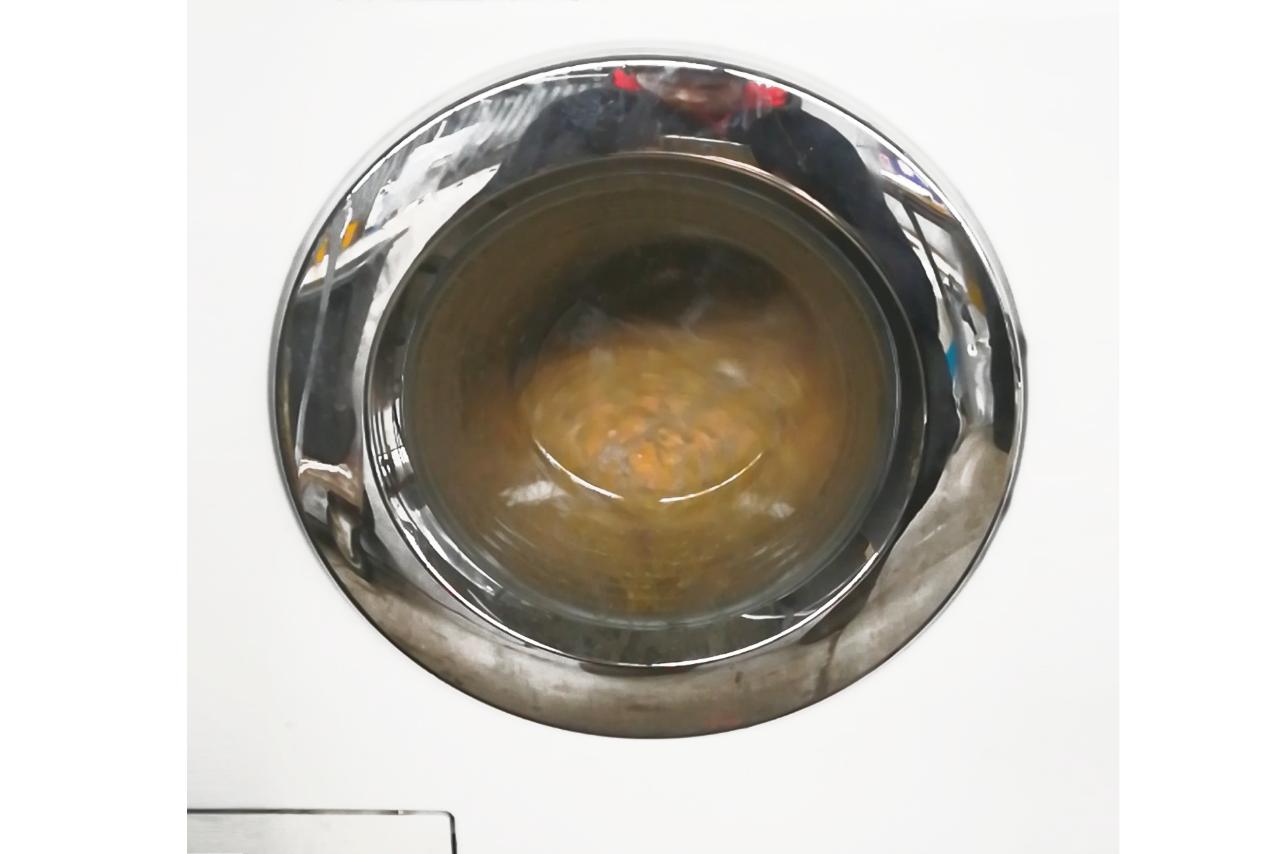
Now fill the bag with pre-washed shreds and put it in the machine. We recommend adding a little bit of laundry detergent, which helps to remove the last bits of oil. The settings of the machine depend on the grade of contamination. Usually, we use the 40-degree quick wash program. Afterward, hang it up so the last bit of moisture can go away.
Step 10 - Turn it into something new!
Now you have your clean plastic and you can create some beautiful Precious Plastic products with it.
Though as mentioned this is not finished development, but already works and can give you a good starting point. Feel free to test and modify and share back if you find other good solutions!
❗Be extra careful with the electronics as everything runs on 220 Volts and you have to deal with a lot of water.❗
But if everything works you have a very efficient system to process large amounts of dirty plastic for your workspace.
—
—
—
Comments