Create an extruded lamp
We'll show you how to make a lamp using the extrusion machine and a very simple mould.
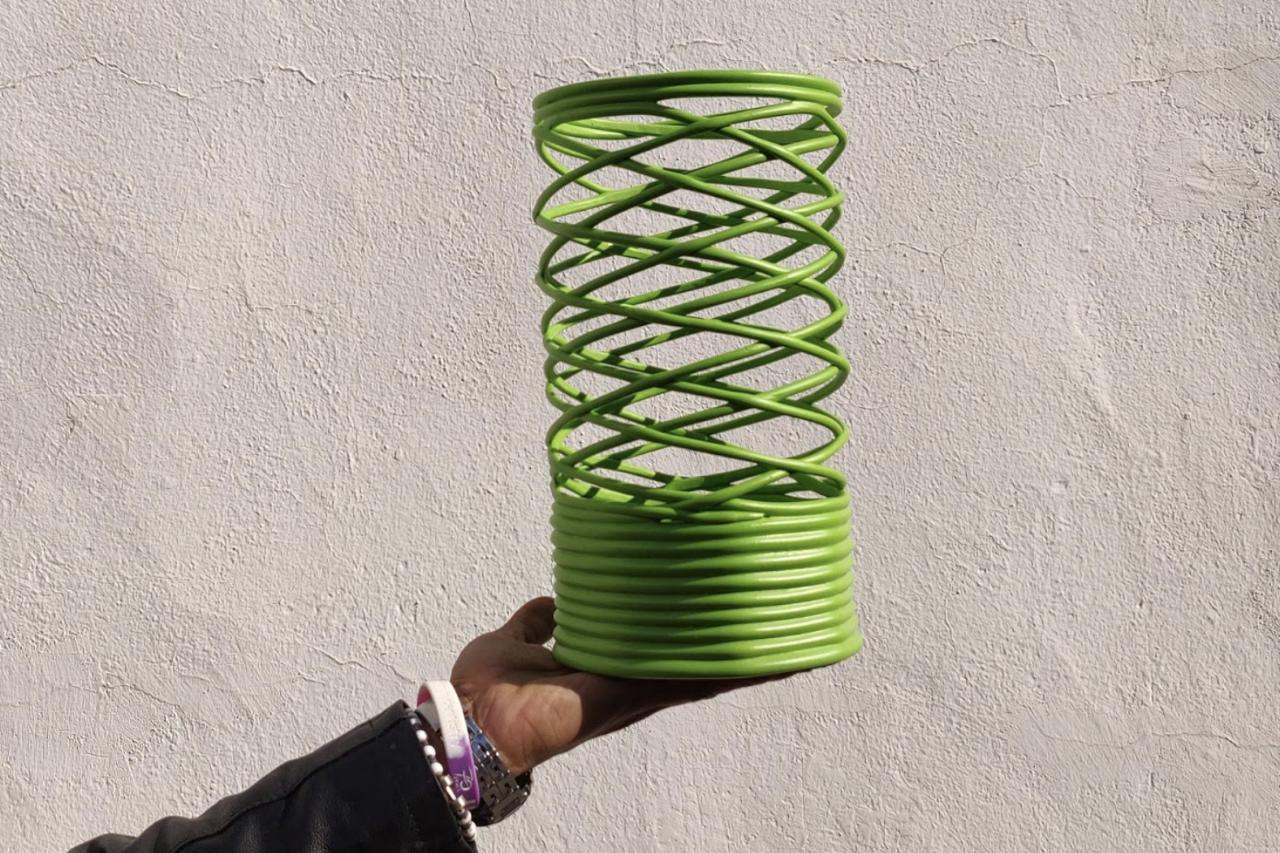
Simple, beautiful, functional.
Workspace: KOUN, Morocco
—
Attachments
Resources
Step 1 - Prepare your materials
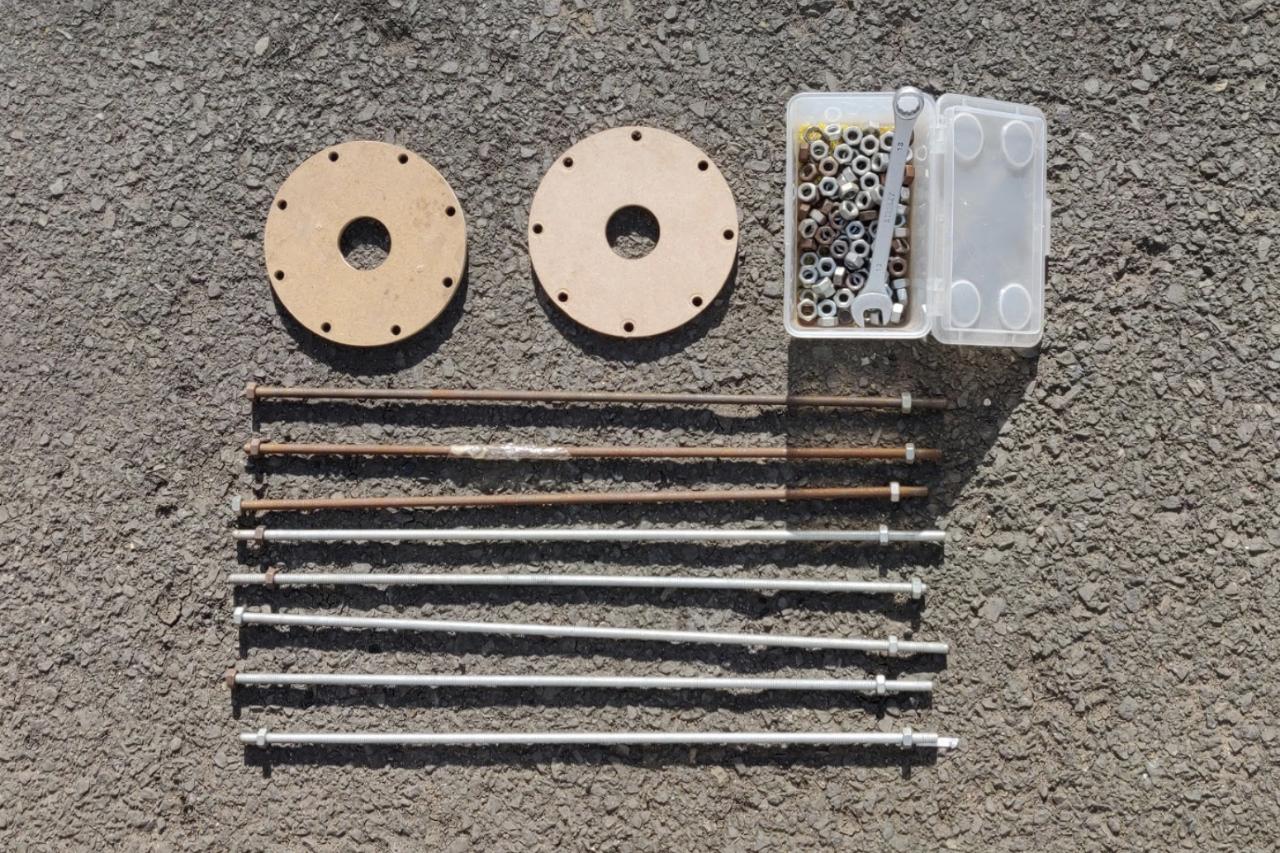
For the mould we need:
- two cylindrical wooden elements (size as you prefer)
- threads and bolts (amount depends on the size of your lamp)
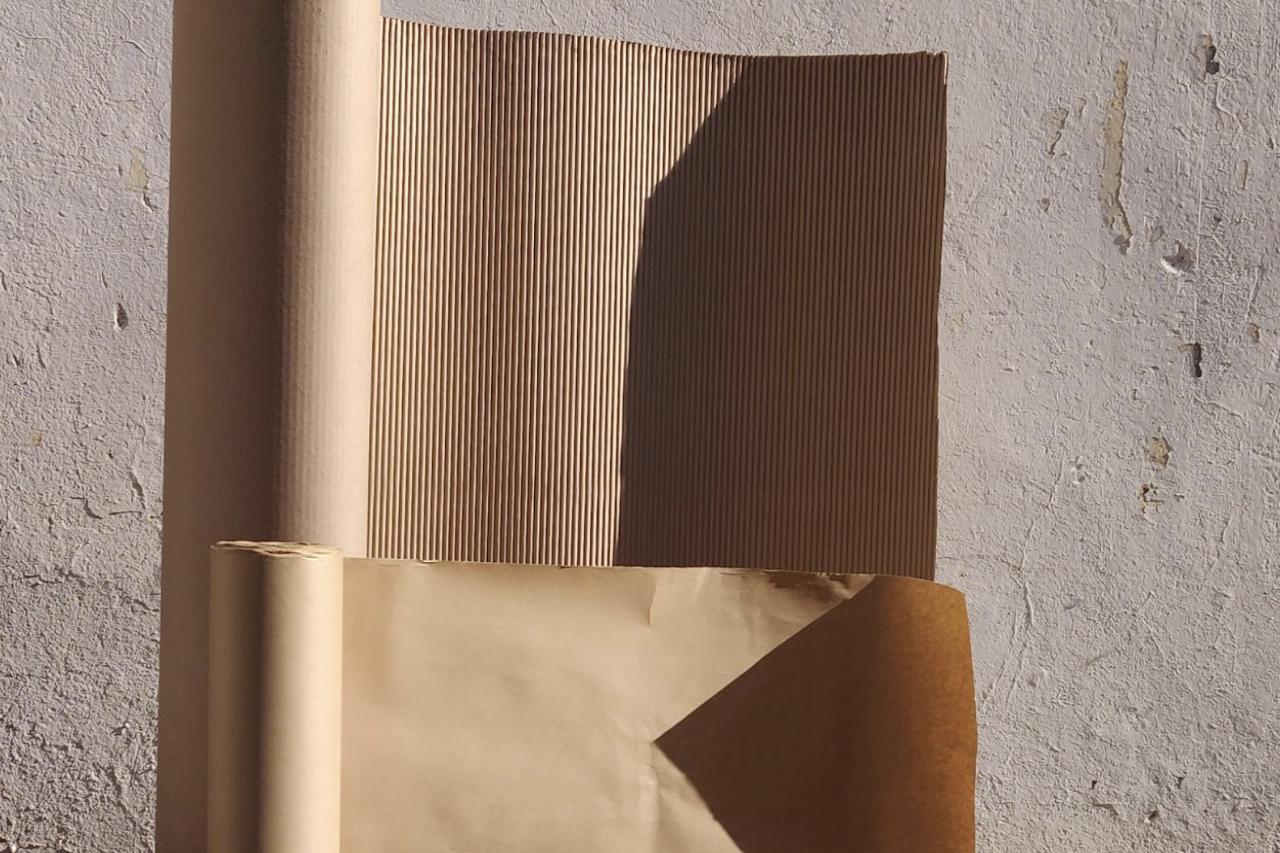
- paper sheets: one corrugated and one softer type
For the lampshade:
- shredded plastic, HDPE recommended
To finish the lamp:
- another wooden circle as support
- bulb socket and cable
- two cylindrical wooden elements (size as you prefer)
- threads and bolts (amount depends on the size of your lamp)
- paper sheets: one corrugated and one softer type
For the lampshade:
- shredded plastic, HDPE recommended
To finish the lamp:
- another wooden circle as support
- bulb socket and cable
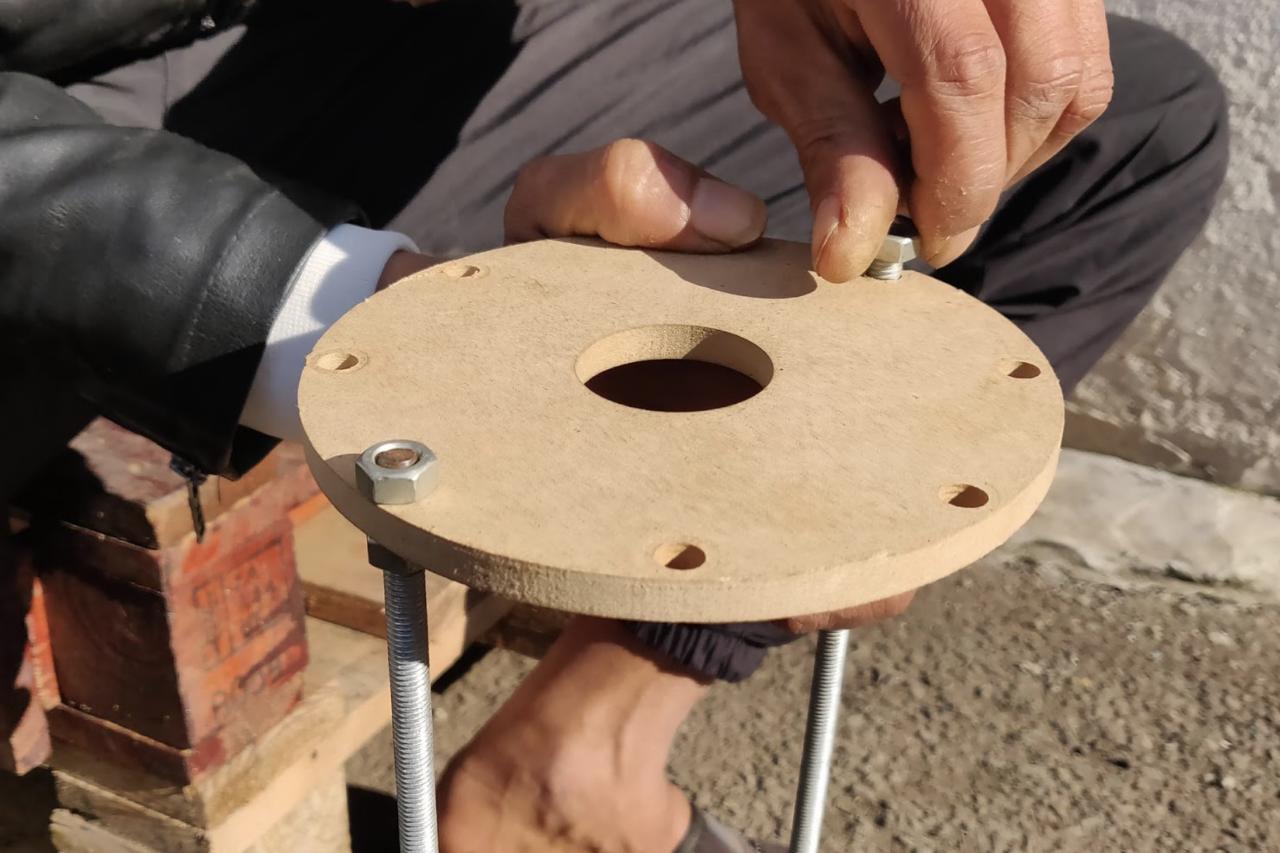
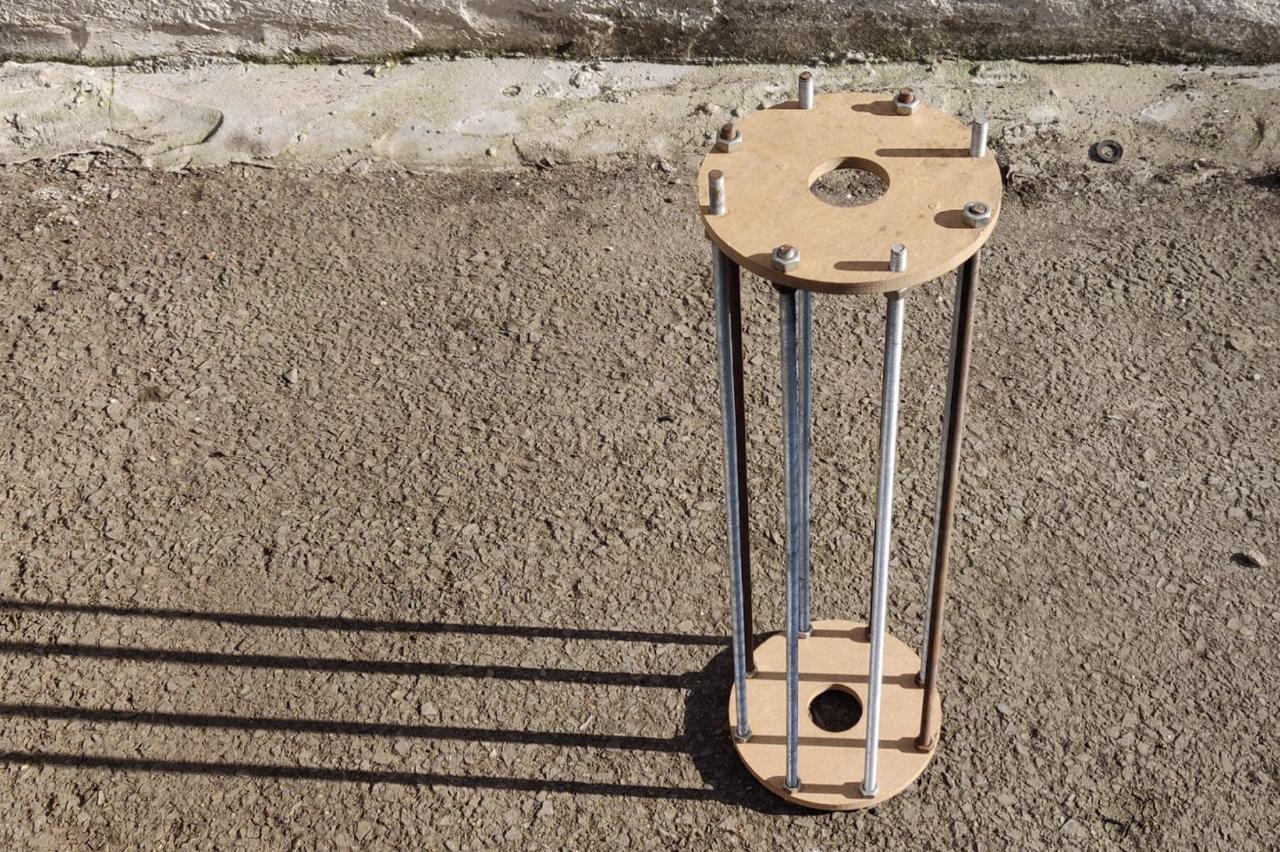
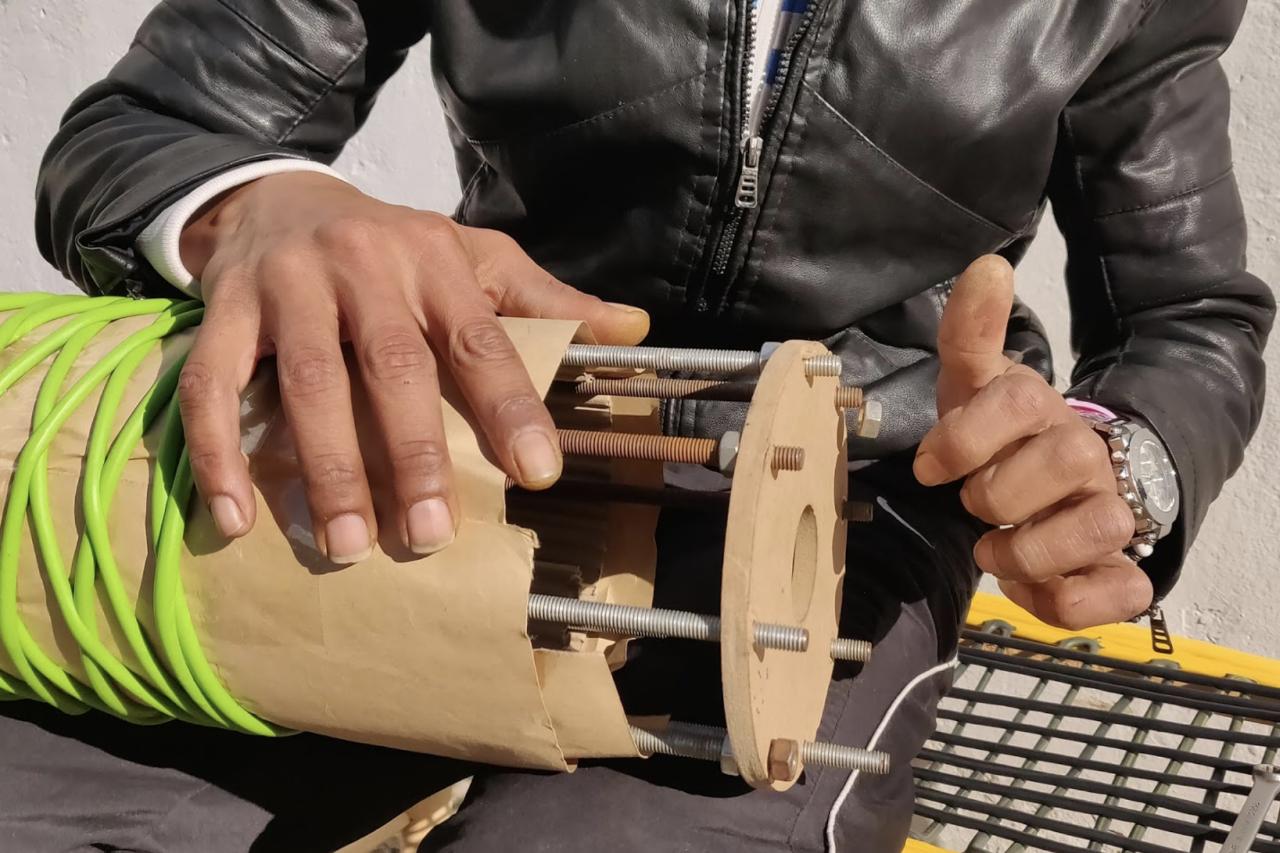
Step 2 - Assemble the mould
Once you’ve got all the components, it’s time to assemble the mould. Pick the length you prefer for your lamp. Connect the 2 wooden circles with each other using the 6 rods, and tighten all together.
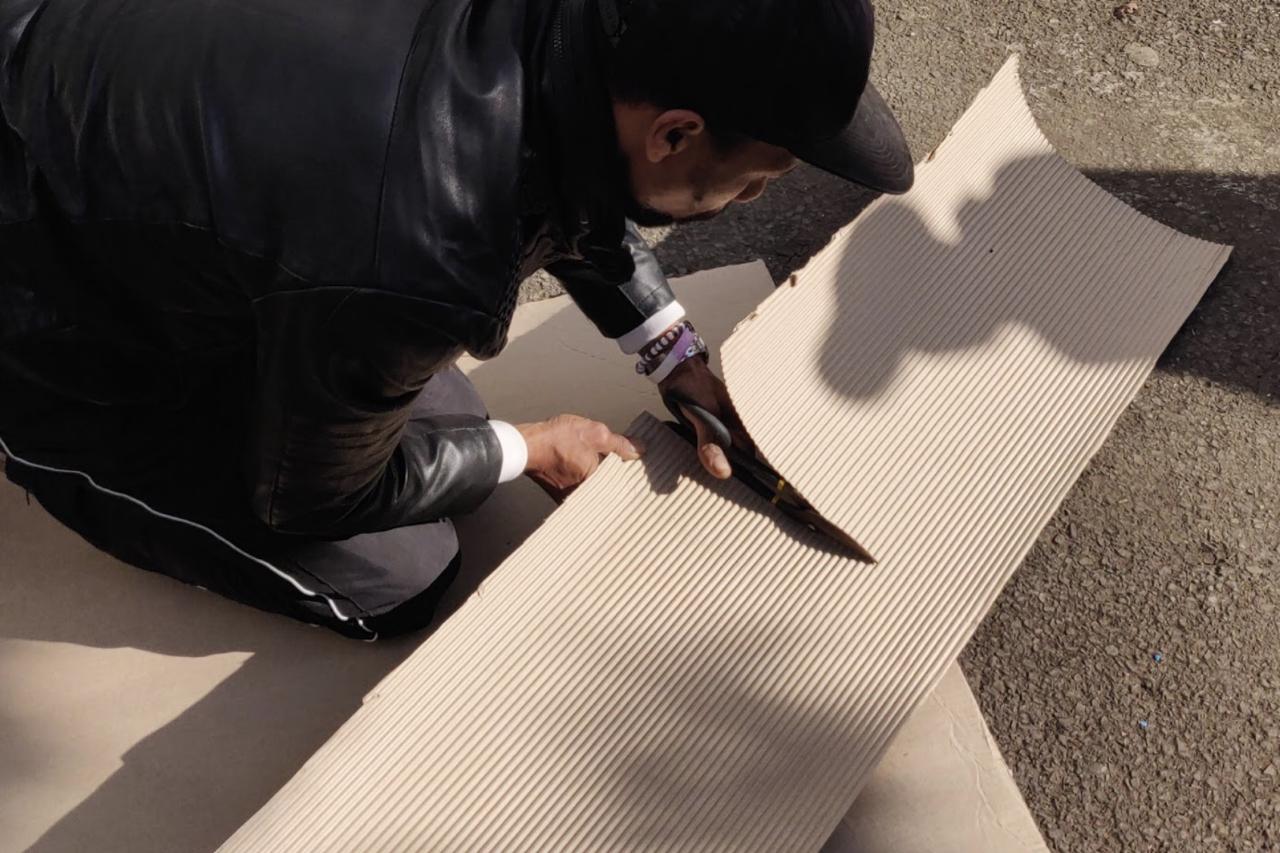
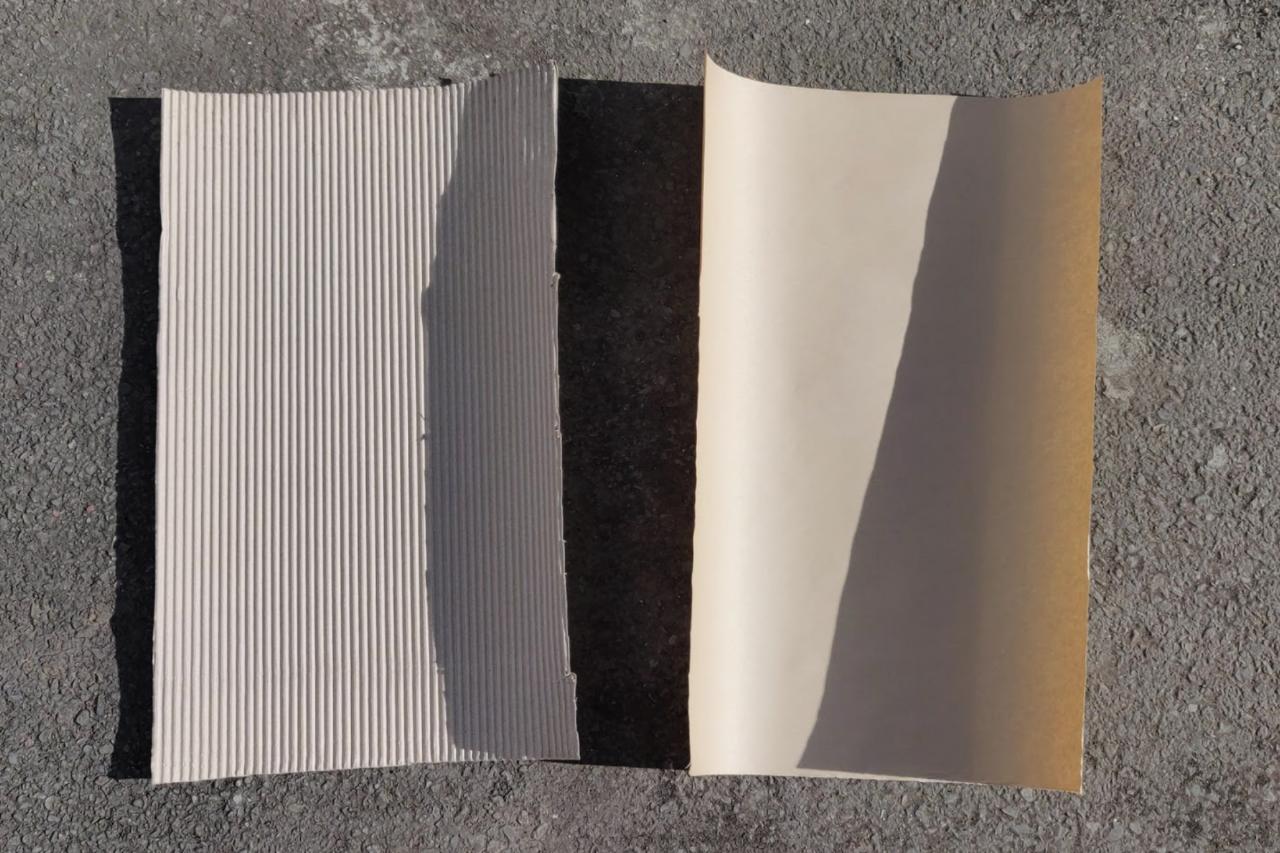
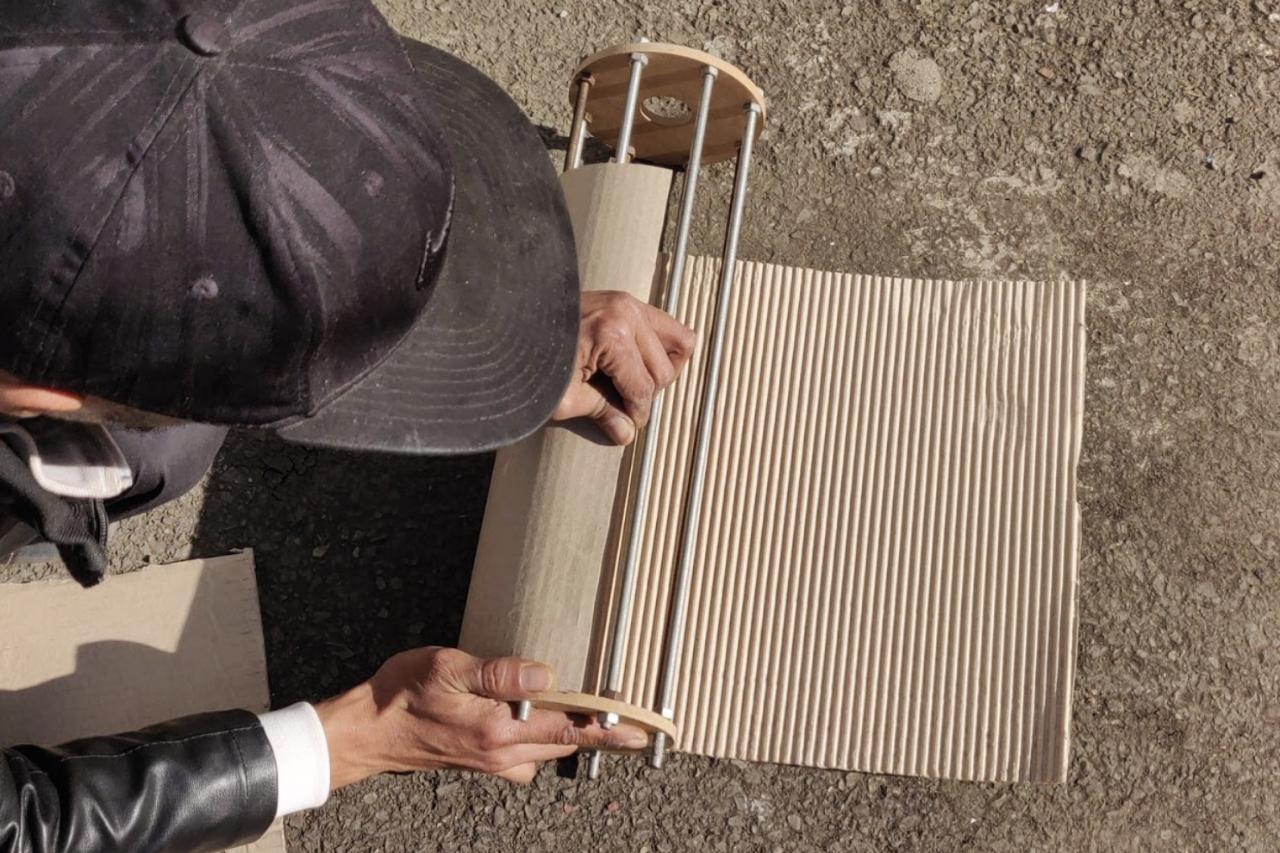
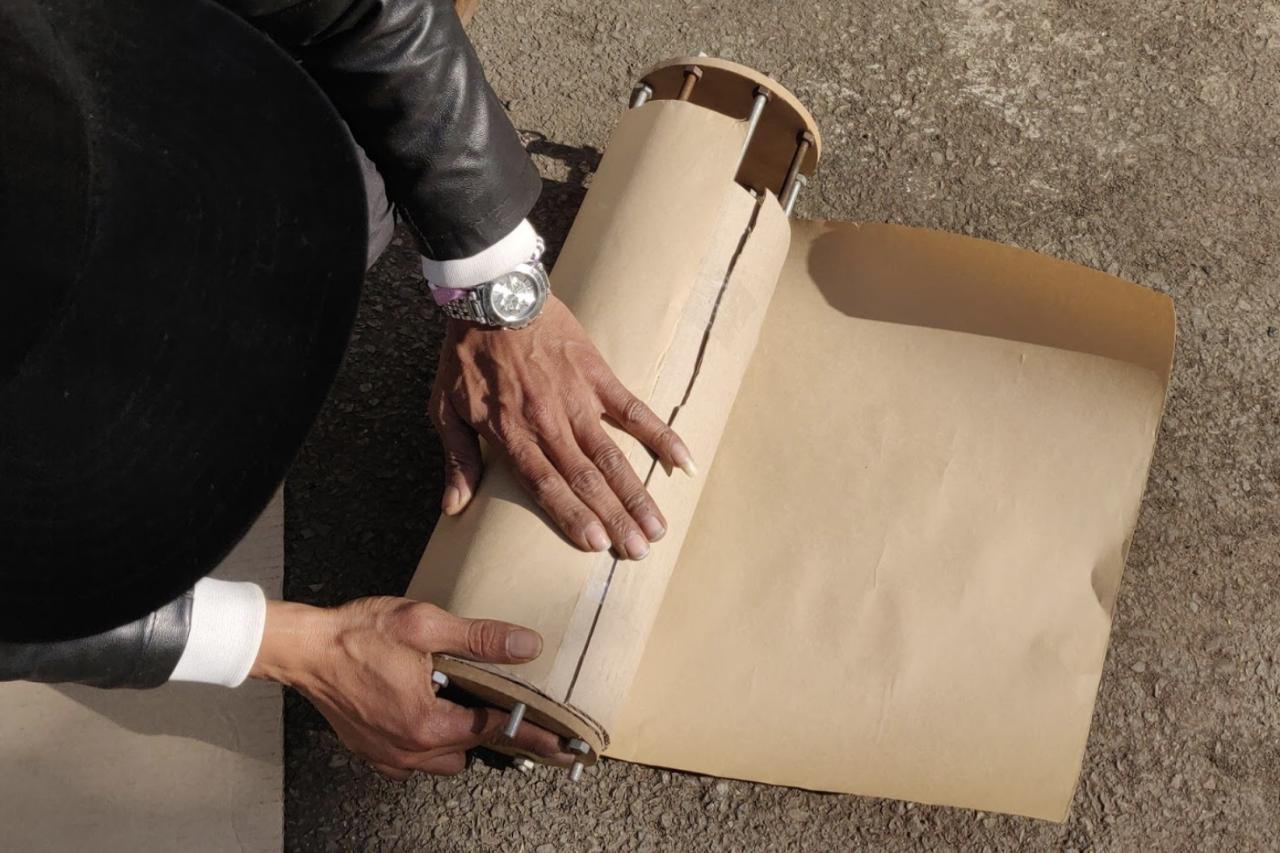
Step 3 - Wrap the mould in paper
We need to create a smoother skin on the mould for the plastic to lay on. We use one corrugated sheet of paper to give the structural strength for the plastic not to collapse. On top of this first layer, we lay a second paper layer which is smoother to give a clean finishing to the product. Again, size depends on your product but generally it should cover the area between the two round elements. We use paper because plastic does not stick to it.

Step 4 - Mark the mould
To help you being consistent with size over time, mark the highest point where you want the extruded plastic to reach.

Step 5 - Extrusion time - Make the base
Get your recycled plastic ready and load it into the extrusion machine.
Wait for the plastic filament to come out and start overlaying multiple plastic strings. First we build a solid base for the lamp: We overlap 9 lines of plastic. Make sure each line melts into the previous one so they stick well onto each other.
Wait for the plastic filament to come out and start overlaying multiple plastic strings. First we build a solid base for the lamp: We overlap 9 lines of plastic. Make sure each line melts into the previous one so they stick well onto each other.

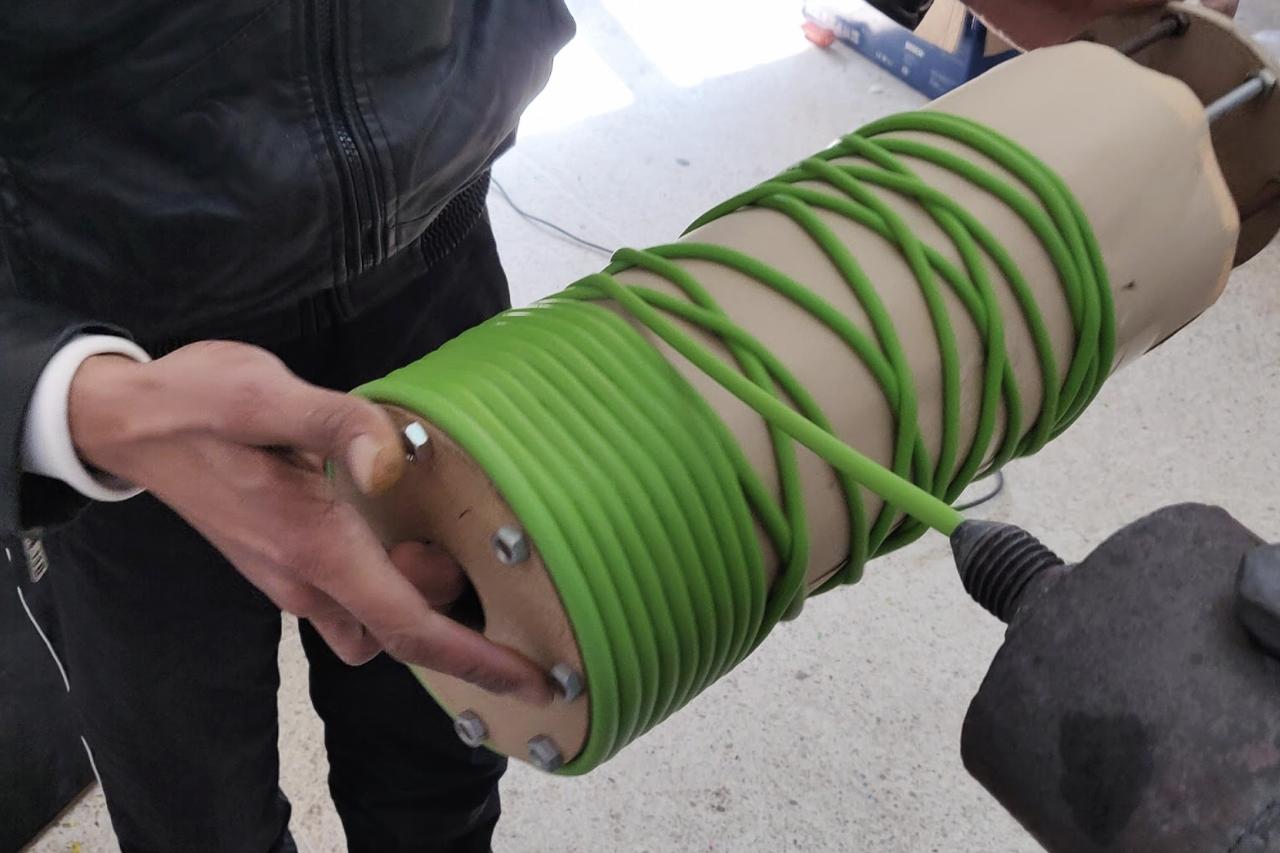
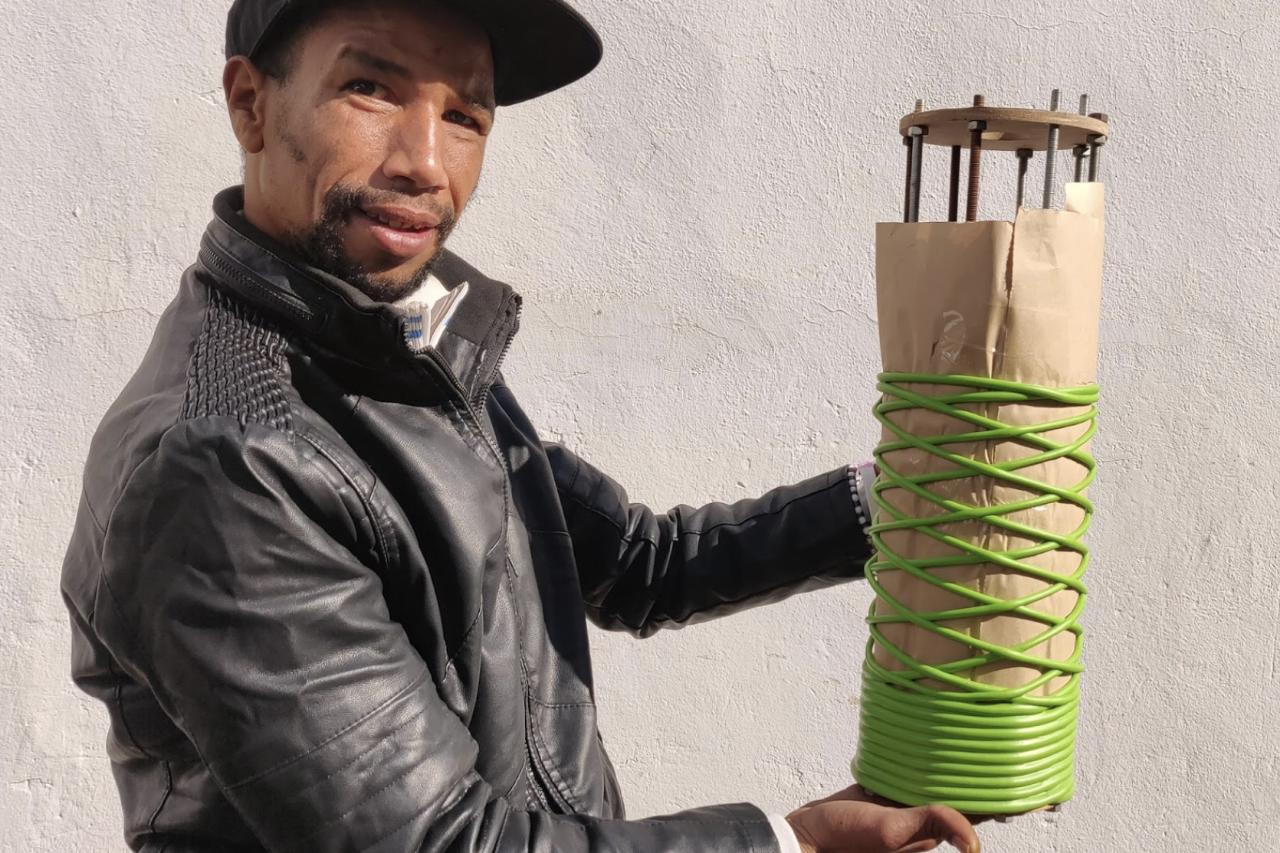
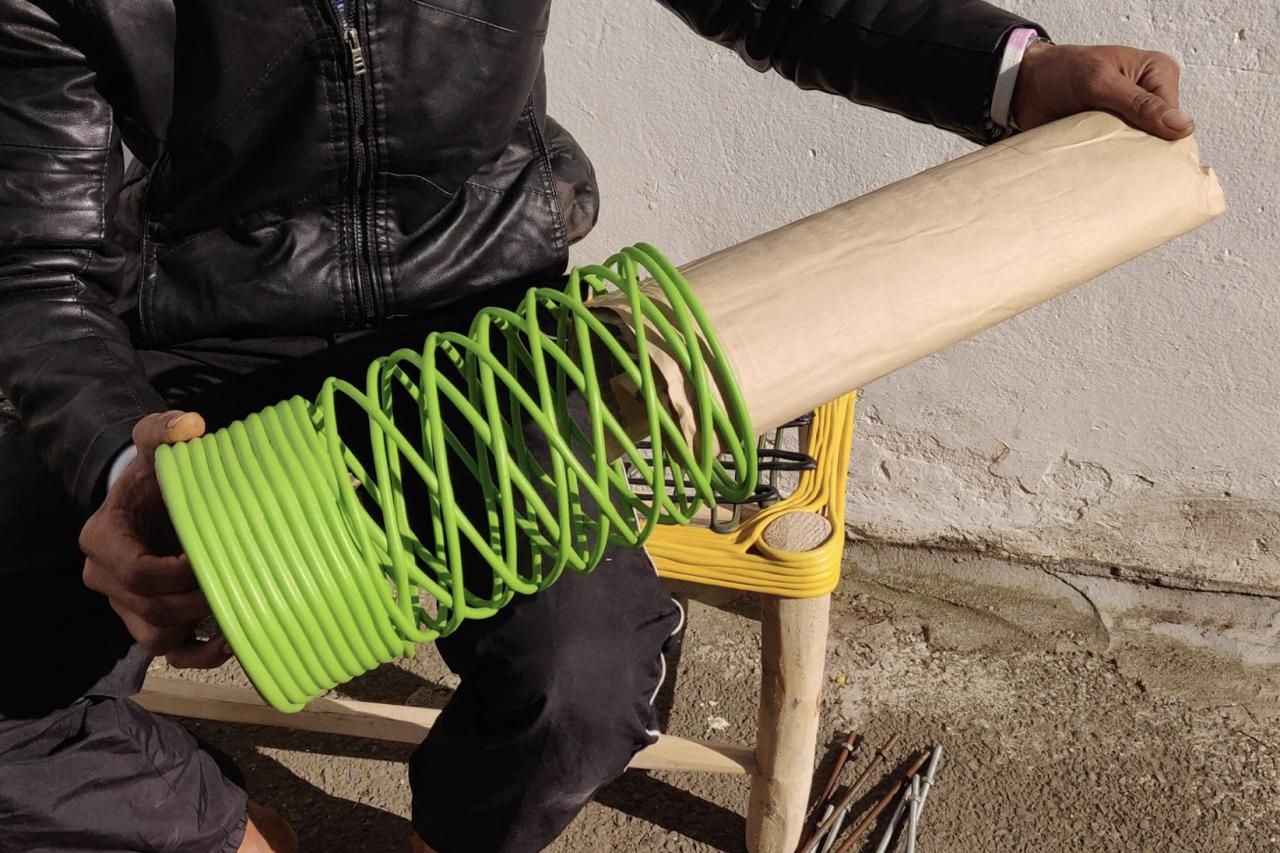
Step 6 - Extrusion time - Make the pattern
Once the base is nicely laid out we start creating the actual lamp’s pattern by moving the mould up and down like in the pictures below. You can get creative with the patterns created but generally you will want to create enough of a structure for the lamp to support itself.
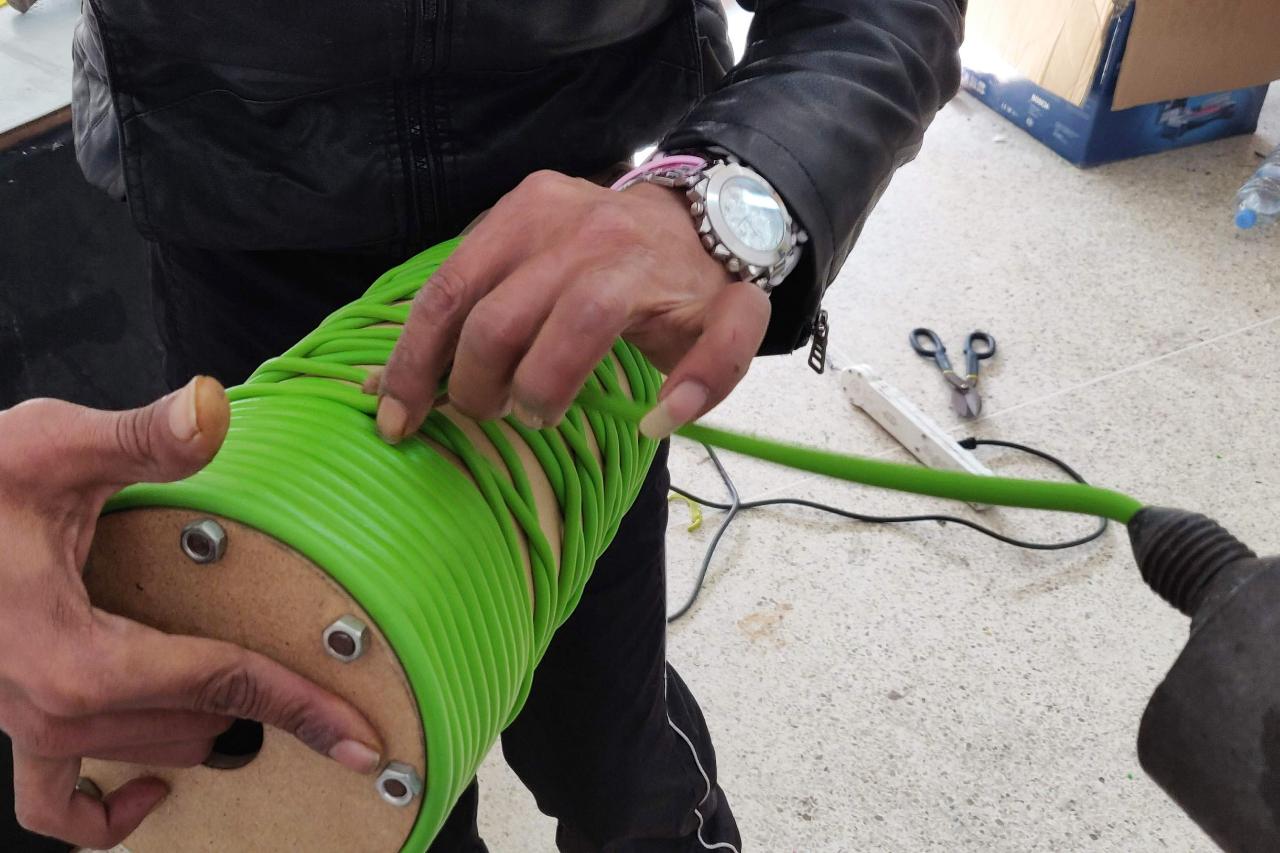
When you’re happy with the pattern you can cut the end of the extrusion line and glue it nicely to the rest of the product.
When you’re happy with the pattern you can cut the end of the extrusion line and glue it nicely to the rest of the product.

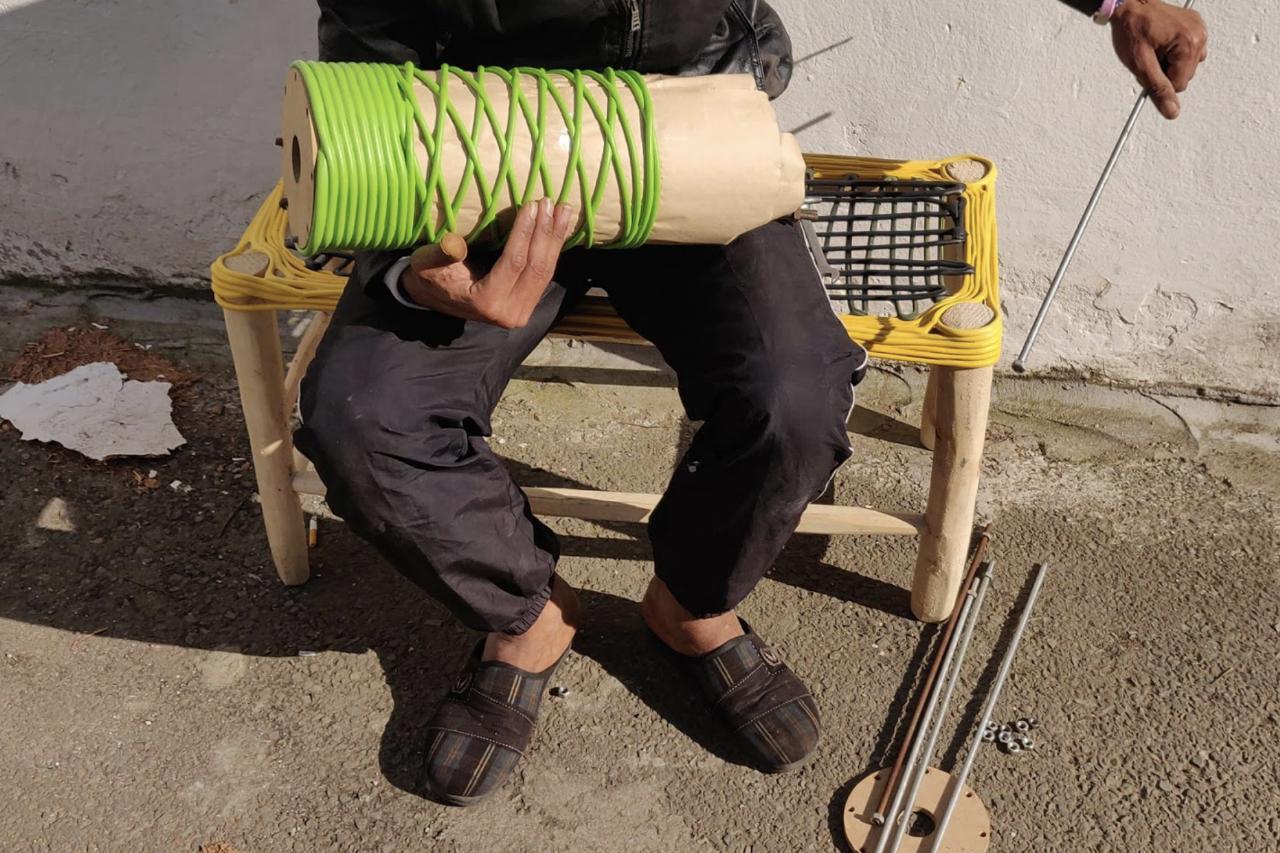
Step 7 - Wait and cool
Once we’re done with extruding, we let it cool down. Make sure it is well cold before removing it from the mould, otherwise the plastic will shrink unpredictably and ruin your final product.
We cool it by simply letting it rest for 20-30 mins.
We cool it by simply letting it rest for 20-30 mins.
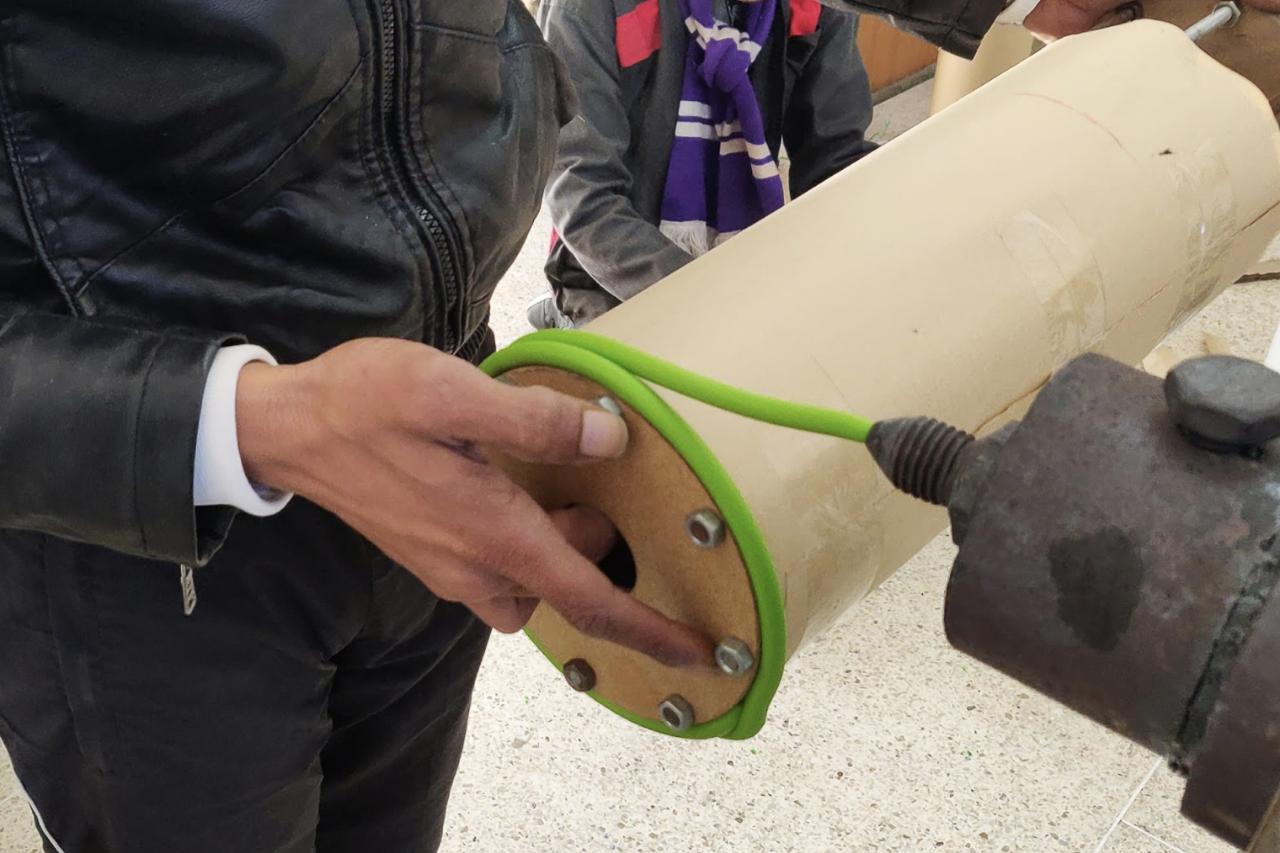
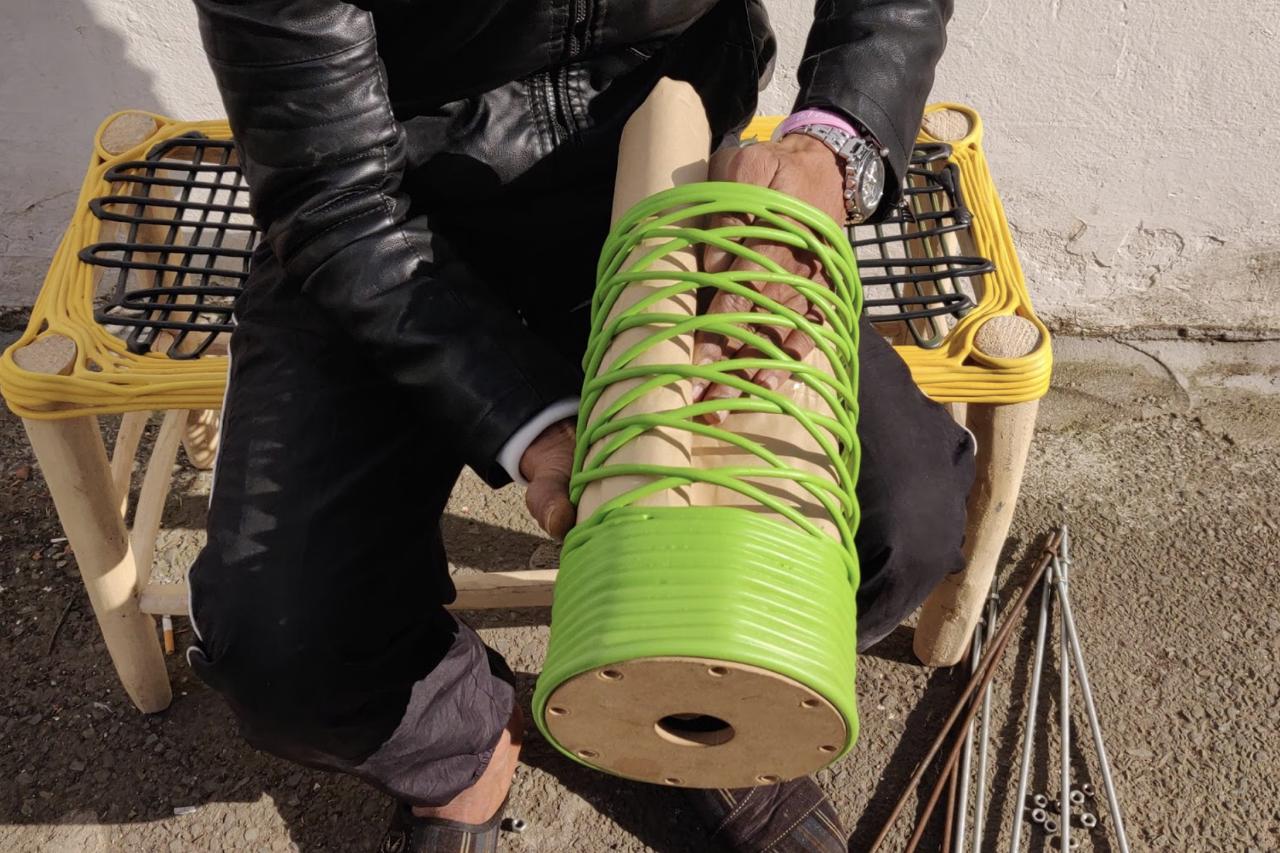
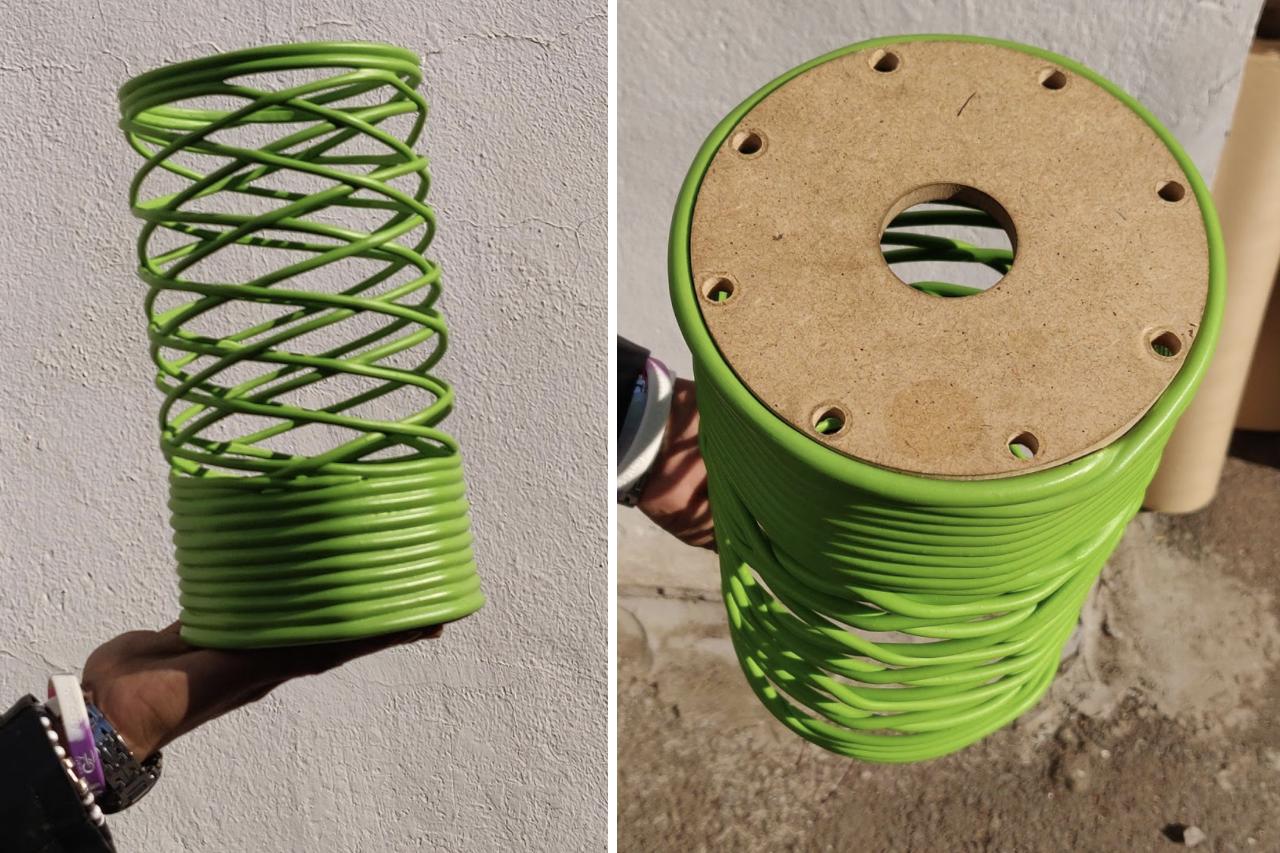
Step 8 - Remove the mould
The lamp is designed to have one of the circles as the base of the lamp. So, when disassembling the mould, only remove the top circular wooden element and the metal rods and bolts.
We can now remove the paper from inside of the lamp.
We can now remove the paper from inside of the lamp.
Step 9 - Ready, almost
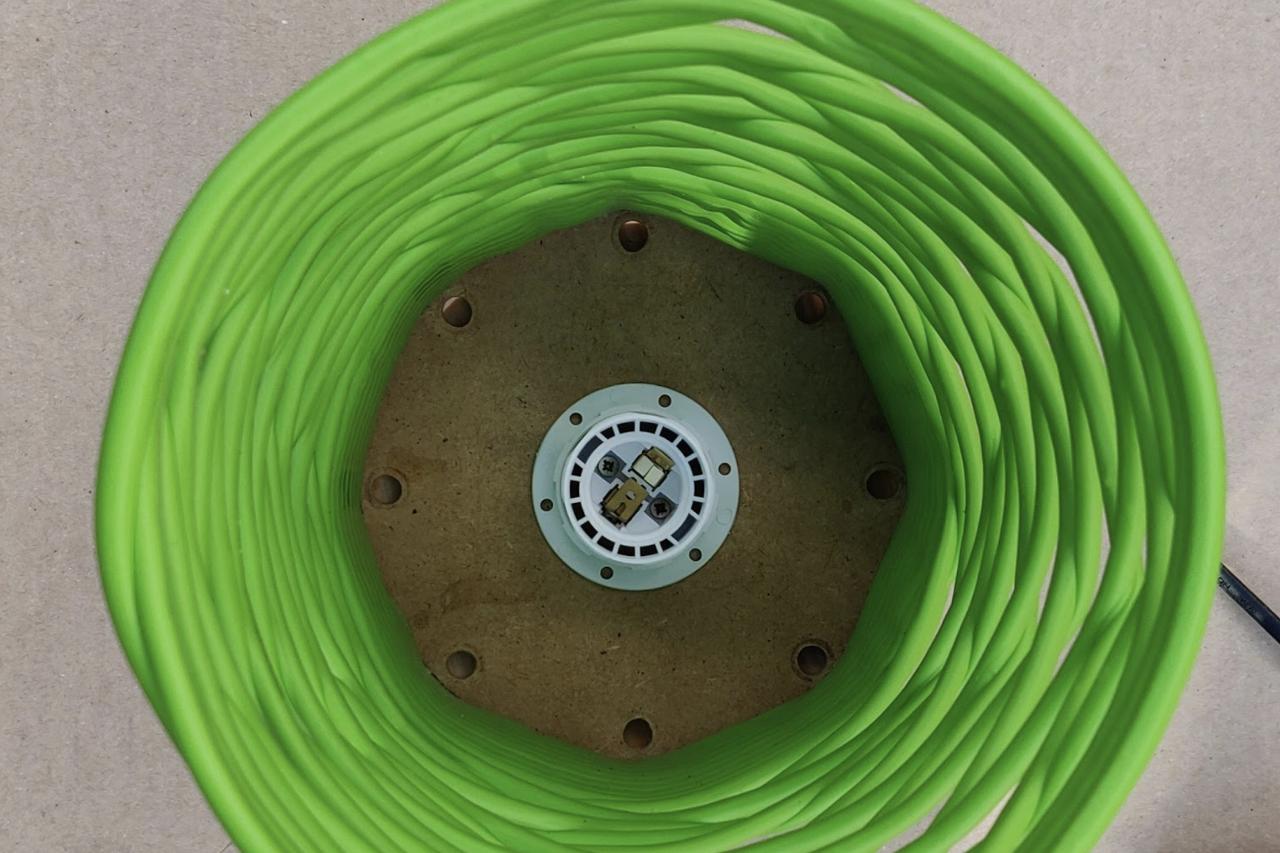
Now we’re left with the core of the lamp made of the wooden base plus the beautiful plastic patterns.
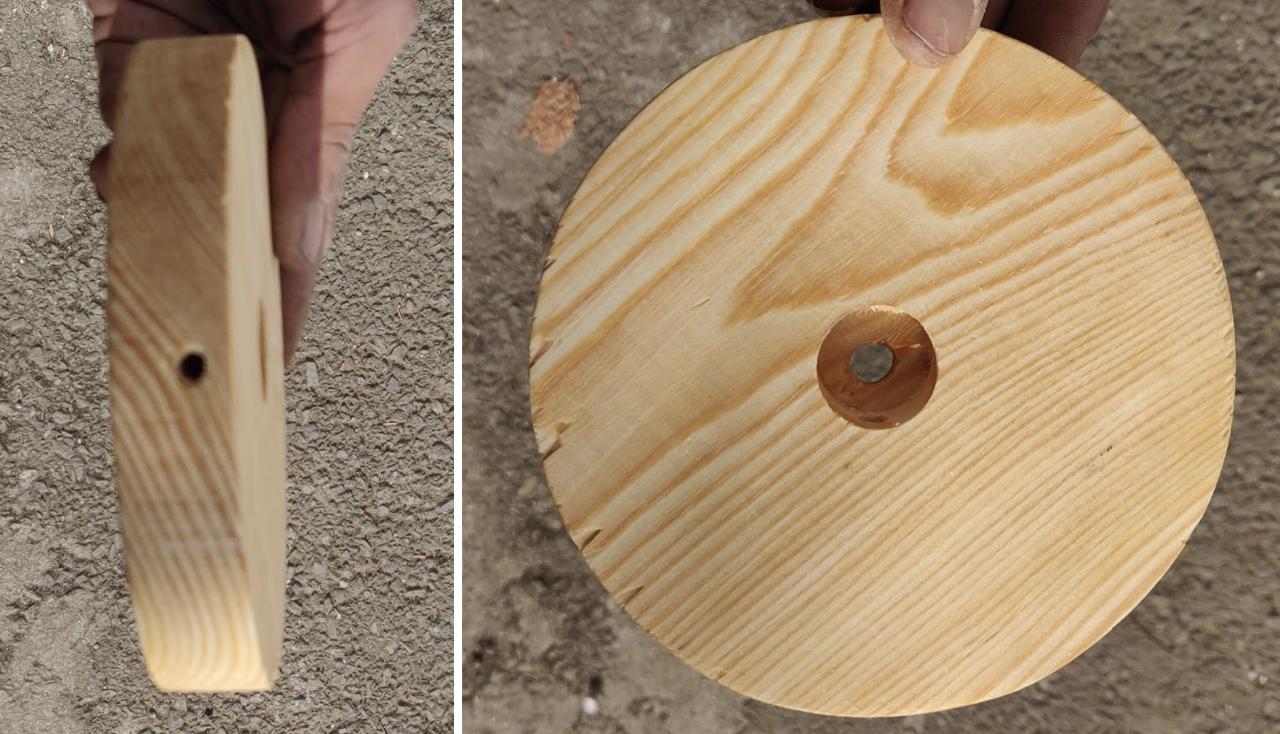
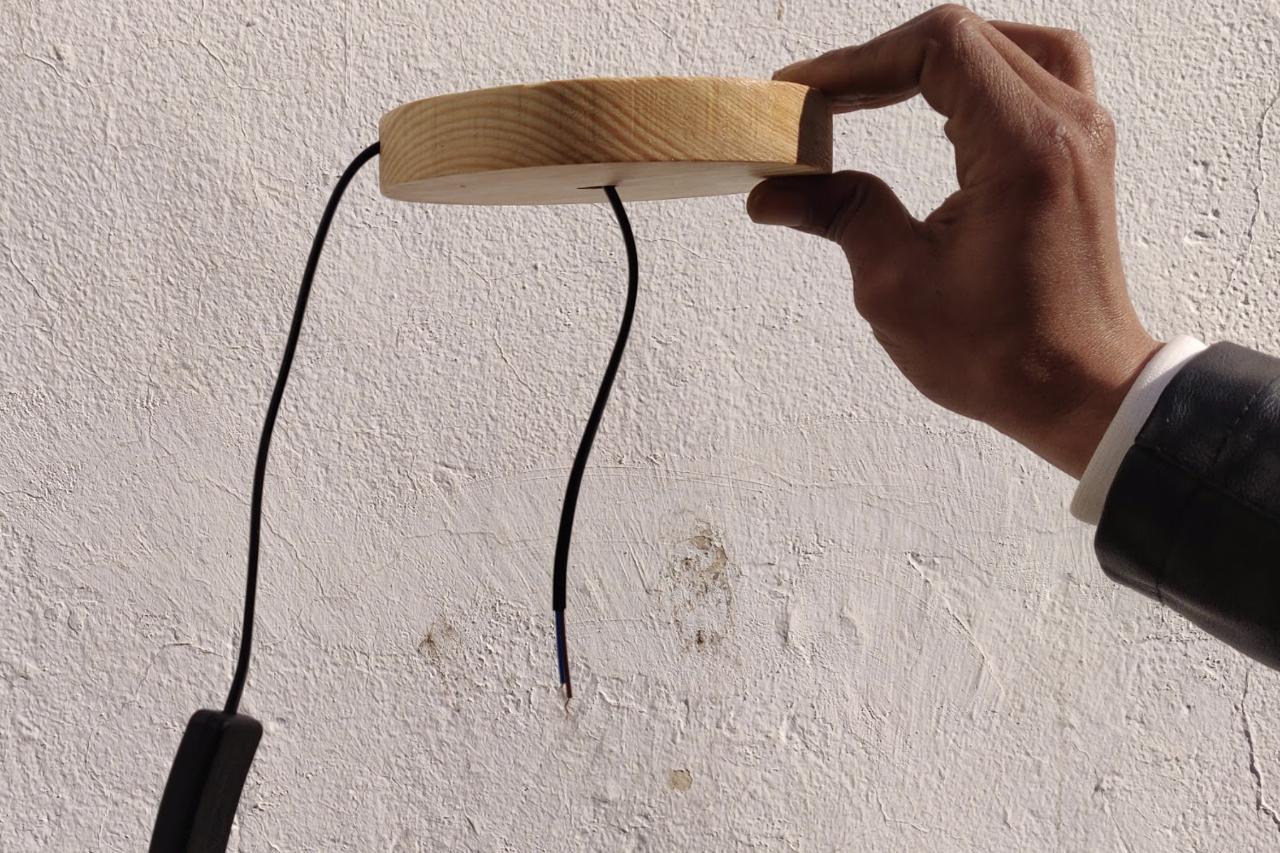
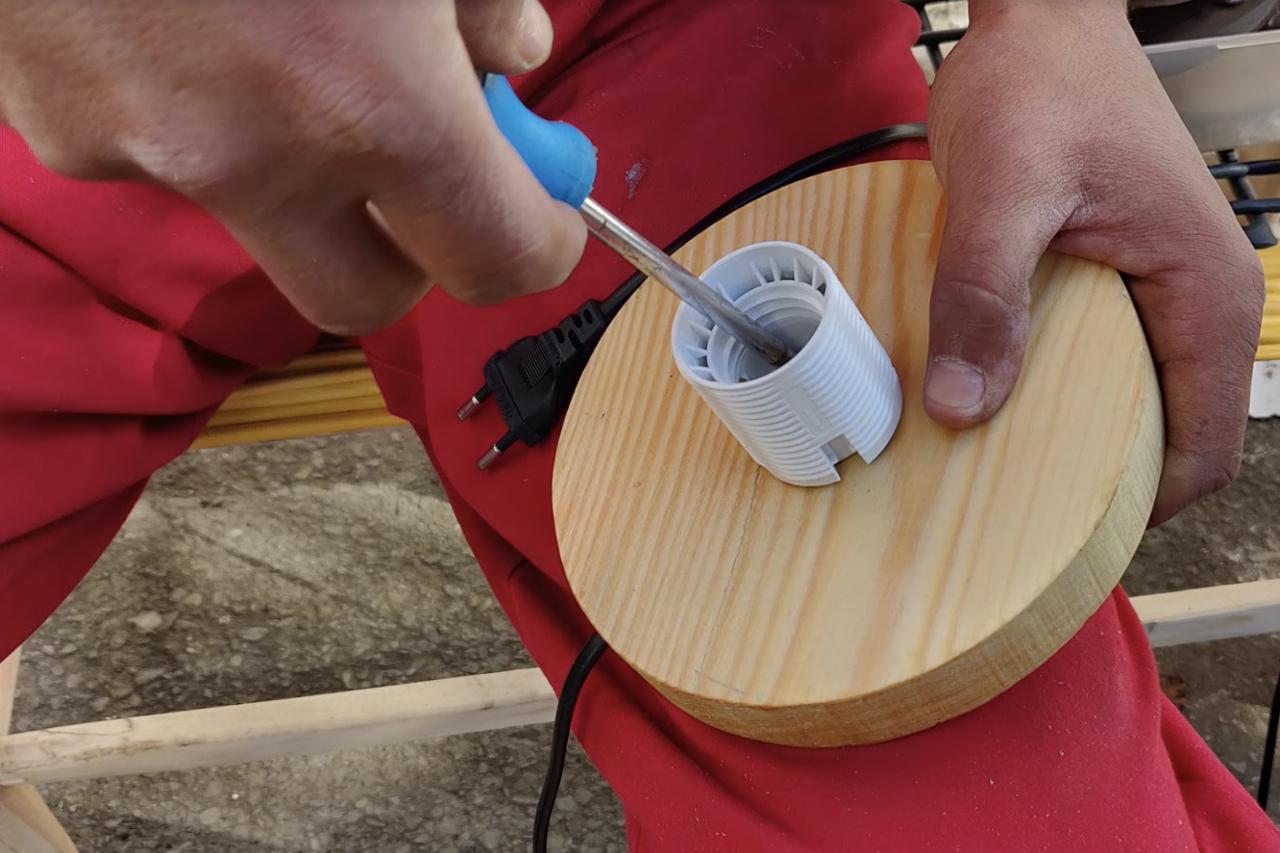
Step 10 - Electronic support
Let's make the lamp functional!
First, we make another wooden circle to support the cables and electronics. Drill two guides in the wood to allow the cables to stay in the right place.
Then get the cables through the holes and connect the socket to the wooden support.
First, we make another wooden circle to support the cables and electronics. Drill two guides in the wood to allow the cables to stay in the right place.
Then get the cables through the holes and connect the socket to the wooden support.

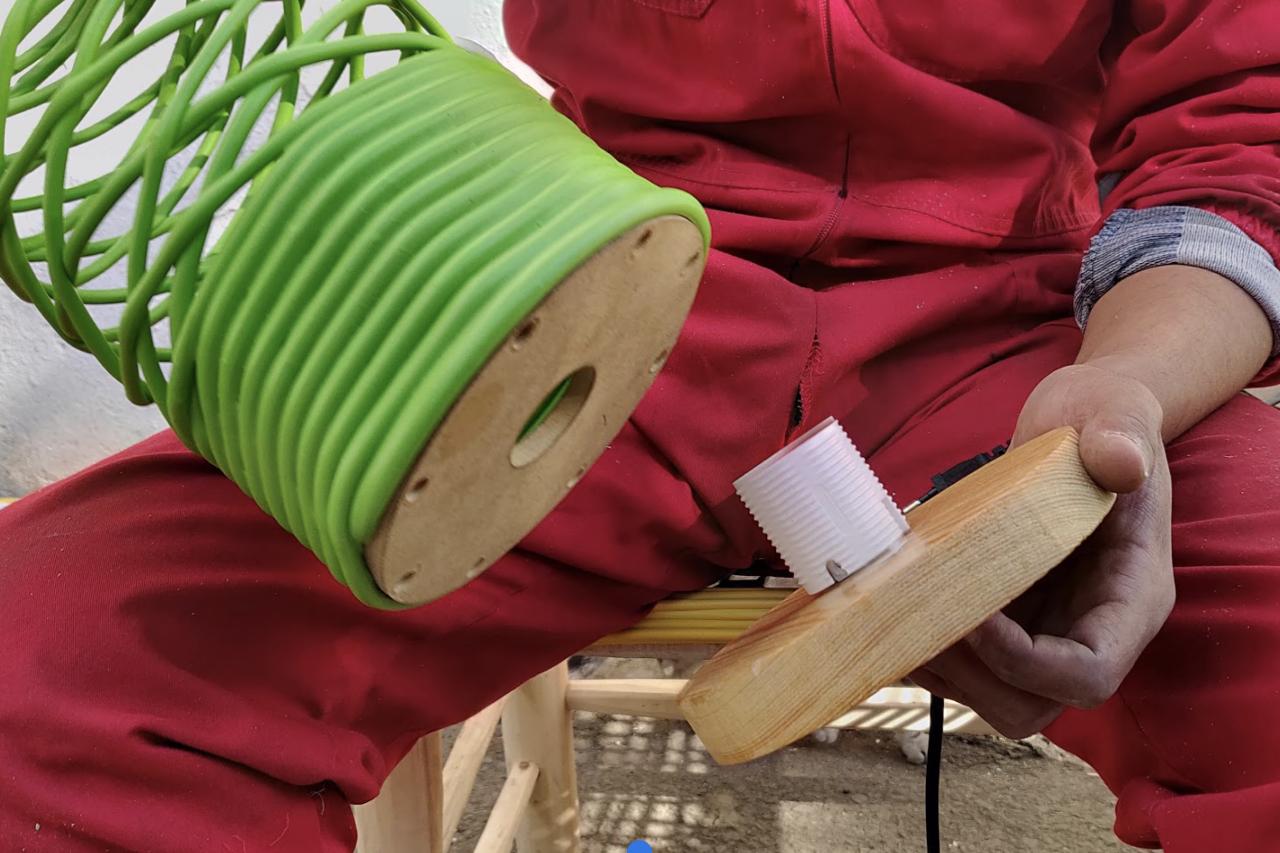
Step 11 - Connect it all
Time to connect it all together. Get the cable connector with the lamp and close it together.
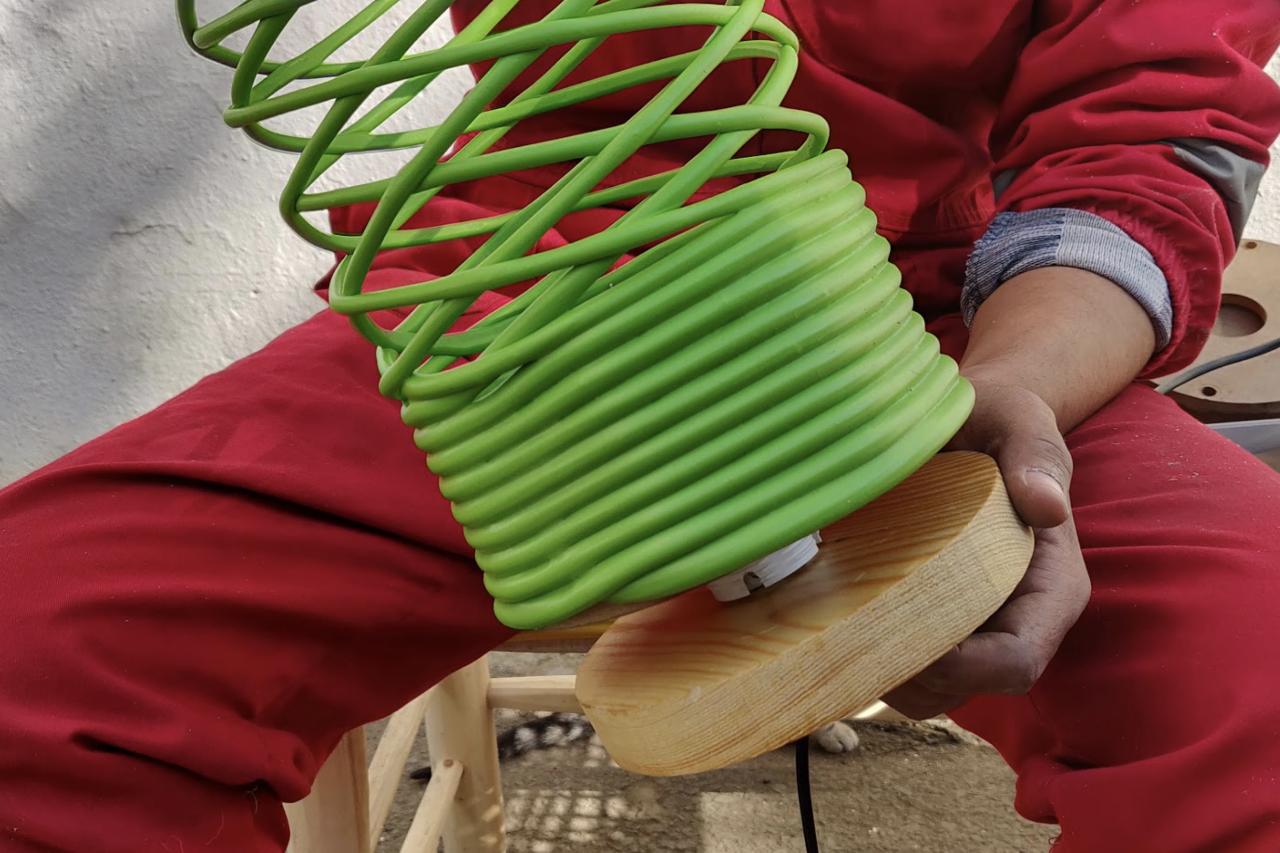
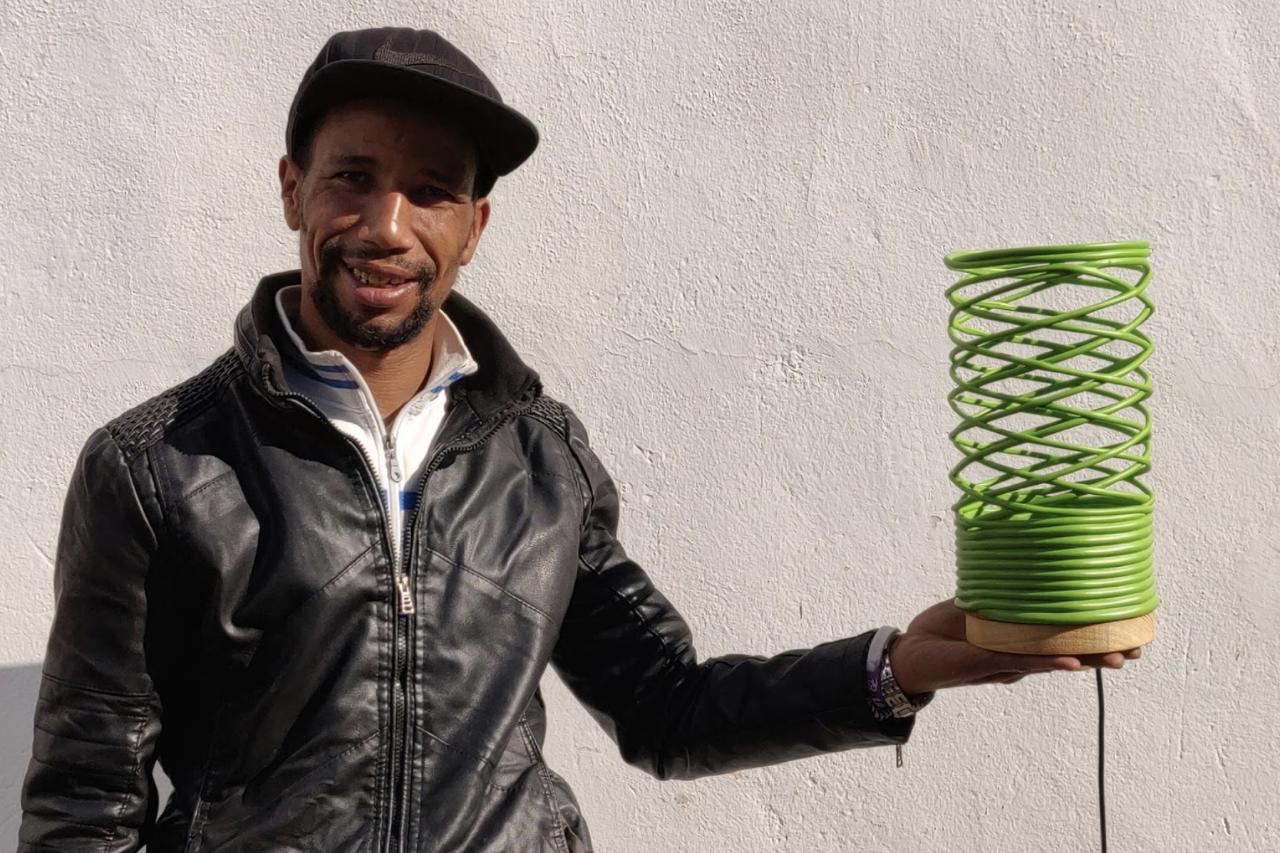
Step 12 - Finished!
And we're done :)
Lamp is ready to be sold or make your living room shine from recycled plastic!
Lamp is ready to be sold or make your living room shine from recycled plastic!
—
—
—
Comments