HDPE Dowel Nuts for Break Down Furniture
by OSR-Plastic
I use an induction stovetop to heat up a steel pipe and cast HDPE plastic to make threaded inserts (the Threaded Beavers). I enjoy making furniture out of pallet wood and dowel nuts are helpful to help create knock down joints. They don't make them larger than 1/2" in diameter.
—
Attachments
Resources
Step 1 - Obtain tools and materials
Tools to melt plastic:
Amazon induction plate: https://www.amazon.com/AmazonBasics-1800W-Portabl...
Cast Iron Pan: https://www.amazon.com/Lodge-Griddle-Pre-seasoned...
or stainless steel plate adapter: https://www.amazon.com/9-45inch-Diffuser-Stainles...
Propane torch: https://www.homedepot.com/p/Bernzomatic-WK2301-Pr...
Scrap conduit (1" Inner diameter)
Plastic Materials:
Milk jugs
construction hard hats
bottle caps.
Safety tools:
3M respirator
Safety glasses
Silicon Gloves: https://www.amazon.com/Gorilla-Grip-Silicone-Prof...
Wood for bench:
Laminated pallet wood for the legs
half lapped pallet wood for the backrest
3/4" pallet plywood
Step 2 - Cut up or shred the HDPE
I'm just getting started in recycling HDPE so I'm manually cutting up plastic with a scissors and some power tools. I think I may buy a cheap blender to shred the plastic into smaller pieces.
Step 3 - Melt HDPE
Melt the plastic using a ferrous/magnetic pan on an induction top. I set my temperature to 400 degrees F and it seems to melt quickly.
I had a scrap cylinder of steel which I was also able to heat up on the induction plate and it helped with rolling out the plastic into a sheet.
See the video link here at ~3:00 mark where I start melting plastic.
I had a scrap cylinder of steel which I was also able to heat up on the induction plate and it helped with rolling out the plastic into a sheet.
See the video link here at ~3:00 mark where I start melting plastic.
Step 4 - CAST HDPE
I heated up a conduit/steel pipe (1" interior diameter) placed it on a hot piece of metal, then I slowly added the melted HDPE into the pipe. I used a spare bolt to shove more plastic in and would heat up the pipe if I thought it cooled to much.
After filling the pipe, I use a clamp and some 1" diameter plywood in the conduit to really get high compression in the conduit. I'm trying to keep the density of this HDPE as high as possible.
After clamping, the HDPE will tend to shrink so I'll tighten the clamps as the plastic & pipe cools.
Adding smaller pieces and compressing down frequently seem to get the best results but I haven't mastered this process yet.
Step 5 - Cut, Drill, & Tap the HDPE
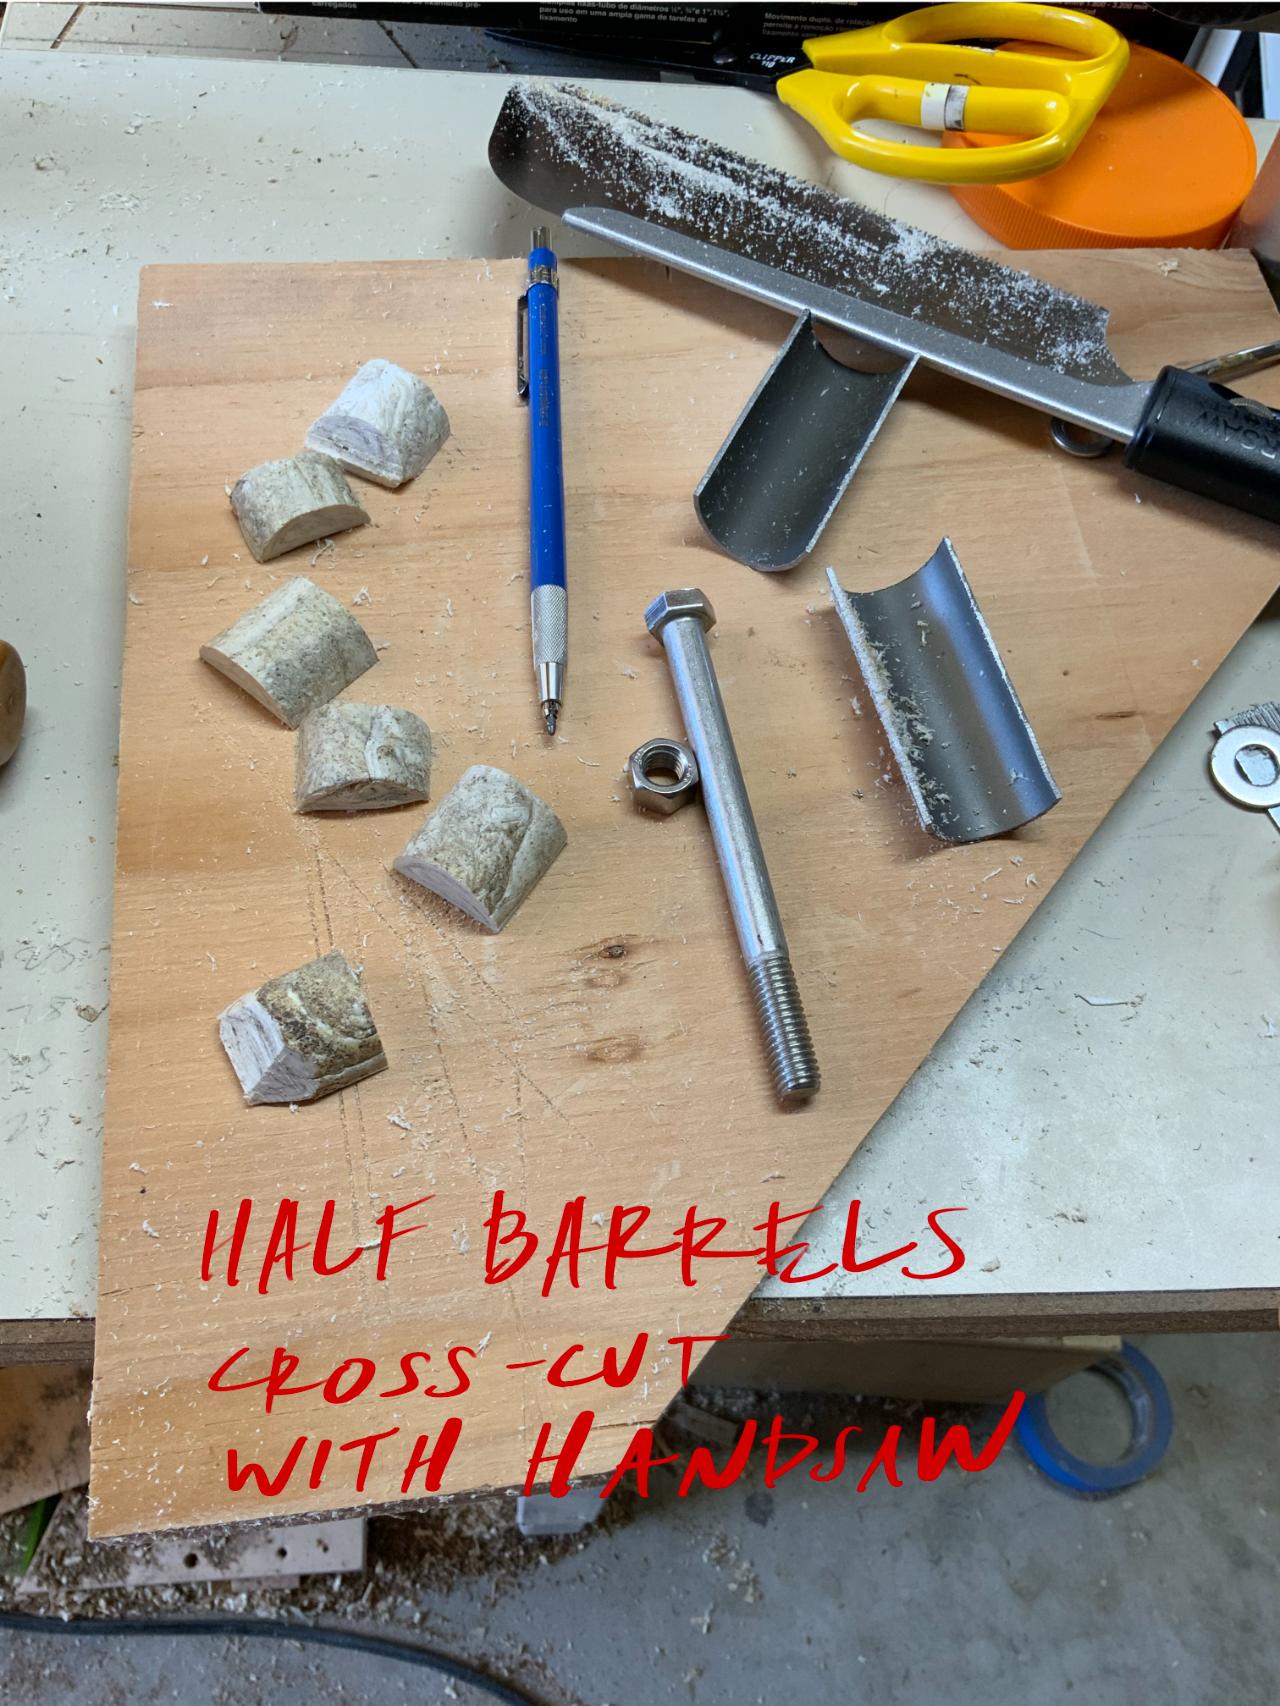
After the HDPE cools inside the conduit/pipe, I found it to be easy to remove the casted plastic. I ended up cutting into 1" long cylinder with a handsaw then cut the cylinder in half.
I drilled a hole into the center, and tapped the hole using a 3/8" x 16 N.C. tap and followed the tap with the actual bolt I used.
To make the bolt easier to enter the hole, I also used a countersink at the bolt entrance holes.
One of the surprising discoveries to me was how strong the thread held. Even using my impact driver, I didn't seem to strip the thread. I also installed some bolts adding a nut on the flat side of the Threaded Beaver and I'll check the differences as the temperature changes.

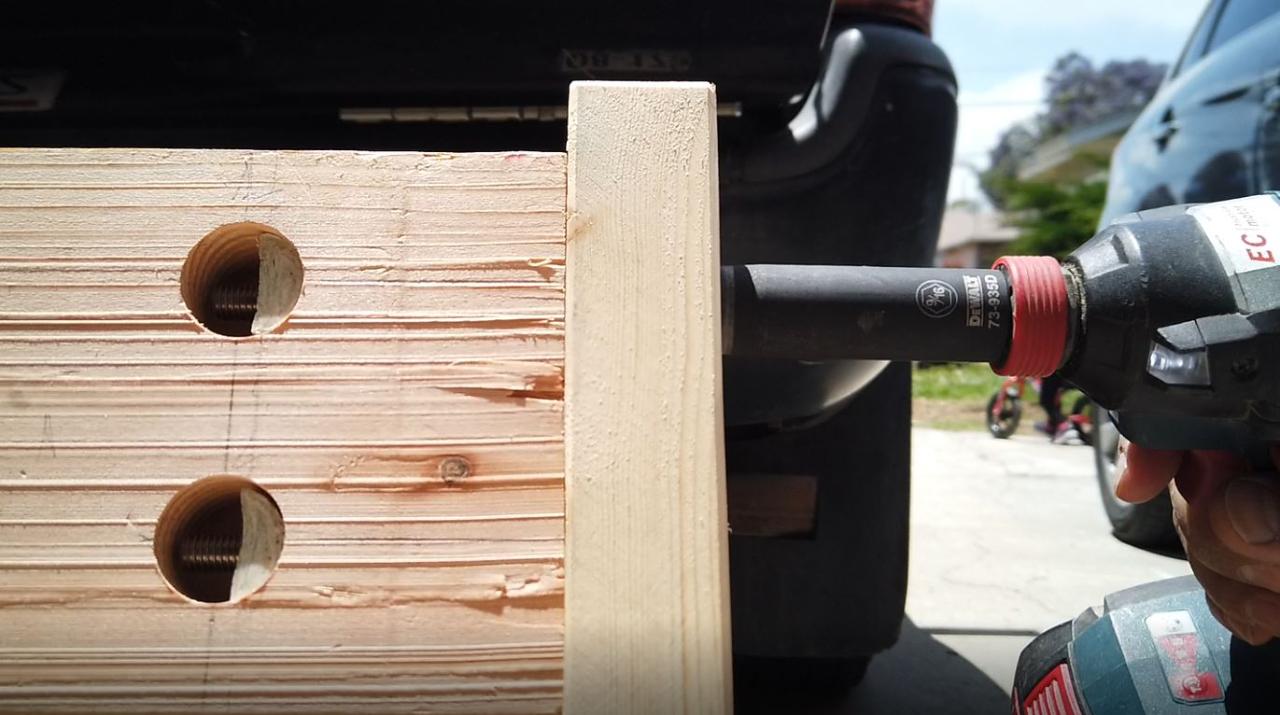
Step 6 - Use the Threaded Beavers
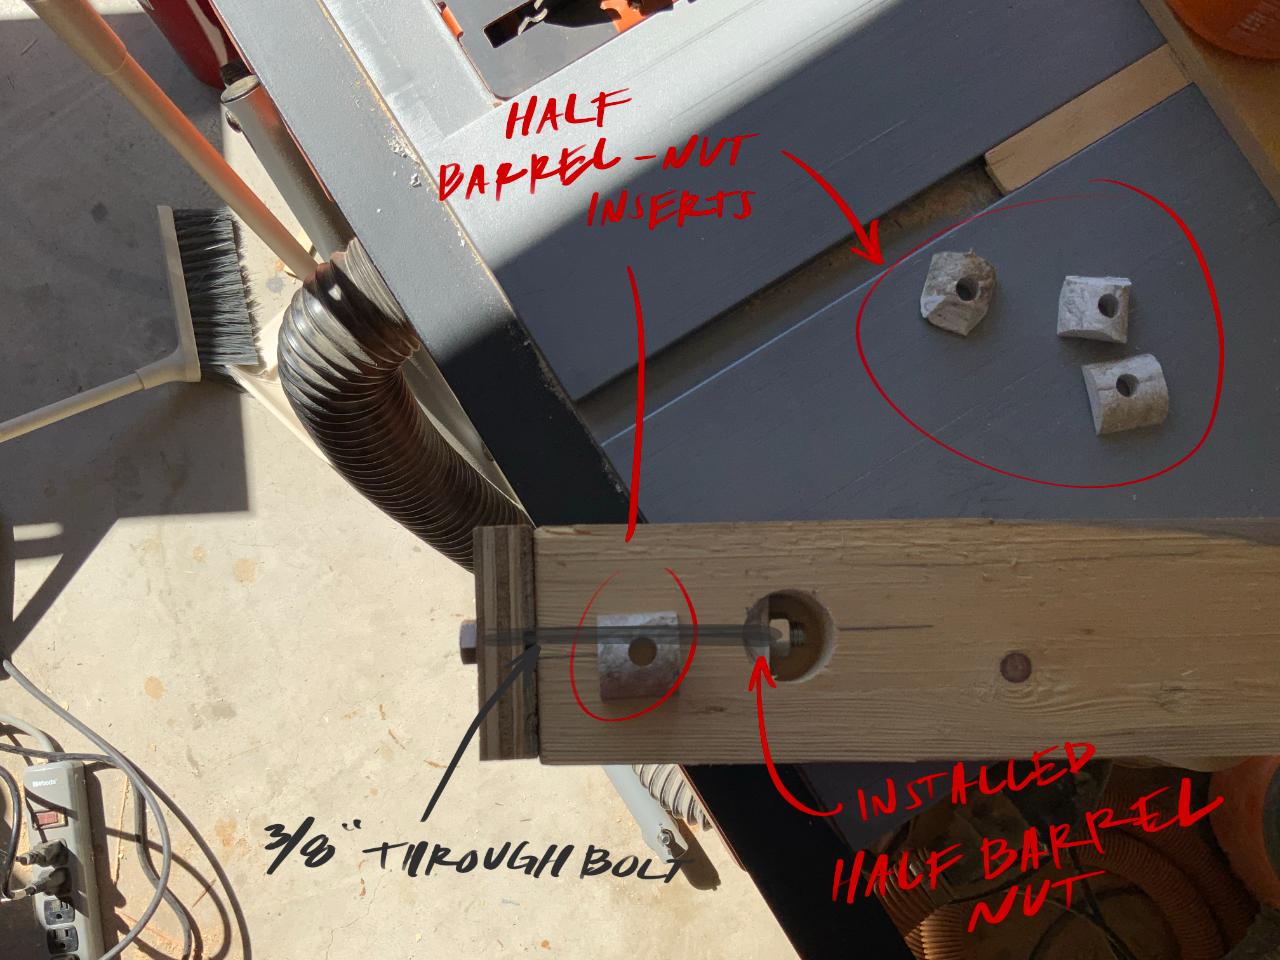
Since I was in prototype mode, I measured roughly where the threaded beaver was going to go and used a 1" forstener bit to make a 1" diameter mortise into the stretcher piece of wood. Using a 7/16" longer drill bit, I drilled into the end grain roughly in the center of the stretcher.
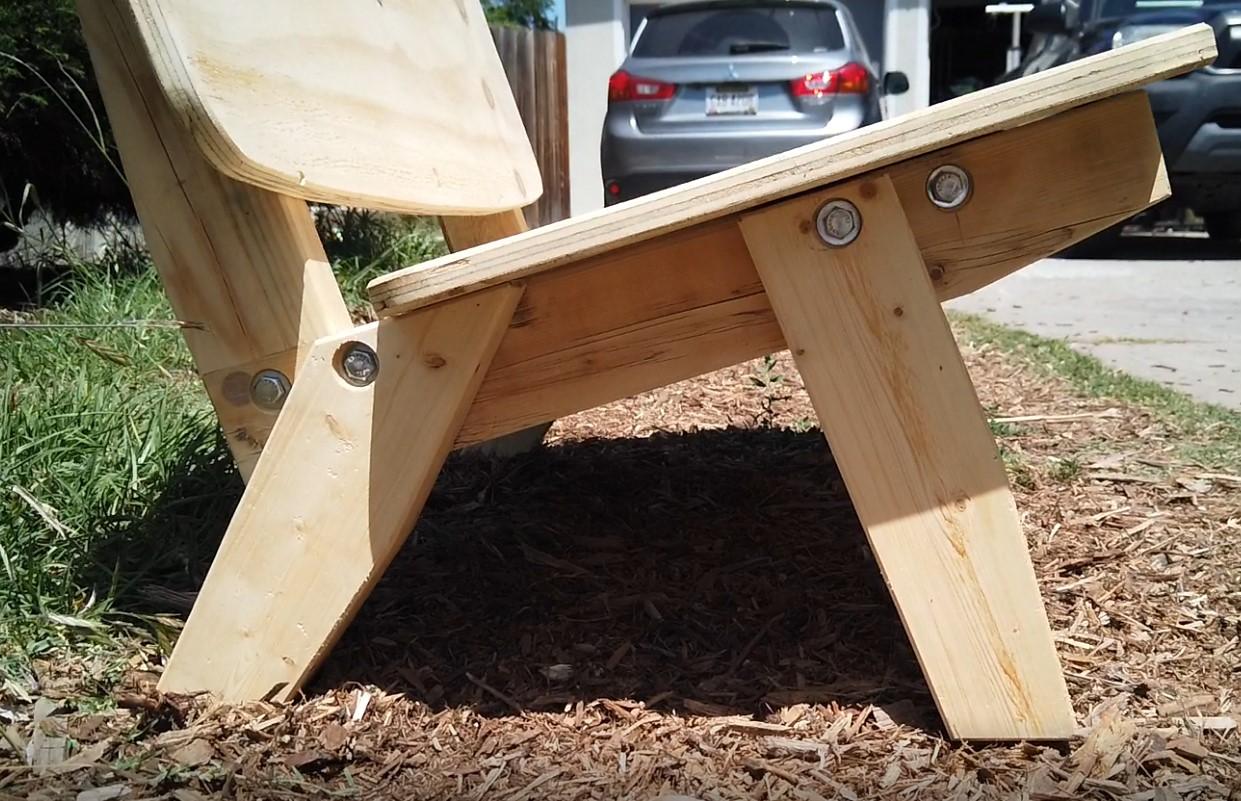
For 2x wood getting connected to the stretcher piece of wood, I countersunk a hole for the hex head bolt and washer to sit nicely in. This is not necessary but I thought it make this bench look a little bit higher end.
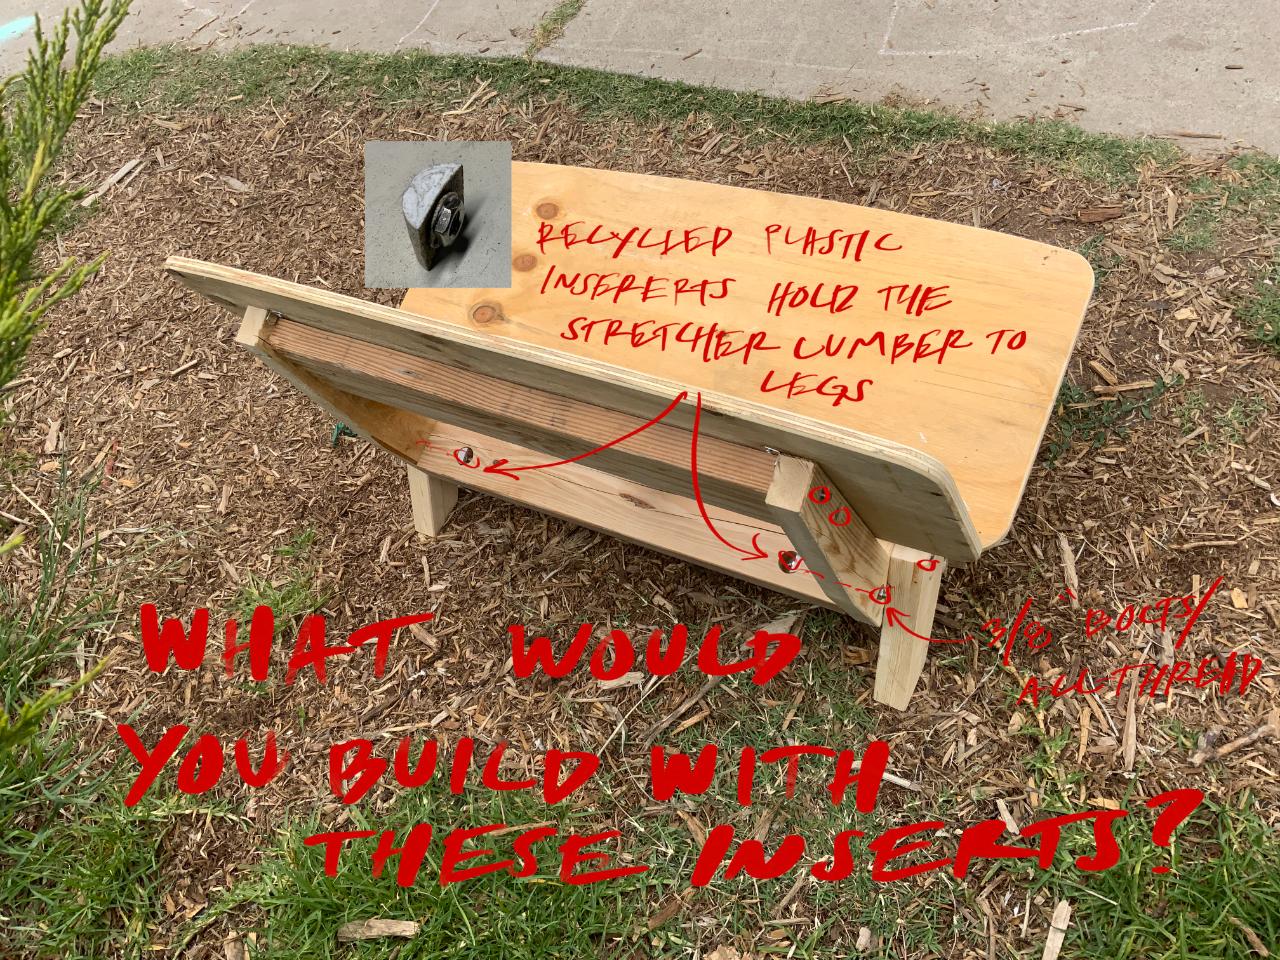
This bench structure I made was really just the bones of my bench, I cut some plywood for the seat and back rest which covers the structure.
For 2x wood getting connected to the stretcher piece of wood, I countersunk a hole for the hex head bolt and washer to sit nicely in. This is not necessary but I thought it make this bench look a little bit higher end.
This bench structure I made was really just the bones of my bench, I cut some plywood for the seat and back rest which covers the structure.
Step 7 - Help me!
Please give me suggestions and comments as I'm just starting to build with recycled HDPE. I'd like to focus on using cheap or readily available tools like an induction top to process the material.
Thank you for reading and I hope that you can learn something from my current process.
Thank you for reading and I hope that you can learn something from my current process.
—
—
—
Comments