Make beam jewelry / key rings
This how to explain the simple process of polishing a piece of PS BEAMS to a shining and beautiful jewelry or key ring! You will need for this a machine to cut slice of the beames and then different polishing grains. It is better to have an electric polishing machine.. you will get better result with the transparency and the shine :-)
—
Attachments
Resources
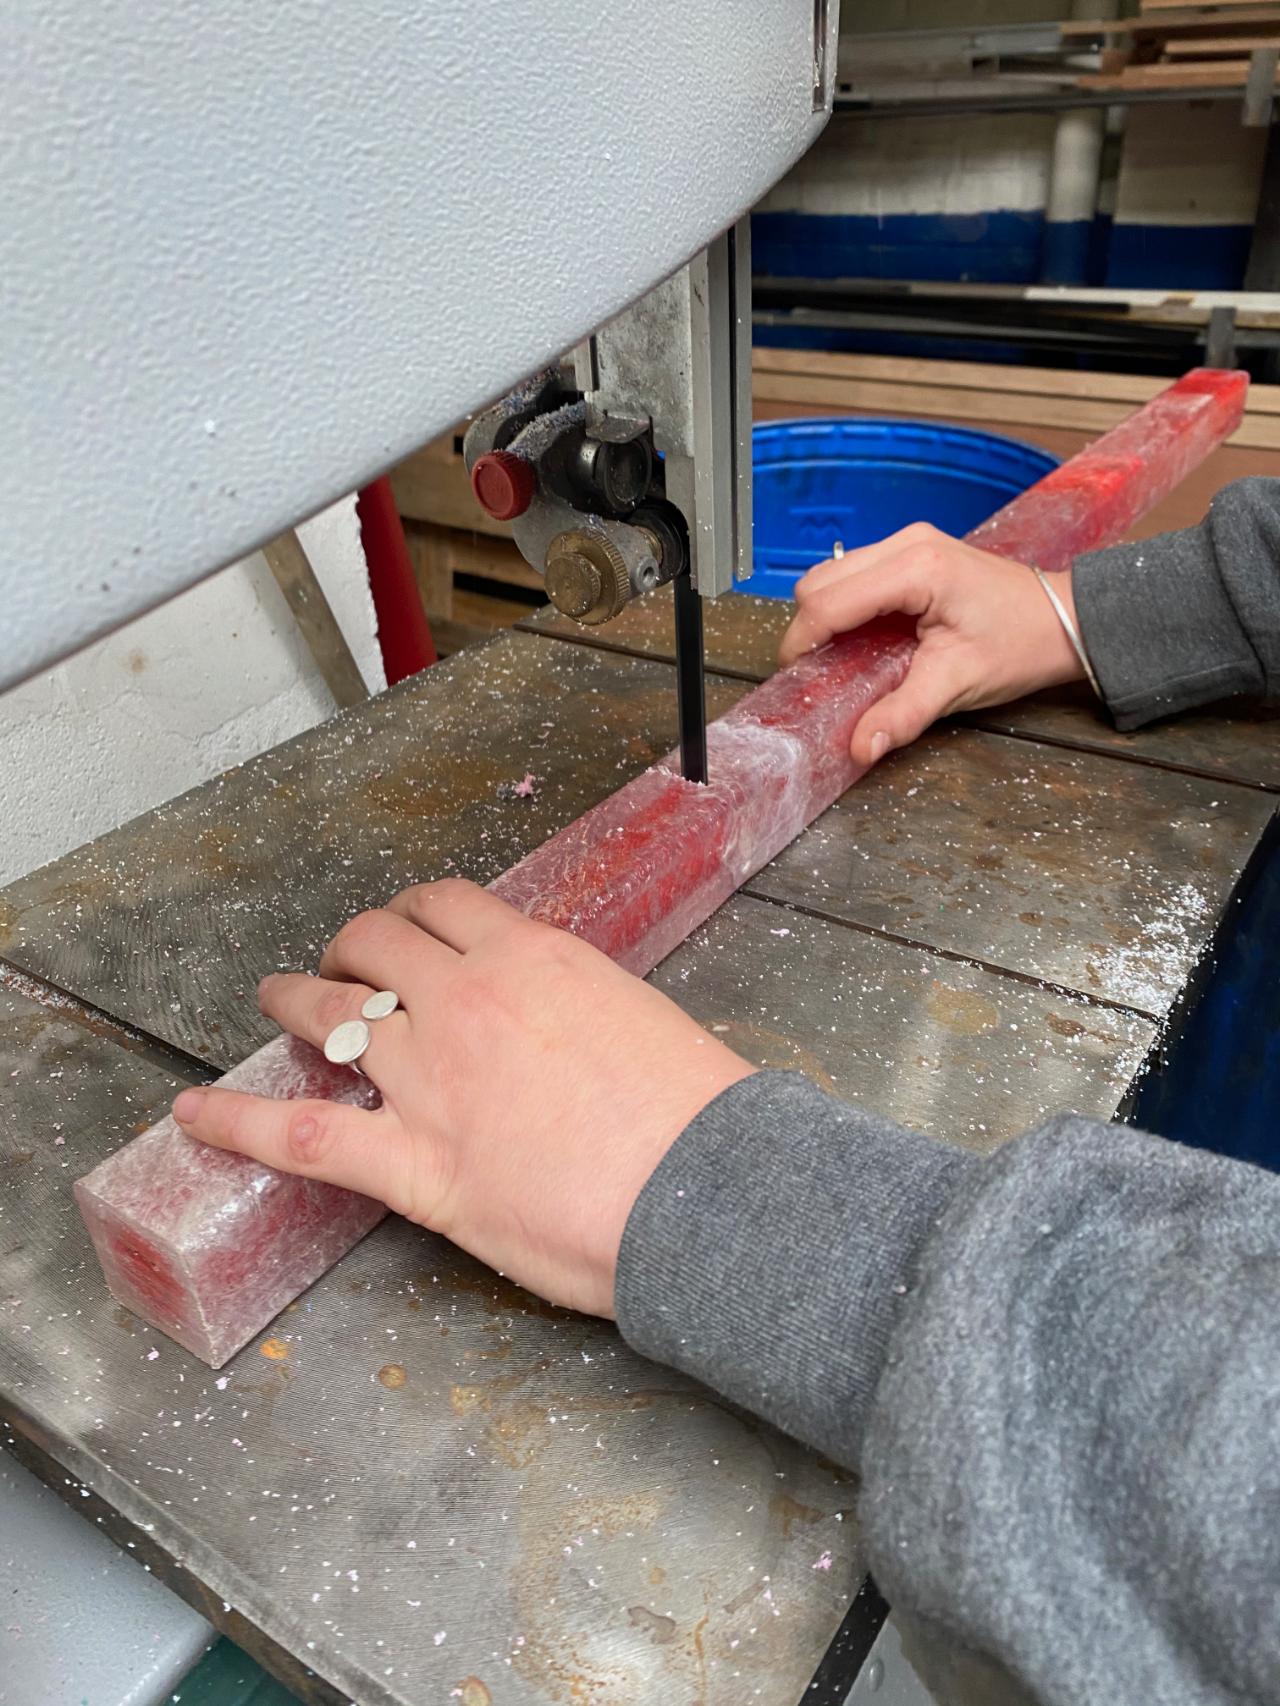
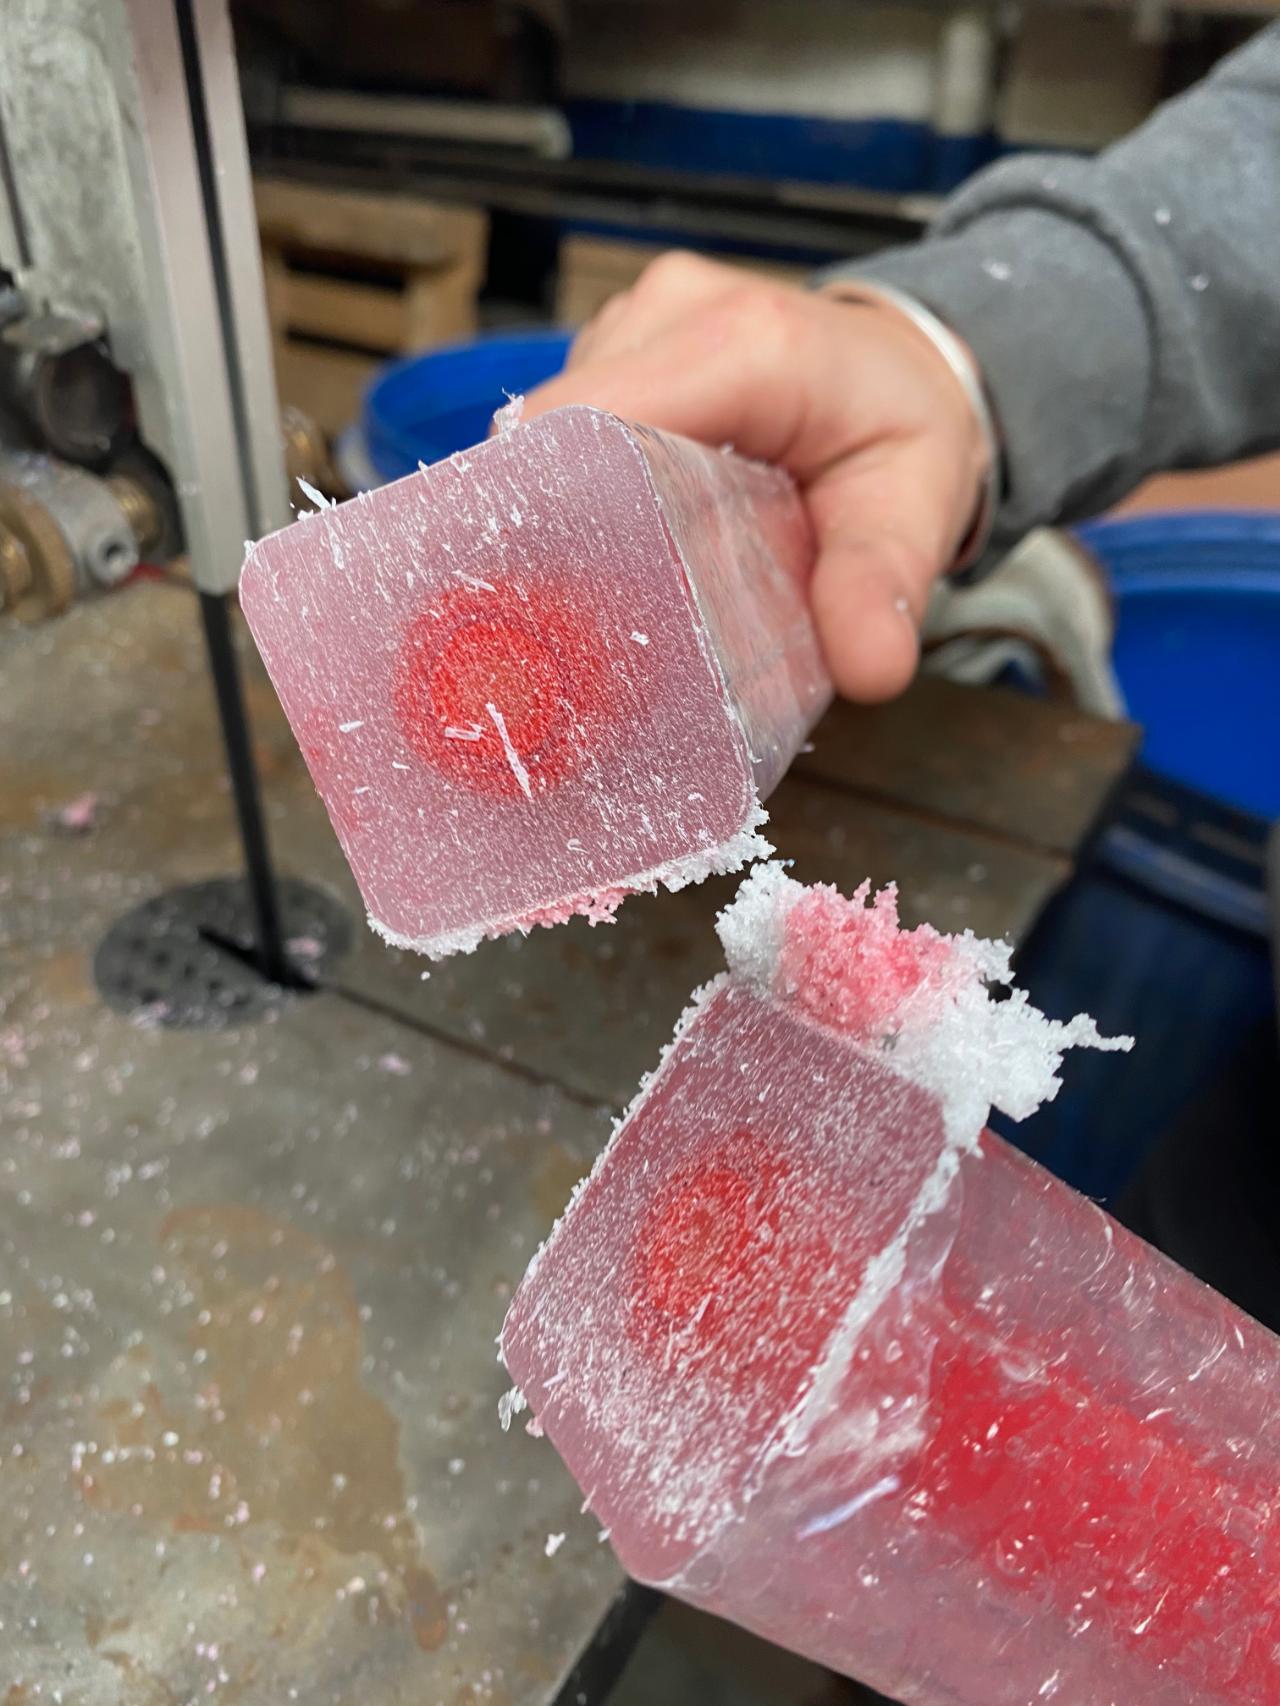
Step 1 - Cut the beames
The first step is to cut the beams, you can cut slices or little blocks as you want. Slices are better for earrings or necklaces and little blocks are better for key ring. Be sure to cut a slice a little thicker than the desired final thickness because when you polish it will become thinner.

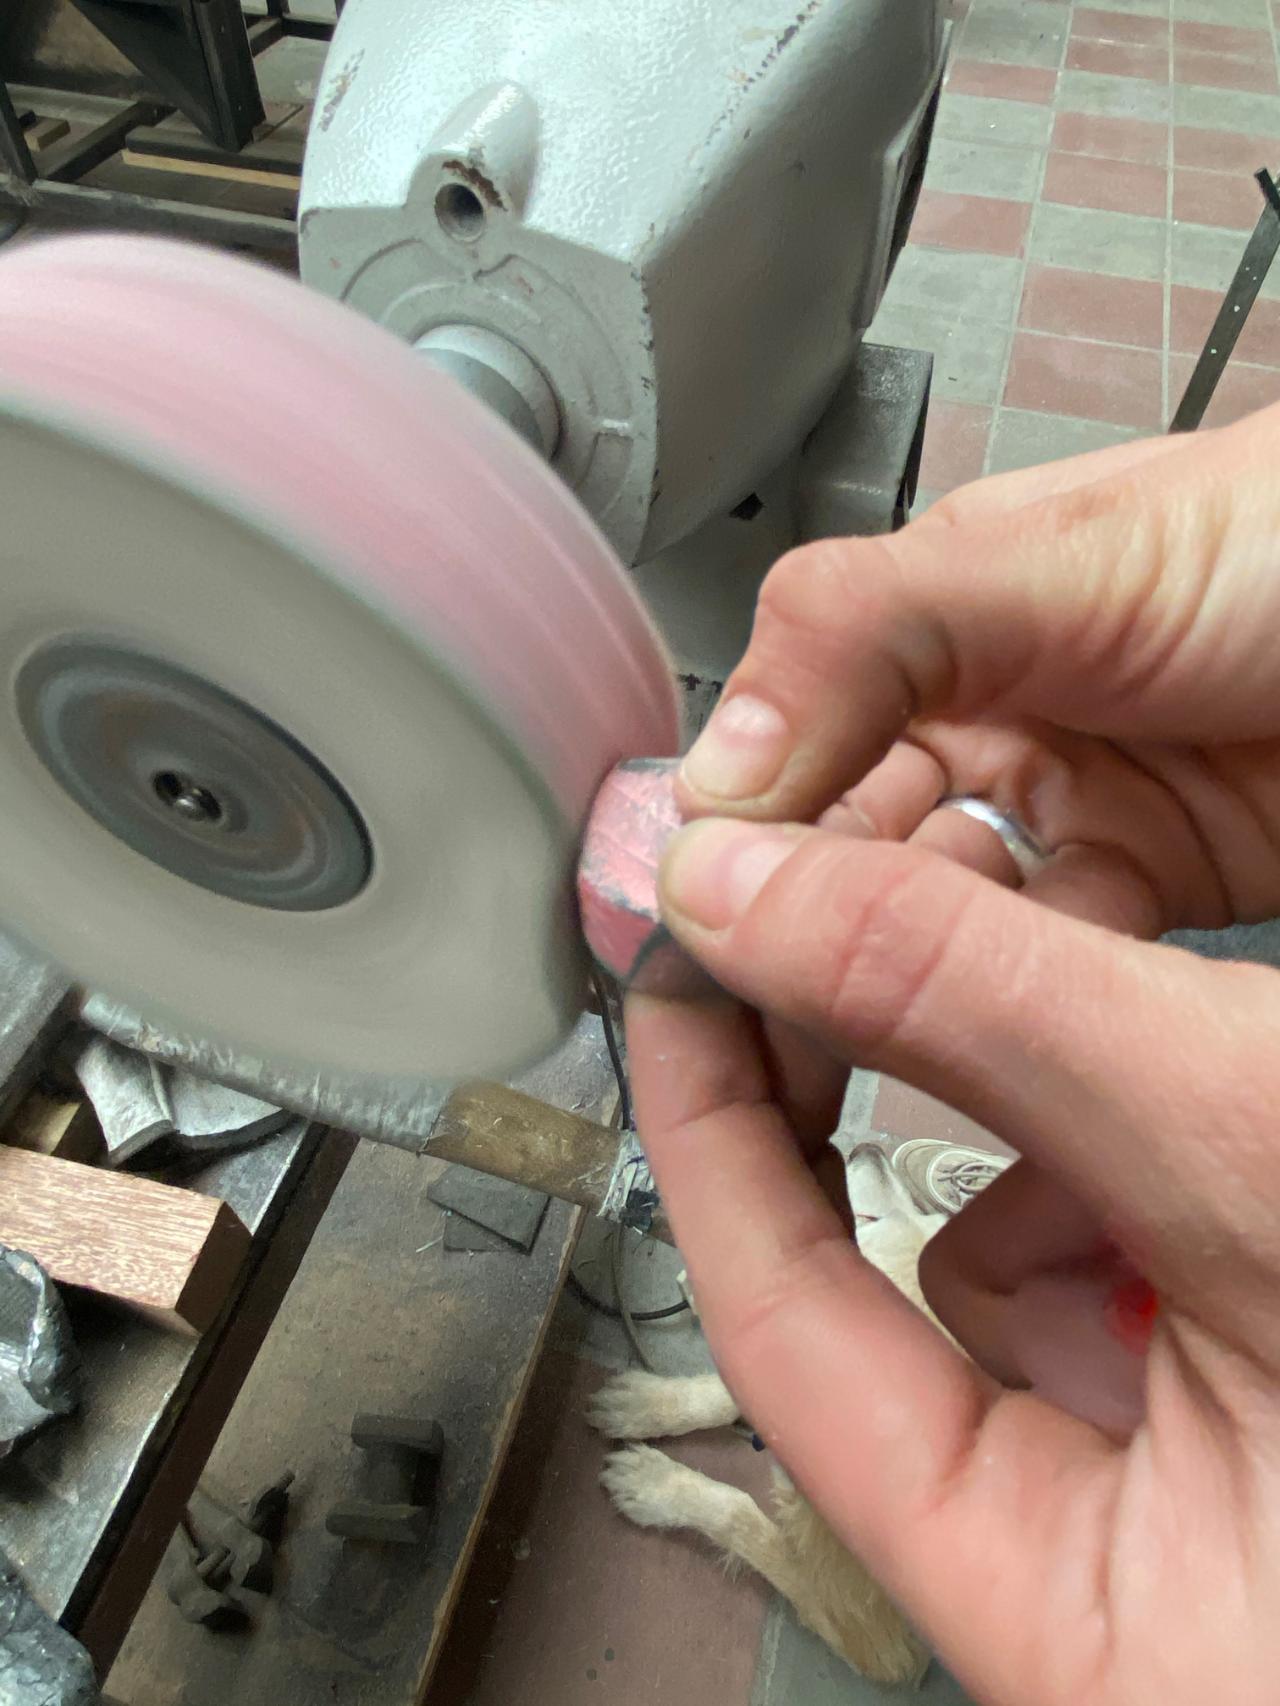
Step 2 - Sculpt the slice
Step 2 will be to sculpt the slice to obtain the desired shape. You can sculpt it with an electric polishing machine or with different idea, it is up to you :-) I will sculpt it in a round shape to do earrings.

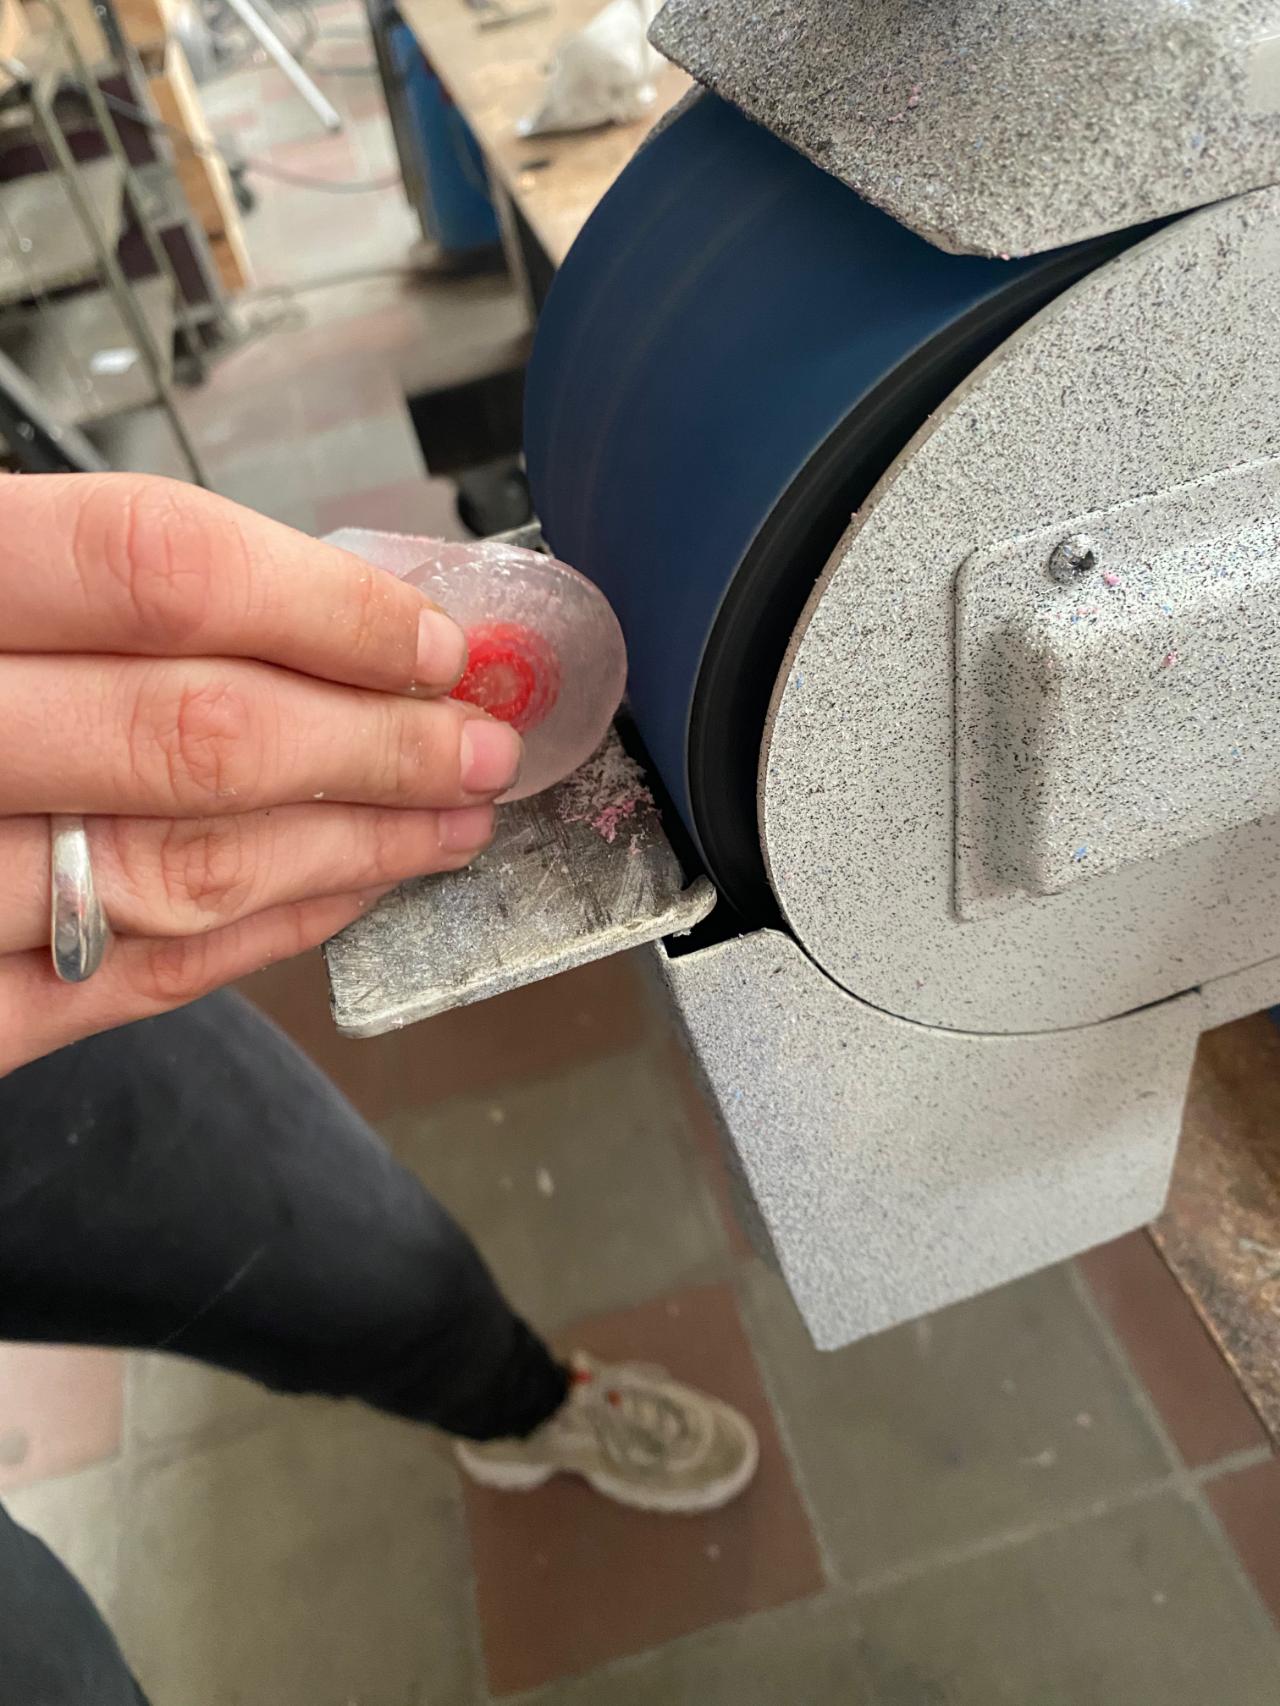

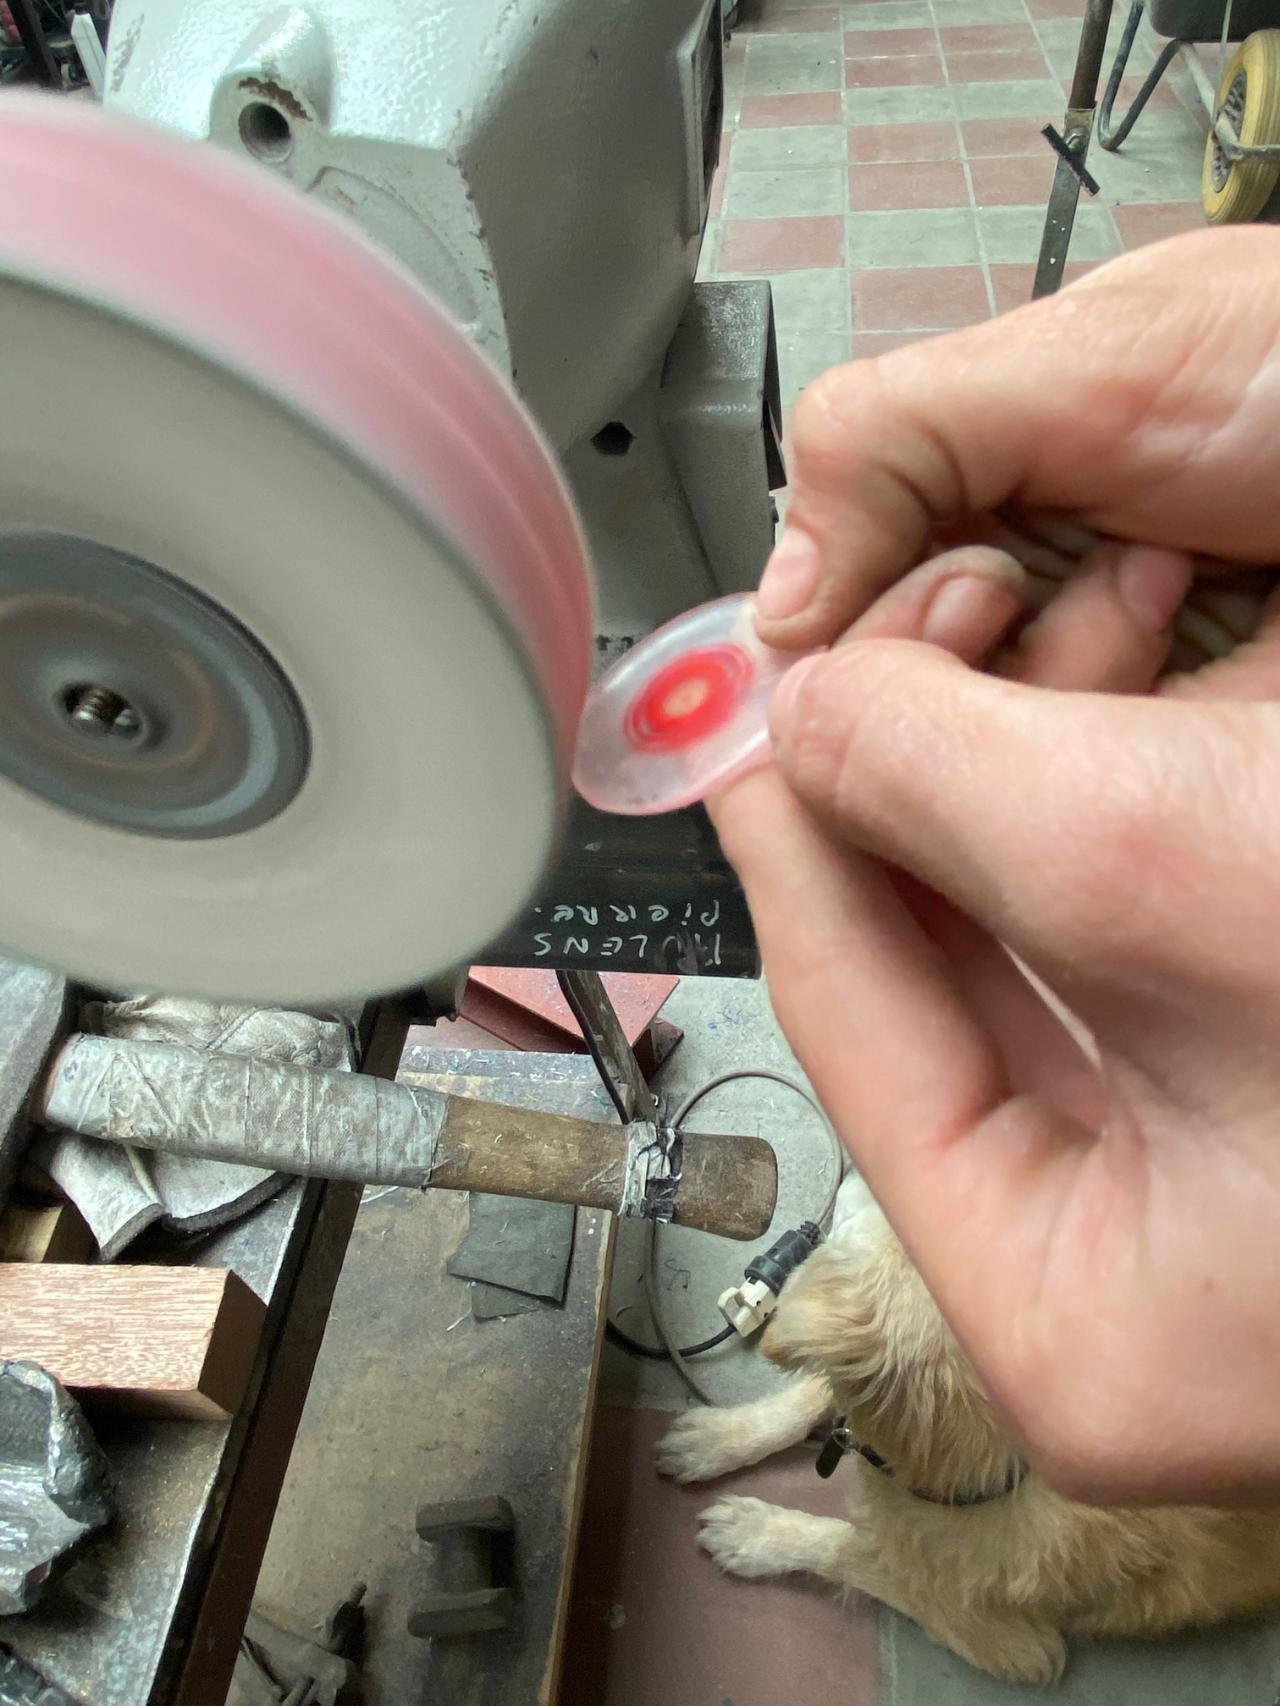
Step 3 - Polishing step
Now that you have your shape, you can start polish it. Make sure you start with the thickest grain and end with the finer grain. The thinner it is, the smoother and more transparent the surface will become. Dont forget to do polish the edges as well so that they are rounded and soft to the touch


Step 4 - Finishes step
Ok now you have your little pebble smooth to the touch and almost transparent and shining. The last step is to polish it with cotton, so for that you will have to use patinas on your cotton. it will give you a great shining and a perfect transparency.
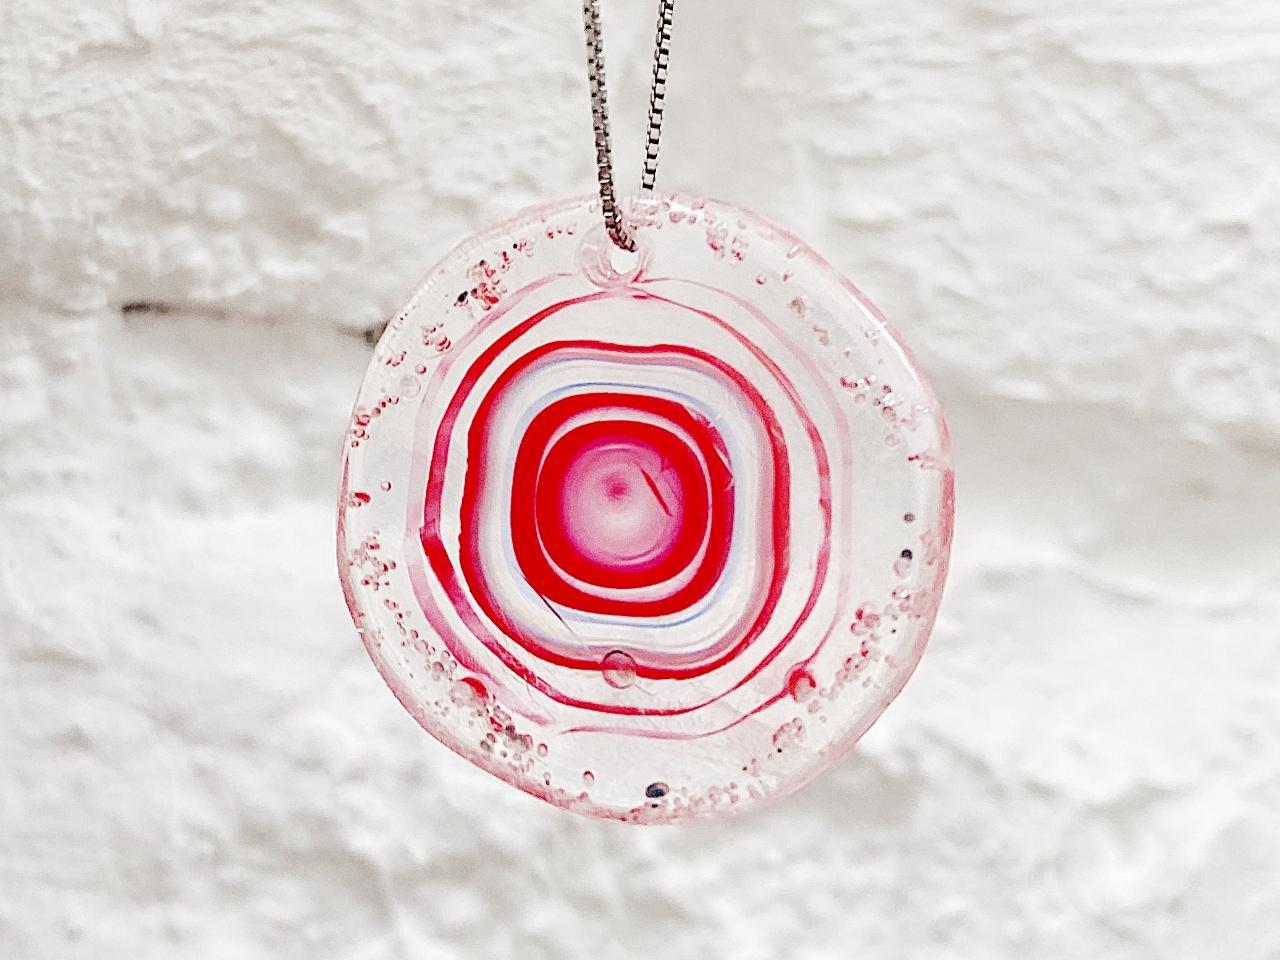
You have now your earrings (or necklace or key ring) ends!
All you have to do next is make small holes in it to pass your accessories, I use a screwdriver with a small metal bit.
You have now your earrings (or necklace or key ring) ends!
All you have to do next is make small holes in it to pass your accessories, I use a screwdriver with a small metal bit.

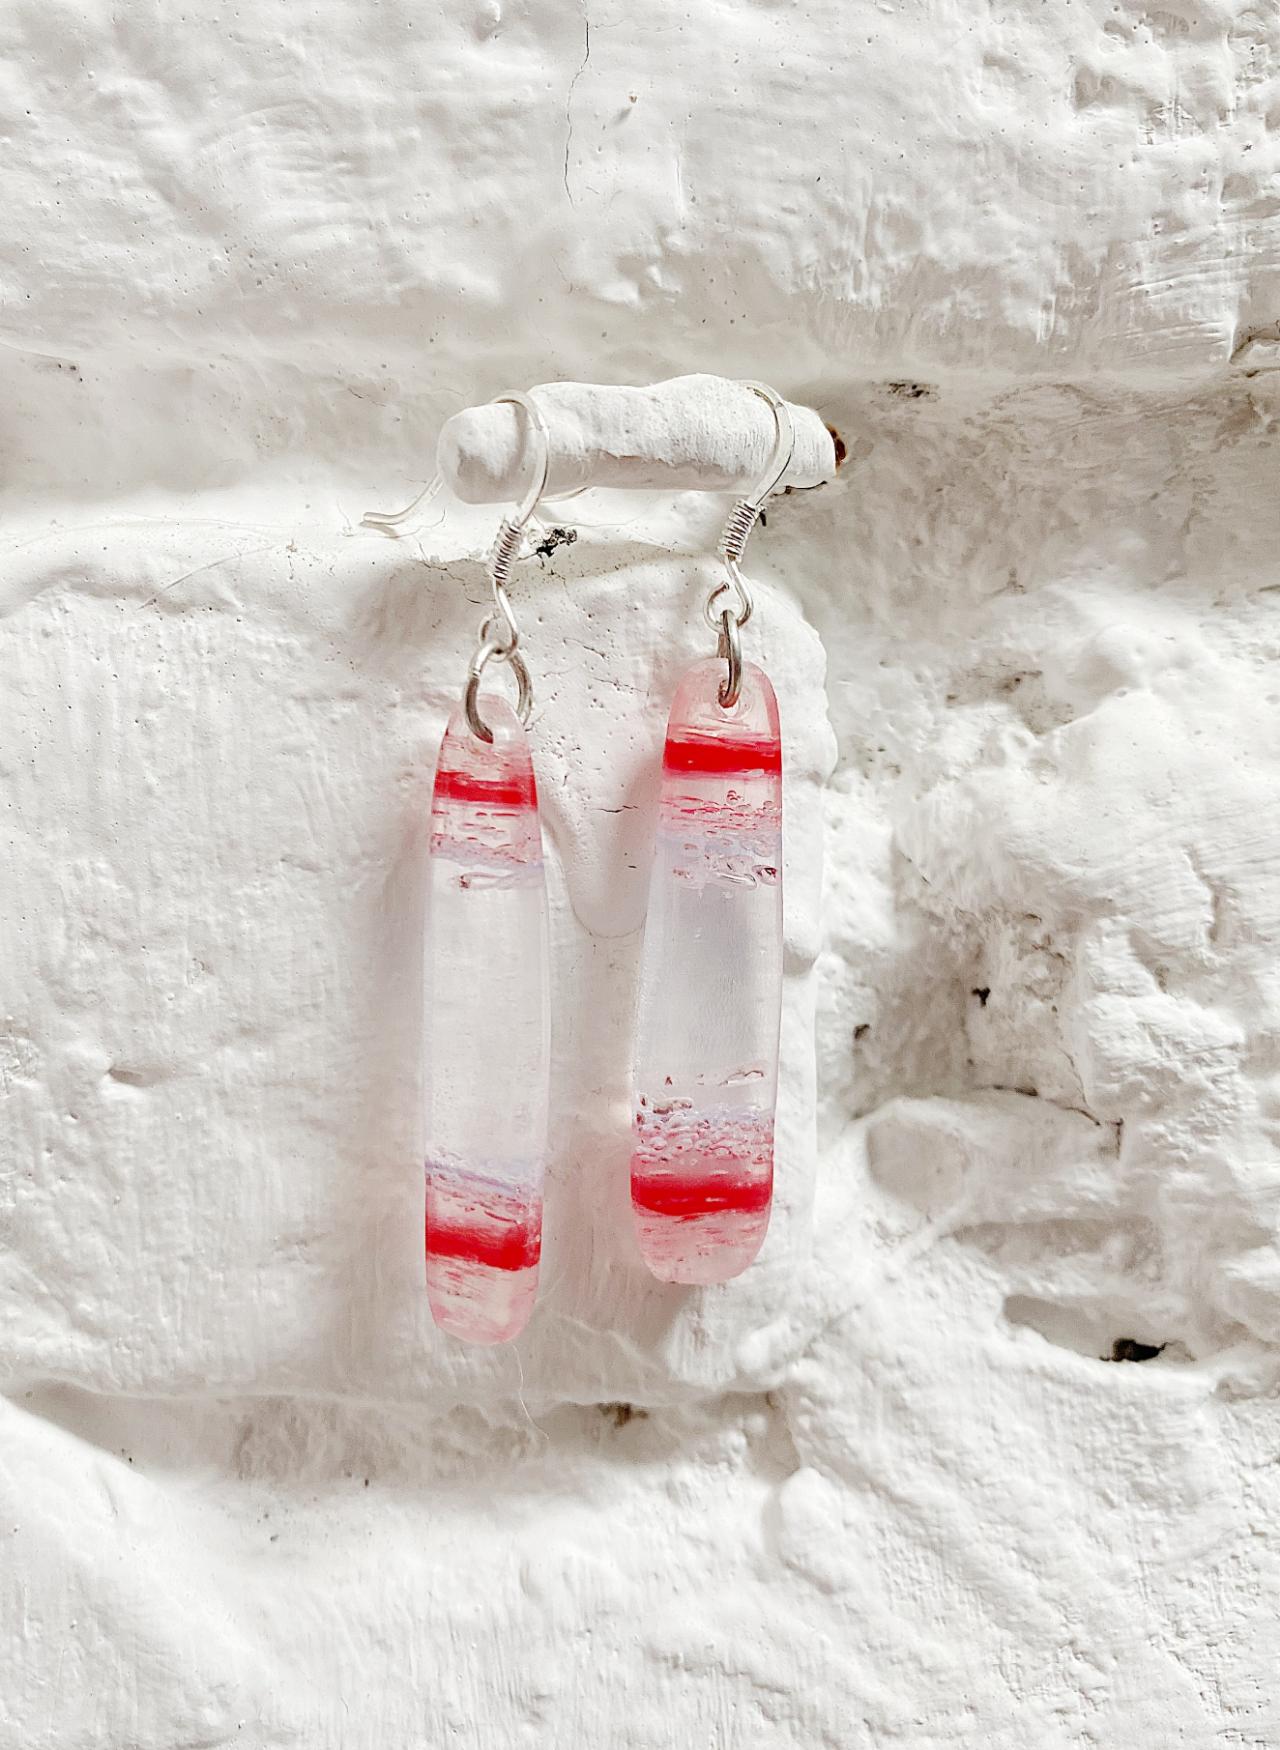
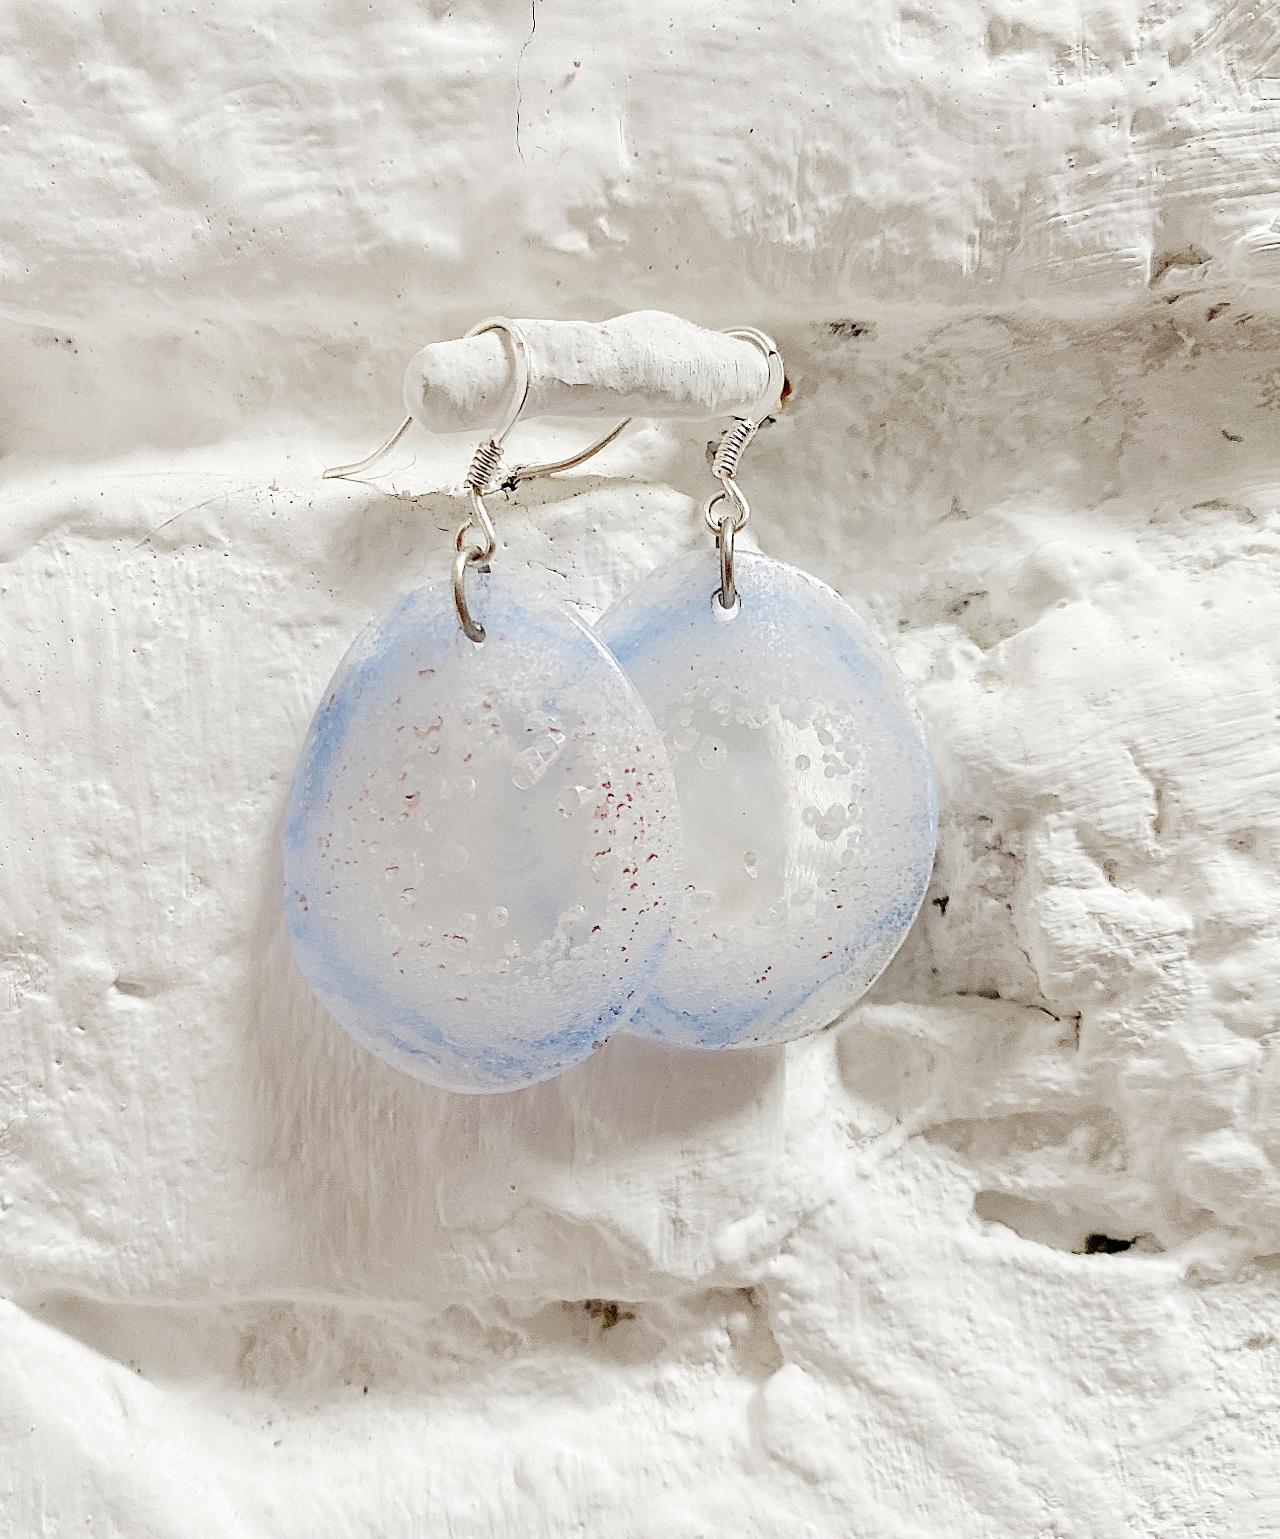
Step 5 - Final result
This if a few exemple of what you can do and how it will look when its completely done :-)

—
—
—
Comments