Add interchangable patterns to injection moulds

Using lasercut, cnc milled or handmade plates you can add interchangable text or patterns to injection mould products. Add plastic types or logo's to the products.
—
Attachments
Resources
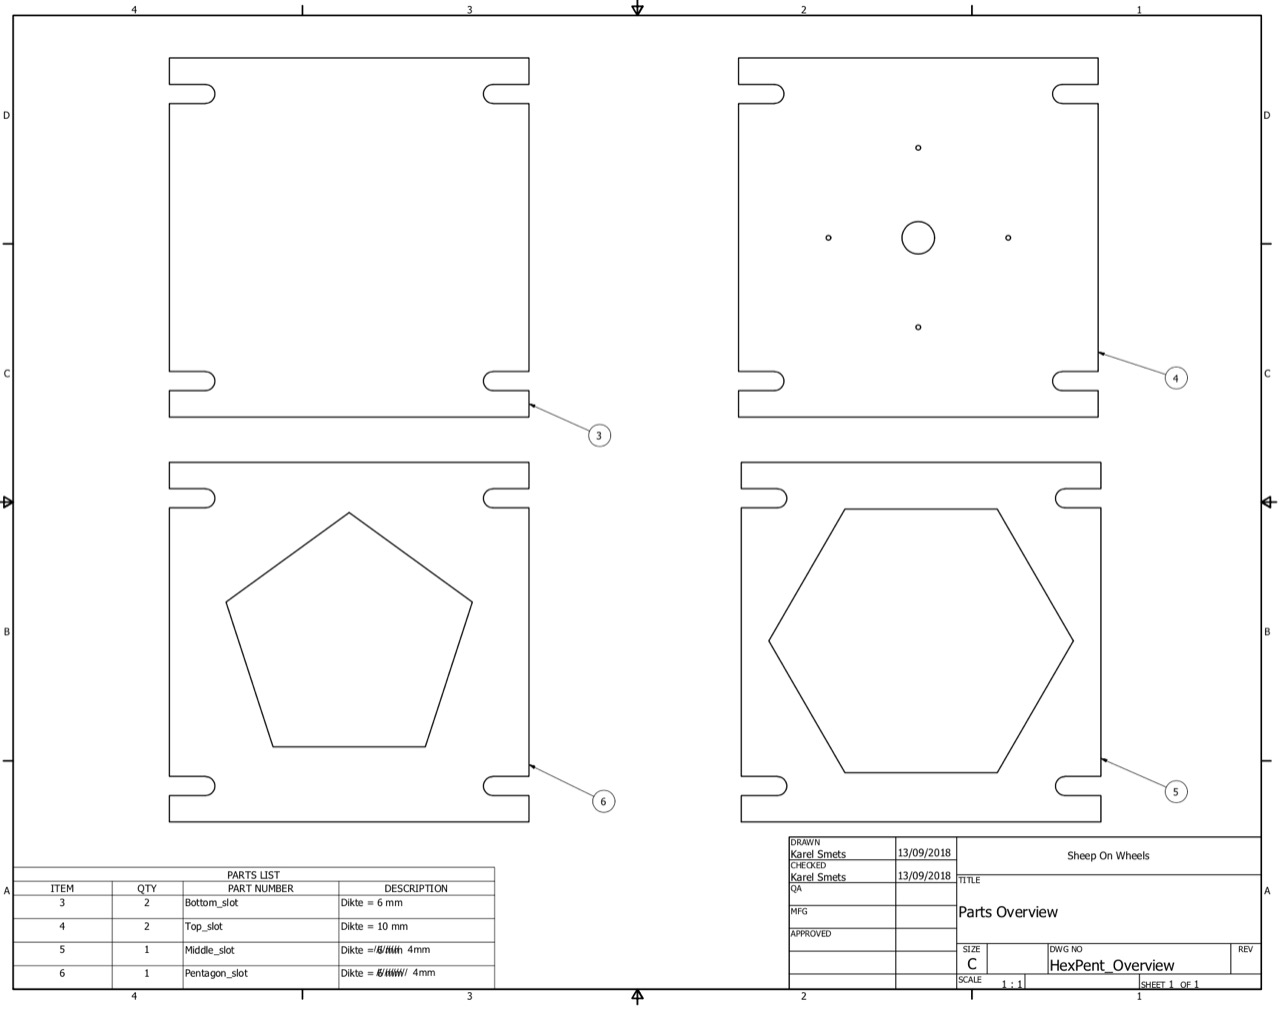
Step 1 - Have a mould
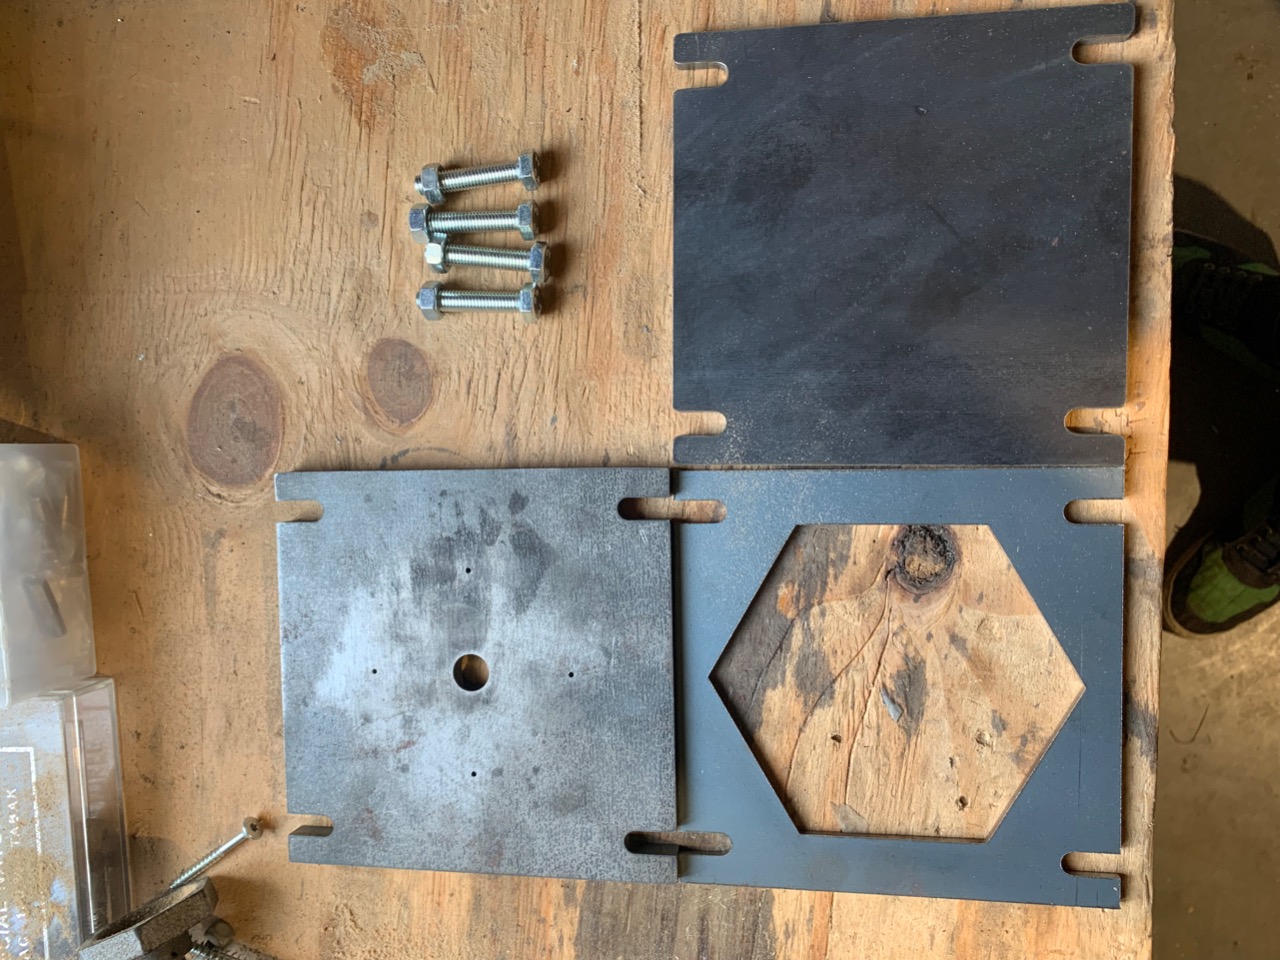
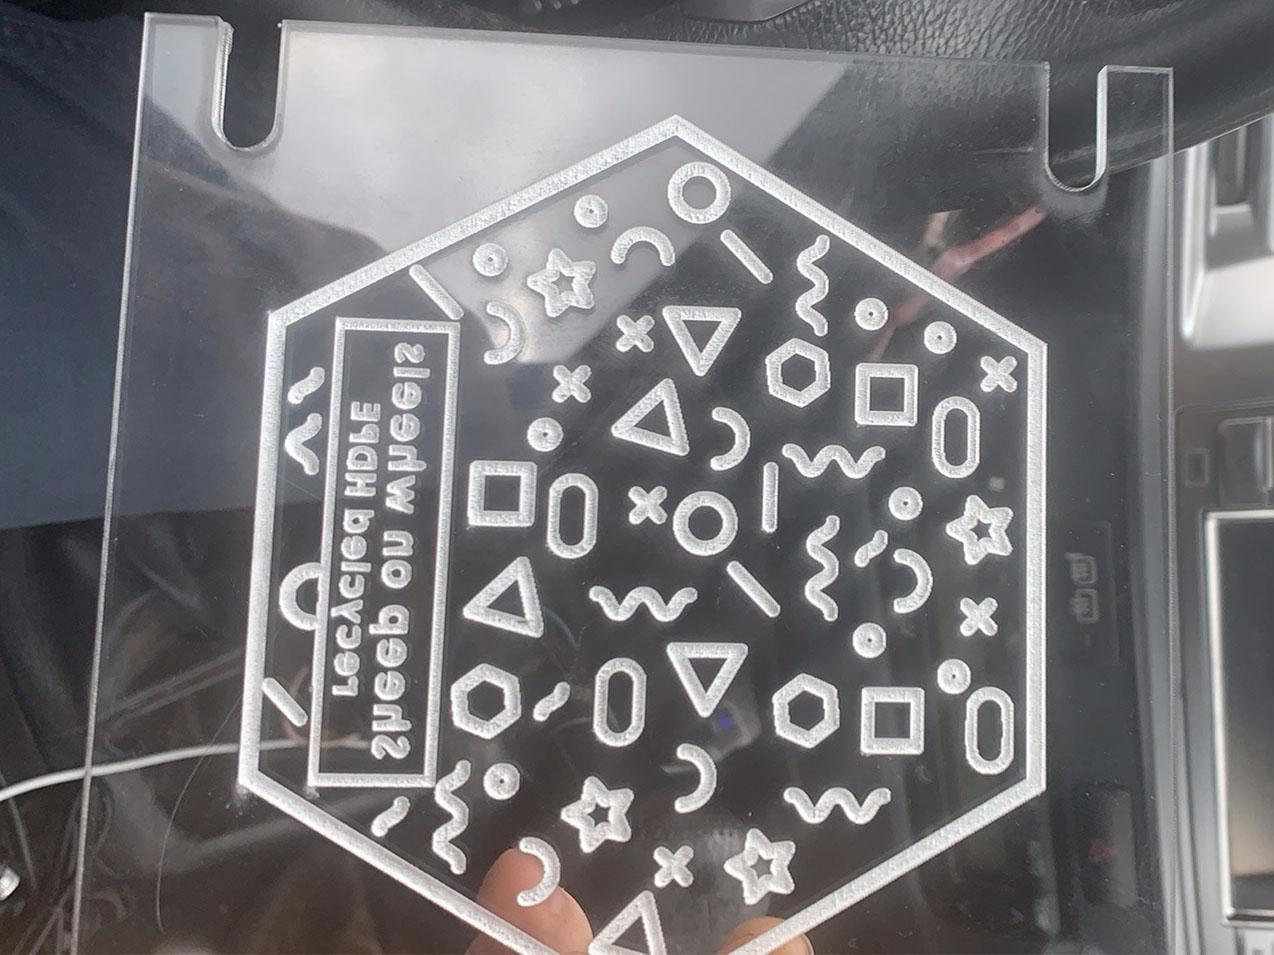
We are adding a part to an existing mould. In this example we use the hexagon tile mould. It's a simple 3 part flat mould held together with boults. Outer size : 15 x 15 cm. The top and bottom plate are 10mm, the center part with hexagon cutout is 4mm.
We will describe how to do lasercutting and CNC milling. For acces to a lasercutter/cnc milling device you can check with your local Fablab/makerspace, sometimes even high schools or universities.
For the lasercut add ons we use 4mm acrylic plates (15 x15cm).
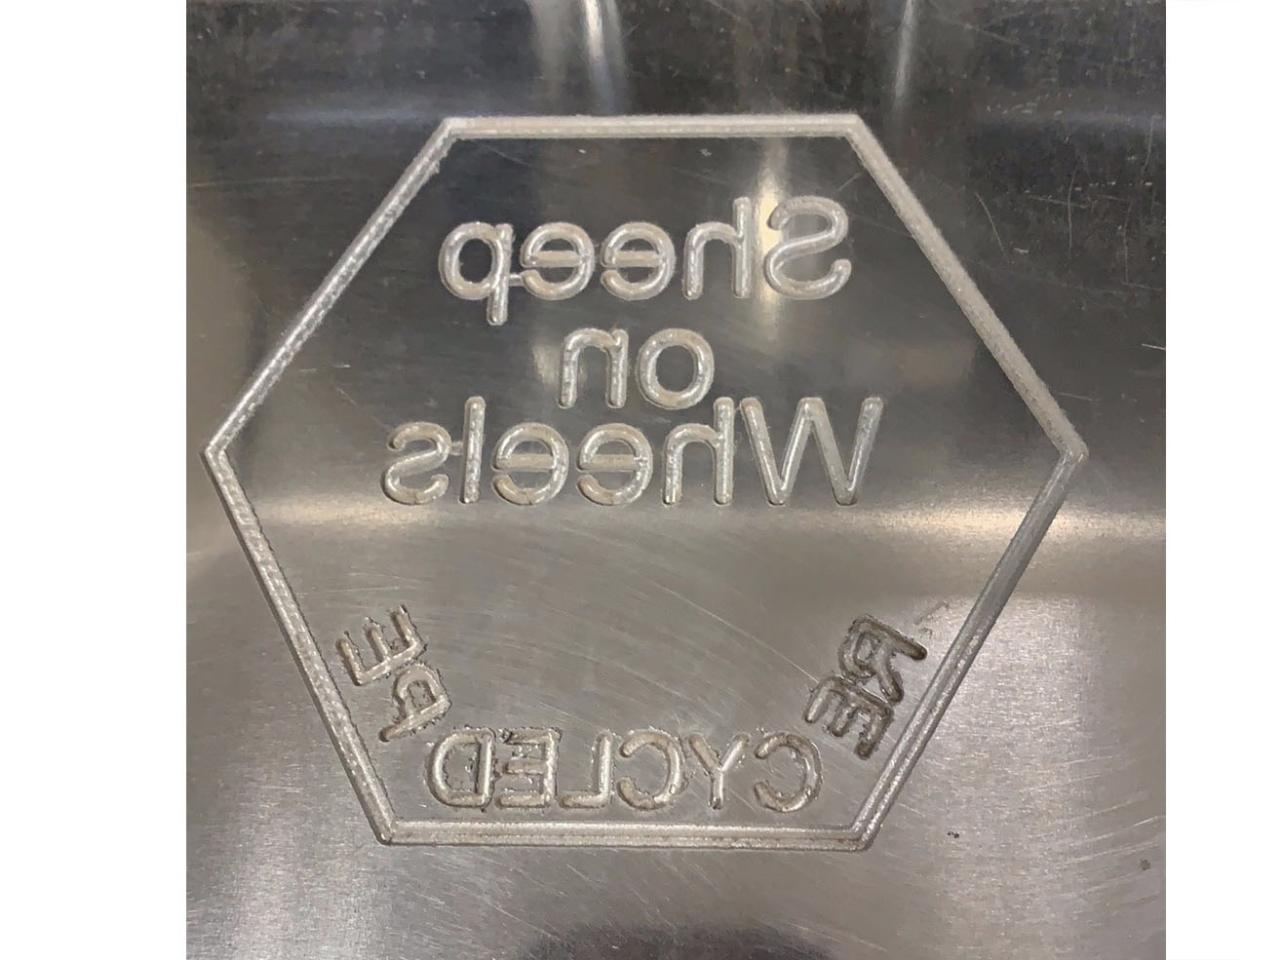
For the CNC we used 3mm aluminium plates (15 x 15cm).
We will describe how to do lasercutting and CNC milling. For acces to a lasercutter/cnc milling device you can check with your local Fablab/makerspace, sometimes even high schools or universities.
For the lasercut add ons we use 4mm acrylic plates (15 x15cm).
For the CNC we used 3mm aluminium plates (15 x 15cm).
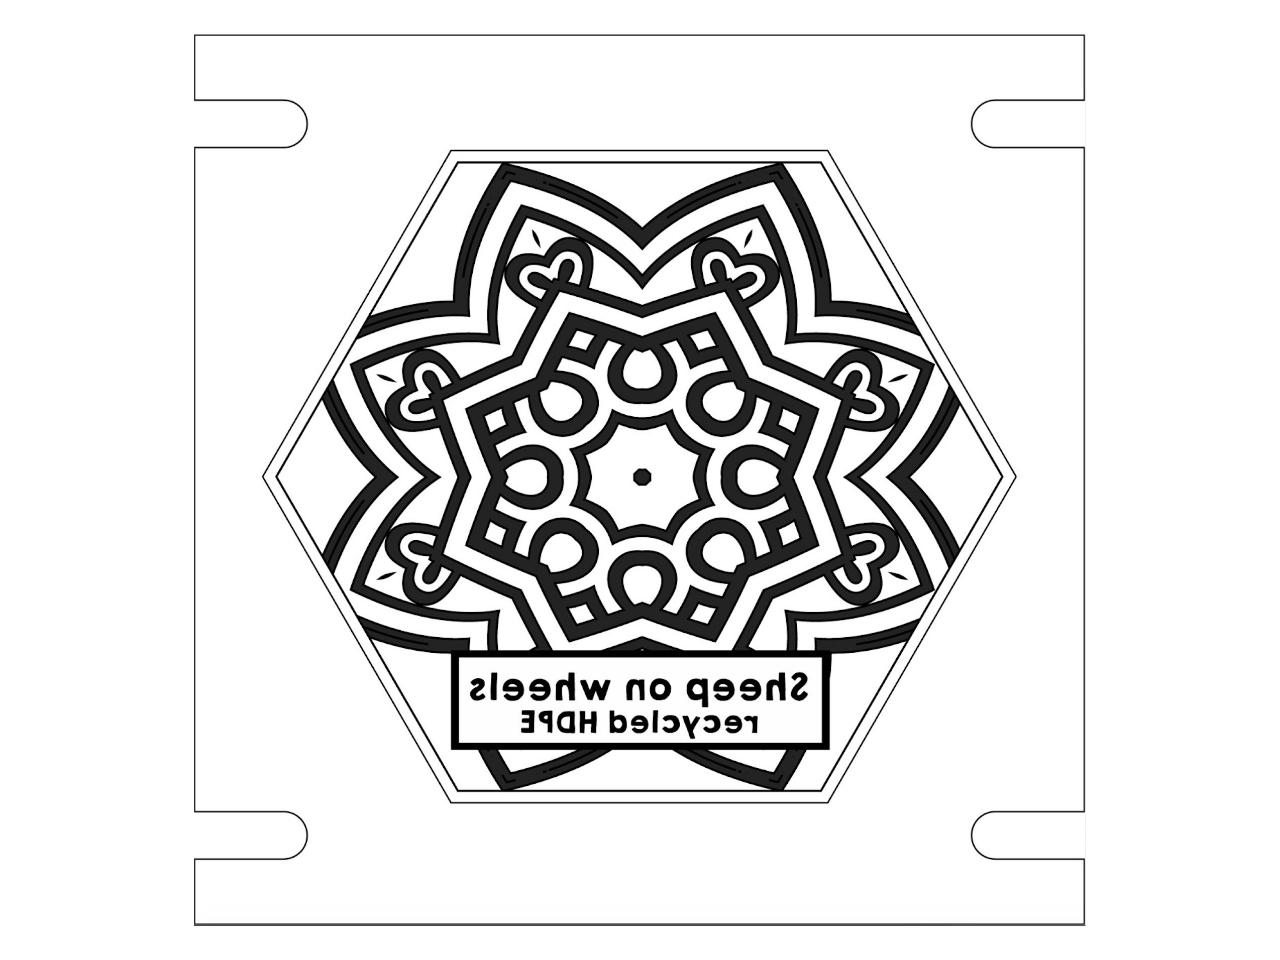
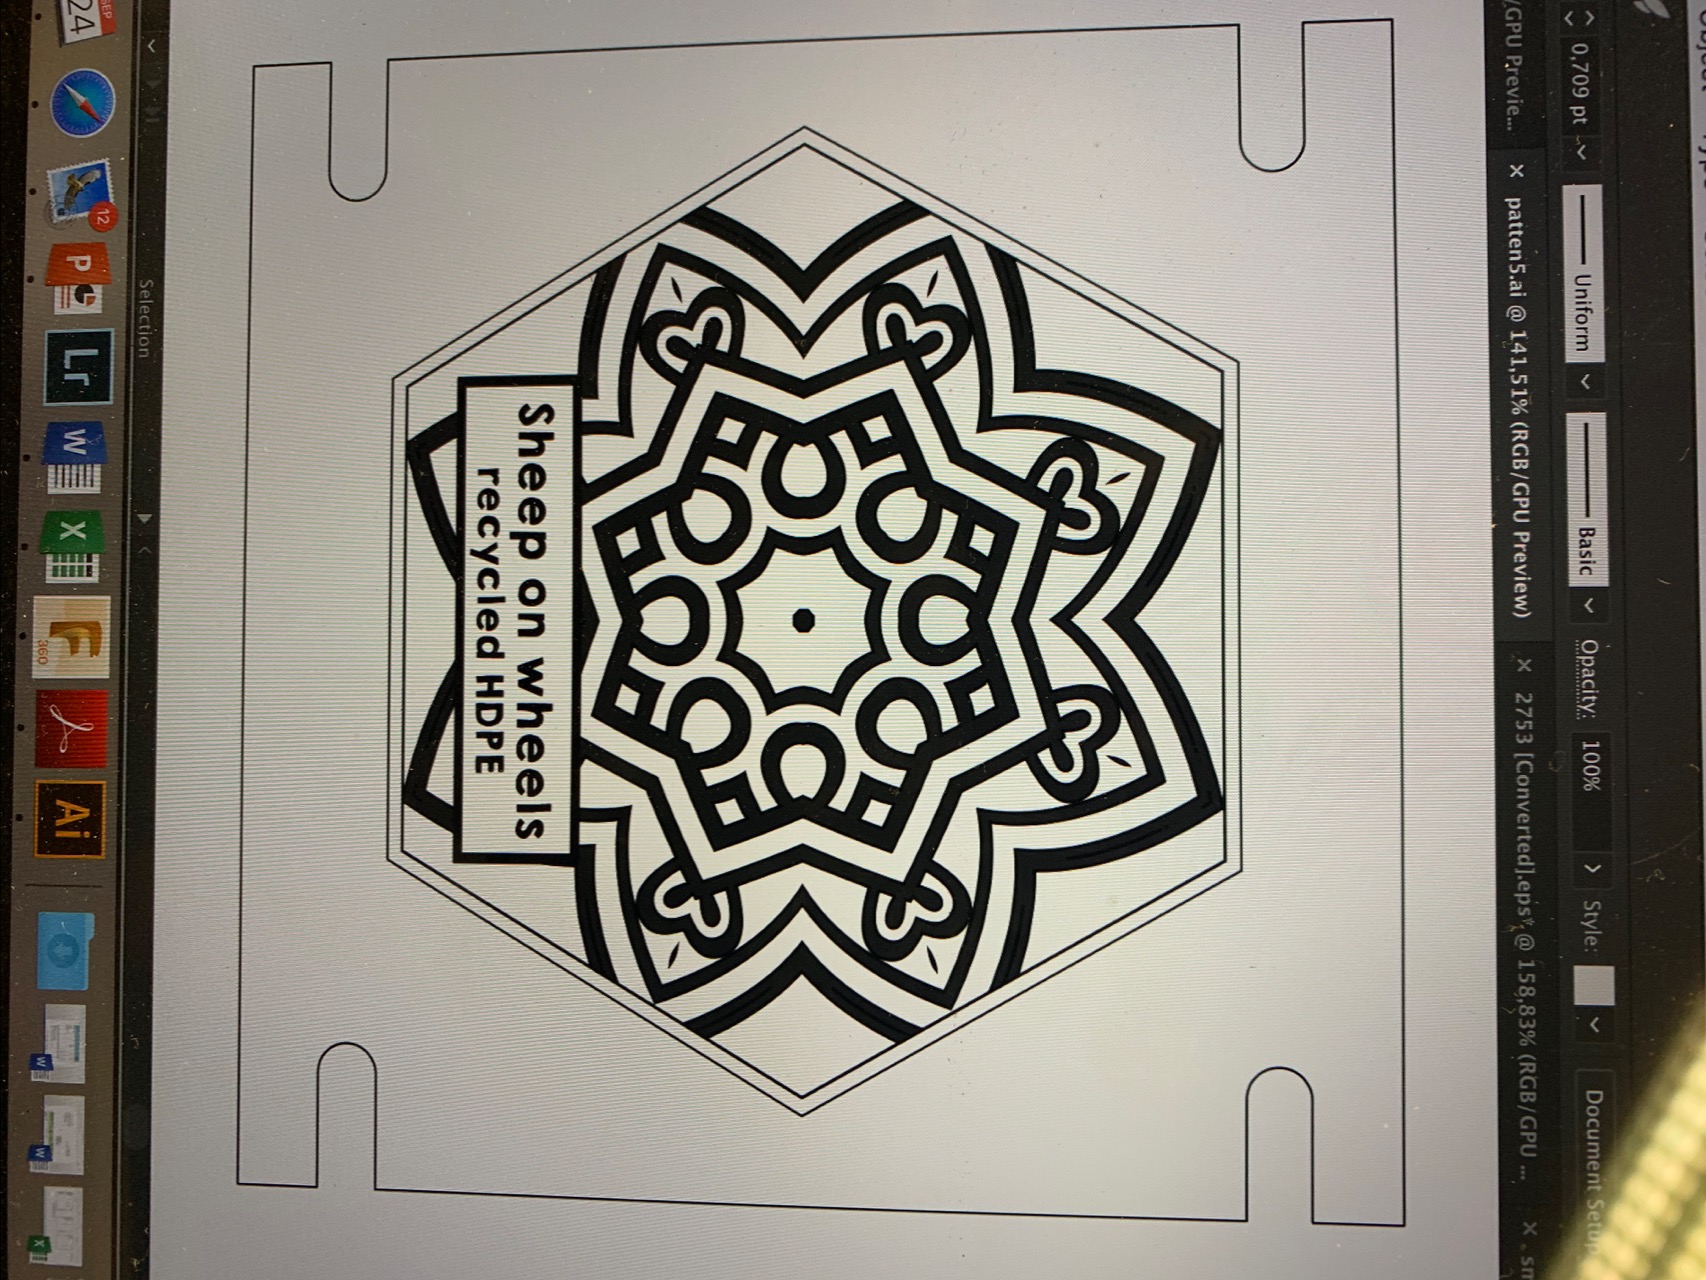
Step 2 - Design a pattern
We used software to create different patterns. Make sure the text is mirrored as we are producing a negative. Depending on the technique used you might need a specific export format.
You can add information (plastic type, production info) as you wish.
With lasecutting there is virtually no limit in shapes you can cut. Do mind that smaller detail is harder to inject. In our experience 2-3mm is possible with HDPE injection.
When CNC milling the limit is set by the router bit. As it cuts by turning all corners are smoothed out by the diameter of the router bit. Check the limit of the machine you are using. We used a 1mm router bit.

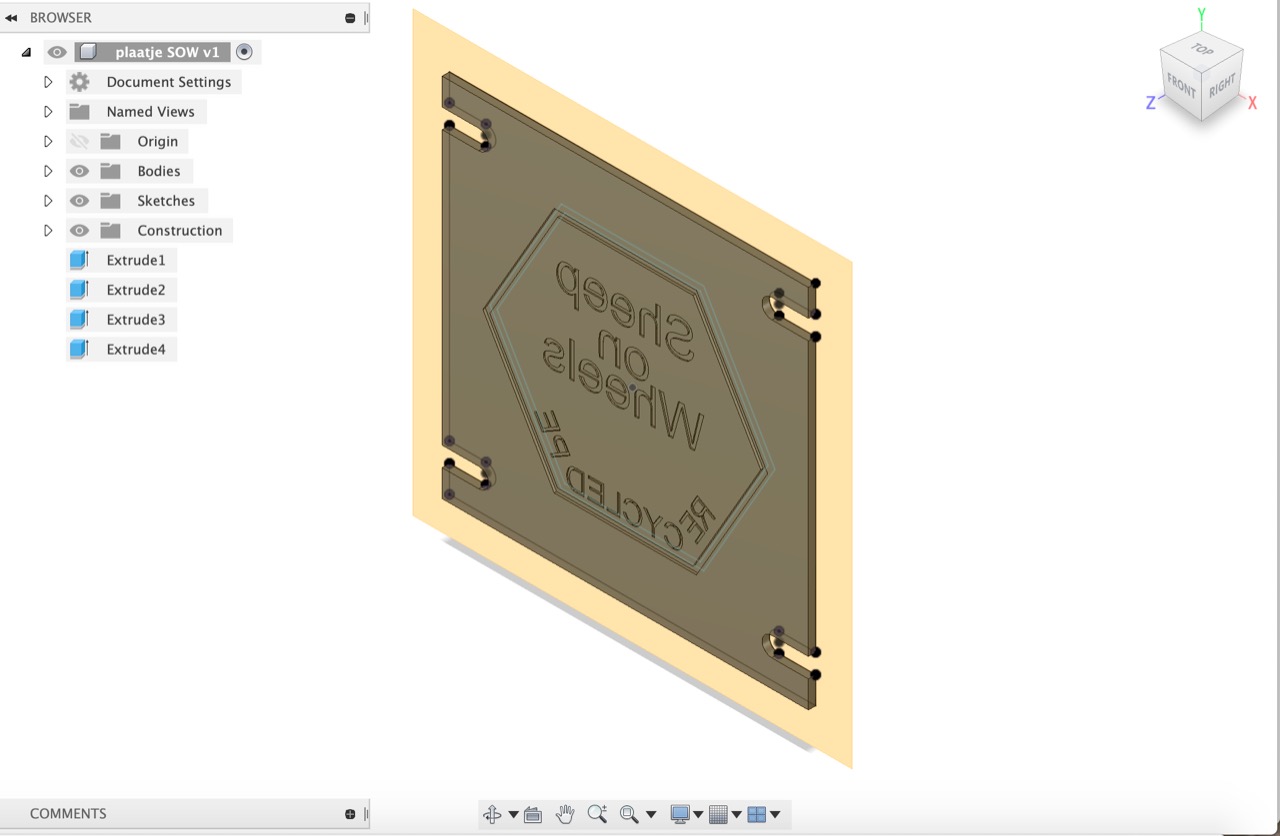
Step 3 - Create a compatible file
When lasercutting a 2D file is sufficient. Some software allows to use PNG, AI or other files.
When CNC milling a 3D file is needed. Using software like Fusion 360 you can change your vector file into a 3D shape.
In our example we've set the cutting depth to 1.5mm.
When CNC milling a 3D file is needed. Using software like Fusion 360 you can change your vector file into a 3D shape.
In our example we've set the cutting depth to 1.5mm.
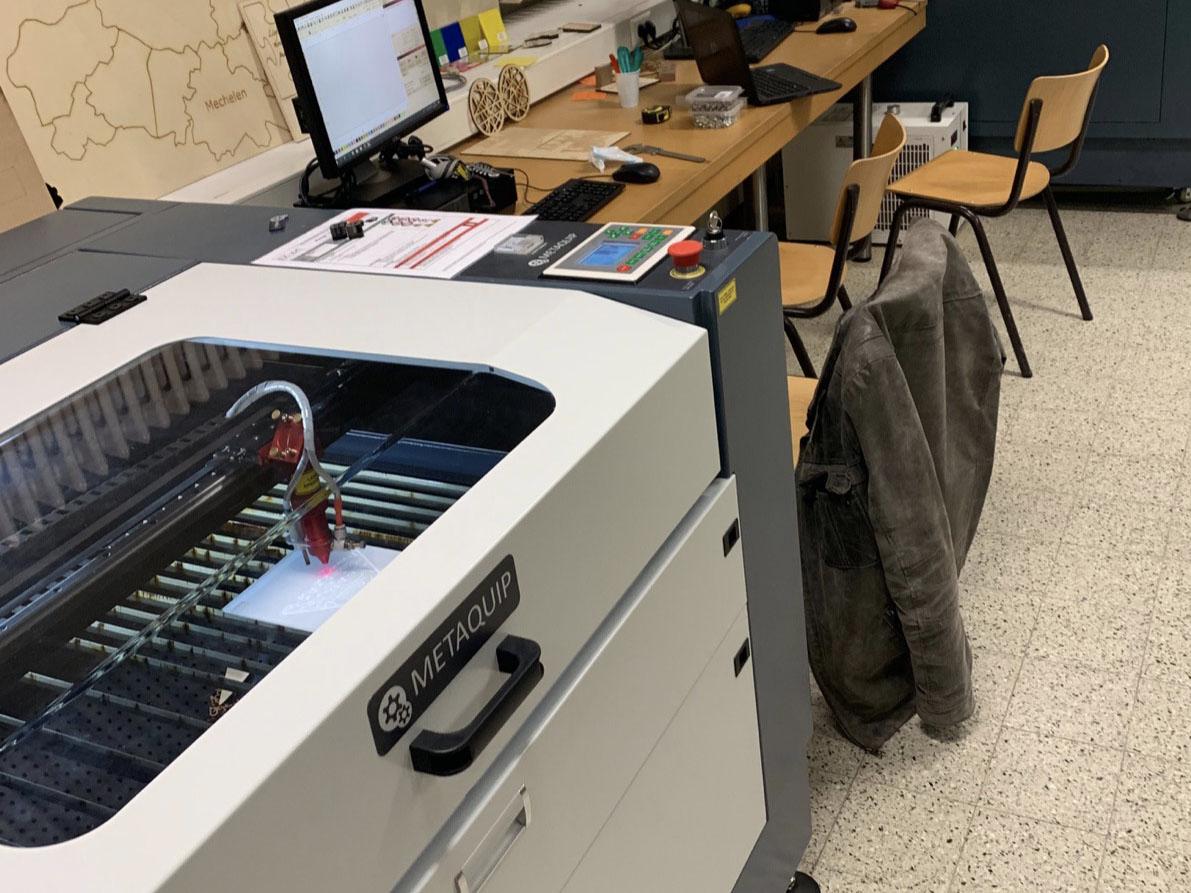
Step 4 - Lasercut
Depending on the type of cutter used settings will differ.
Best is to do some test cuts first, changing the speed and intensity of the laser. Acrylic is safe to ut but does smell so dust extraction is advised.
Make sure the pattern is not cut trough the acrylic plate as it will weaken the texture mould and make it less durable (although its possible for some shapes).
Make sure the edges are cut through to prevent having to drill and cut manually later on in the proces.
You can use multiple depths in one mould by assigning different settings to the cutting lines.
Step 5 - CNC milling
Run the file through the software, clamp the material in place and start milling.
Again it is wise to do some speed tests first.
Again it is wise to do some speed tests first.

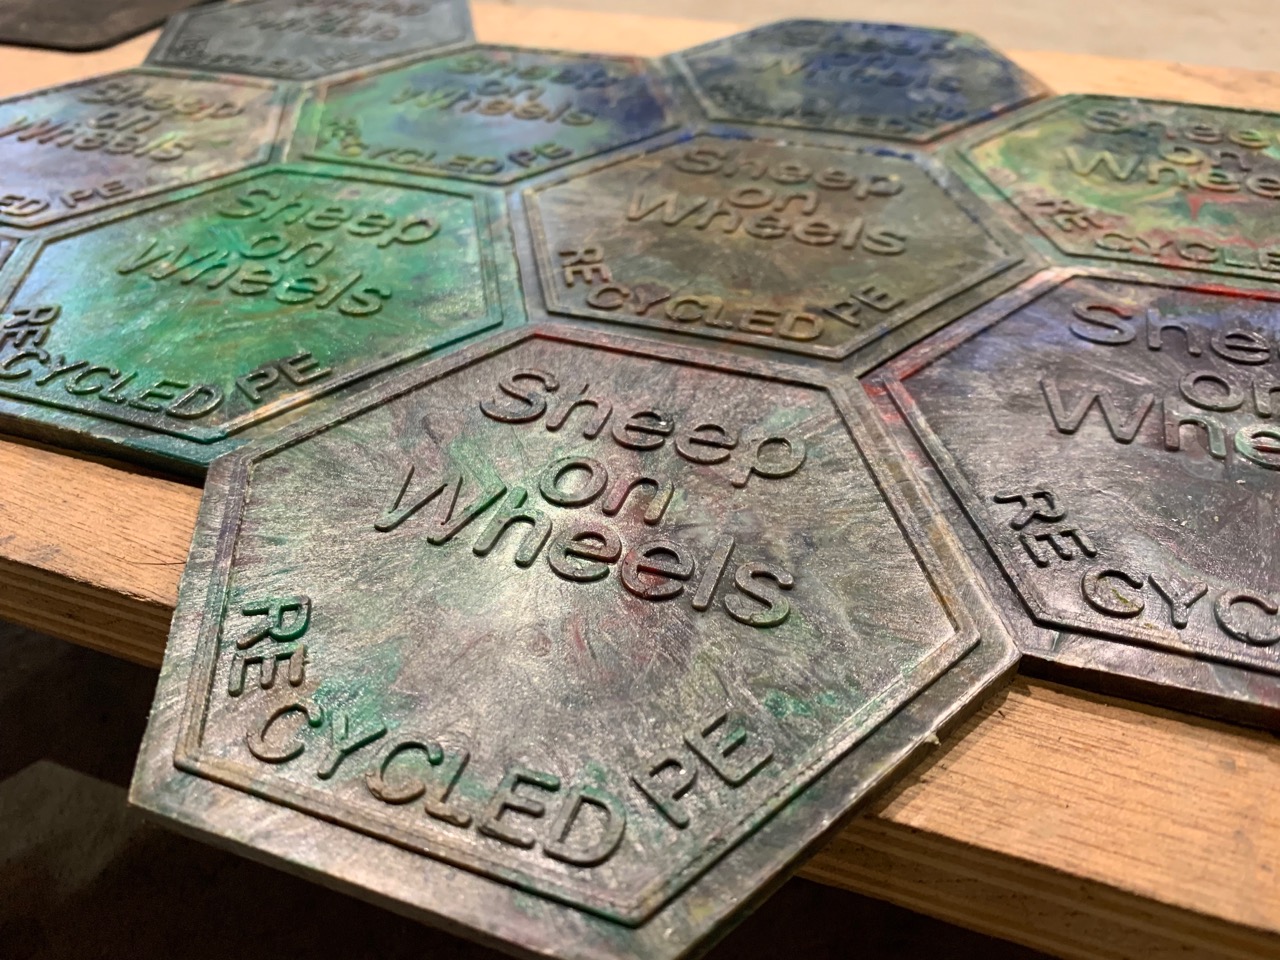
Step 6 - Inject
Add the texture plate to the mould and start injecting.
Best results when cooling down the mould quickly.
Best results when cooling down the mould quickly.

—
—
—
Comments