Easily (hands-free) connect moulds to the injector
Screw-on moulds, clamping beds and other methods such as car jacks take time and more effort with your hands to connect moulds to the injector. This method using a motorcycle stand provides enough travel to clamp the mould against the injector and enables the power of your legs to be used keeping your hands free.
This method also enables heavier moulds or other accessories such as clamps to be lifted easily. Perhaps leading to reduced bolting for clamping the mould itself up!
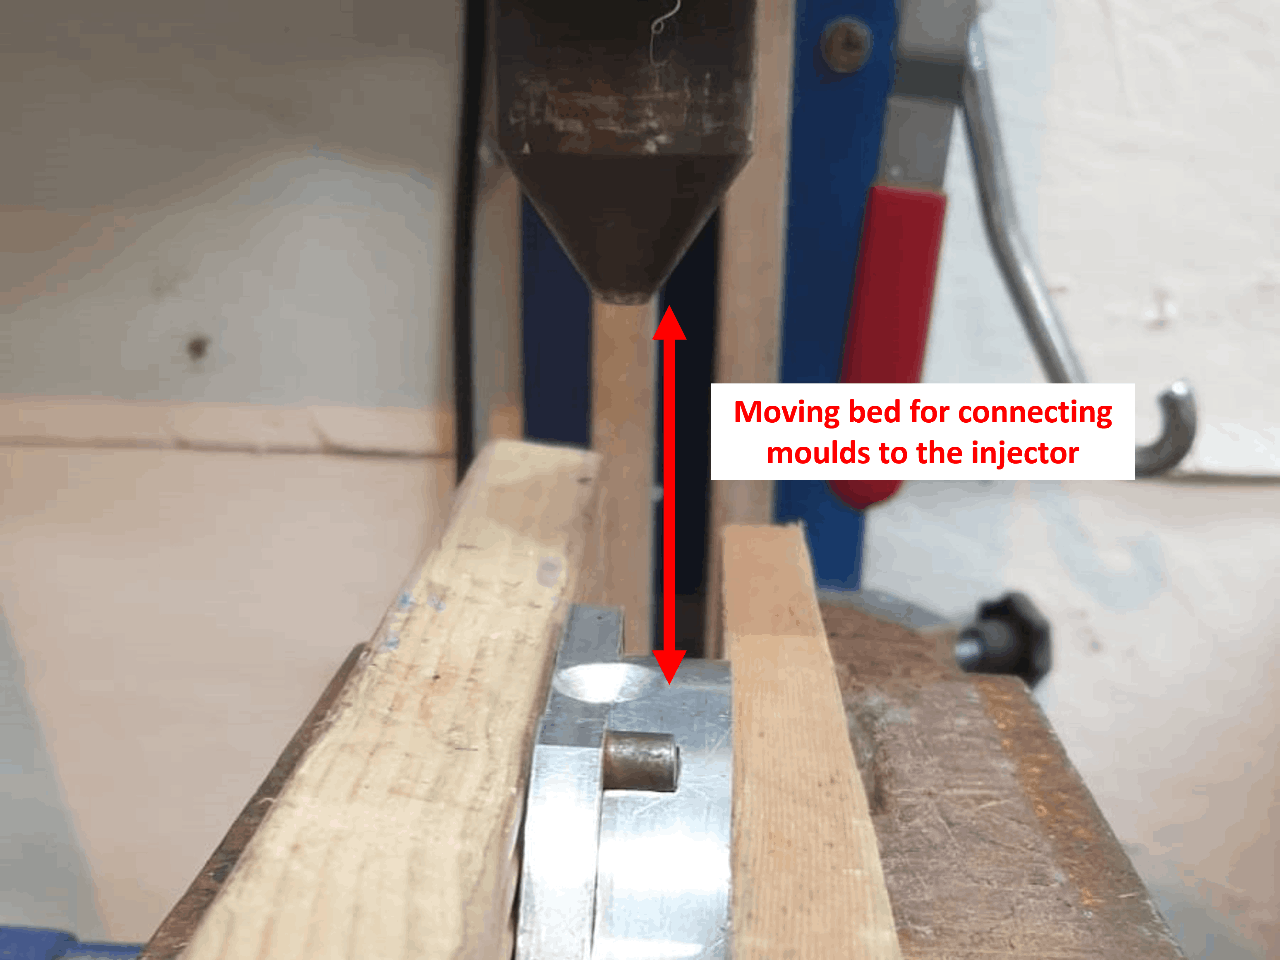
This method works for the conical style injection nozzles and chamfered style moulds. The machines we use are from PlasticPreneur in this guide.
—
Attachments
Resources
Step 1 - One video to explain it all...
See attached a video explaining the process and parts required.
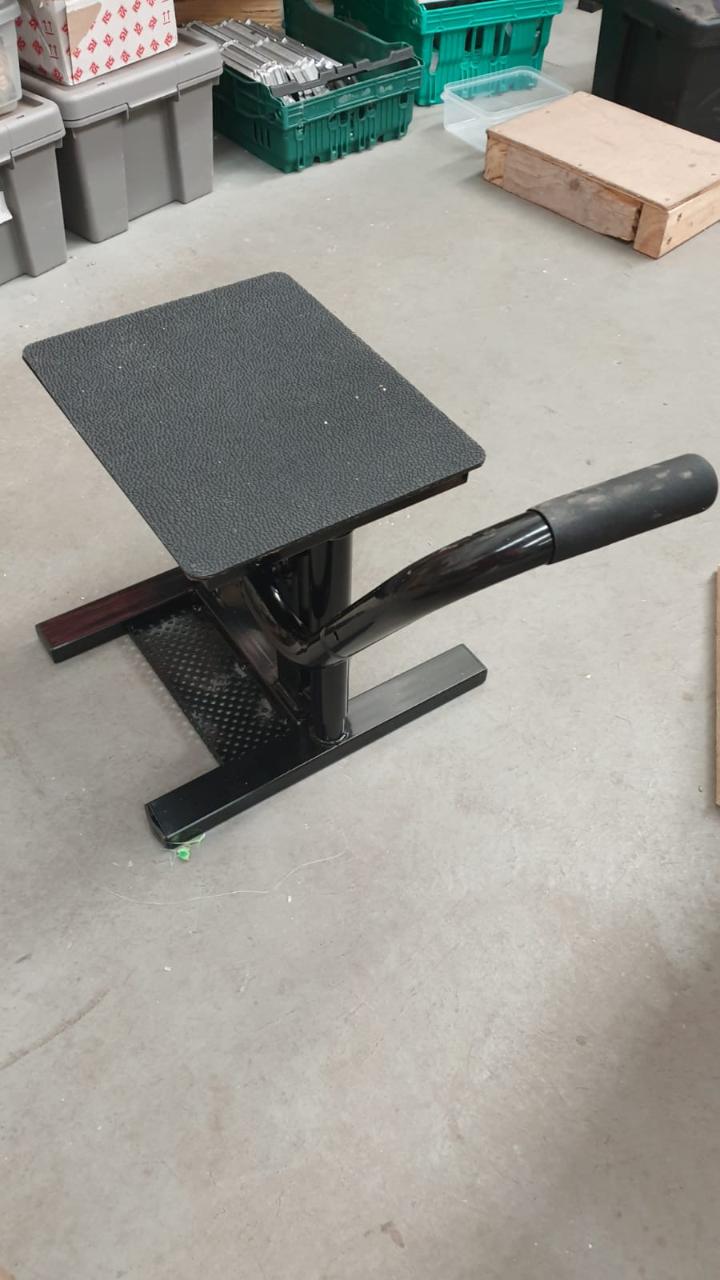
Step 2 - Find yourself a bike stand
We found our first one locally on Facebook Marketplace, you could try workshops that work on bikes - they might have some old ones.
Otherwise, the internet is your friend and you can find them pretty easily by searching "motorcycle stand" or "dirtbike stand".
Otherwise, the internet is your friend and you can find them pretty easily by searching "motorcycle stand" or "dirtbike stand".
Step 3 - (if wall-mounted) Make it taller
We used 4 pieces of 3x2 in each corner of the flat plate of the stand finished with a flat piece of wood on top to create a higher bed for the moulds to sit on. This could easily be made of metal and be differently shaped if required.
We find the gap in the middle of the pillars is useful for storing the 'height-raising blocks'.
You might find you have enough height already or you can add wooden blocks to raise it up if required when using a floor-based injection moulder.
One modification to this design would be to make the pillars shorter and then add a car jack on top. This alleviates the need to use different thickness wooden blocks depending on what mould you are using as you could use the car jack (with a plate on top) to change the general height you want to work out, then use the bike stand to get the extra travel you need to interface with the nozzle.
-17f79e6f15c.jpeg)
Step 4 - Modify the lever system
We found that out of the box this lever is quite high for your leg to use it multiple times in the day. If you're looking for a good workout, perhaps keep it as is.
For us, we wanted something easier to work with all day and we found simply flipping the arm that slots on works brilliantly.
We drilled an extra hole in the rod that comes out of the base, and corresponding holes in the arm that slots on. This way, we could put and M8 bolt through them and clamp it on.
The extra bolt behind the arm is to stop it pivoting back too far so you can always step on it confidently without it slipping away!
You could create a different system to this which would perhaps be more ergonomic or aesthetic, get creative!

-17f79e6bf6d.jpeg)
-17f79e6cb9e.jpeg)
Step 5 - Watch the video
Please watch the video as everything is explained much better there!
—
—
—
Comments