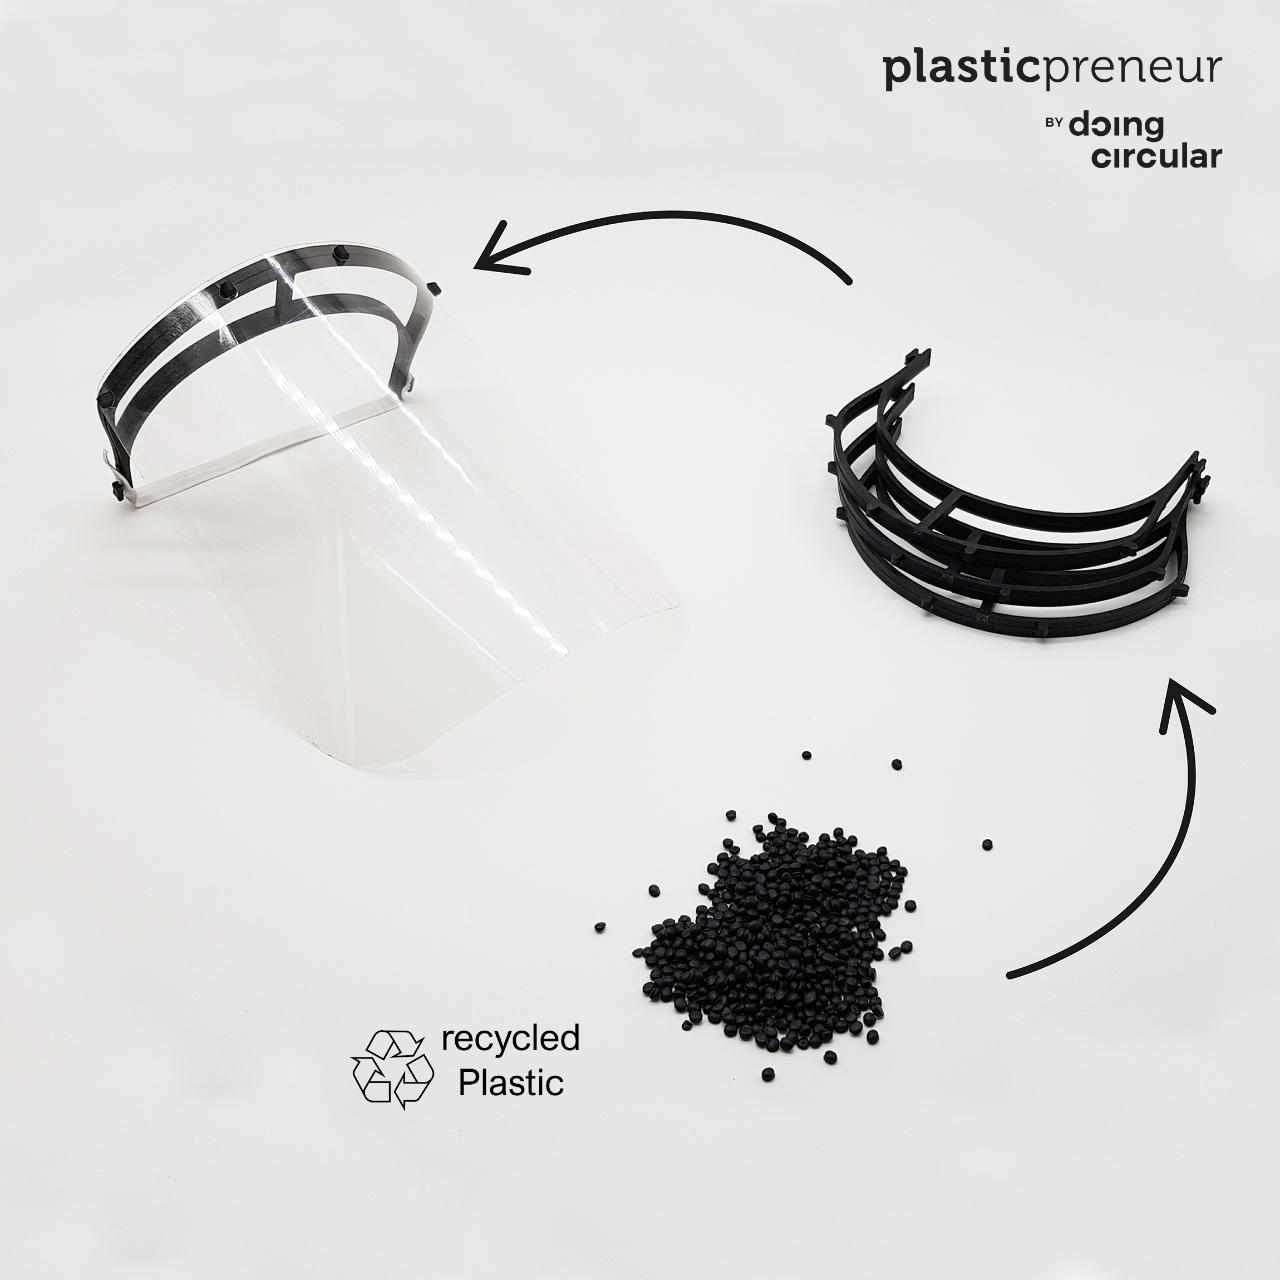
Injection Faceshield

With the current, global situation of COVID-19 we face many challenges.
One challenge is the short pass and access to safety equipment.
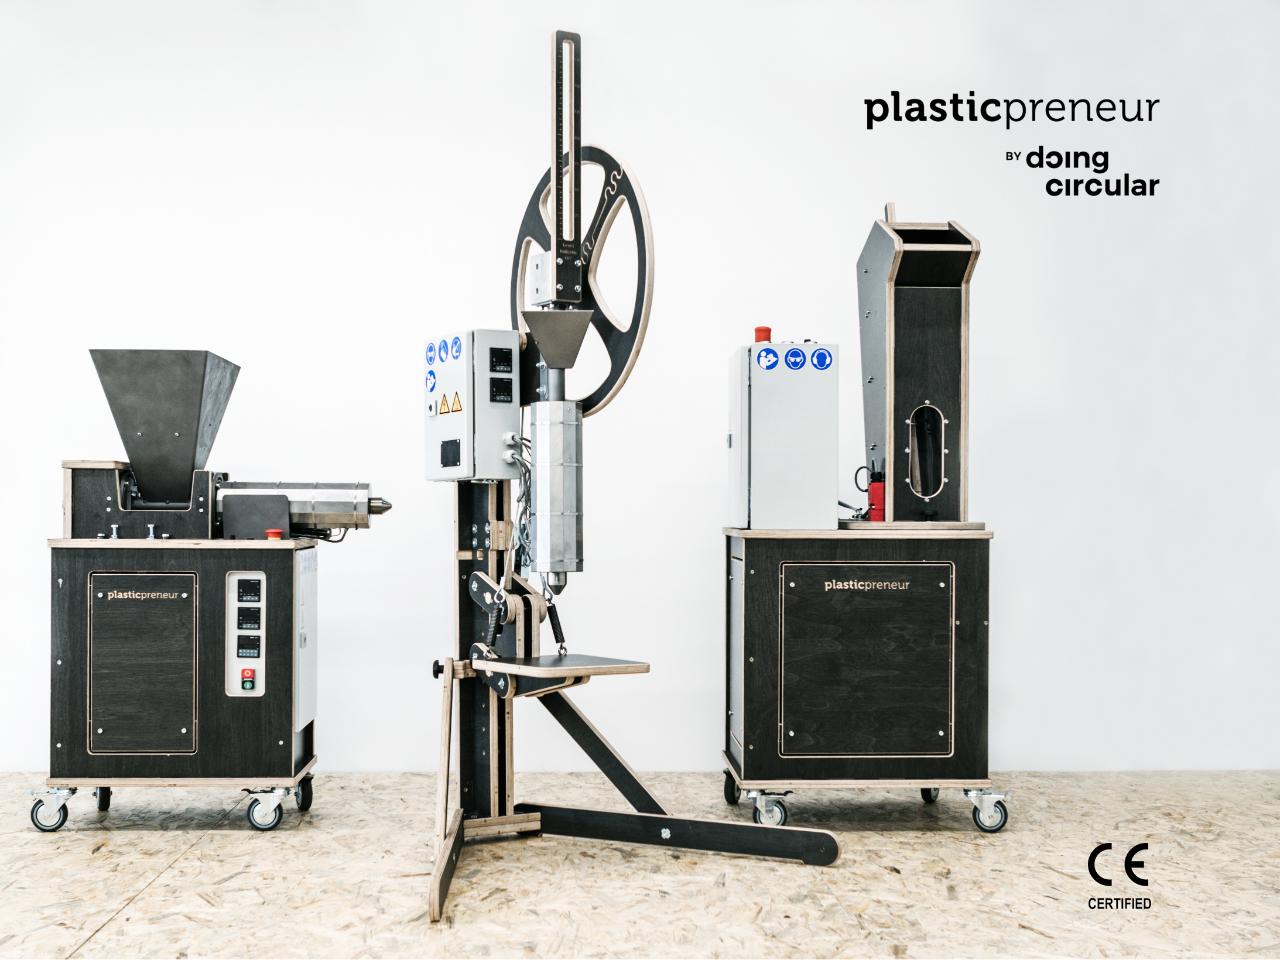
With our machines in place the batch production of products like a Face Shield can start immediately.
With this Mould you are able to produce around 120 Shields per day, with one person and one machine.
—
Attachments
Resources
3D Files
- 3D Step File: /files/Lasercut_Faceshield_Plasticpreneur_V2/Lasercut Faceshield Plasticpreneur/CNC/Mould_Faceshield_V3_plasticpreneur.step - Preview
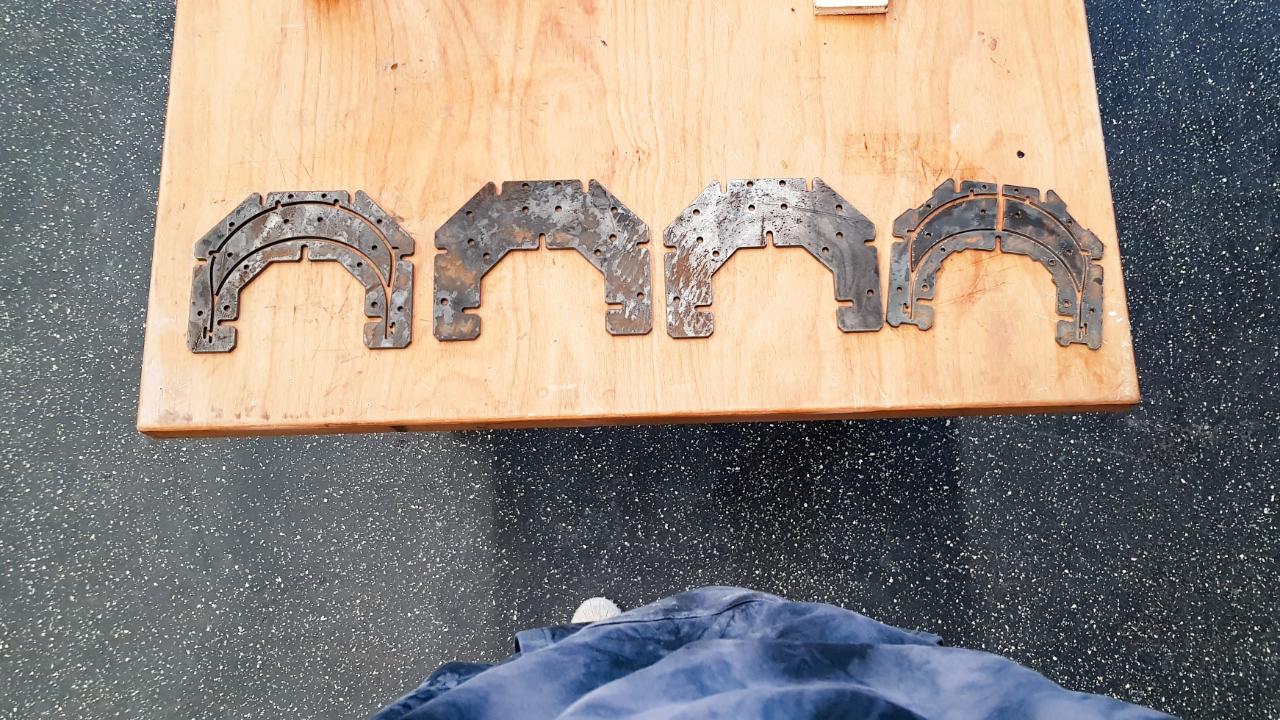
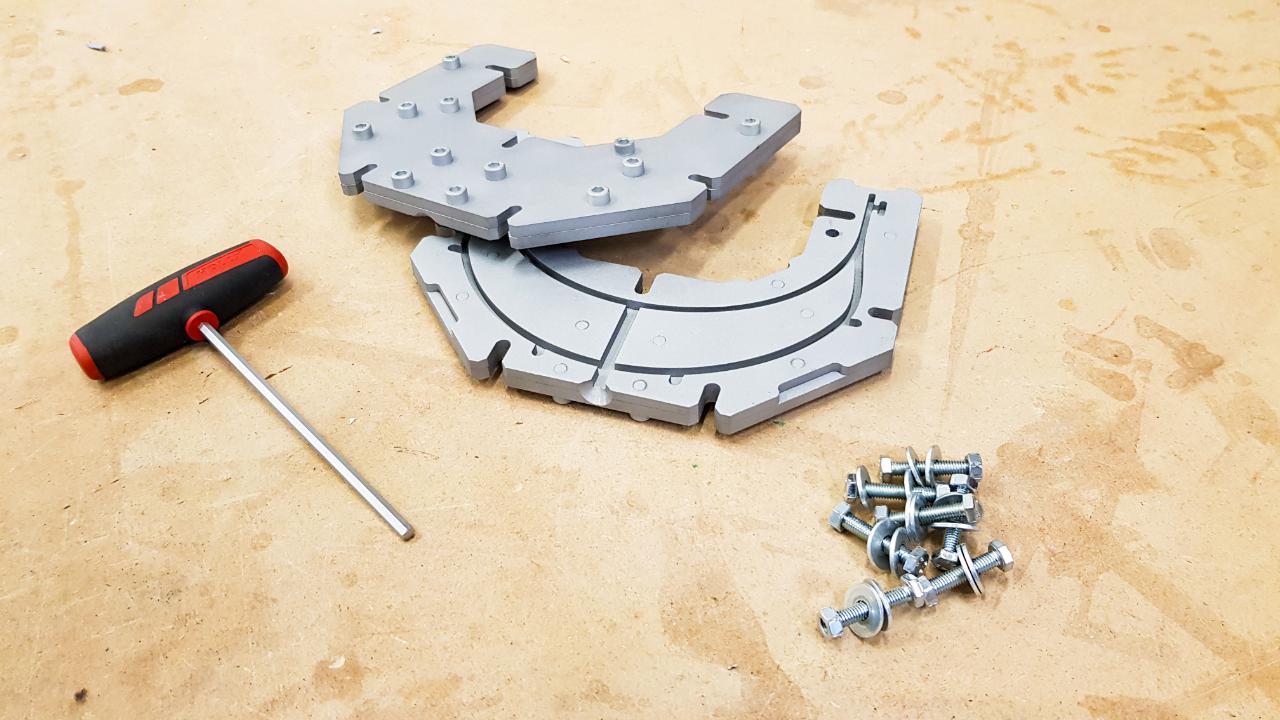
Step 1 - Order the laser cut parts
In the Downloadkit you can find all the DXF Files for lasercutting the parts.
I used 6mm steel for the top, bottom and one of the insert plate.
The other insert plate is made out of 5mm steel so that you can make the holes in the foil with an office punch.
If you are planing to make a bigger production, there is also a CNC Mould attached.
U can skip to step 4, if u are using the CNC Mould.
For the CNC Mould you can use 20 - 25mm aluminium.
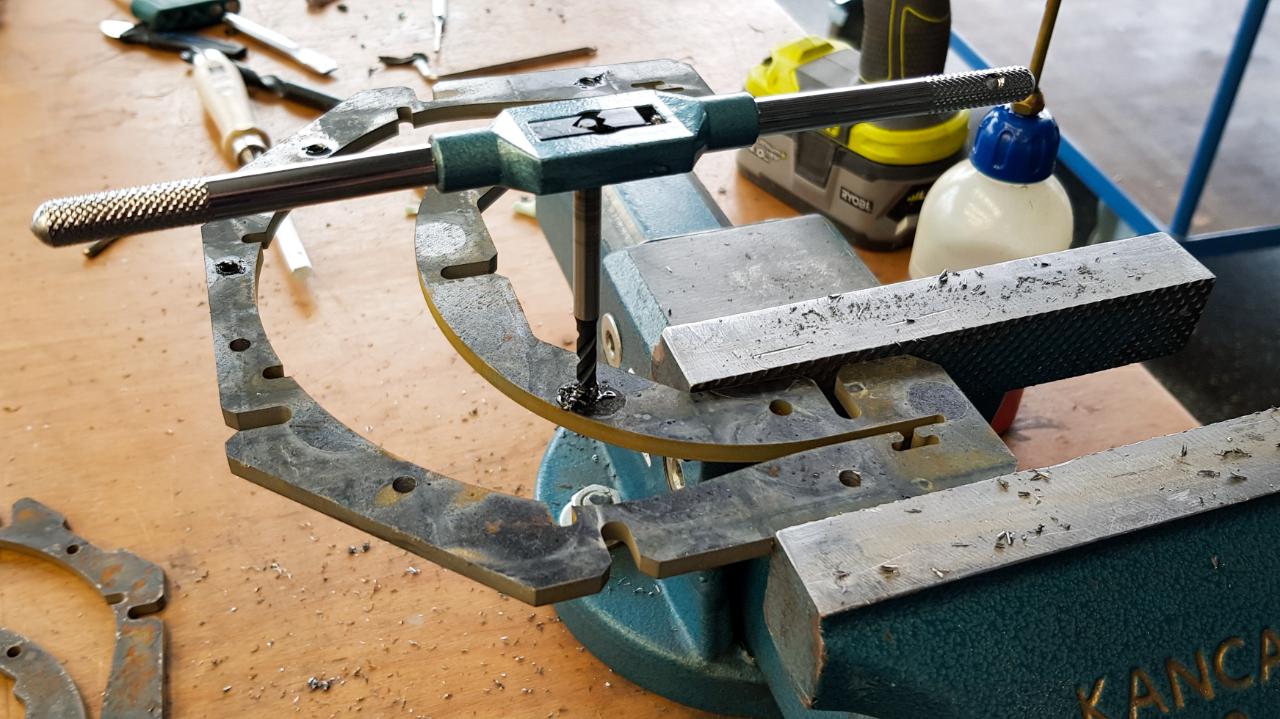
Step 2 - Cut the thread
Cut M6 threads in the 5mm holes on the insert plates.
You also can drill up the two 5,8mm holes for the metal pin with a H6 reamer in the injection Plate.
Then you can drill up the holes in the other insert plate so 6.1 mm
You also can drill up the two 5,8mm holes for the metal pin with a H6 reamer in the injection Plate.
Then you can drill up the holes in the other insert plate so 6.1 mm
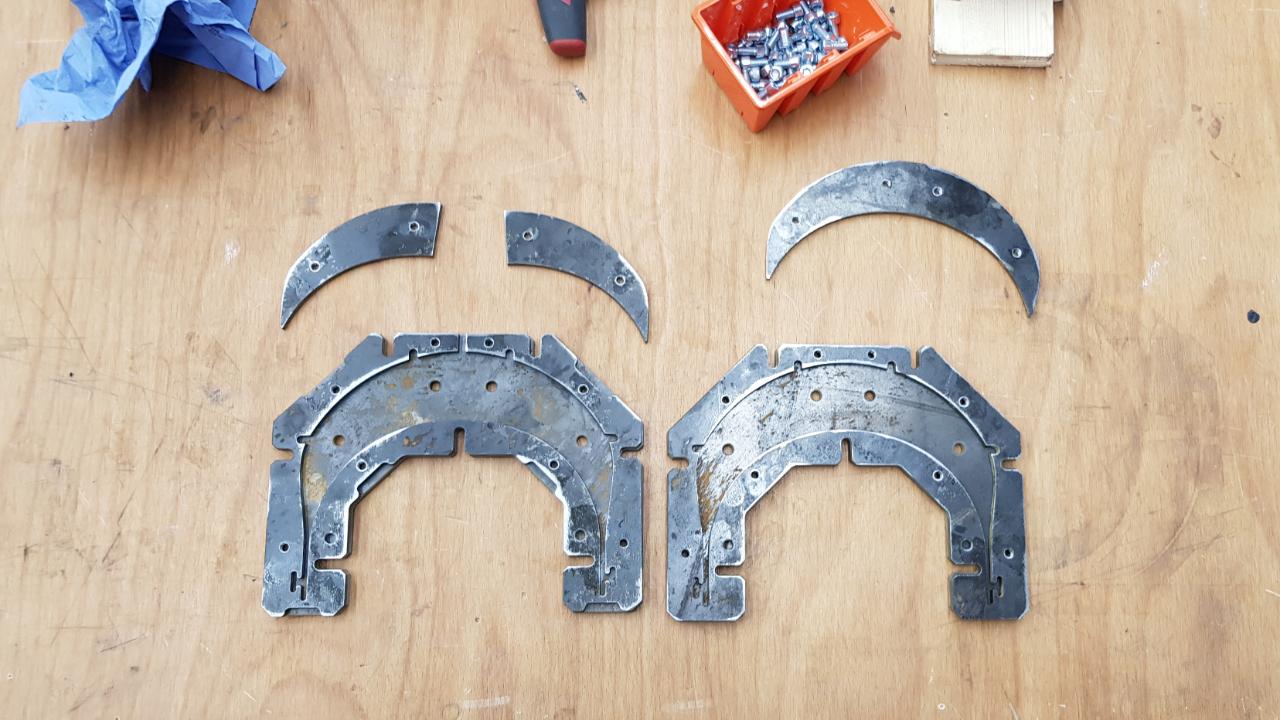
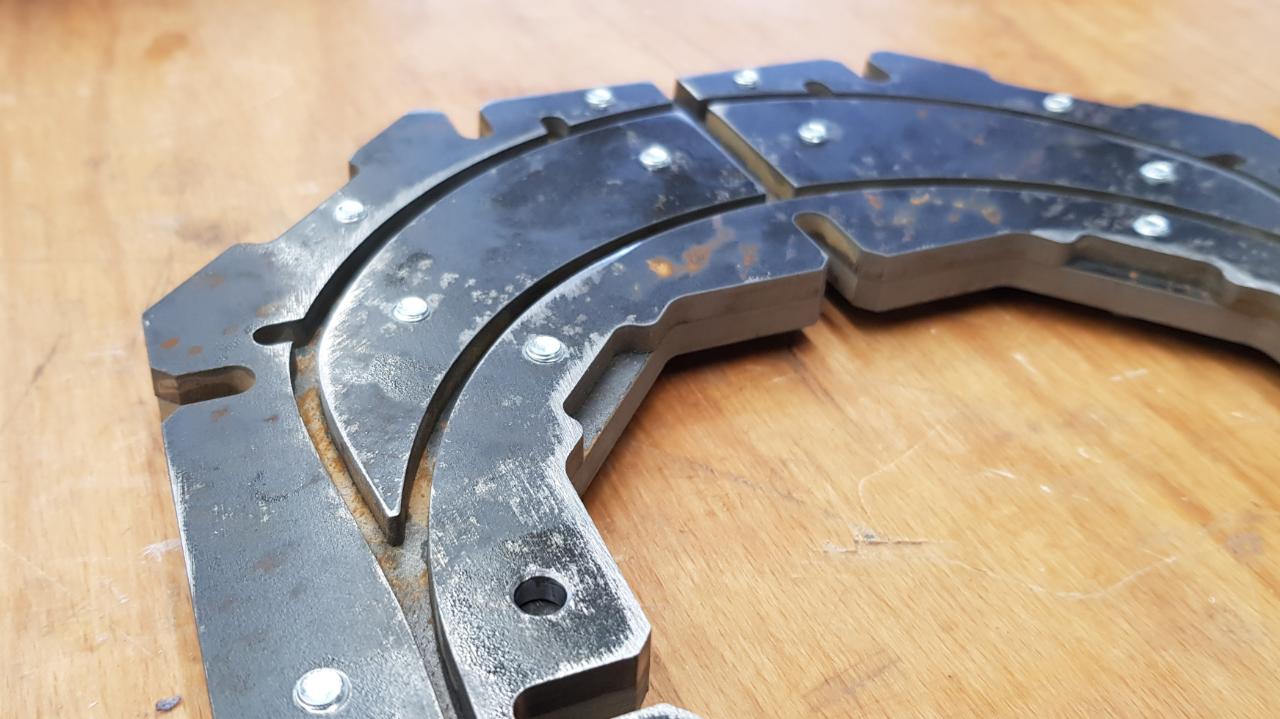
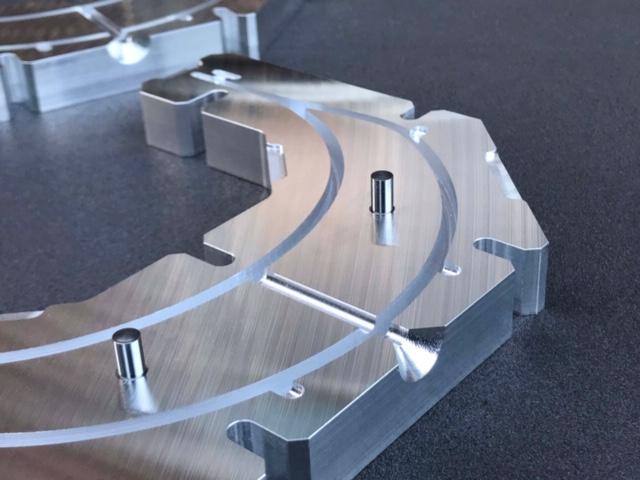
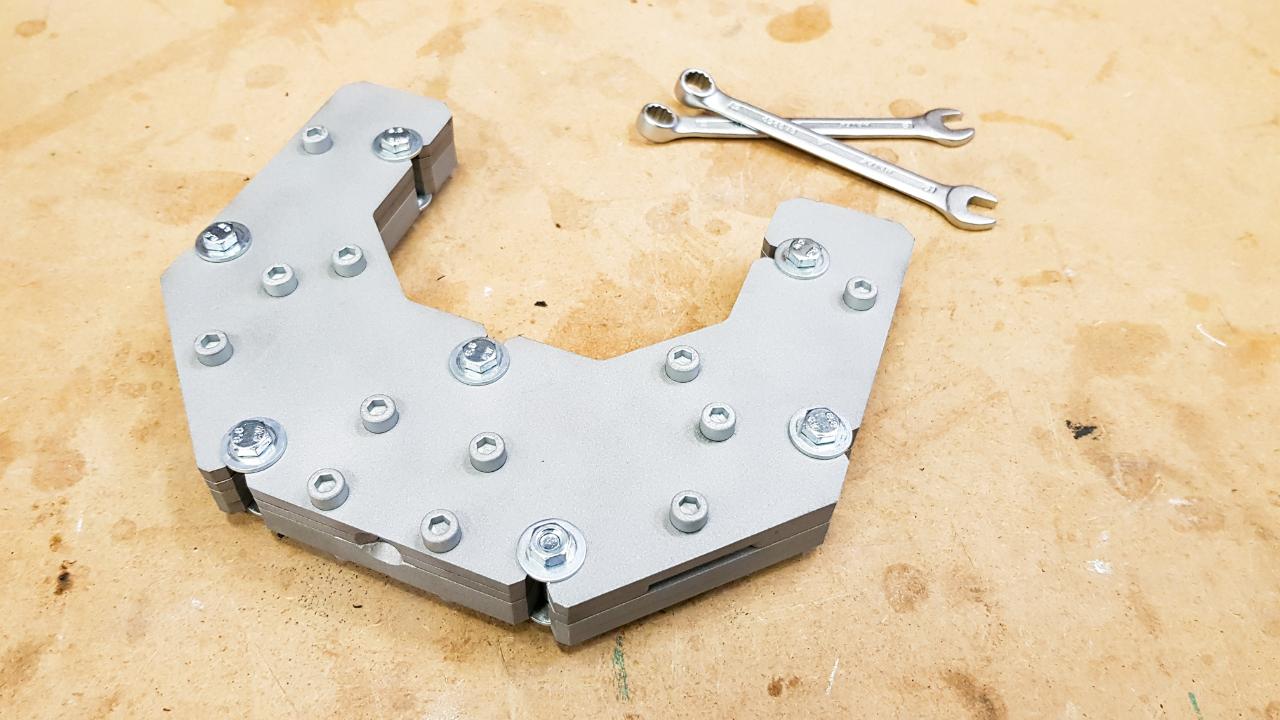
Step 3 - Assemble
Mount the plates with M6x12mm screws.
On the Injection insert plate you have to sand away the screws, since the plate is a little bit thinner.
On the Injection insert plate you have to sand away the screws, since the plate is a little bit thinner.
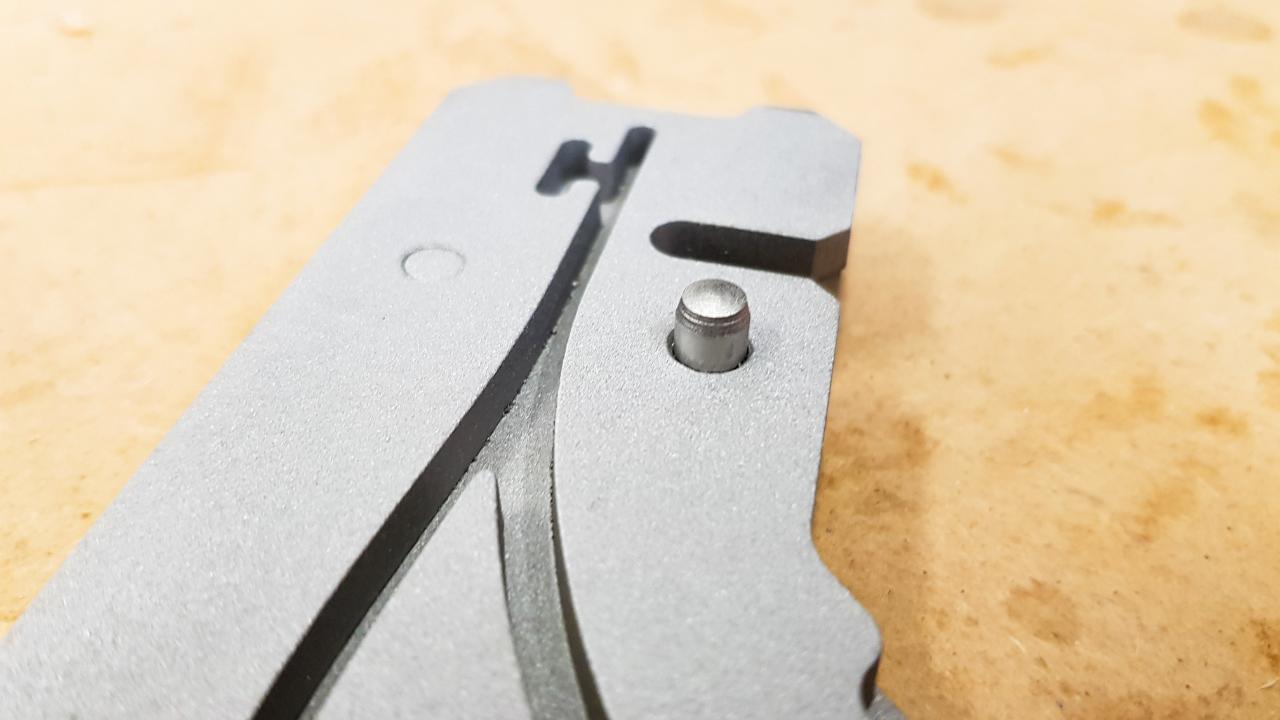
Step 4 - Mount the Metal Pins
Depending on the pins you get you have to cut them to be shorter than 11mm.
We use H6x20mm pins and cut them to length.
Punch in the metal pins with a hammer, ore glue them in place if you don´t have a reamer.
We use H6x20mm pins and cut them to length.
Punch in the metal pins with a hammer, ore glue them in place if you don´t have a reamer.
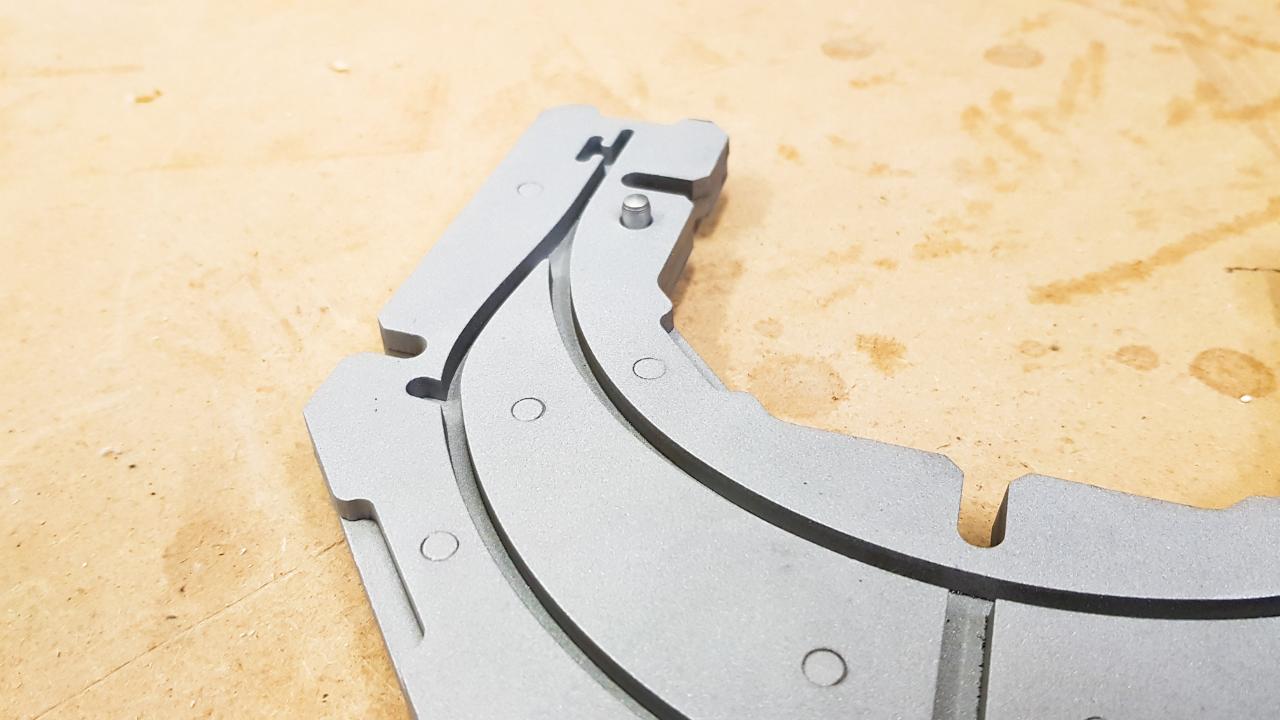
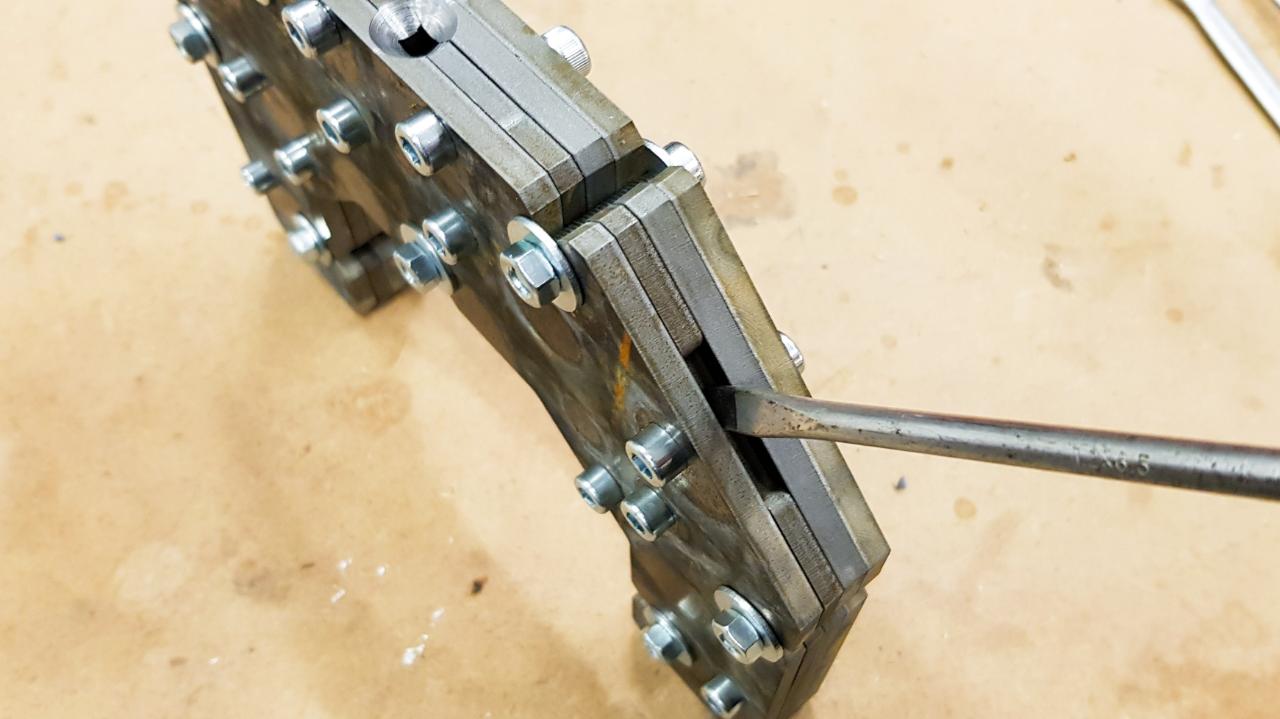
Step 5 - Drill the bevel
Since we have a spring clamp system on our plasticpreneur machines, we just have to make a bevel to the mould.
If you are workingg with precious plastic noozle system u have to weld on an adapter.
Feel free to change my design if needed.
U can use a flat screwdriver to seperate the mould again.
If you are workingg with precious plastic noozle system u have to weld on an adapter.
Feel free to change my design if needed.
U can use a flat screwdriver to seperate the mould again.
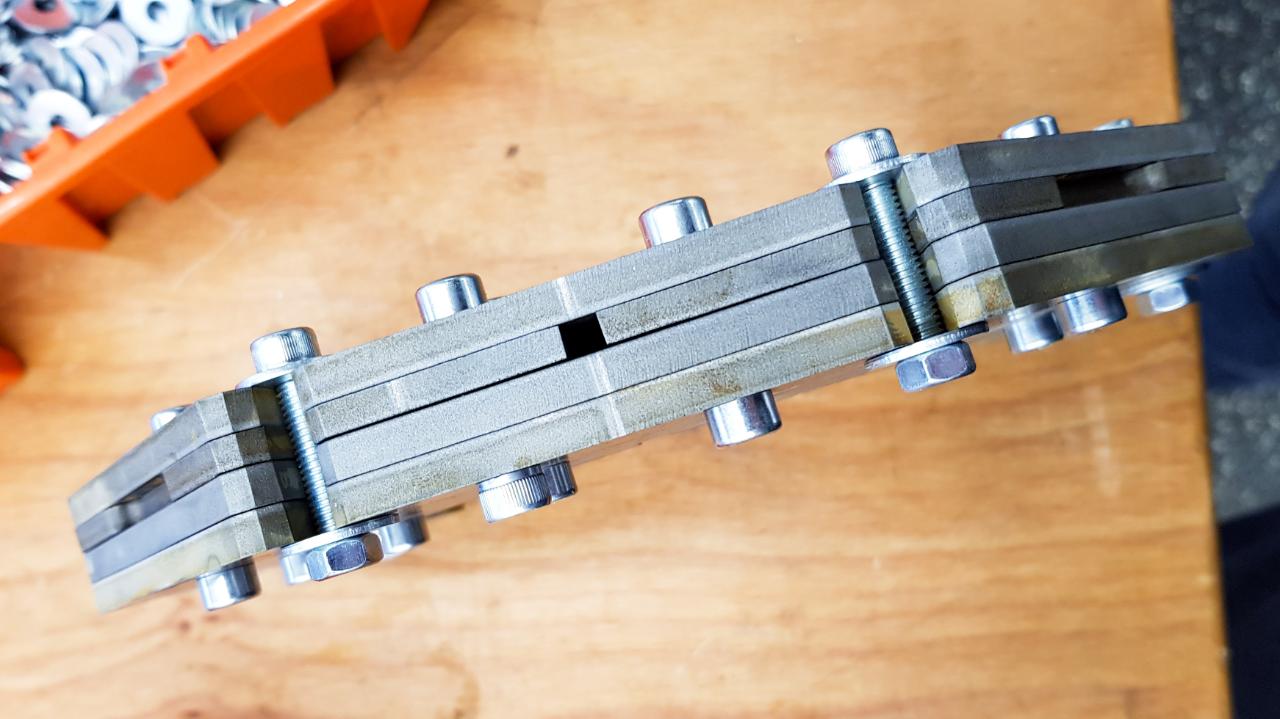

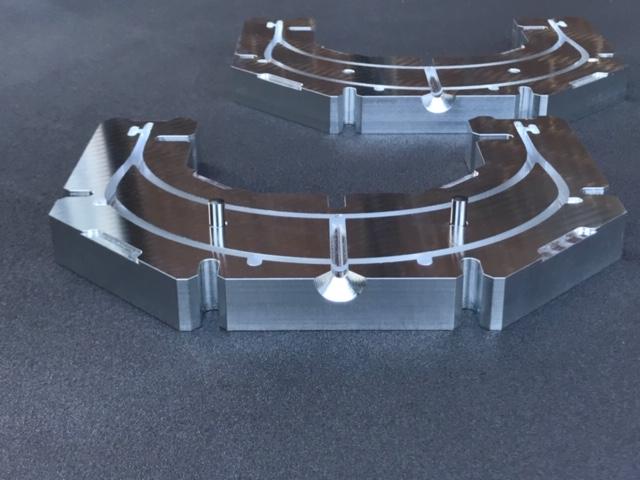
Step 6 - Finish it
We allways like to sandblust our moulds to have them nice and clean.
If you are producting the shields for a medical use, make sure, your mould is perfectly clean!
All you need now are some M6x30 screws an some nuts to screw the mould together an you are yeady to go.
CNC Mould from Industriedesigner Silke Grimmelmann und Adrian Heymann.
If you are producting the shields for a medical use, make sure, your mould is perfectly clean!
All you need now are some M6x30 screws an some nuts to screw the mould together an you are yeady to go.
CNC Mould from Industriedesigner Silke Grimmelmann und Adrian Heymann.
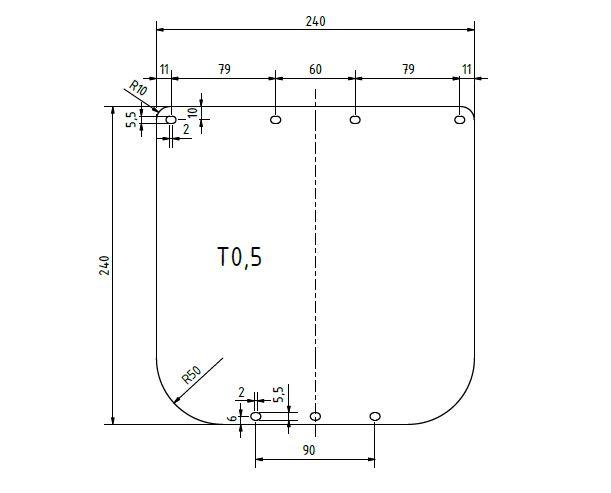
Step 7 - Cut the Faceshield
There is also a cutting plan for the shiled in the download kit.
We used 0,2 to 0,5mm PET Foil.
2 liter PET bottles also work great.
You can use a laser or a scissors to cut it.
The holes are designt to can be made with an office puncher.
To mount the shield on your face you can use a rubber or an buttonhole tape.
We used 0,2 to 0,5mm PET Foil.
2 liter PET bottles also work great.
You can use a laser or a scissors to cut it.
The holes are designt to can be made with an office puncher.
To mount the shield on your face you can use a rubber or an buttonhole tape.
Step 8 - Spread the Vision
As Part of the Precious Plastic Community we love to share our ideas.
Feel free to share, to explain people the process.
Feel free to share, to explain people the process.
Step 9 - Fight the Virus
If you don´t have acces to a lasercutter or a cnc machine, you also can buy the mould in the bazar.
https://bazar.preciousplastic.com/moulds/injection-moulds/faceshield-mould-plasticpreneur-clone/
https://bazar.preciousplastic.com/index.php?dispatch=products.view&product_id=312
If you have any problem with the design, feel free to contact me.
Email: florian@doingcircular.com
Send us pictures from your finished products on Instagram ;)
https://www.instagram.com/plasticpreneur/
STAY HOME & STAY SAFE!
—
—
—
Comments