Make a simple stamp from copper wire
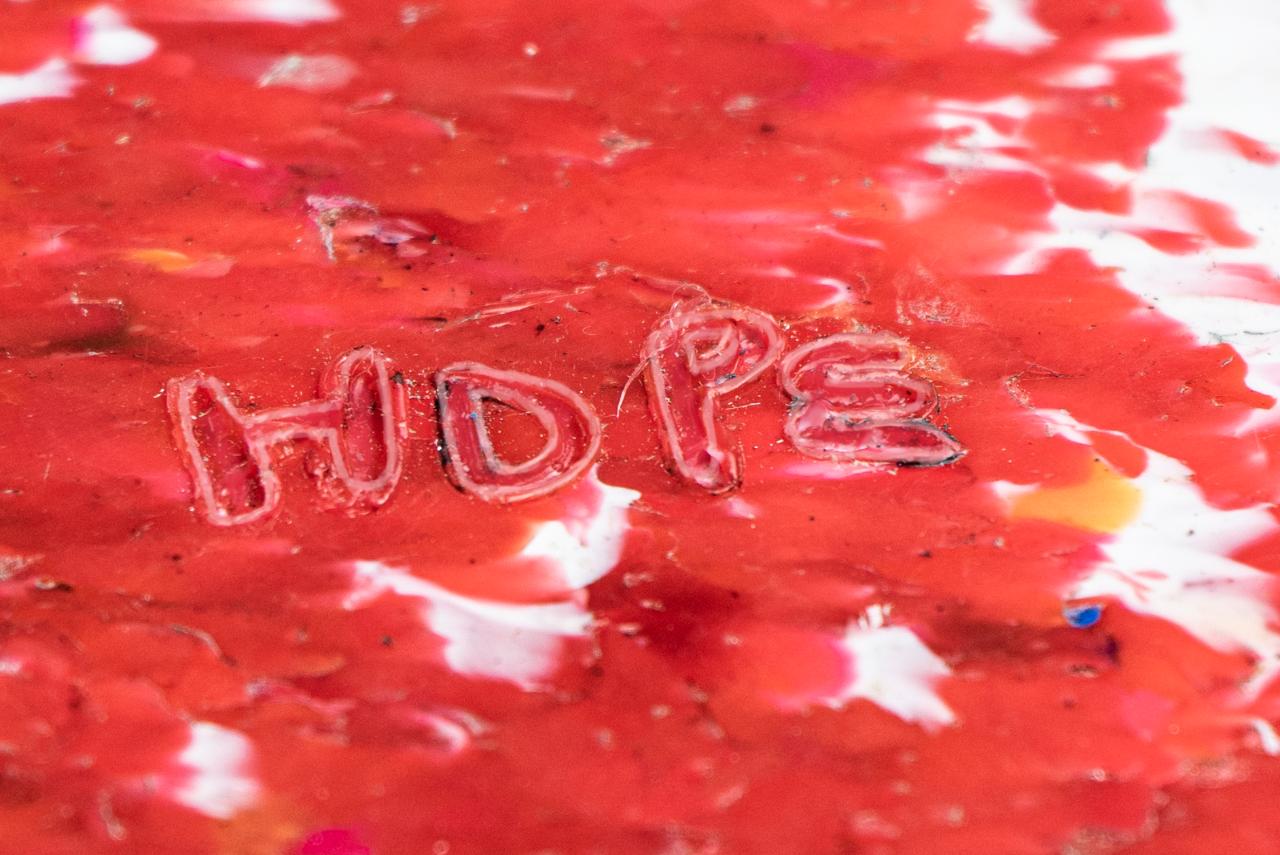
It is very important to mark your products with their specific plastic type, so they can be recycled better. There are several ways to do this. Here we show a very simple technique to make your own stamps with a copper wire.
(Alternatively you can also buy plastic type stamps on the Precious Plastic bazar)
—
Attachments
Resources
Step 1 - Get ready
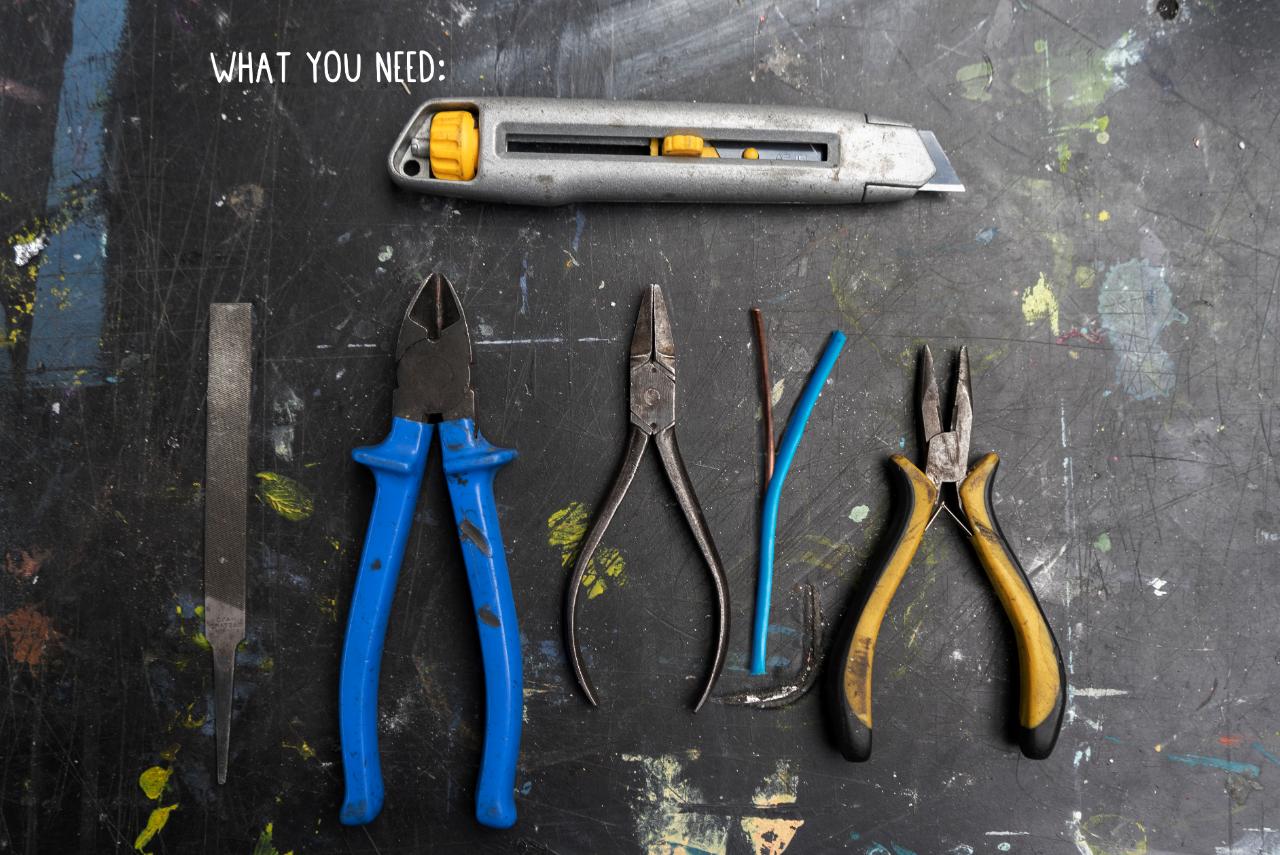
Let's start with getting our materials and tools ready.
To make the stamps, you will need:
- Wire/cables
- Cutter (Workshop knife)
- Pliers to bend and cut
- File to soften corners
- Soldering Iron
To make the stamps, you will need:
- Wire/cables
- Cutter (Workshop knife)
- Pliers to bend and cut
- File to soften corners
- Soldering Iron
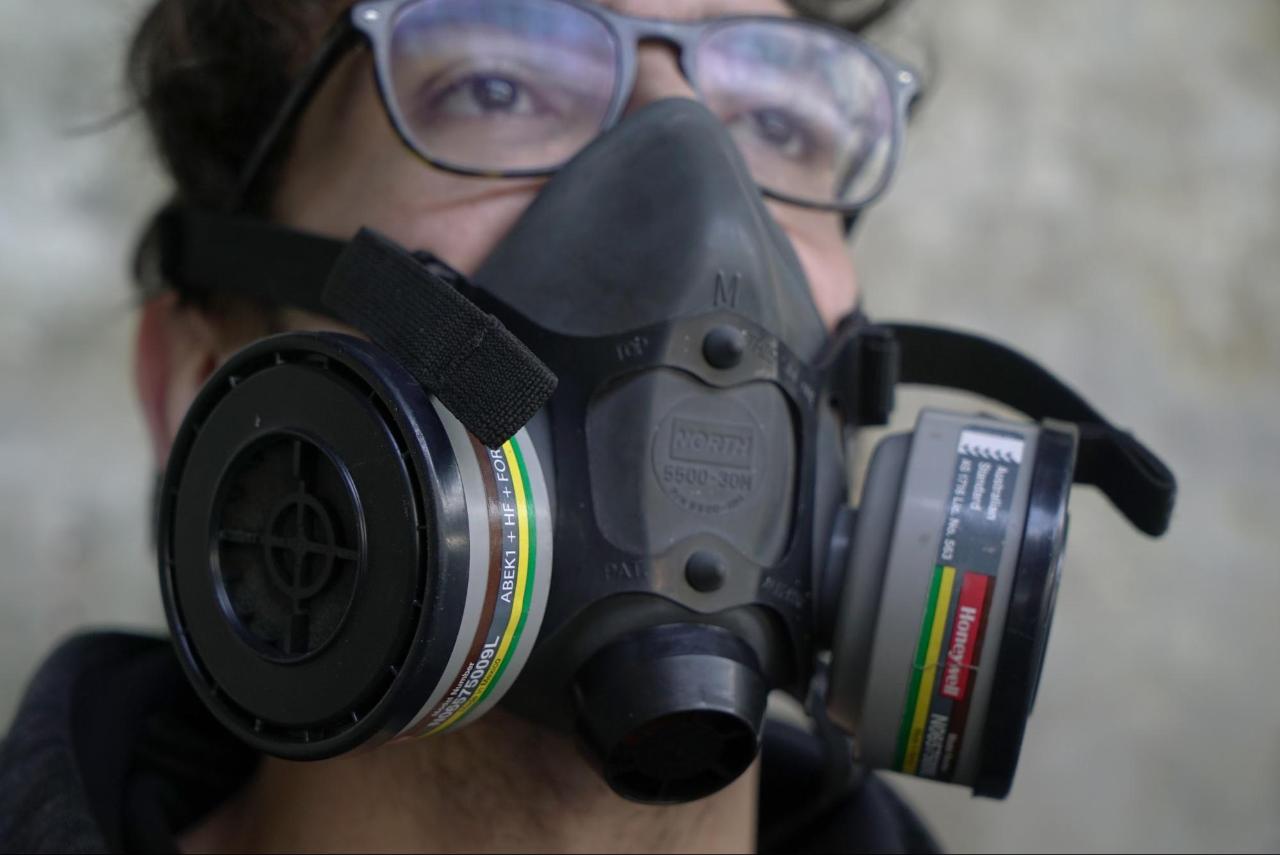
Step 2 - Stay safe
When you use your new stamp make sure to wear a mask as toxic fumes can arouse. In general when handling the iron be careful to not burn yourself and a workshop knife also can be quite dangerous. So stay safe.
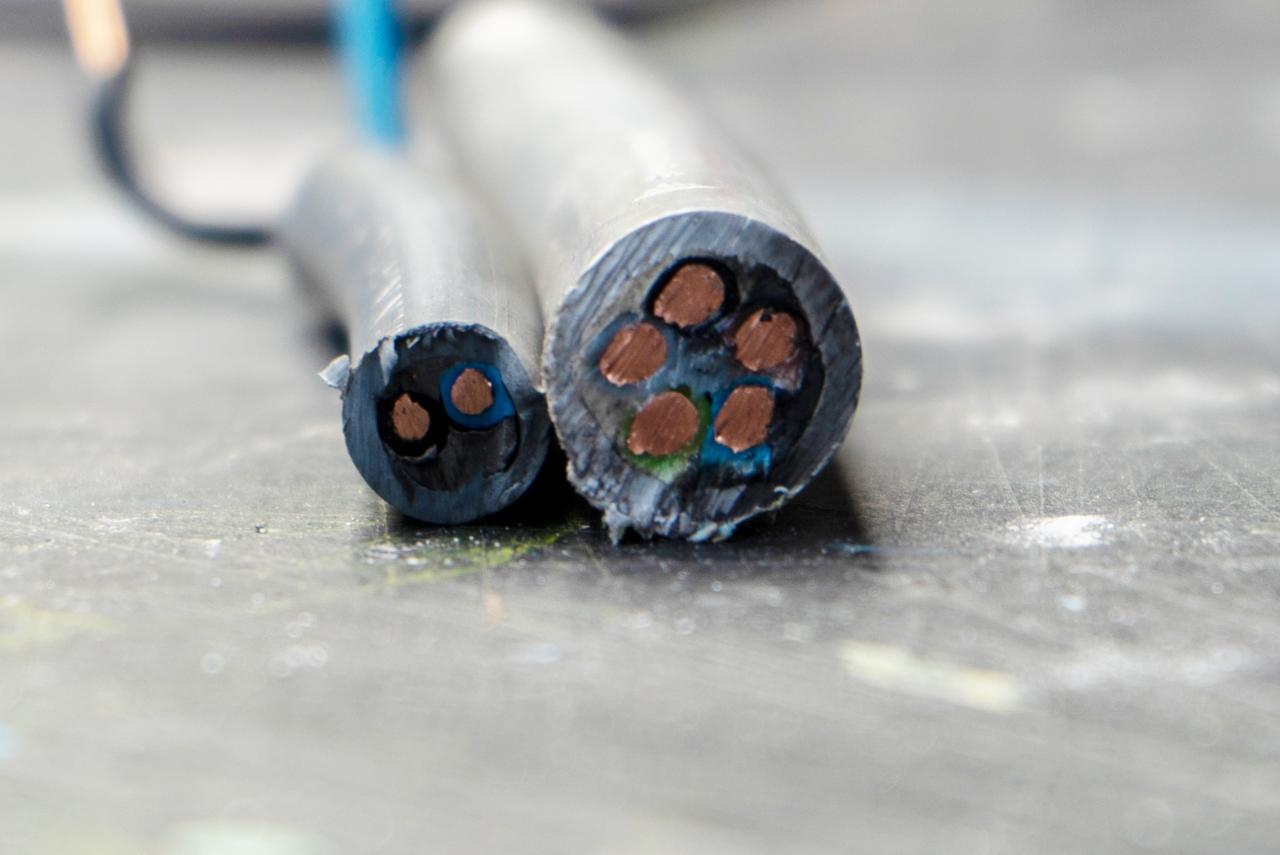
Step 3 - Get your wire
Copper offers very good heat transportation and works the best for the stamps. We can get this from some cables, which are made with hard copper wire. This means there is one massive string of copper and not many small ones. Check your offcut area or visit your local scrap yard, if you can’t find them, you can also buy normal copper rods. Strip your cable carefully from the plastic with the knife and you are ready to move on.

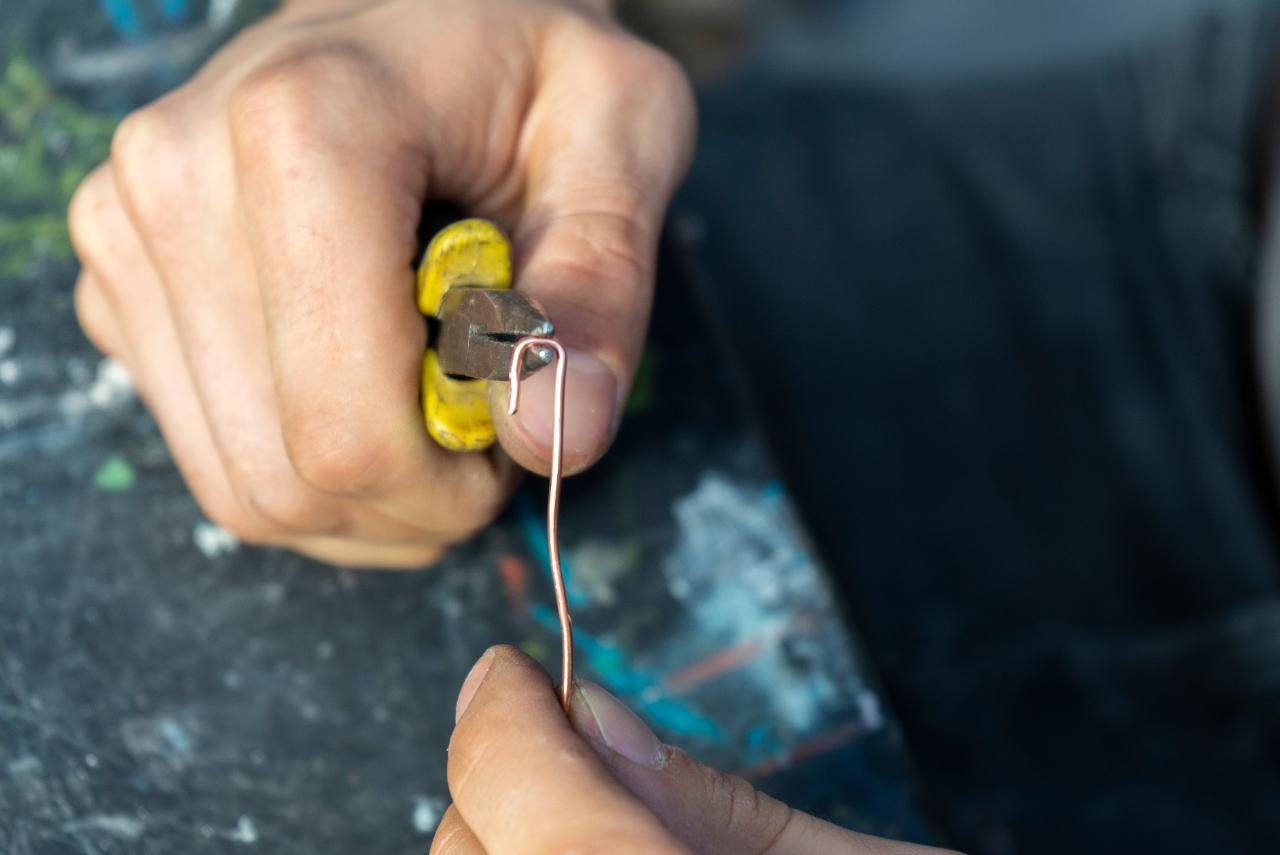
Step 4 - Bend your wire
Now bend the copper in your desired shapes. Use your pliers to support the bending and squeezing. Make sure to include 2 cm of wire orthogonally from your later or symbol to fix later in your iron.
If you feel adventurous you can also carefully solder copper pieces together, but we didn’t experiment with that, as we heat up the copper later, which can weaken the bond.
If you feel adventurous you can also carefully solder copper pieces together, but we didn’t experiment with that, as we heat up the copper later, which can weaken the bond.
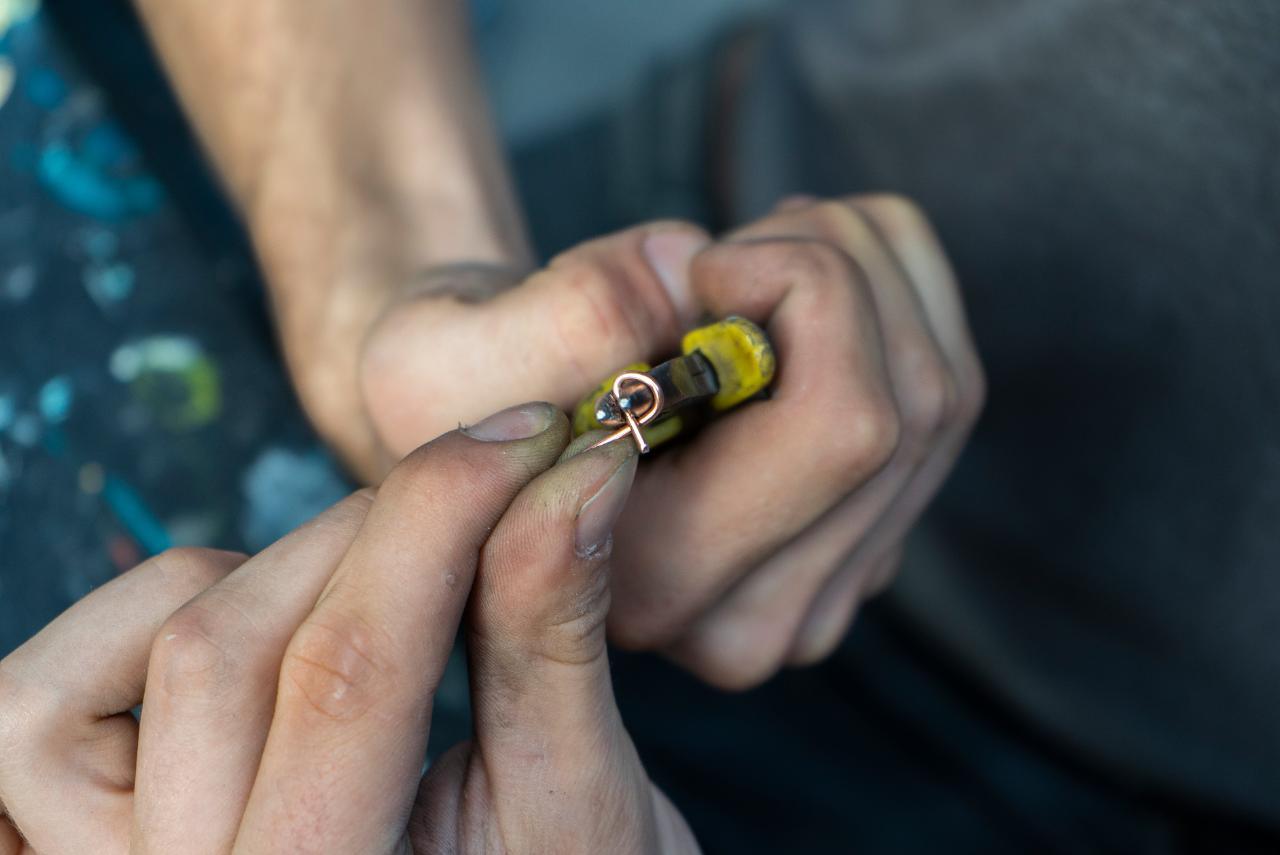
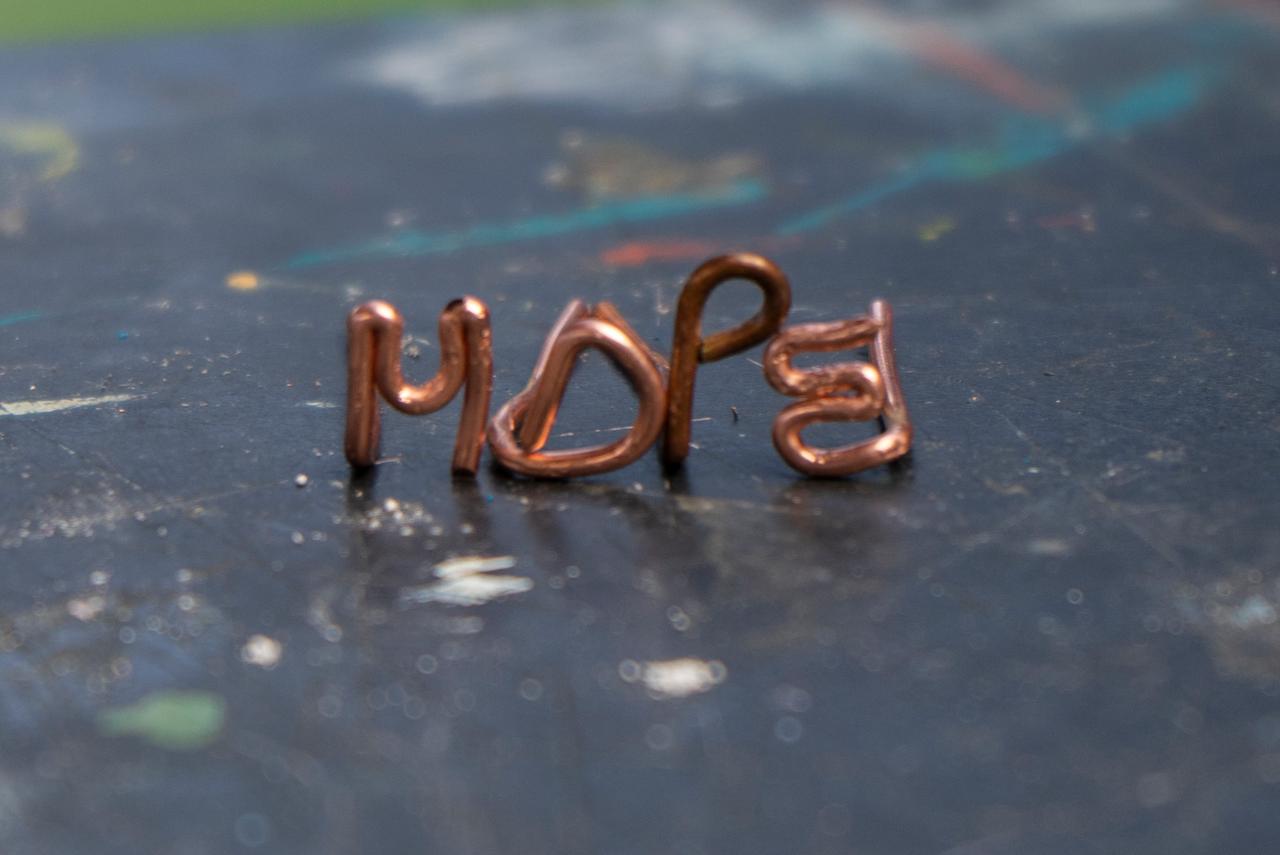
Step 5 - Make a library of shapes and letters
We found it makes sense to create everything you could need in advance so you are well prepared for marking your plastic.
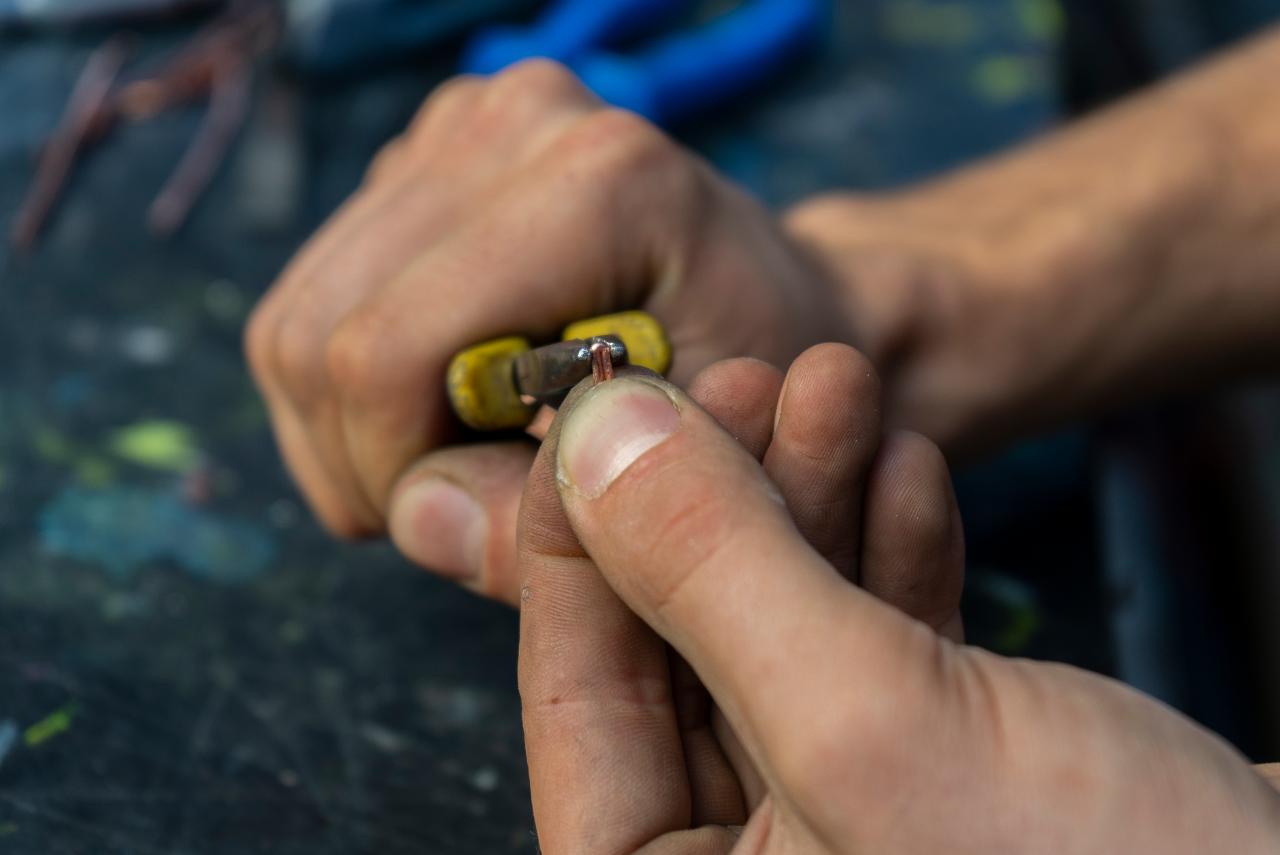
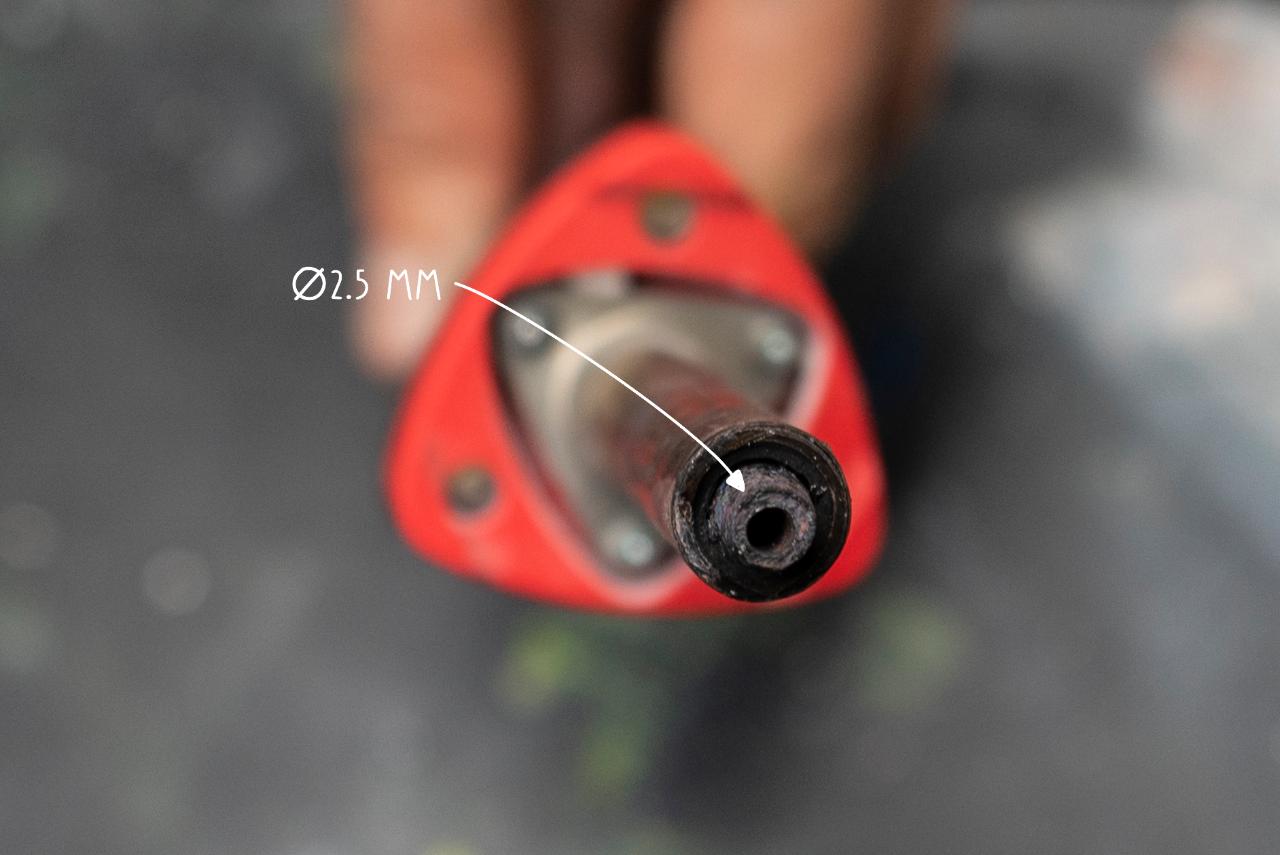
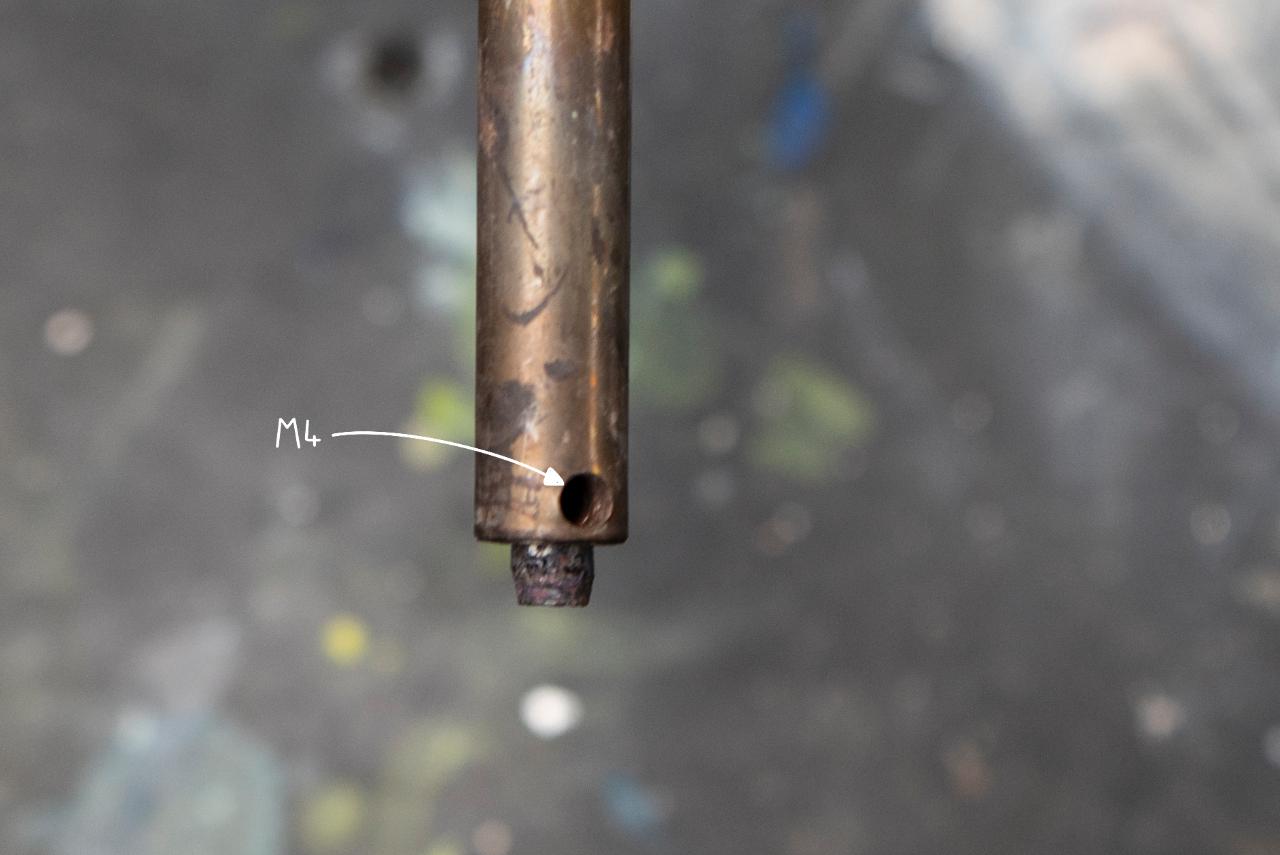
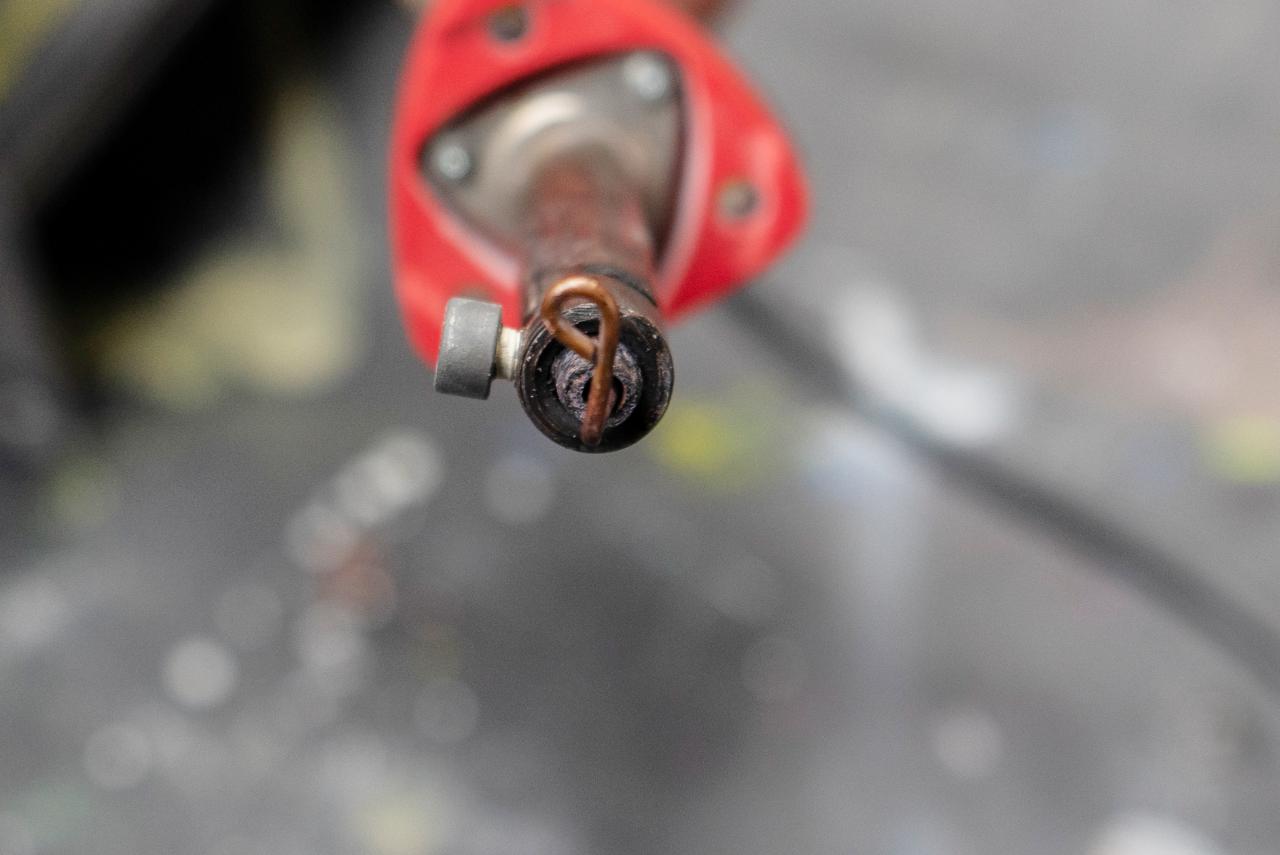
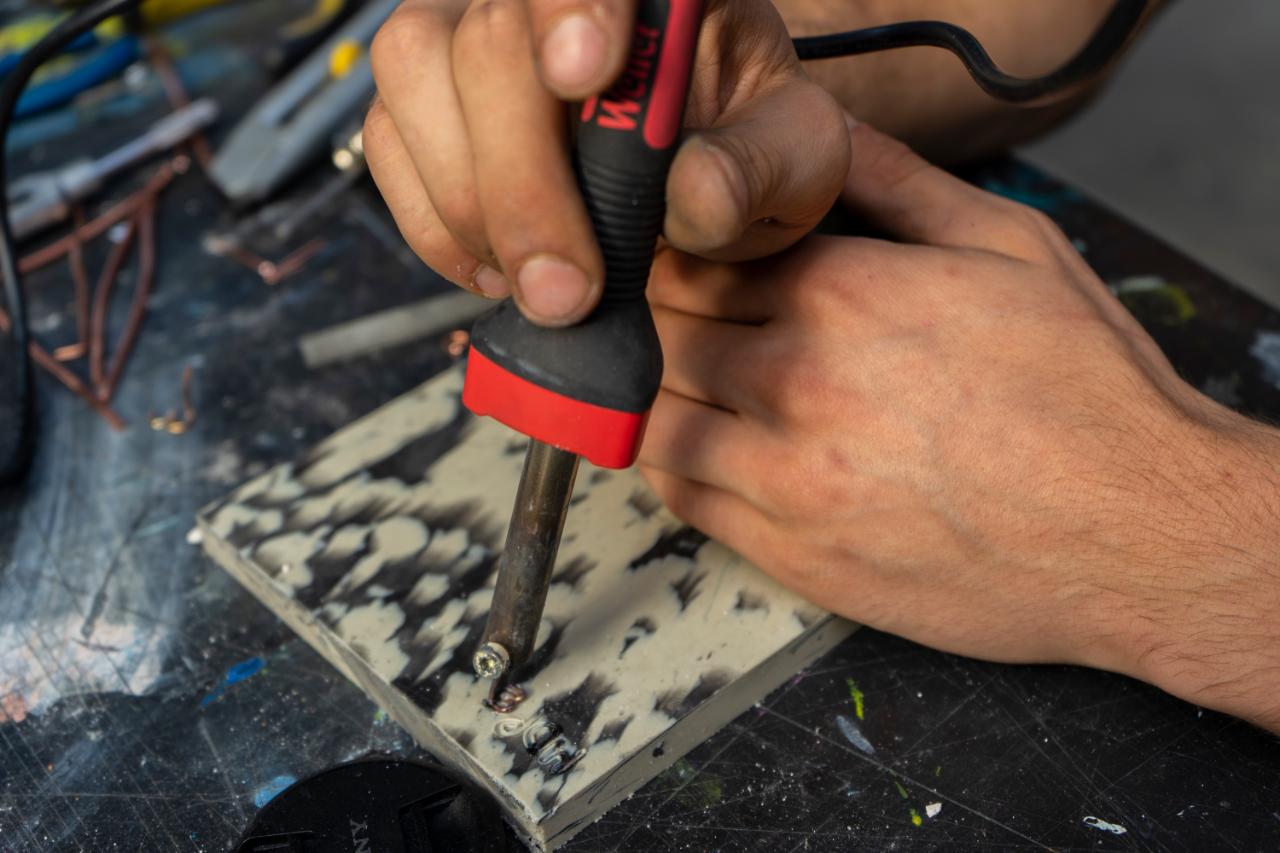
Step 6 - Get your iron ready
We are using a very basic 65W soldering iron and didn’t need to change much. Your iron needs a bolt on the side to keep the copper wire in place. We had already a hole in it to fix the tip, which we just opened a little more and threaded it to M4 for a better grip. Get a short M4 bolt and you are good to go.
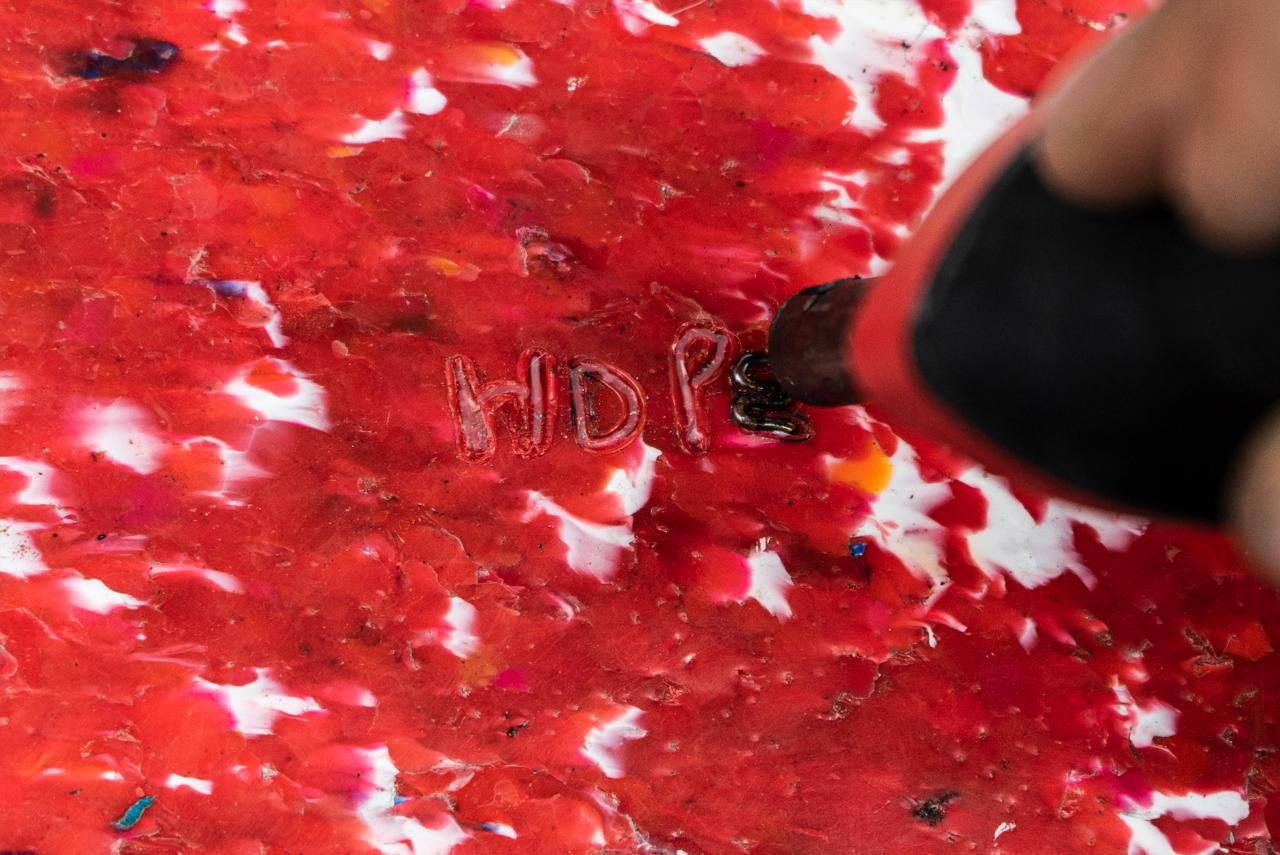
Step 7 - Stamping
Now you are ready to stamp. The copper shows through a slight changing of color very good when it is hot enough to stamp. This shouldn’t take more than a few seconds. Carefully press the copper on the plastic and see how it melts your work into it. Don’t apply too much pressure as the copper gets very soft when warm and can bend. Different materials need different handling so always when using something new have a piece for testing on hand.
Step 8 - Happy stamping!
Easy and fast way to mark your plastic, as you should NEVER give out plastic without labeling. Let us know how it went for you and if you discovered something new.
—
—
—
Comments