Make Blueprints in FreeCAD
Whether you're making moulds, building machines or other work making Blueprints is a key tool to communicate your ideas to builders, colleagues and manufacturers. FreeCAD is an amazing bit of free open source software to make 3d models and much more that is available on all platforms. It has a Blueprint feature built in and this How-Tt will show you how to use it to make Blueprints of your own!
—
Attachments
- Injection V2.0 CAD.step
- Injection_Machine_Box_Front_Blueprint.FCStd
- mask.png
- mask_annotation.png
- PP_Injection_Electronics_Front_Plate_Blueprint.pdf
Resources
3D Files
- 3D Step File: /Injection V2.0 CAD.step - Preview
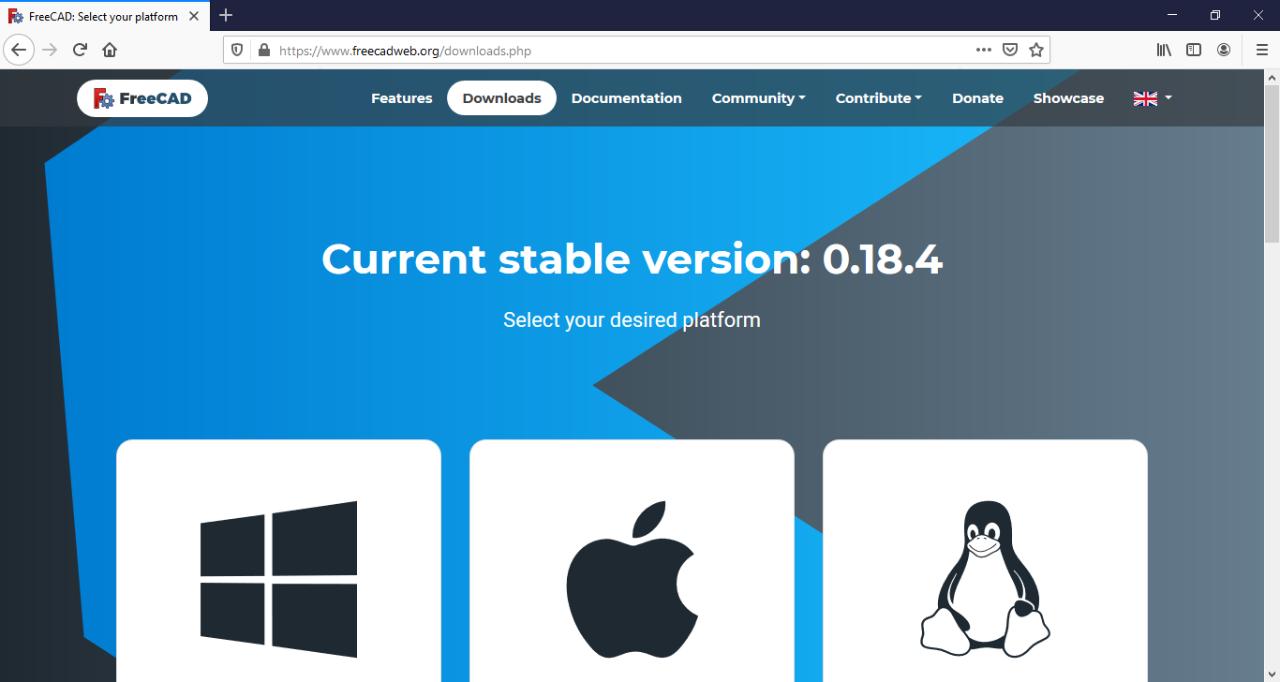
Step 1 - Download FreeCAD
-Go to https://www.freecadweb.org/downloads.php and select the distribution you need for your operating system
-Follow the instructions for the installation guide
-Follow the instructions for the installation guide

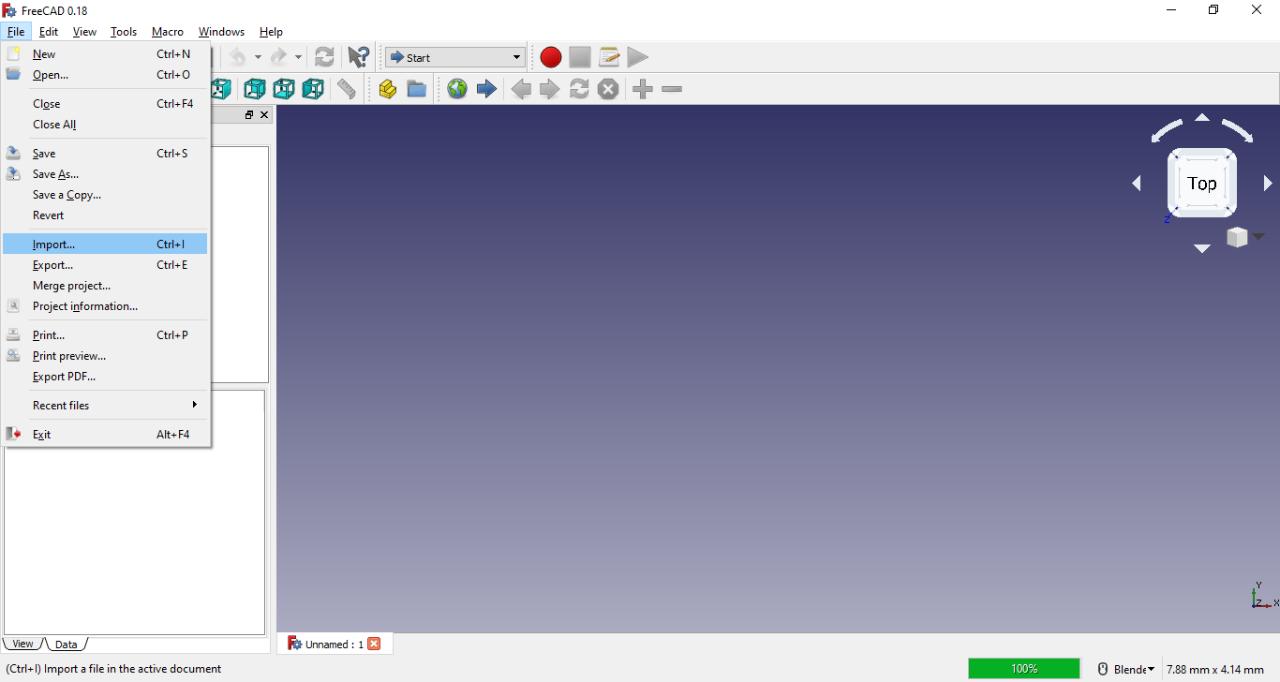
Step 2 - Import 3D Model
-We took this model from the starter kit but you can also use a part that you have designed yourself in FreeCAD
-Create a new empty document by clicking the new document button in the menu
-Click File > Import then select the file you wish to use
-Create a new empty document by clicking the new document button in the menu
-Click File > Import then select the file you wish to use


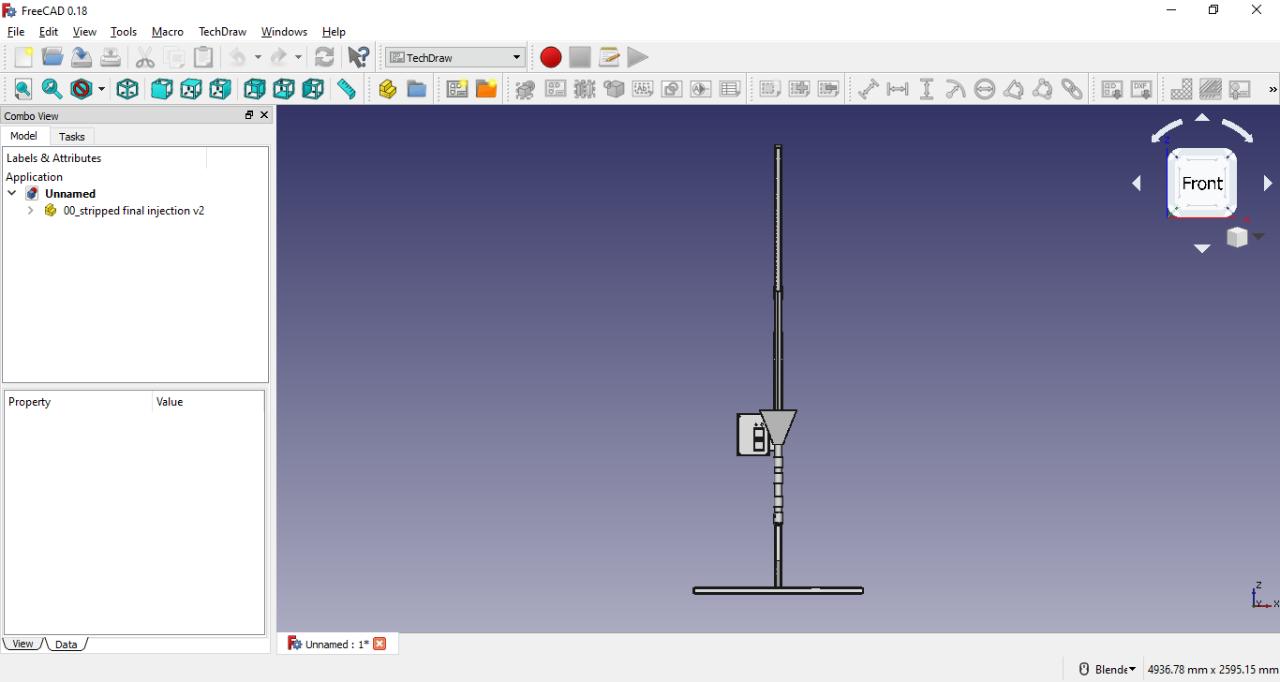
Step 3 - Select the TechDraw Workspace
-FreeCAD has various workspaces which has different buttons and are used for different use cases
-The one we need is the TechDraw workspace as it is used for create
-All you need to to do is select it from the dropdown at the top of the application
-The one we need is the TechDraw workspace as it is used for create
-All you need to to do is select it from the dropdown at the top of the application

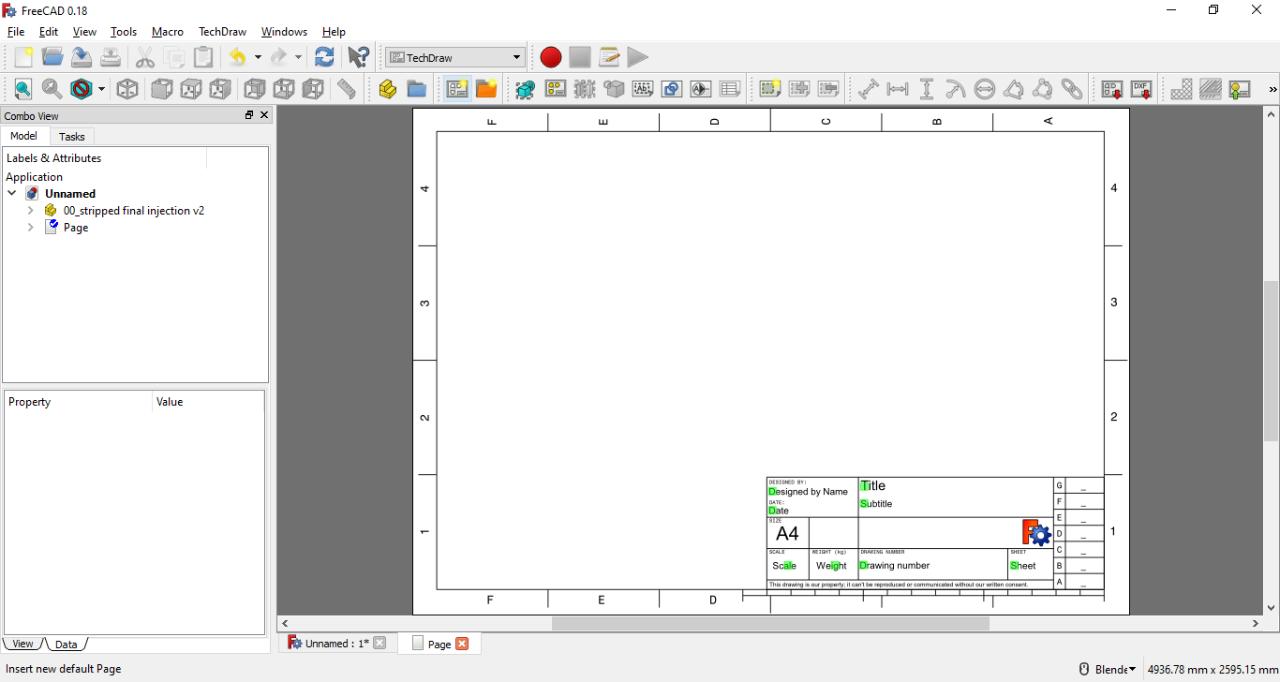
Step 4 - Generate a blank template
-FreeCAD already comes prepared with various Blueprint sizes and standards
-You can select it by clicking the folder icon in the TechDraw workspace and select the type
-Or you can select the default one by clicking the "Insert new default Page" button in the TechDraw workspace
-You can also make your own as it takes an SVG format so you can adapt it to your needs
-You can select it by clicking the folder icon in the TechDraw workspace and select the type
-Or you can select the default one by clicking the "Insert new default Page" button in the TechDraw workspace
-You can also make your own as it takes an SVG format so you can adapt it to your needs

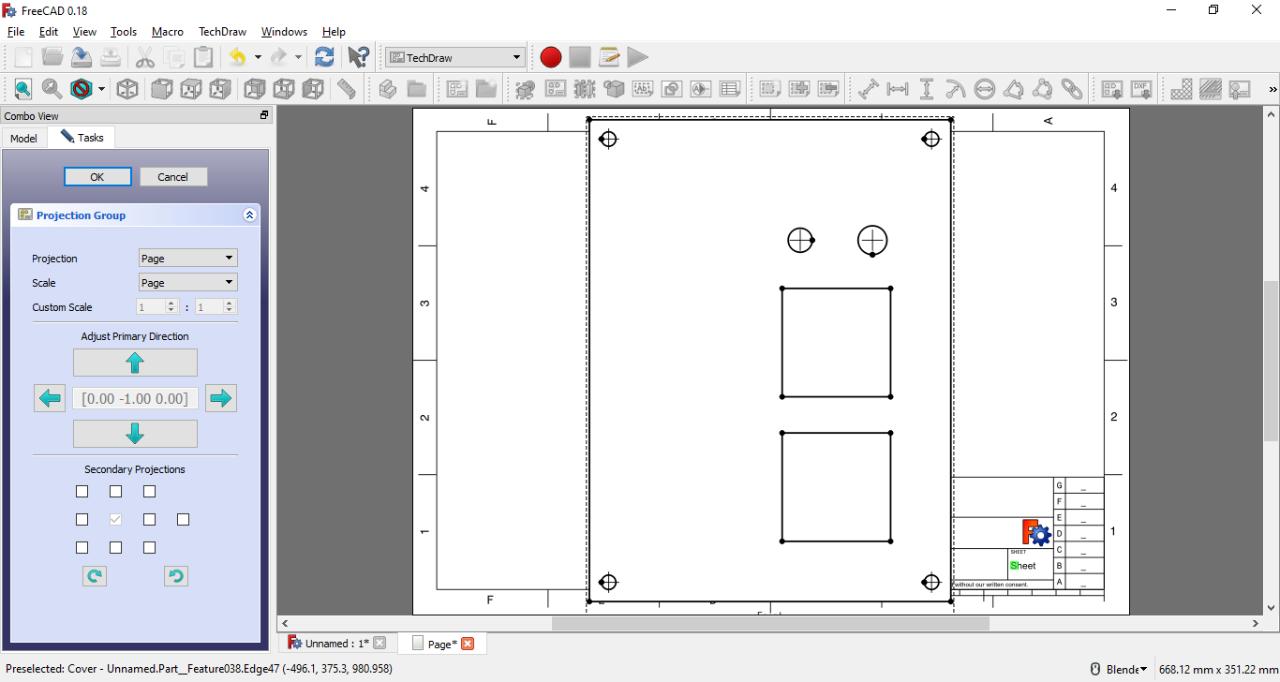
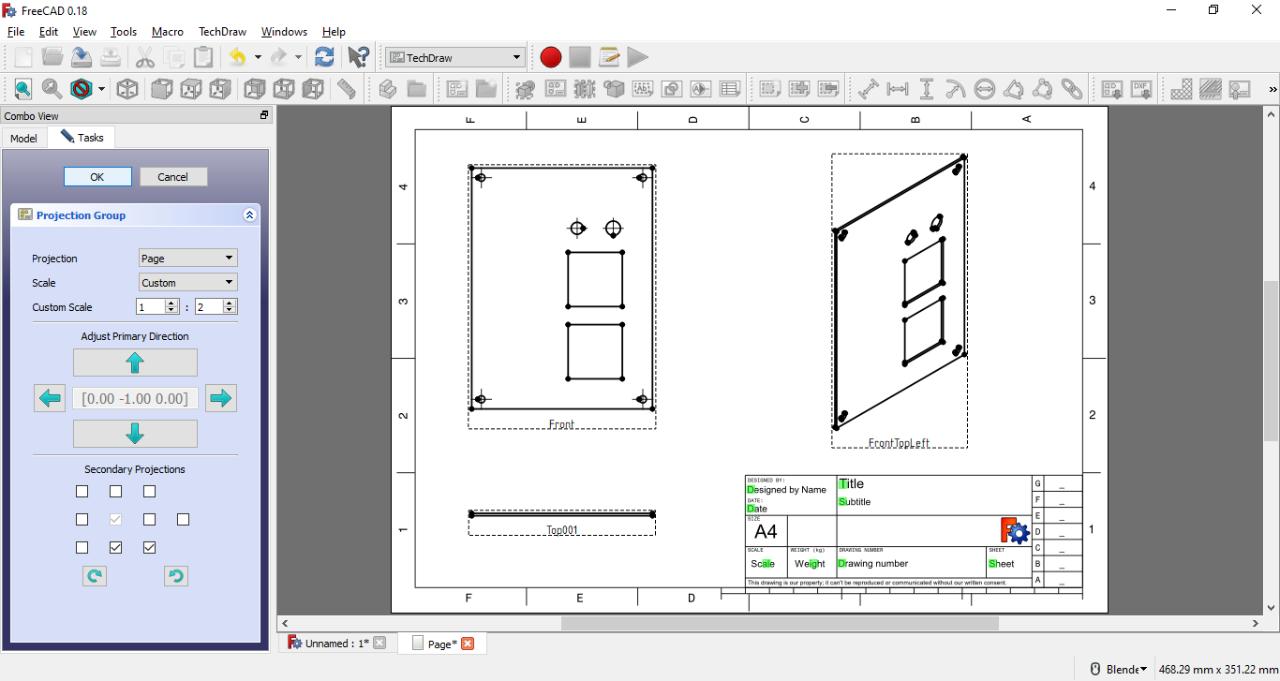
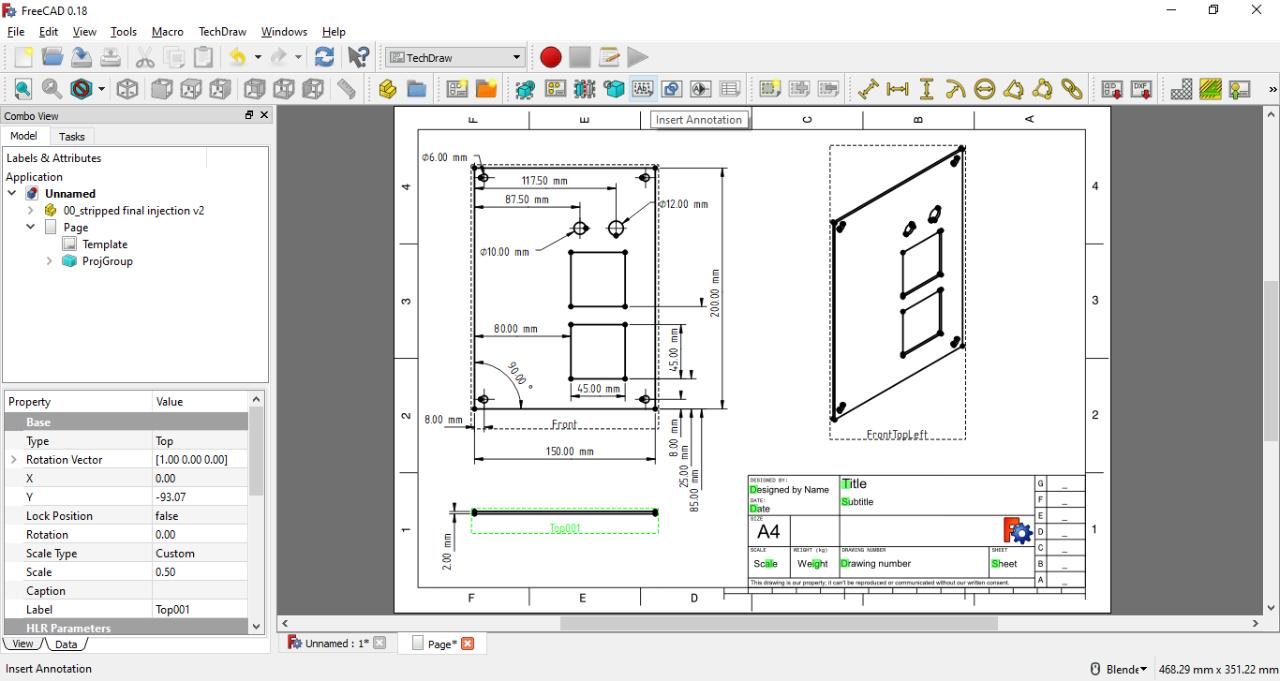
Step 5 - Import perspective view
-Select the item you wish to do a blueprint of in the view by left clicking the item
-Then holding CTRL & clicking on the page in the side menu
-Click on the "Insert Projection View" button
-Open the Page and you will see the drawing in the page by
-You can adjust the rotation, scaling & which views are visible from the side menu
-Click "OK" in the task menu to confirm your choice
-If it's not updating click the refresh button in the top menu
-The good thing about doing it this was is that the blueprint and any dimensions you add should update if you update the base model

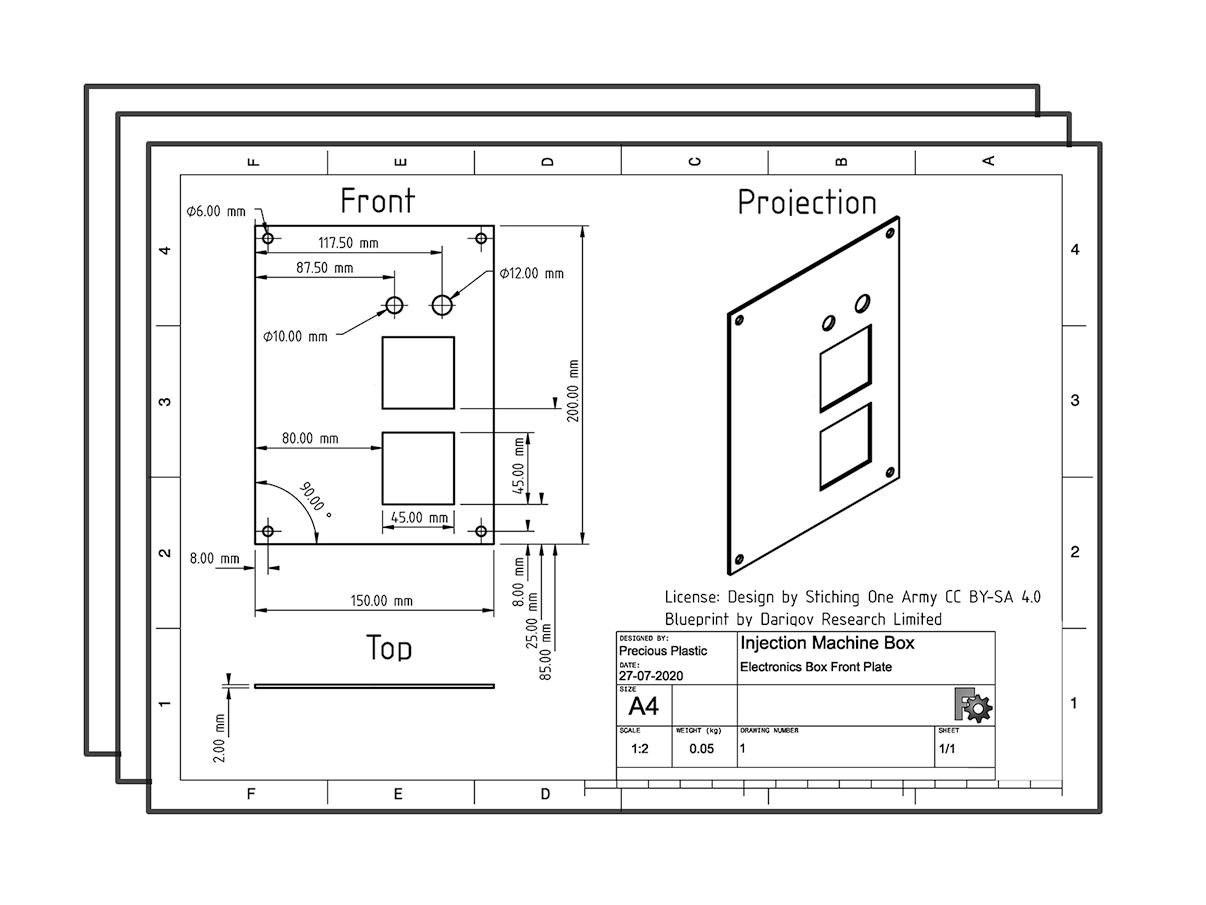
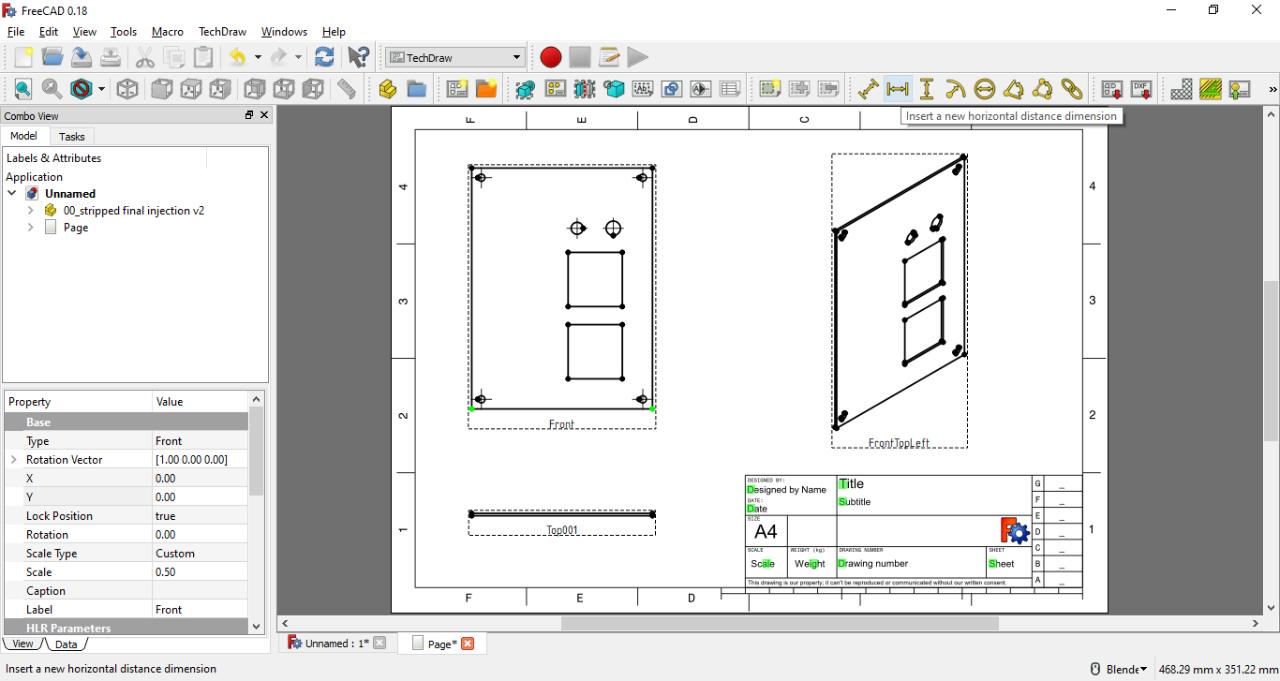
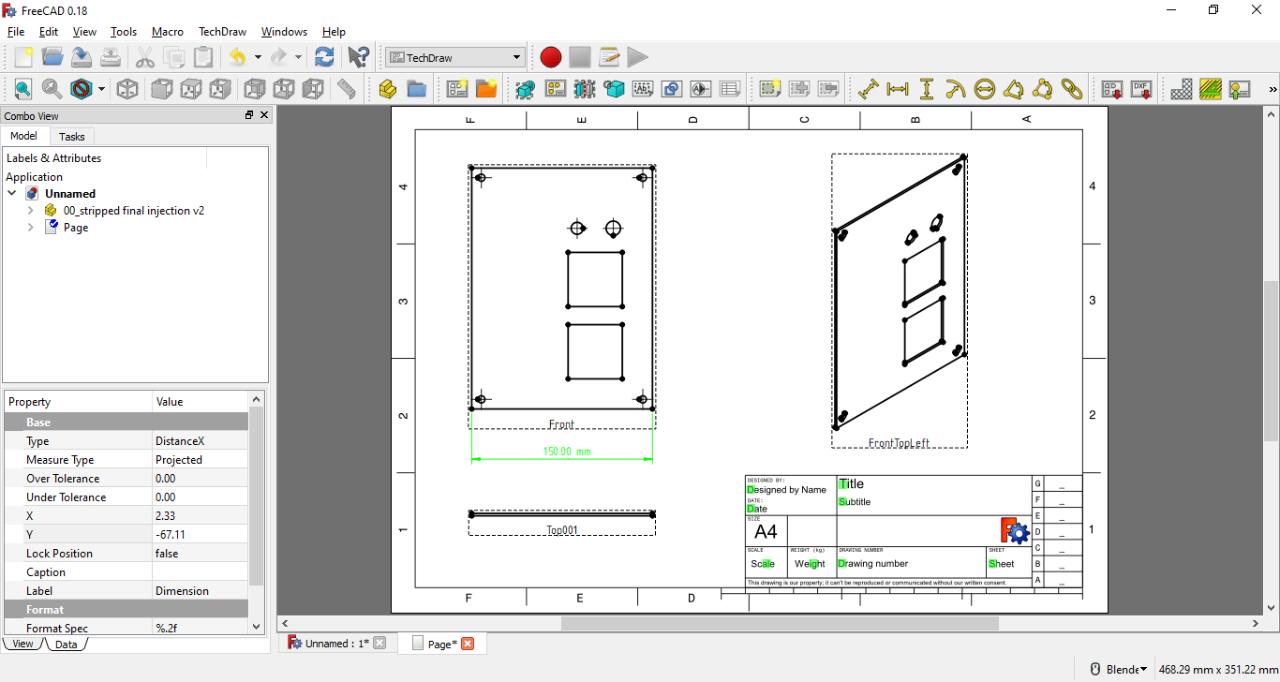
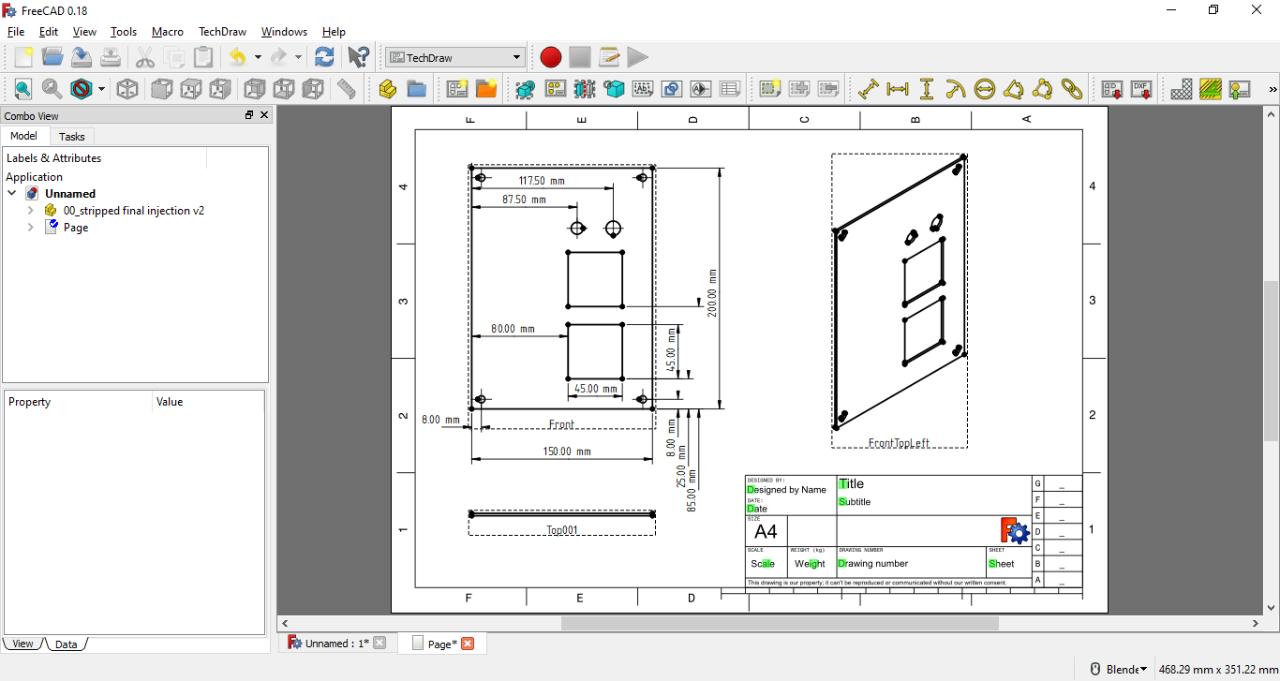
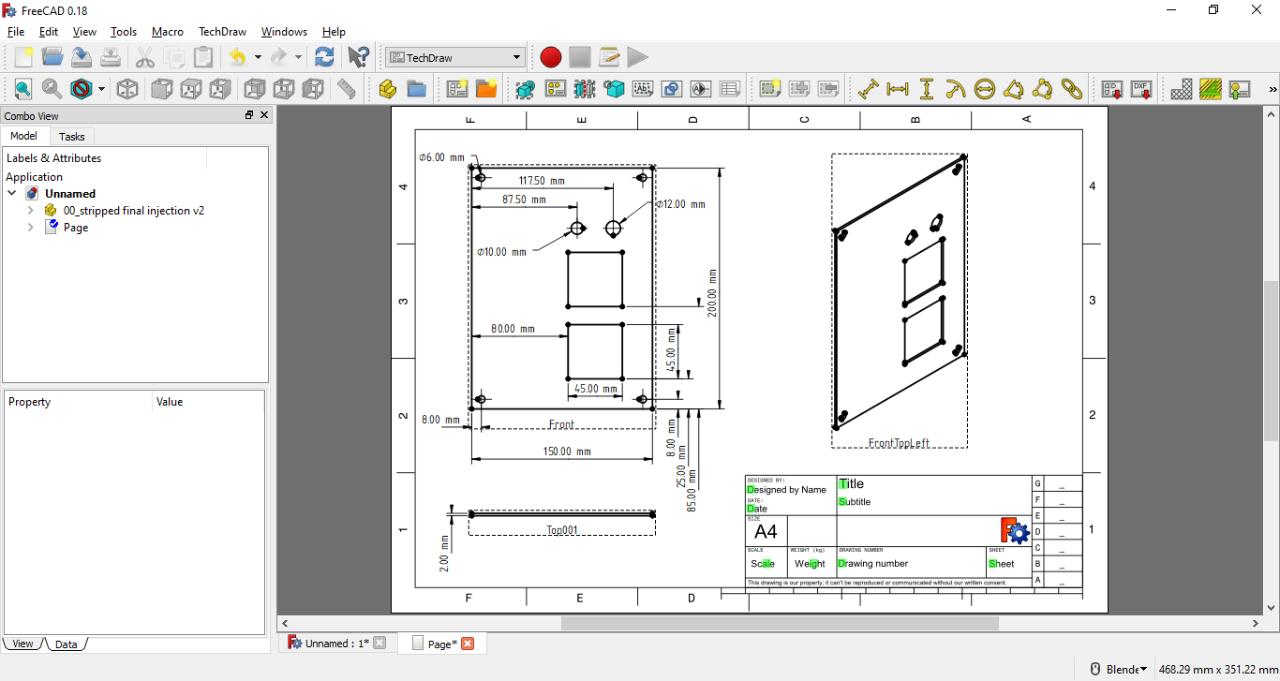
Step 6 - Add Linear Dimensions
-Select two points by holding CTRL and clicking on the two points you need
-Click the horizontal or vertical dimension buttons & adjust location of the dimension to your needs
-Adjust the location so the dimension is legible
-Repeat till all relevant information is present
-Click the horizontal or vertical dimension buttons & adjust location of the dimension to your needs
-Adjust the location so the dimension is legible
-Repeat till all relevant information is present
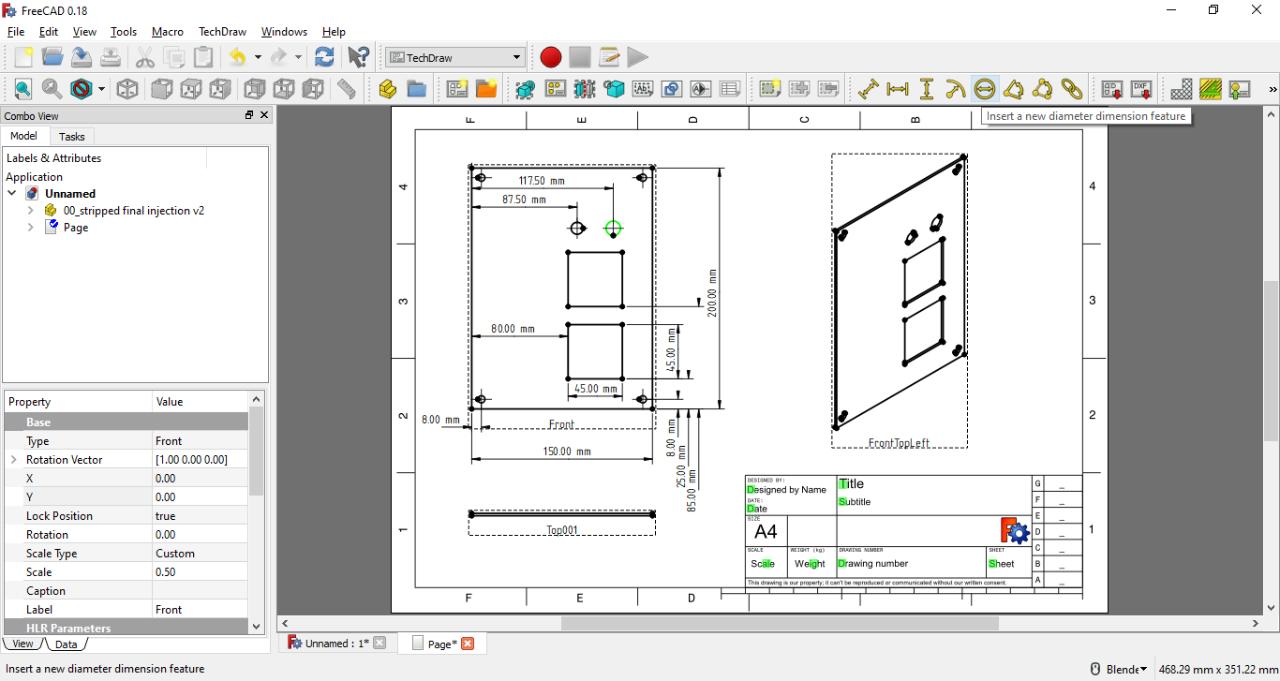
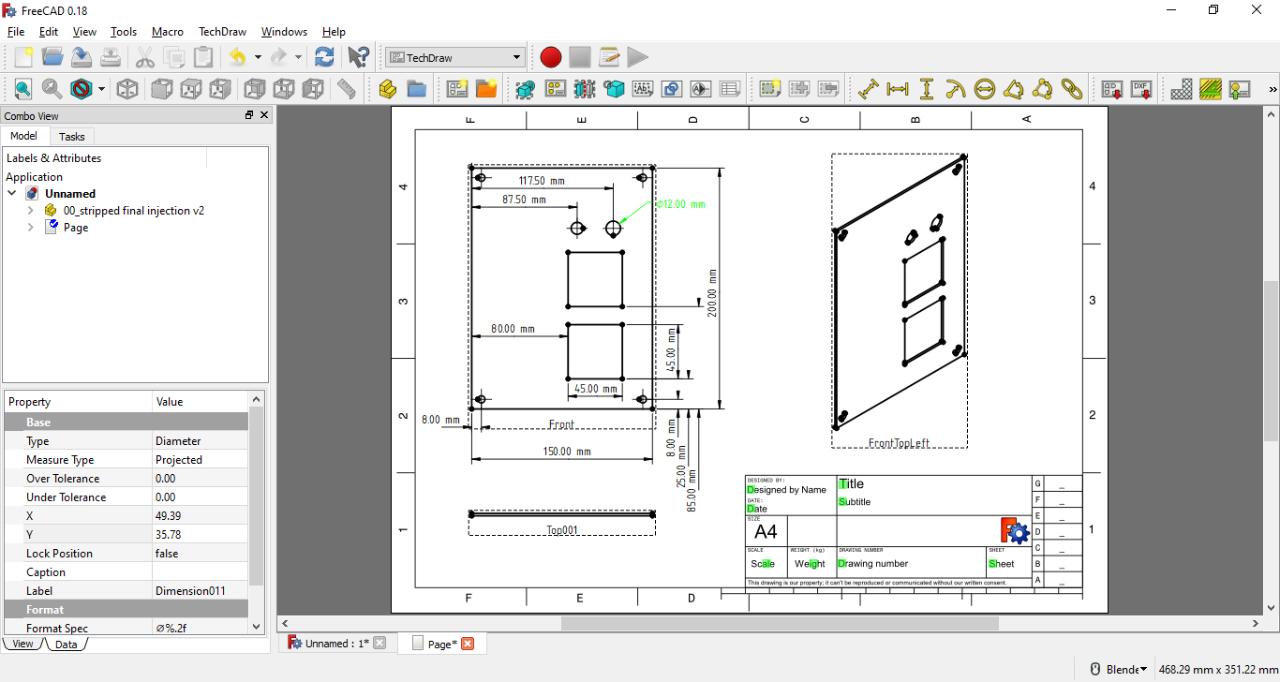
Step 7 - Add Diameter Dimensions
-Select the circle you wish to add a diameter to
-Click on the Diameter dimension button
-Adjust the location so the dimension is legible
-Repeat for all circles in your drawing
-Click on the Diameter dimension button
-Adjust the location so the dimension is legible
-Repeat for all circles in your drawing
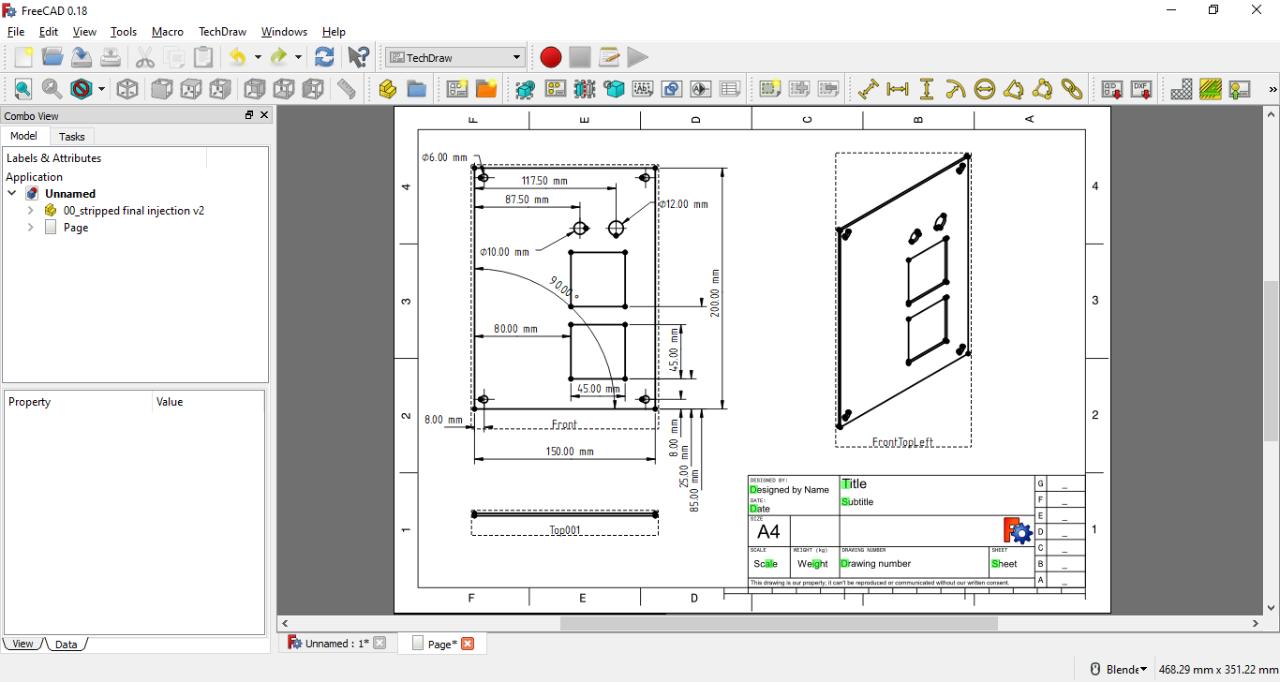
Step 8 - Add Angle Dimensions
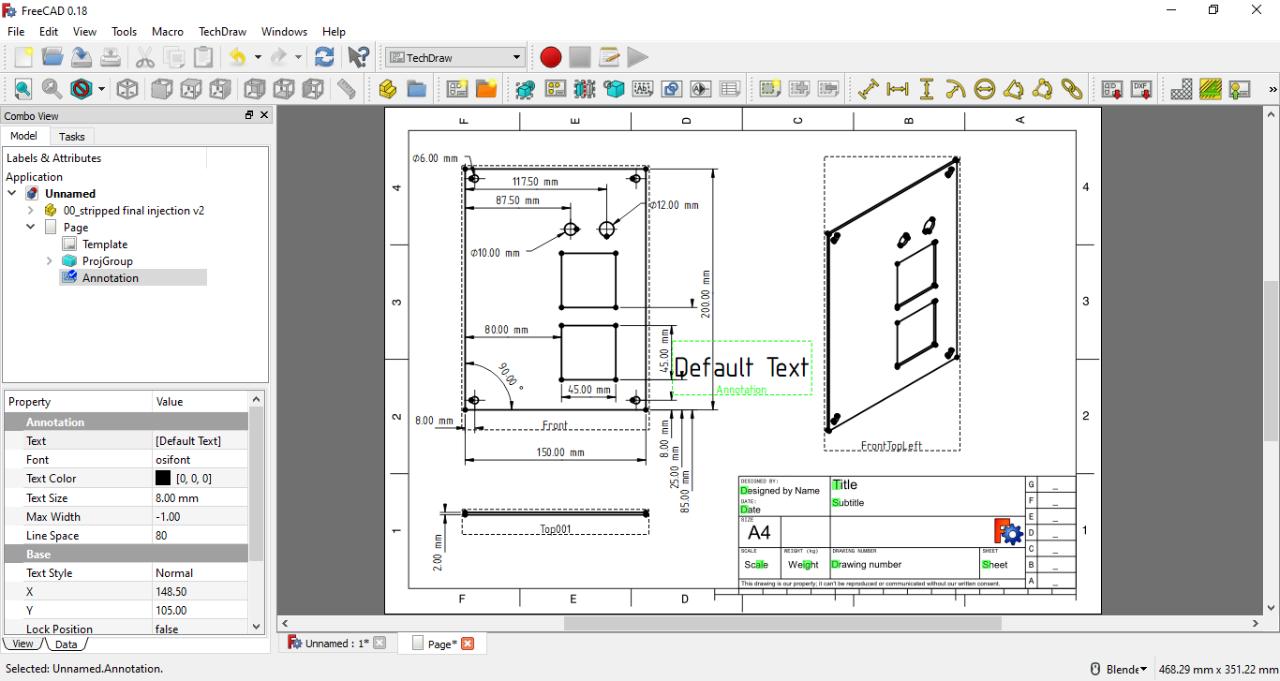
-Click the "Insert Annotation" button in the TechDraw workspace
-You can adjust the text & text size in the left hand panel
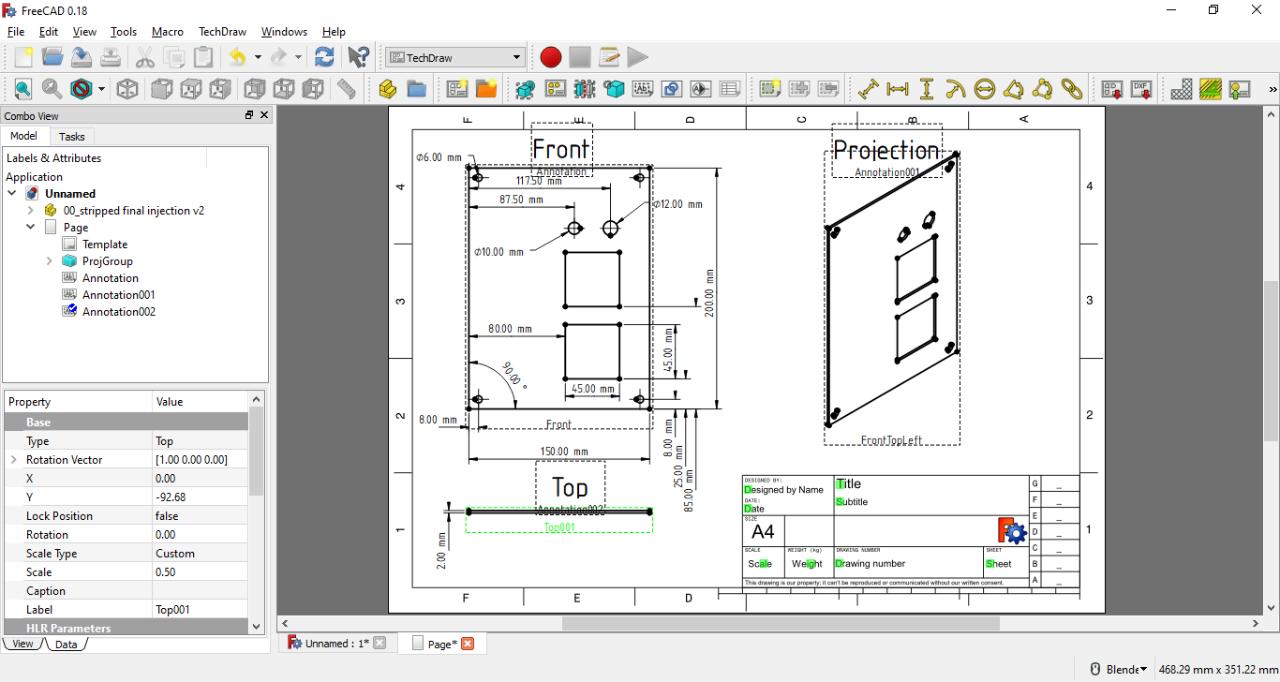
-We have added the names of each of the views as the frame titles are not visible on export
-You can adjust the text & text size in the left hand panel
-We have added the names of each of the views as the frame titles are not visible on export

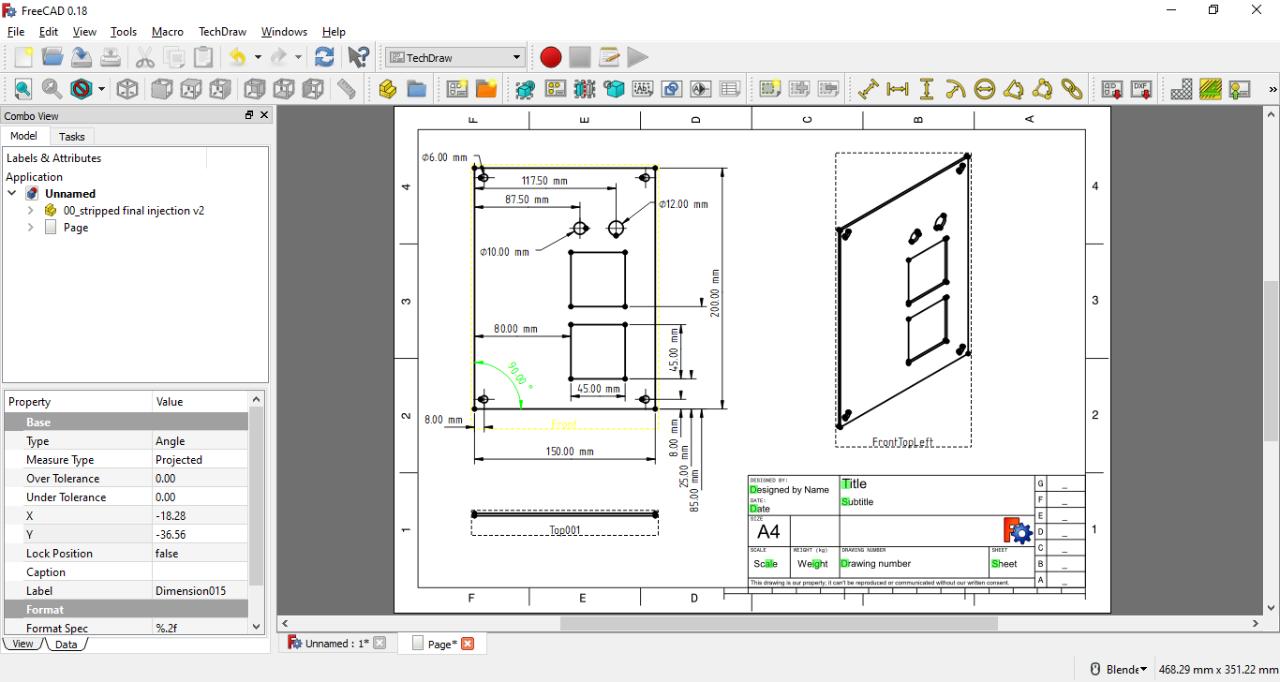
Step 9 - Add Annotations
-Click the "Insert Annotation" button in the TechDraw workspace
-You can adjust the text & text size in the left hand panel
-We have added the names of each of the views as the frame titles are not visible on export
-You can adjust the text & text size in the left hand panel
-We have added the names of each of the views as the frame titles are not visible on export
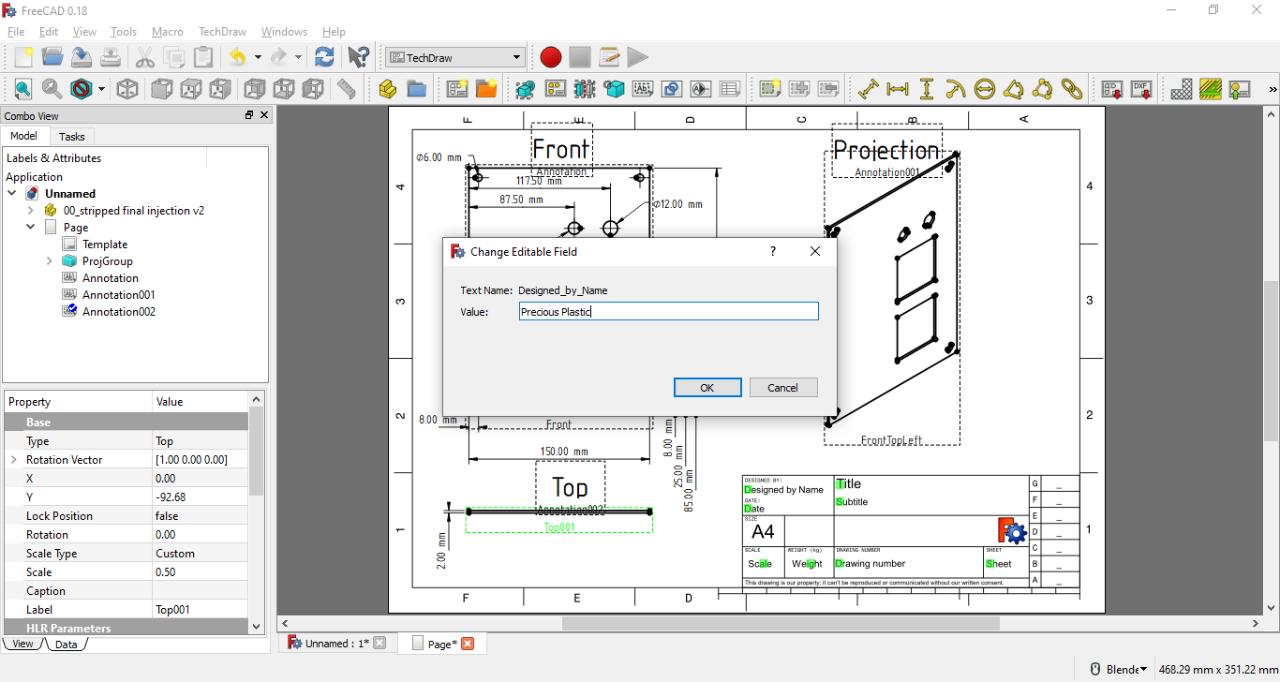
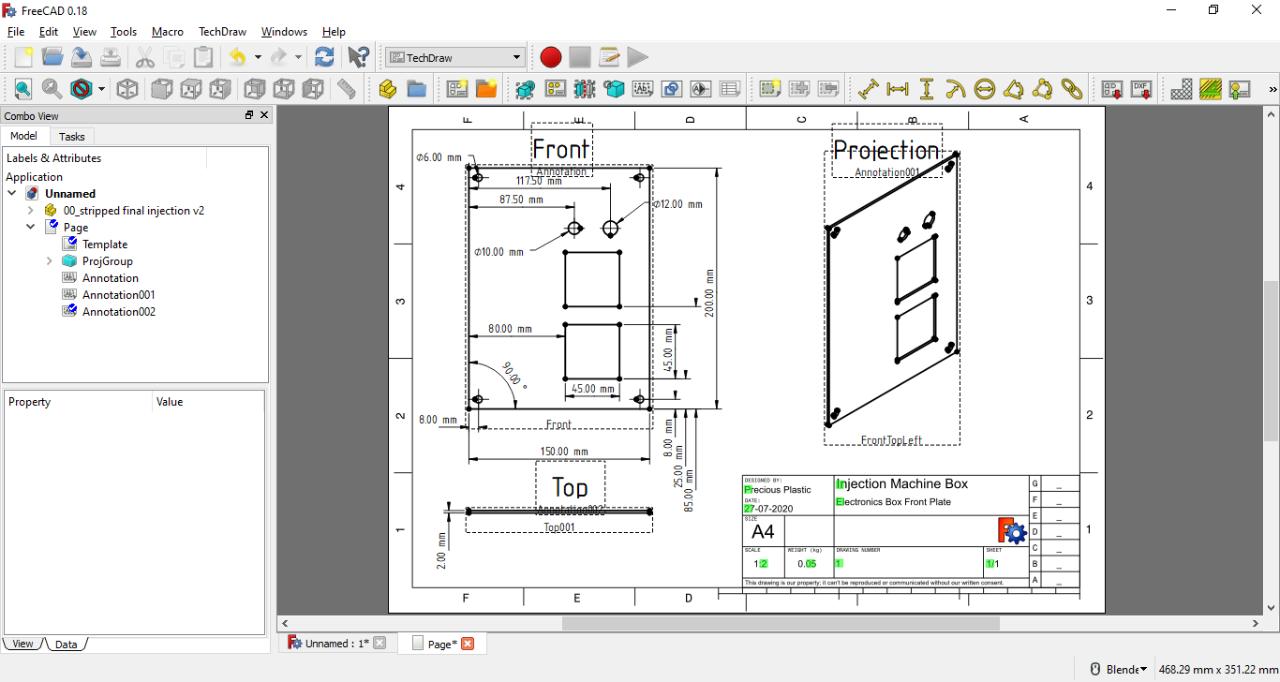
Step 10 - Add Blueprint Details
-There is always a section in blueprints explaining the details of the drawing
-You can see by the green boxes what is editable in the template
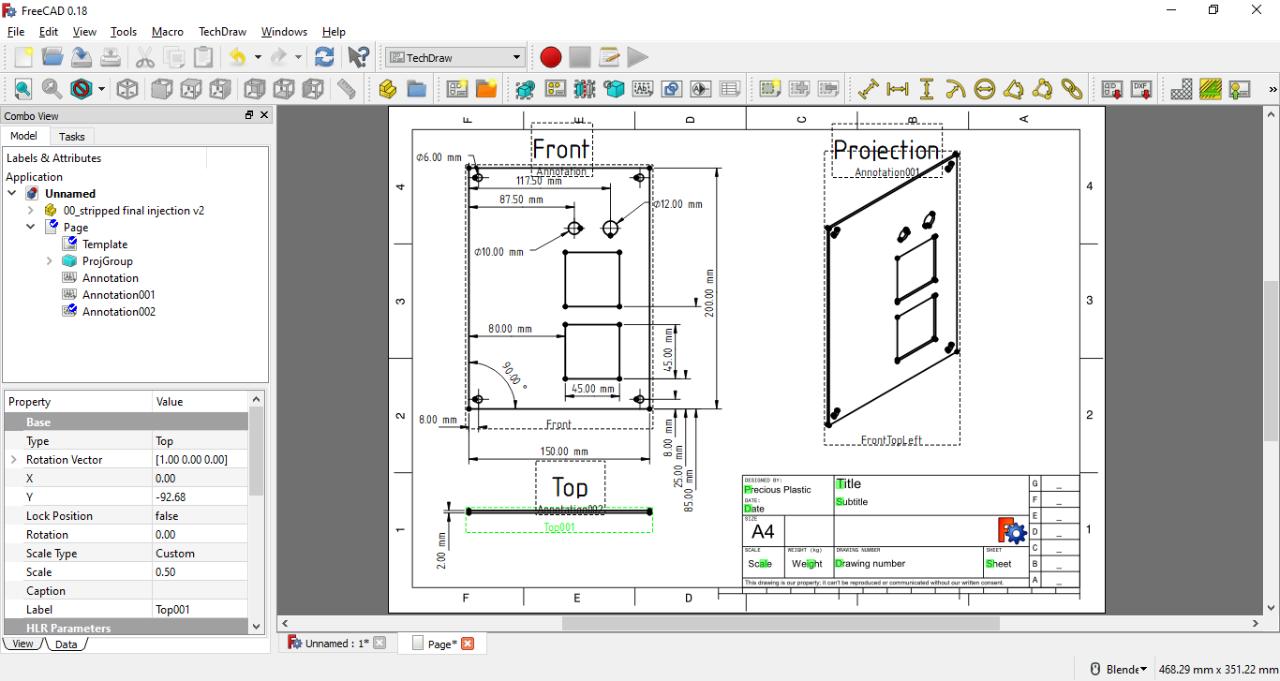
-Click the green box within each section and it will open a modal window for you to fill in the text
Don't forget to add
-Who made it
-When it was made
-What the dimensions of the notations are
-What the scale of the view is
-What version number it is
-If there are multiple sheets explaining the file
-You can see by the green boxes what is editable in the template
-Click the green box within each section and it will open a modal window for you to fill in the text
Don't forget to add
-Who made it
-When it was made
-What the dimensions of the notations are
-What the scale of the view is
-What version number it is
-If there are multiple sheets explaining the file
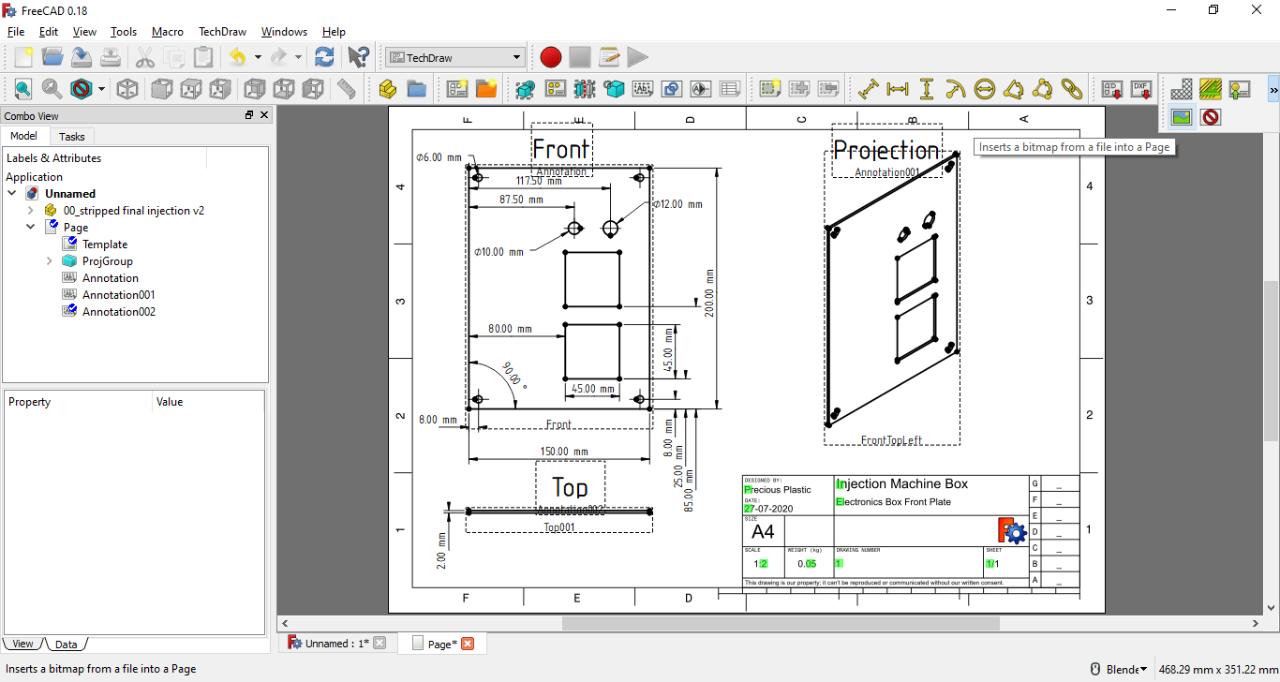
Step 11 - Cleanup
-As this is open source work we will need to remove the default text from the template
-While we're at it we can also remove the details table on the right hand side
-We done this by using a blank white .png file and using it as a mask
-Select the "Insert Bitmap from file" button and use the masks provided in this tutorial
-You'll need to put it in the right position & adjust for the size
-This is done by adjusting the parameters after clicking it in the left hand panel


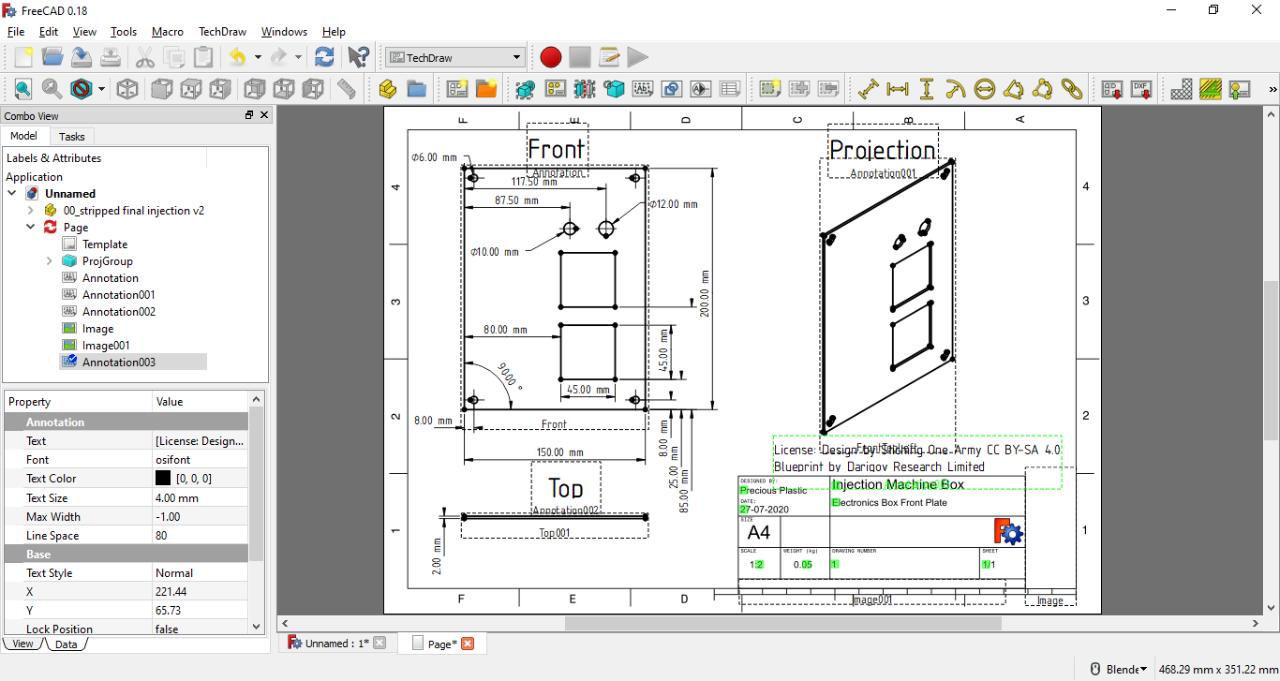
Step 12 - Add the license
-We will fill in the license of the starter kit and we need to note what was done for this blueprint
-We added it by using another annotation as shown before
-We added it by using another annotation as shown before
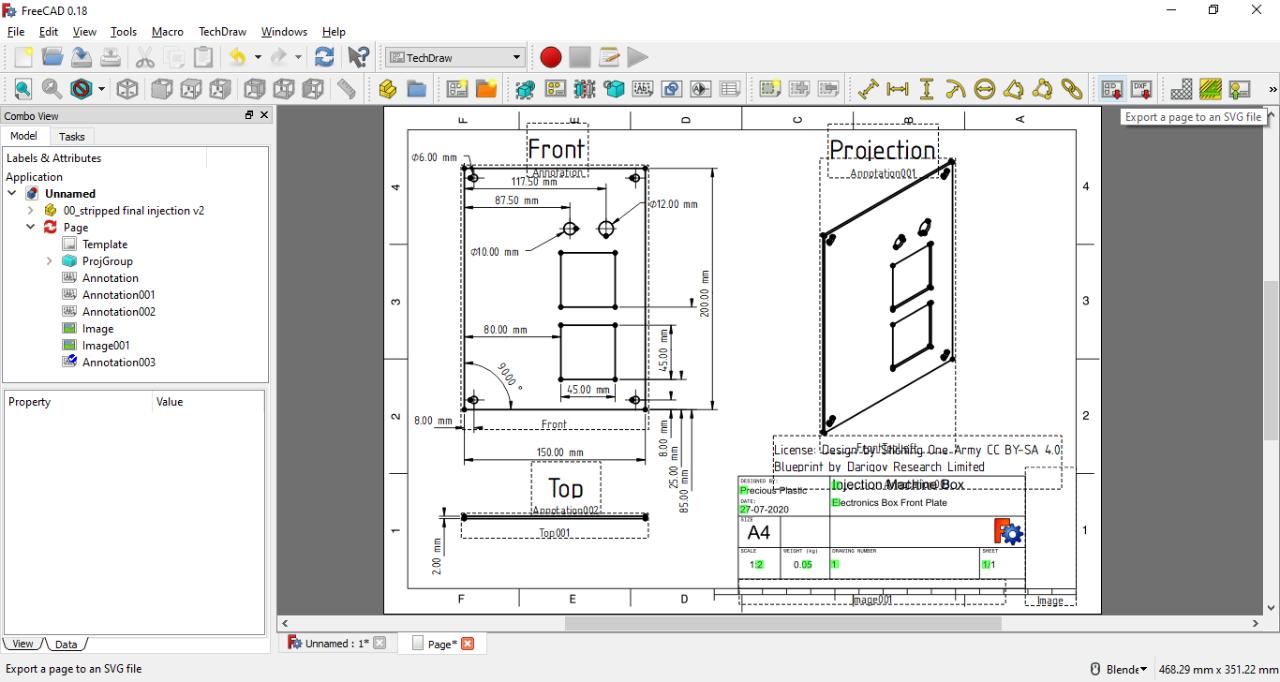
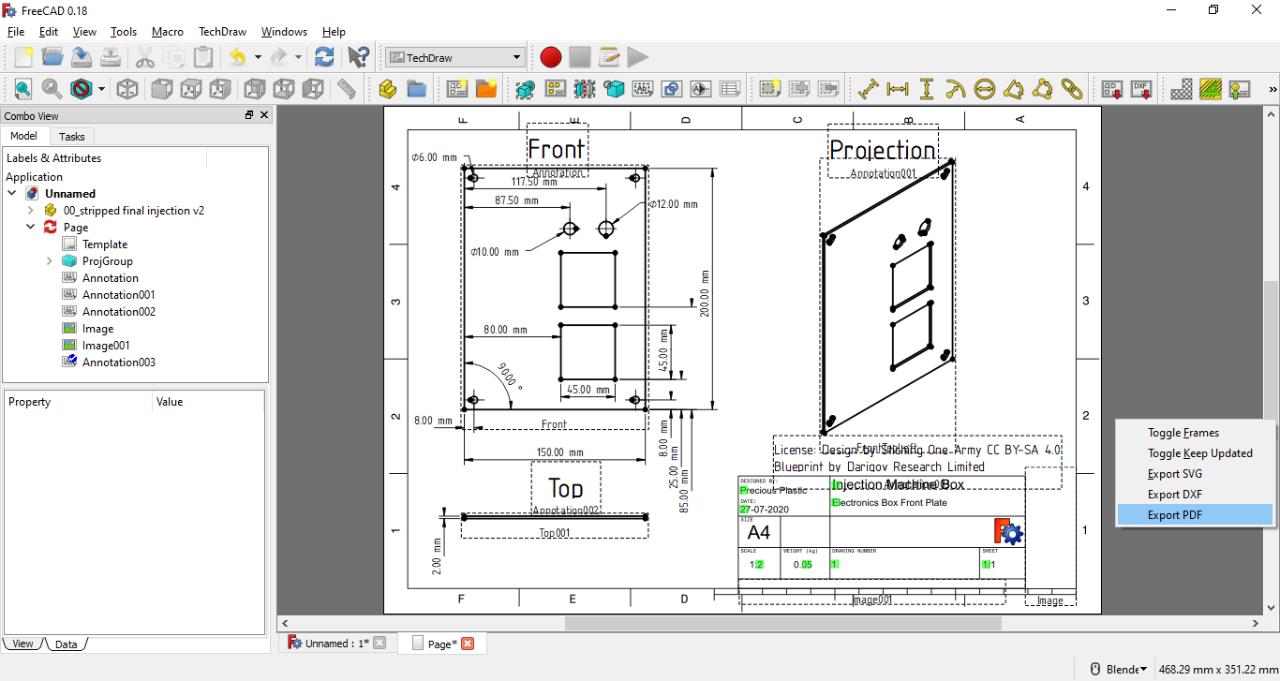
Step 13 - Export
-There are many file formats that you can export to such as SVG, DXF & PDF
-SVG & DXF formats have their own buttons that you can click in the top menu
-If you wish to export to PDF just right click anywhere on the page and click "Export PDF"
-Save it somewhere you will find it later
-SVG & DXF formats have their own buttons that you can click in the top menu
-If you wish to export to PDF just right click anywhere on the page and click "Export PDF"
-Save it somewhere you will find it later

Step 14 - Spread the Love
-Open source is not Open source if you don't share the source & files
-You can put it on GitHub or other places like GitLab as well
-Feel free to share your work with us on our social media
At Darigov Research we specialise in open source hardware, software and education to help people tackle global issues in their local community.
If you wish to support us in the work that we do consider donating or joining us on Patreon
Donate - https://www.darigovresearch.com/donate
Patreon - https://www.patreon.com/darigovresearch
Website - https://www.darigovresearch.com/
Youtube Channel – https://www.youtube.com/channel/UCb34hWA6u2Lif92aljhV4HA
Twitter, GitHub, Instagram - @darigovresearch
Step 15 - Get Started
We've been building Precious Plastic machines since V2 of the machines so we're very passionate about the great work that has been done so far and where this community will grow to!
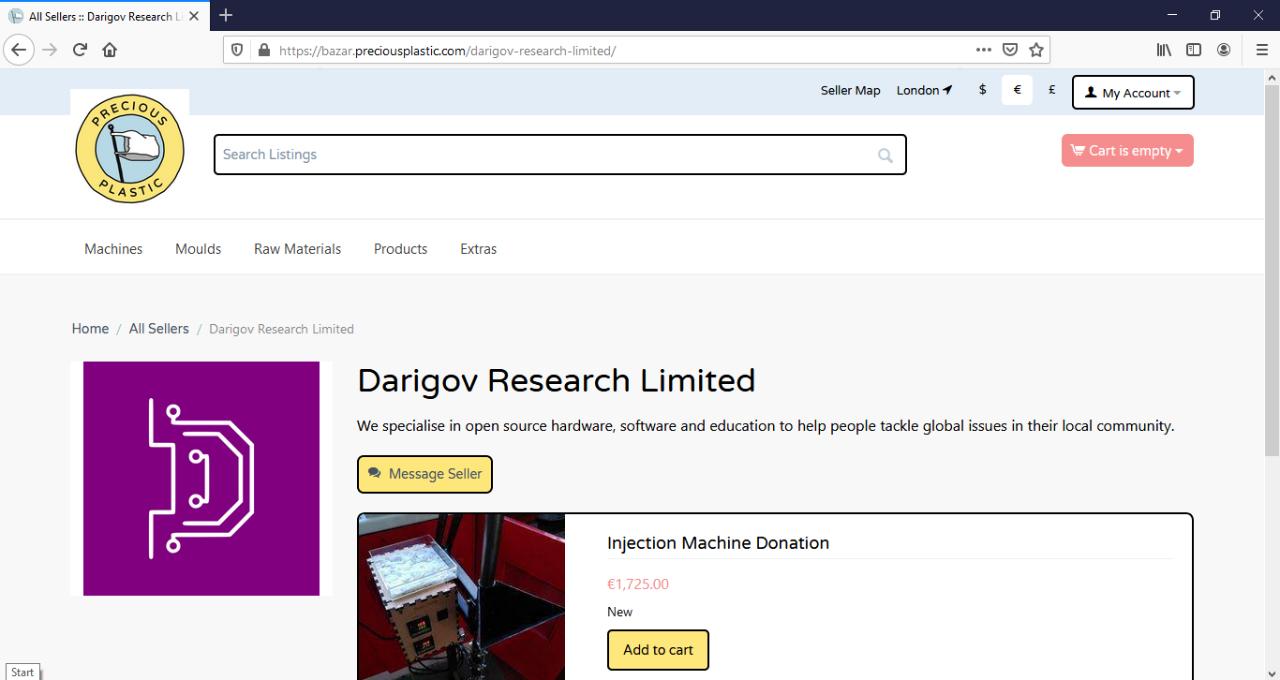
If you're interested in purchasing a machine or interested in inquiring about our services for any research and development purposes do take a look at the products we are selling on the Bazar or message us directly!
https://bazar.preciousplastic.com/darigov-research-limited/
If you're interested in purchasing a machine or interested in inquiring about our services for any research and development purposes do take a look at the products we are selling on the Bazar or message us directly!
https://bazar.preciousplastic.com/darigov-research-limited/
—
—
—
Comments