Make christmas ornaments from upcycled bottle caps
by IN MOCEAN
Turn your plastic waste into some cute Christmas Ornaments that you can use for decoration or to hang on your gifts. Let`s make Christmas less trashy!
What you will need:
- Bottle caps
- A panini press with a flat surface
- Silicone gloves
- Baking paper
- Eye protection
- Respiration mask
- a fret saw (manual or electrical)
- sharp knife or razor blade
- cookie cutters or paper stencil
—
Attachments
Resources
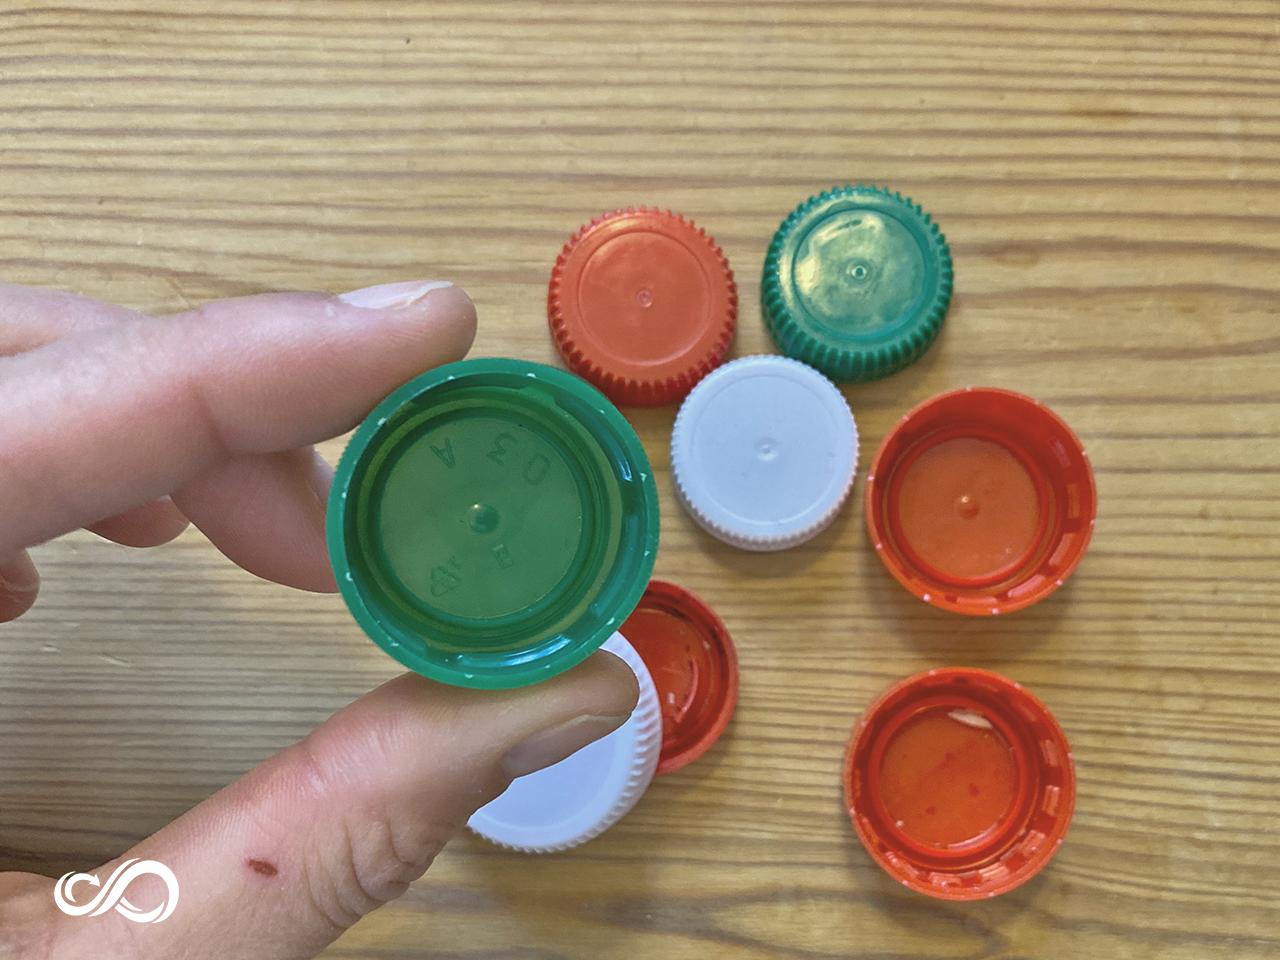
Step 1 - Sort your bottle caps
First you need to sort your bottle caps to make sure they are all the same kind of plastic. You can use either a batch of HDPE or PP bottle caps. You can usually find the recycling category on the inside of the bottle cap: number 2 for HDPE and number 5 for PP.
If they are not labeled, you can also identify them by squeezing them a bit. You will notice that HDPE caps are a bit more flexible and PP are a bit more rigid. Caps from milk jugs are usually made from HDPE whereas some caps for soda bottle are sometimes PP. If in doubt, through it out! Otherwise, you risk to contaminate your batch.
If they are not labeled, you can also identify them by squeezing them a bit. You will notice that HDPE caps are a bit more flexible and PP are a bit more rigid. Caps from milk jugs are usually made from HDPE whereas some caps for soda bottle are sometimes PP. If in doubt, through it out! Otherwise, you risk to contaminate your batch.
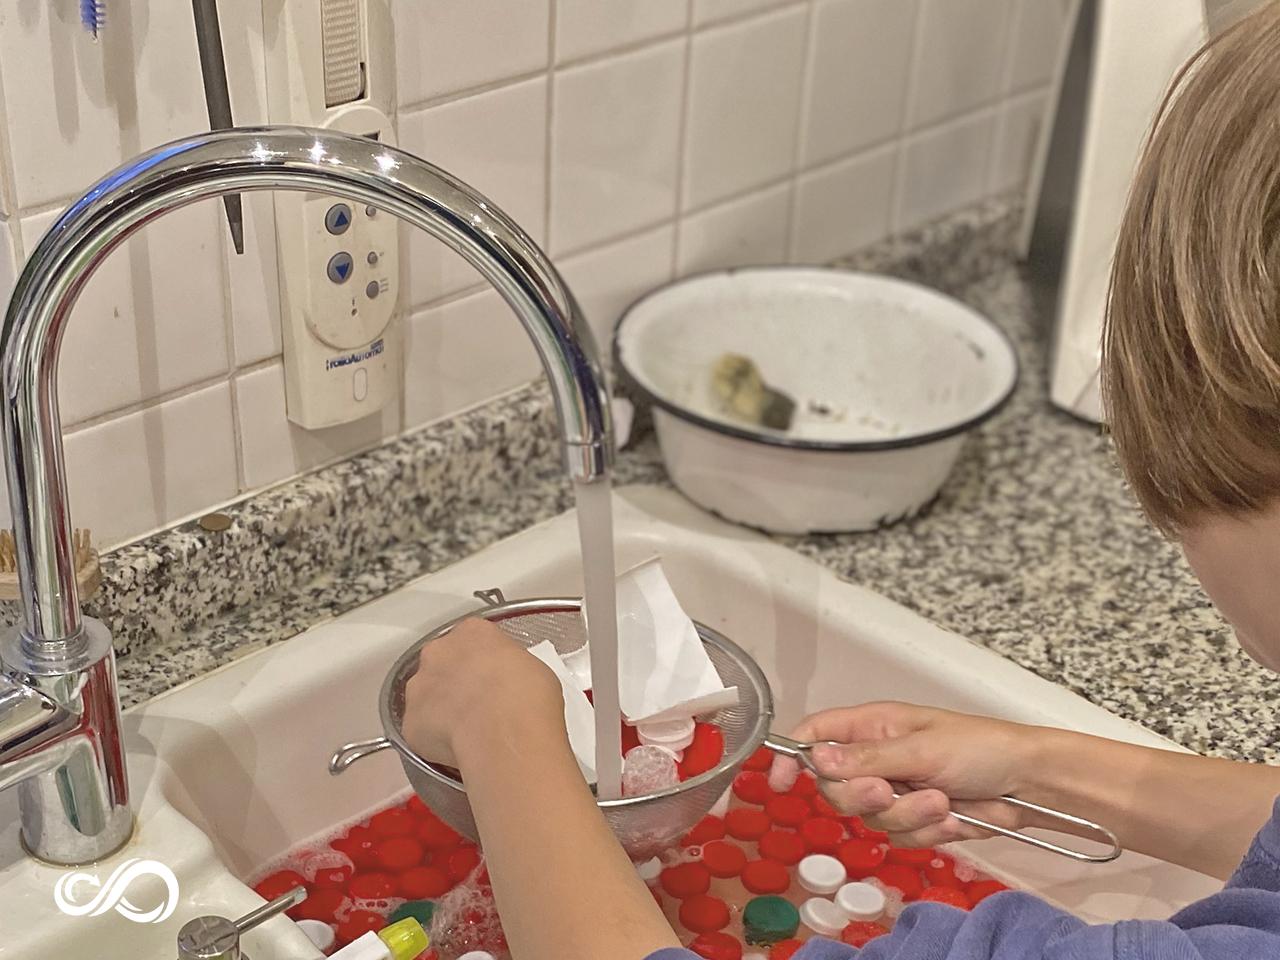
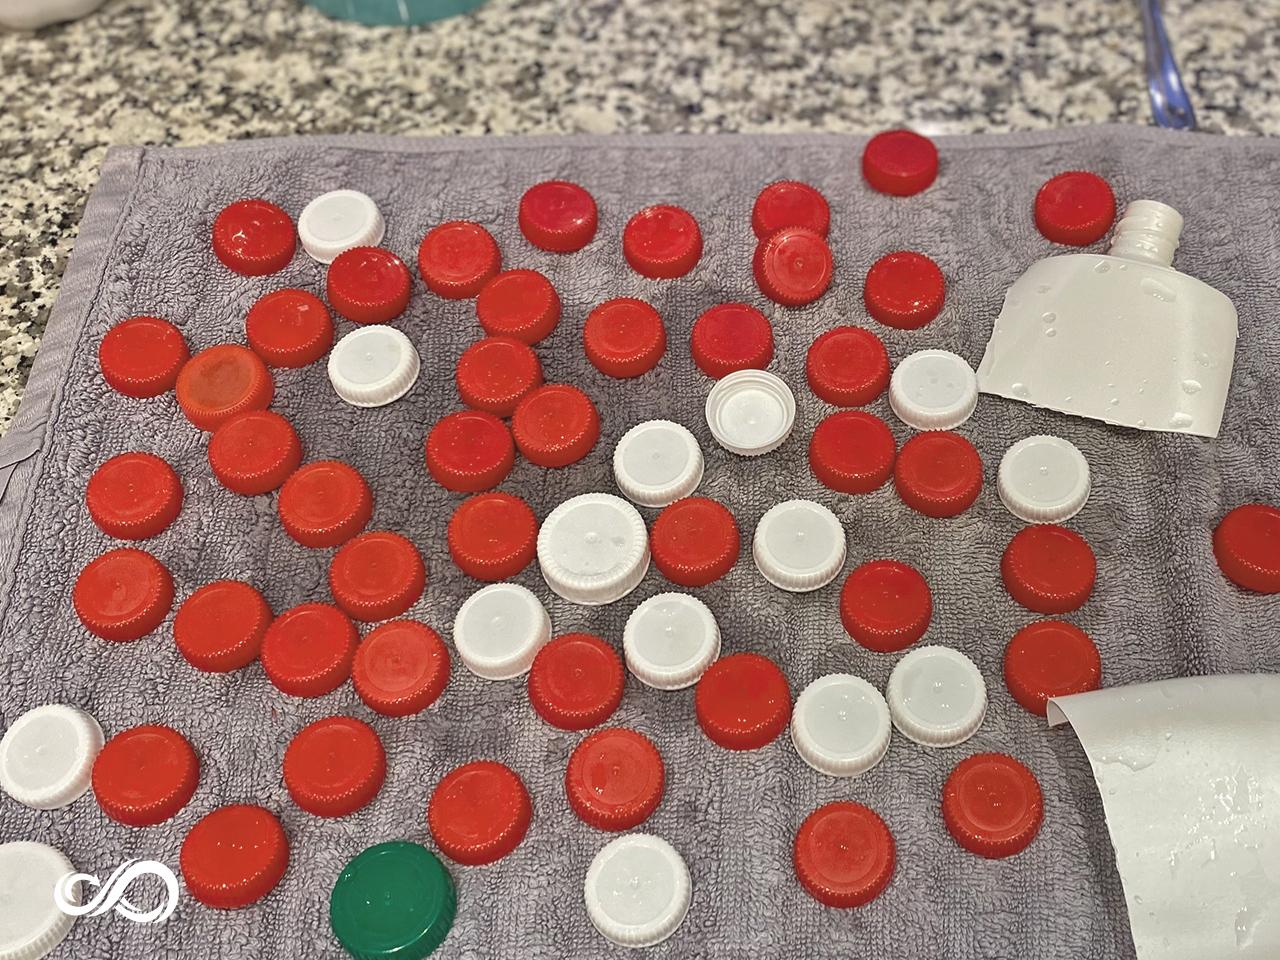
Step 2 - Wash your bottle caps
Once sorted, you need to wash the caps that you want to use. You can either soak them in a sink and clean them manually with a brush. If you plan to recycle quite a lot of caps, it will be more efficient to put them into a clothes bag and throw them into the washing machine, choosing a short washing cycle. Let them dry completely and you are ready for the next step.
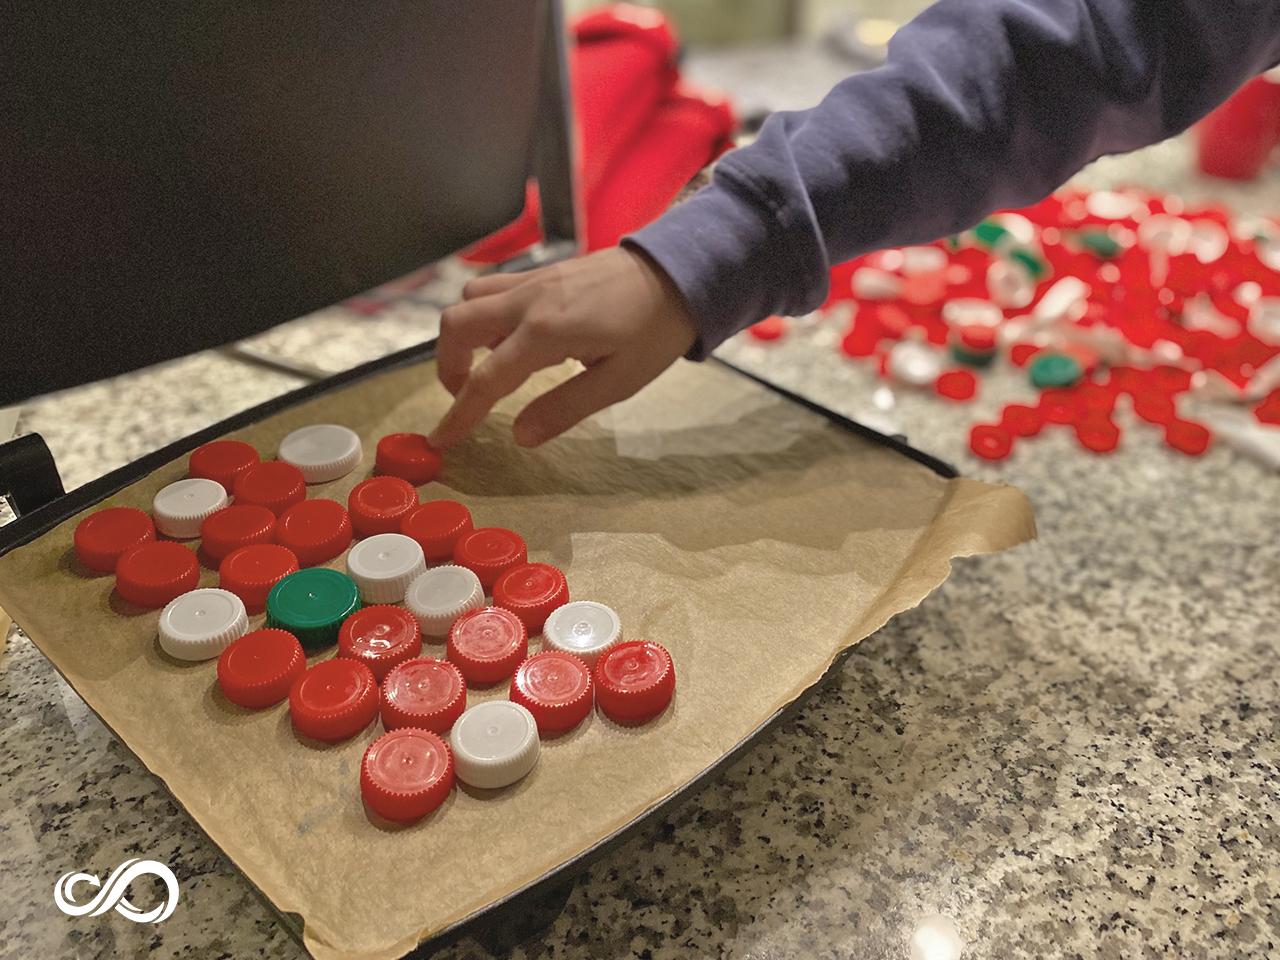
Also, think about what colors you want your ornaments to be. We chose red and white as base colors and added some green highlights to give the ornaments a Christmassy touch. But of course, it`s totally up to you what color you like your ornaments to be – and up to what colors you may have available.
Also, think about what colors you want your ornaments to be. We chose red and white as base colors and added some green highlights to give the ornaments a Christmassy touch. But of course, it`s totally up to you what color you like your ornaments to be – and up to what colors you may have available.
Step 3 - First layer of bottle caps
Plug in your panini press and let it heat up. Make sure you are using one with a flat surface in order to get a flat plastic sheet for your ornaments. Once the panini press is hot, place a baking sheet on the press. We usually work with Teflon baking sheets because you can reuse them more often and they don`t tear apart.
Now place your bottle caps on the panini press. It does not matter which way round you place them, they will melt just the same. Now cover the bottle caps with a second baking sheet and close the panini press.
It helps the melting process, if you place something heavy on top of the panini press. This can be some bricks or heavy books, whatever you may have available.
Step 4 - Second or third layer
Once your bottle caps are melted, you can add one or two more layers on top of it in the same way you did in Step 2. This depends a bit on how thick you want your ornaments to be. We went for 3 to 4mm thickness for the plastic sheet. You will need to melt 2 to 4 layers of bottle caps for that, depending a bit on the size of your caps.
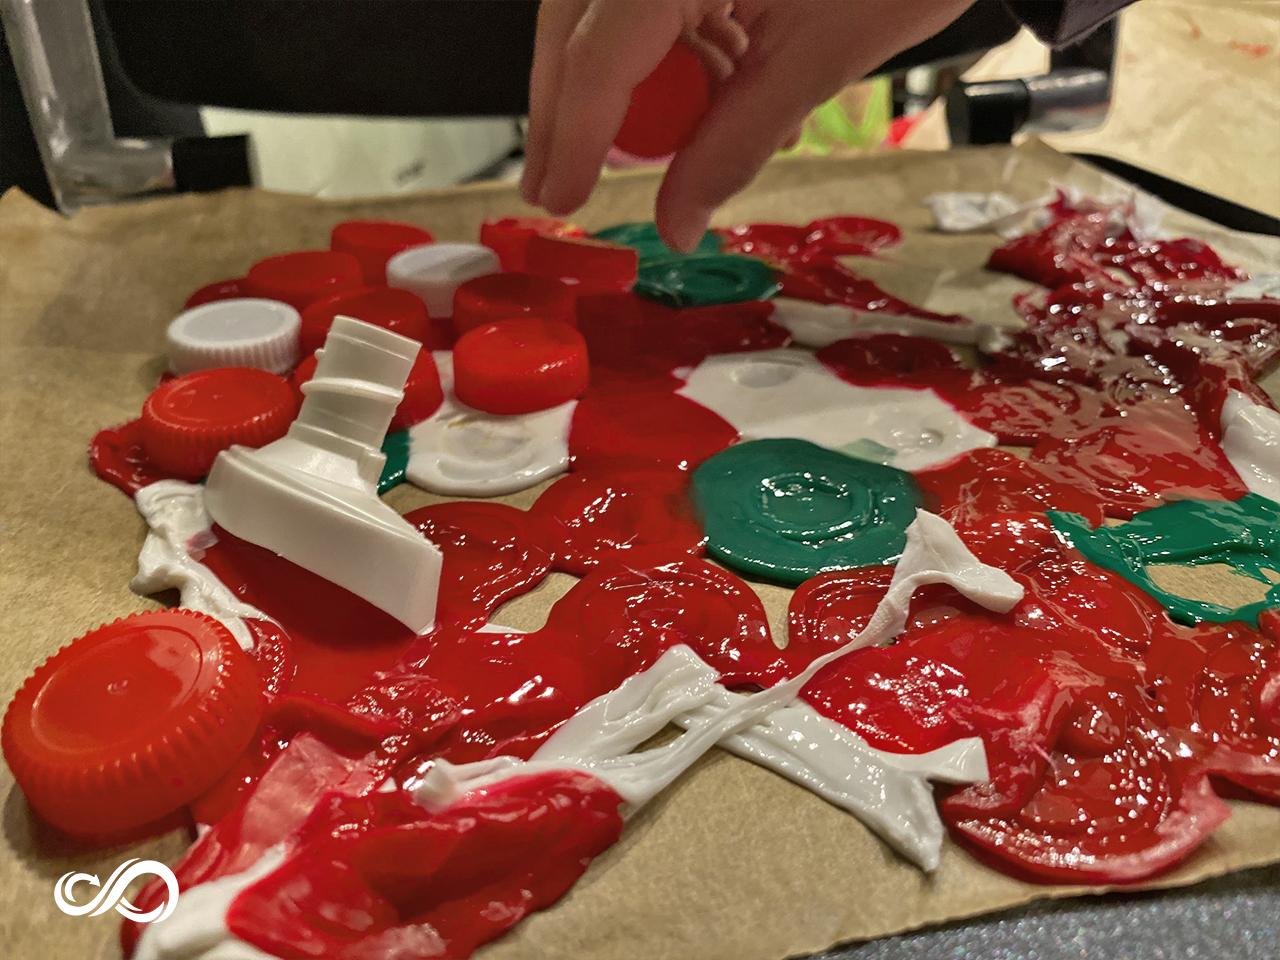
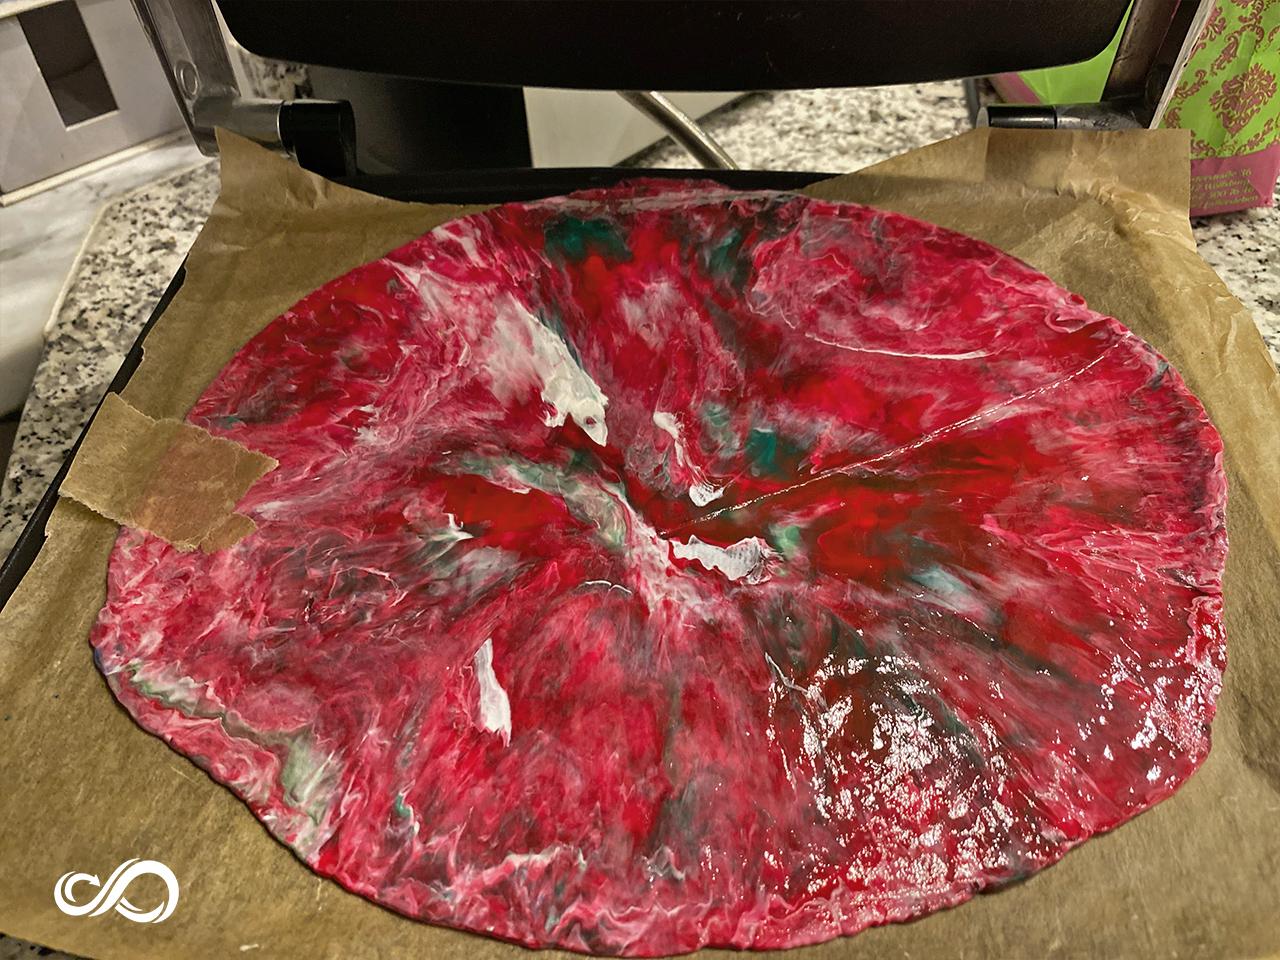
Step 5 - Create a beautiful batik desig
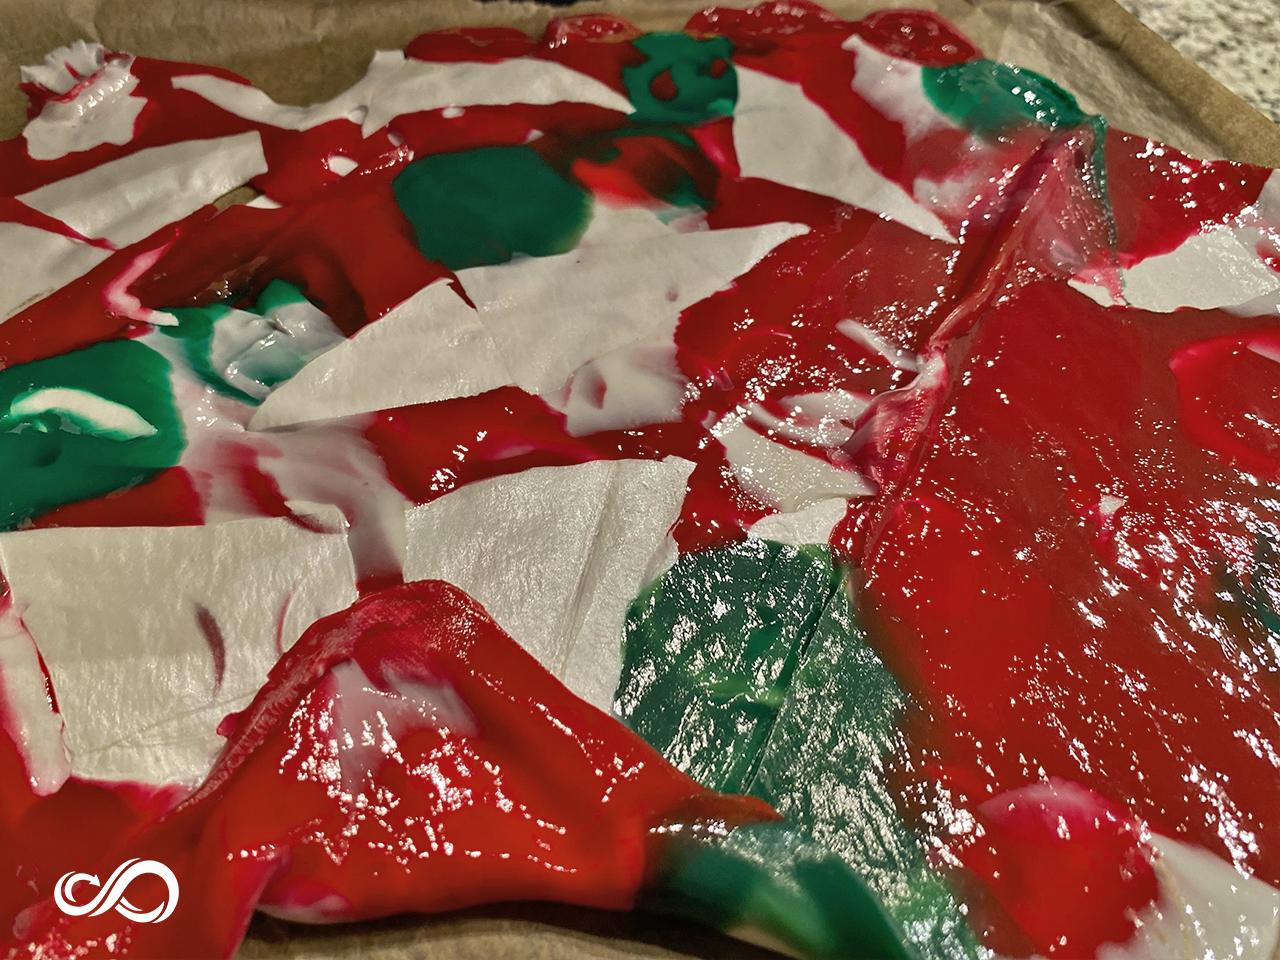
Now you should have a layer of melted bottle caps. You can either use the sheet right away or you can create a pretty batik design. To create that, put on some silicone gloves, roll the warm plastic into a sausage and then twist it around. This step is totally up to your own creativity. You can pull the warm plastic to stretch it, then fold it together and twist it again until you reach your desired design.
If the plastic hardens in the process, you can always re-heat it in the press to make it moldable again.
Now you have a lump of plastic that needs to be melted again in order to make a flat sheet from it.
If the plastic hardens in the process, you can always re-heat it in the press to make it moldable again.
Now you have a lump of plastic that needs to be melted again in order to make a flat sheet from it.
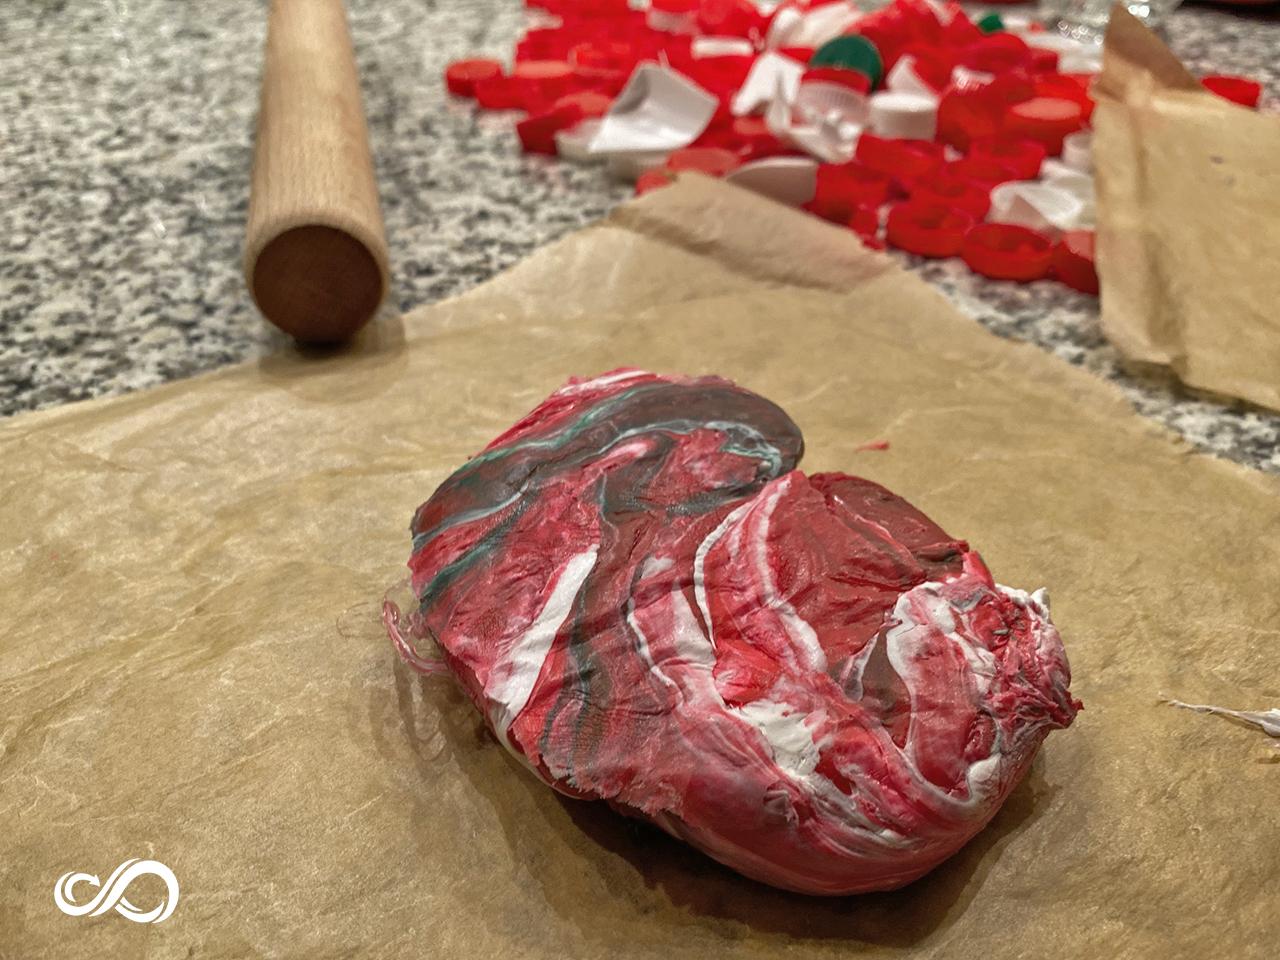
Step 6 - Make a flat sheet
Place the plastic lump inside the panini press and heat it up. Once the plastic starts to get soft, you can start applying pressure to the panini press again. We found that it helps to sit on top of it (careful not to burn yourself) and wiggle around a bit to make sure the plastic stretches out far enough.
You can also remove the plastic from the press and use a rolling pin, but we found that sitting on top of the press works much better because you are not removing the plastic from the heat source.
You can also remove the plastic from the press and use a rolling pin, but we found that sitting on top of the press works much better because you are not removing the plastic from the heat source.

Step 7 - Let it cool down
Open the press every now and then to check if you have reached the desired thickness of the sheet. Once it`s to your liking, switch off the press and let the sheet cool down. Make sure to leave something heavy on top of the press, otherwise your plastic will deform in the cooling process.
Step 8 - Draw your ornaments onto sheet
Once your sheet has cooled down, it`s time to get creative. Grab a pen that writes on plastic and draw your ornaments on the plastic sheet. We used cookie cutters for some of them but we also made some stencils from paper.
When choosing your design, try to think about the sawing process: the more difficult or filigree your design is, the harder it will be to cut it out. Maybe start with something simple and then work your way towards more complicated designs.
When choosing your design, try to think about the sawing process: the more difficult or filigree your design is, the harder it will be to cut it out. Maybe start with something simple and then work your way towards more complicated designs.
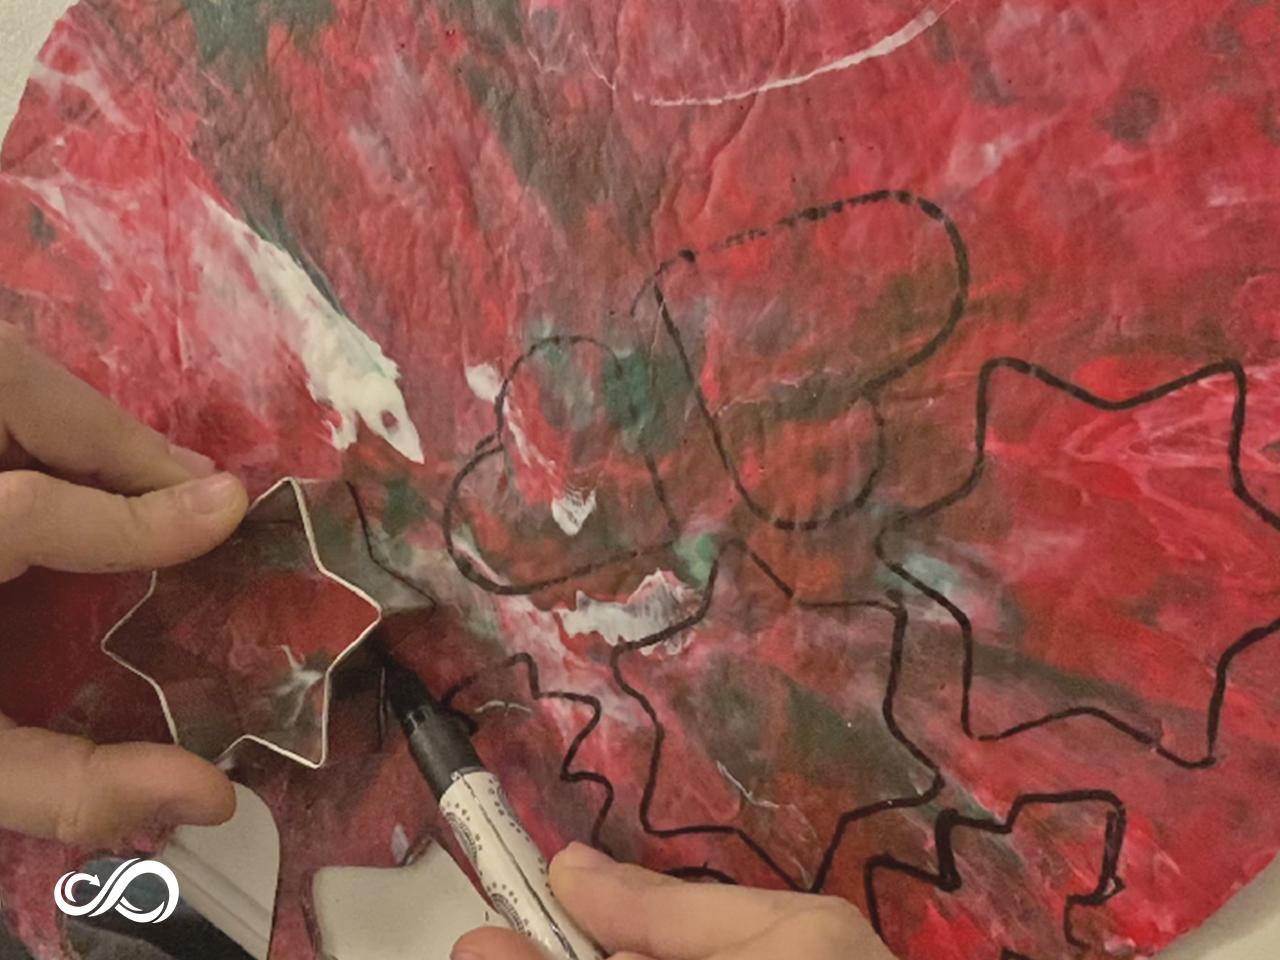
Step 9 - Cut out the ornaments
Now it`s time to cut. For this step, you need a fretsaw. This can be a manual one or an electrical one, both work. We used an electrical one because it makes the process a little easier. But it`s also possible with a manual one, you just need a bit more patience.
Move the saw along the lines that you drew on the plastic sheet and voilà: you have your Christmas Ornament.
Move the saw along the lines that you drew on the plastic sheet and voilà: you have your Christmas Ornament.

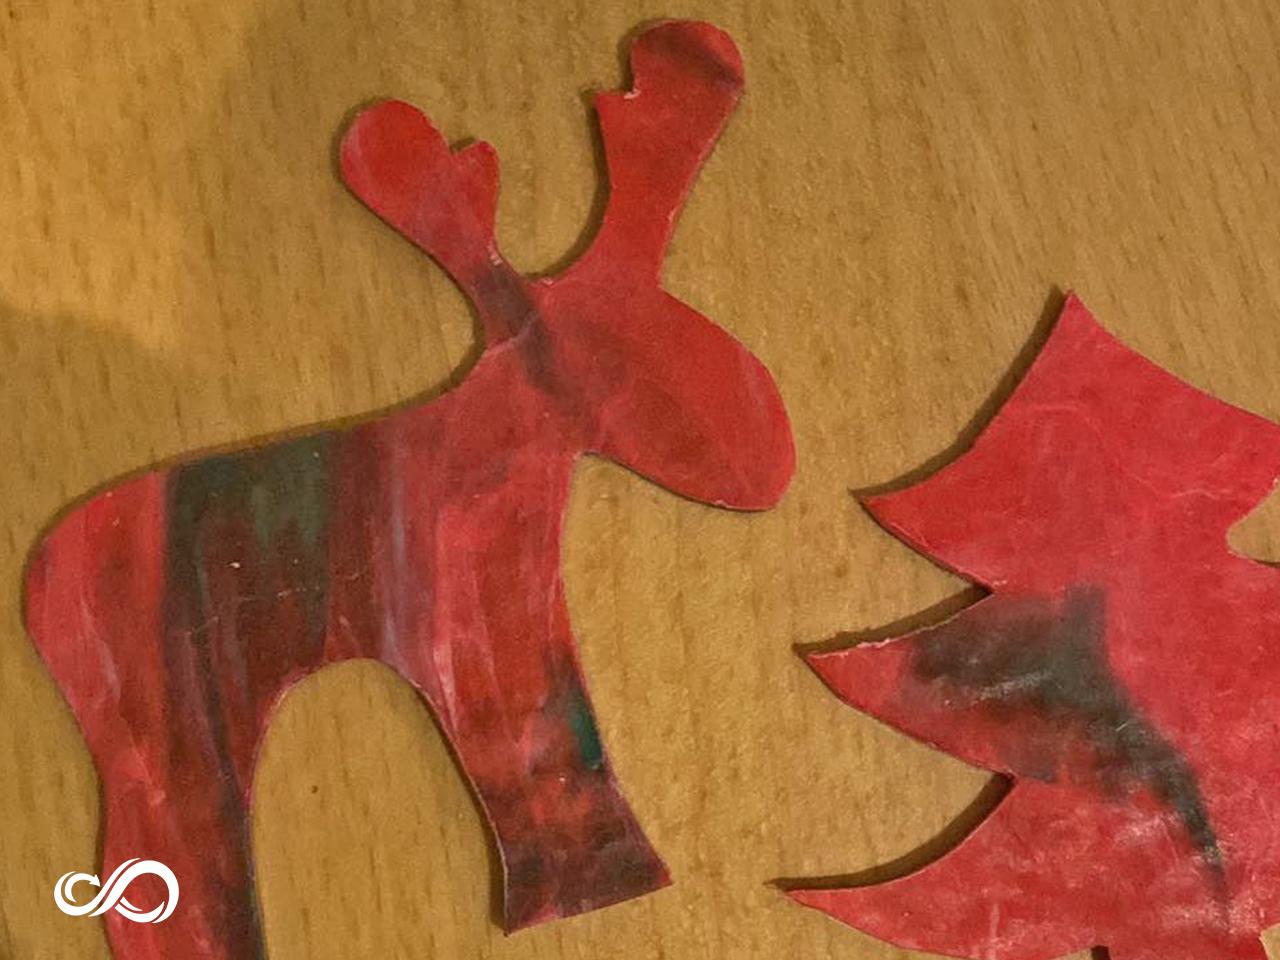
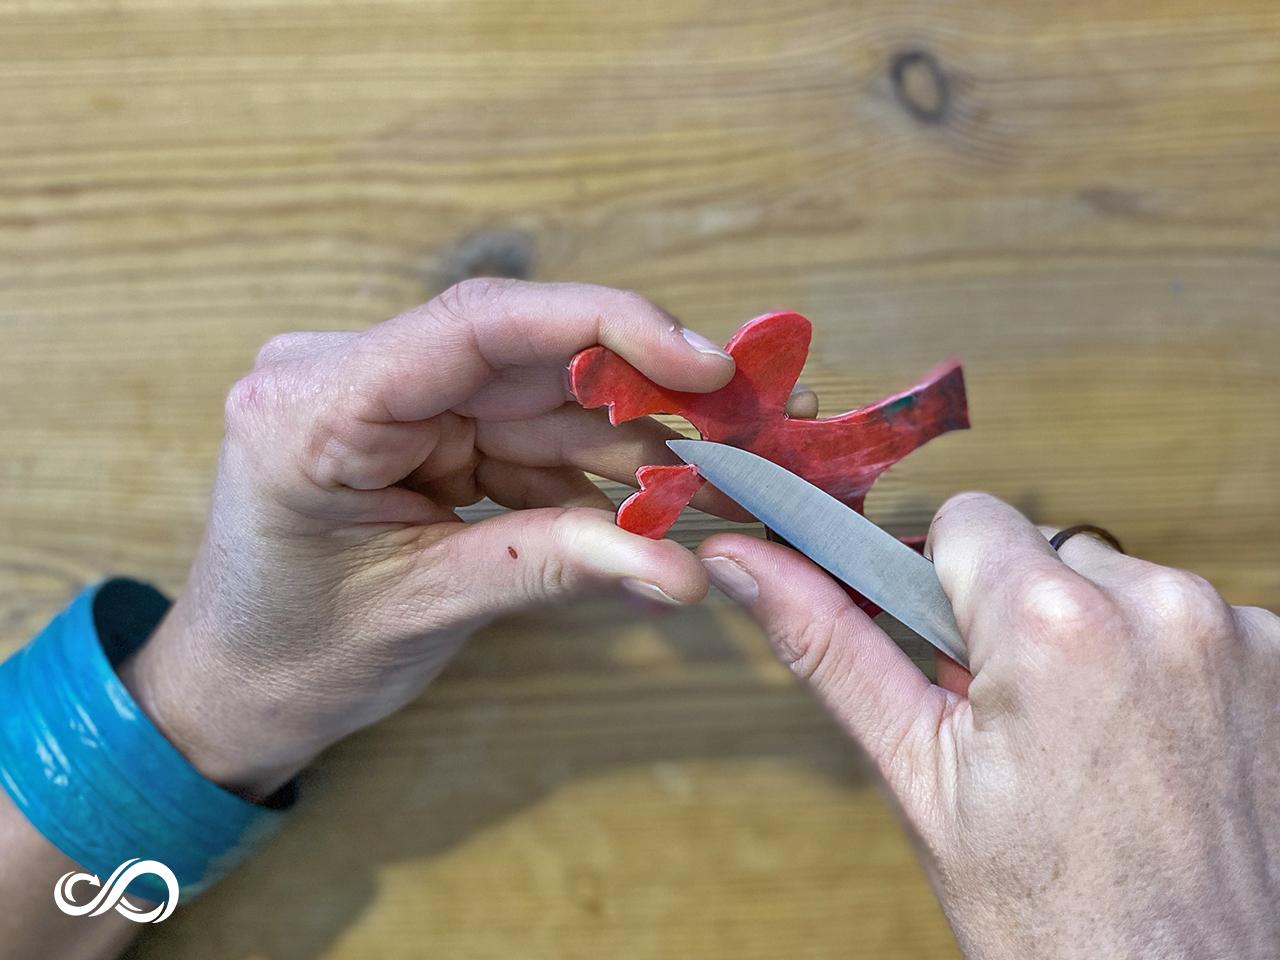
Step 10 - Clean the edges
Use a sharp knife or razor blade to clean the edges of your ornament. We found that this works better than using sanding paper and it also produces less micro plastic.
Remember: You don`t want to create additional pollution with your crafting, so make sure you always collect all the little plastic pieces that get cut off during your creative process. The great thing: you can throw them back on the panini press for your next batch!
Remember: You don`t want to create additional pollution with your crafting, so make sure you always collect all the little plastic pieces that get cut off during your creative process. The great thing: you can throw them back on the panini press for your next batch!
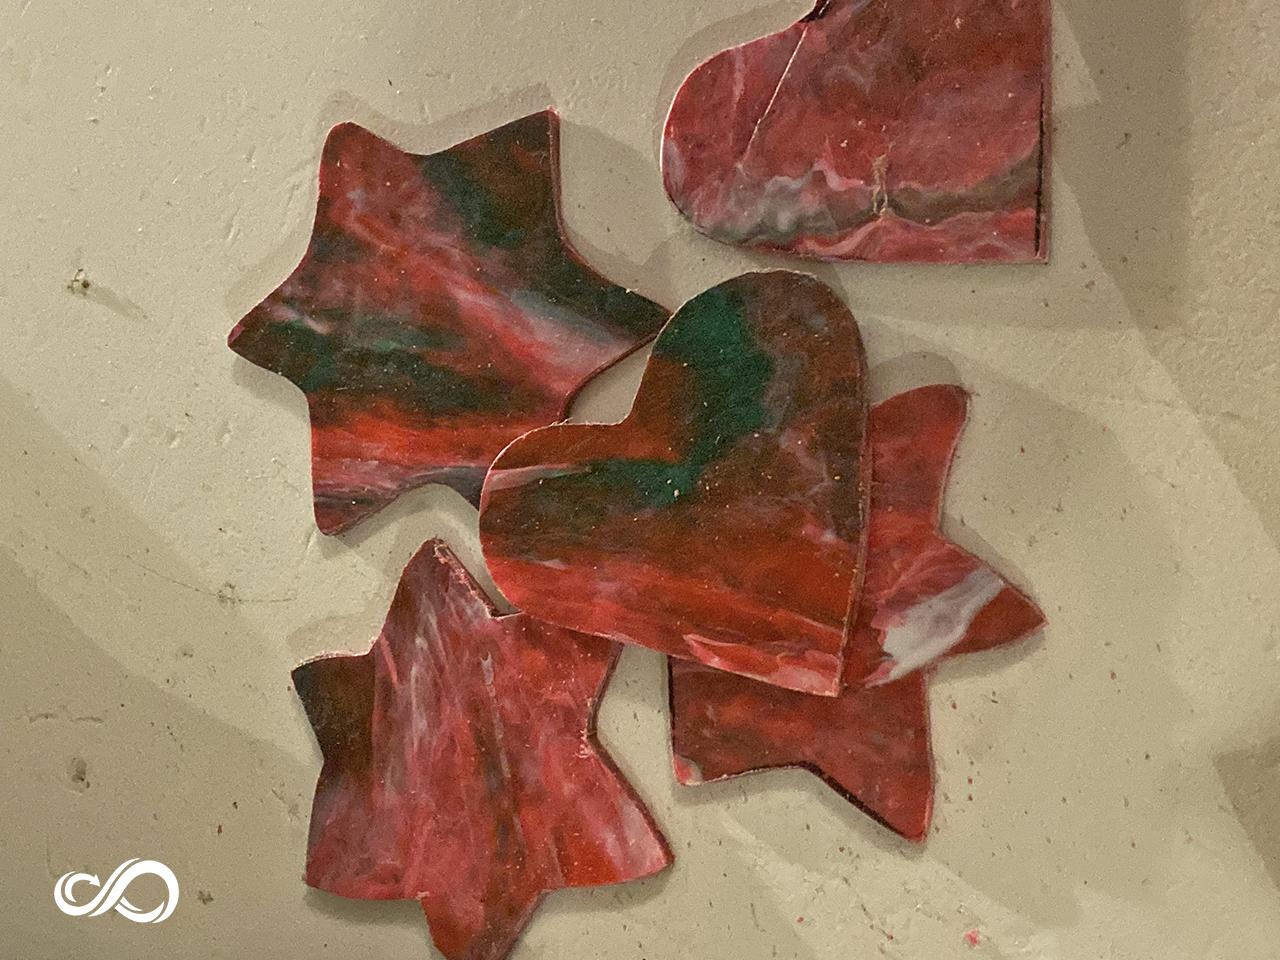
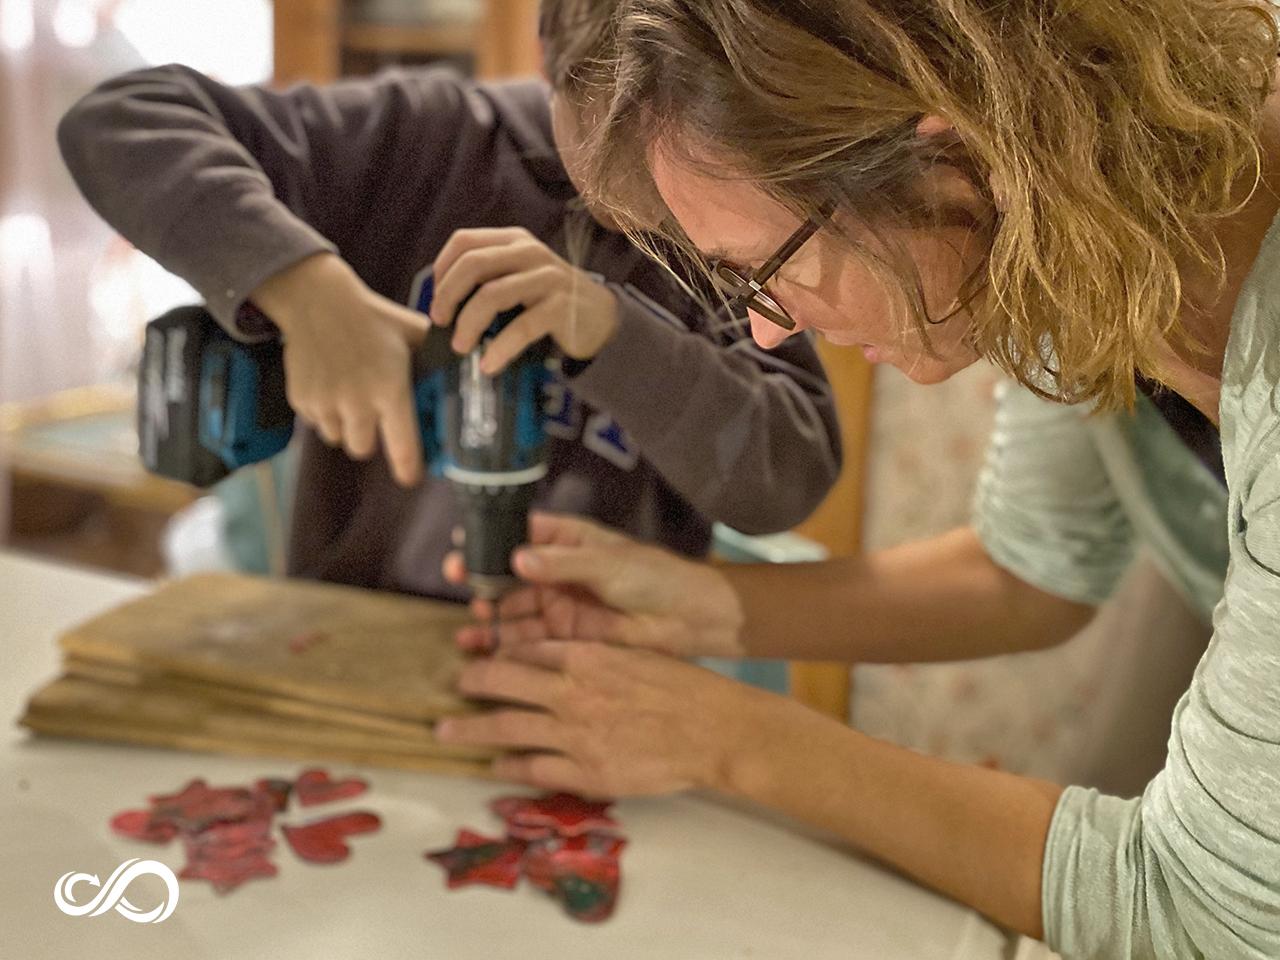
Step 11 - Drill a hole and add a string
You are nearly ready now. Just drill a small hole into the top of your ornament so you can add a string. The size of the hole depends on the thickness of your string.
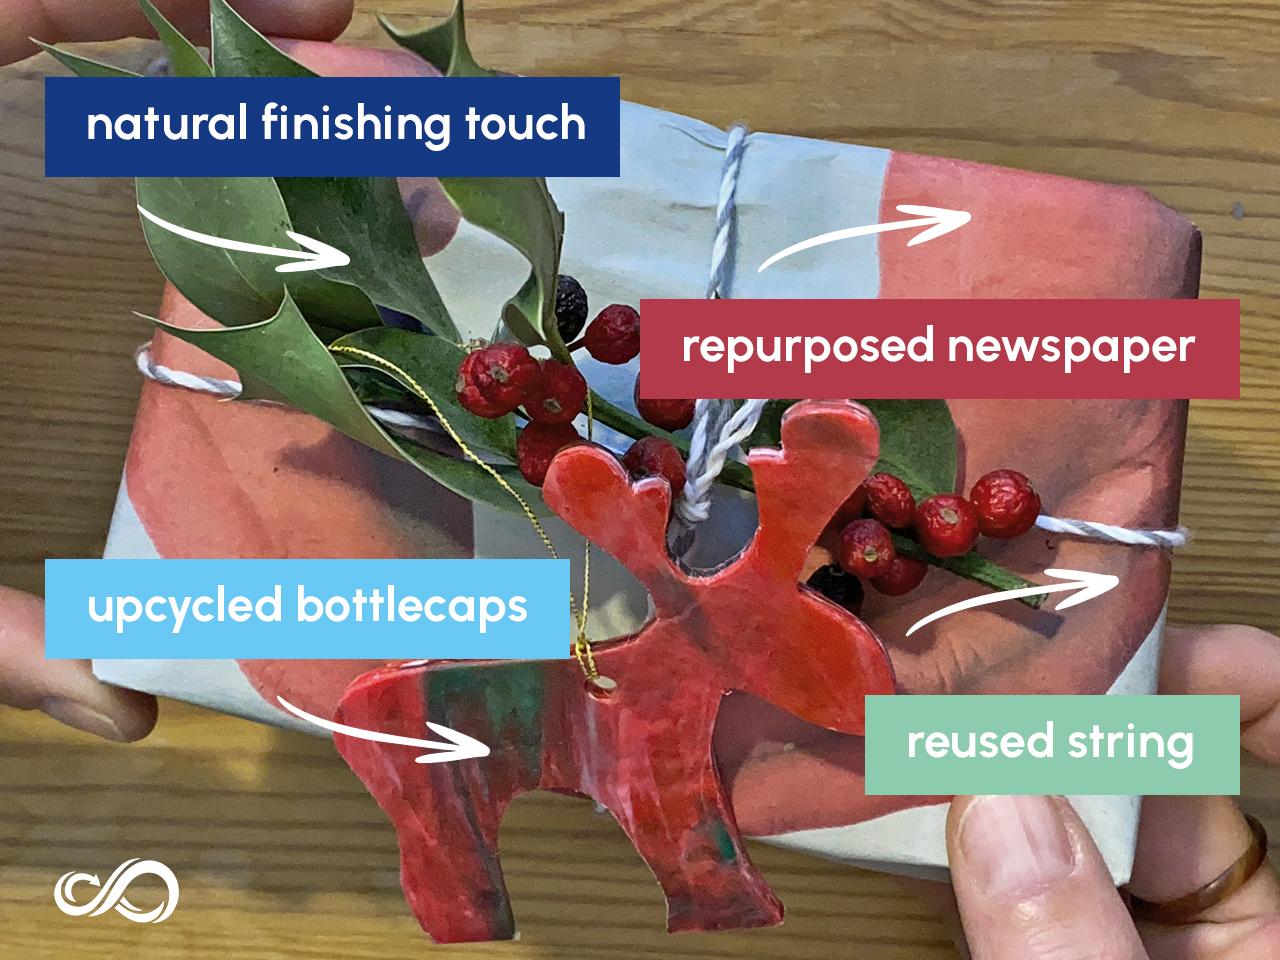
We re-used strings that we had collected over the past years. That way, your Christmas ornaments are 100% upcycled and zero new materials were needed to create them.
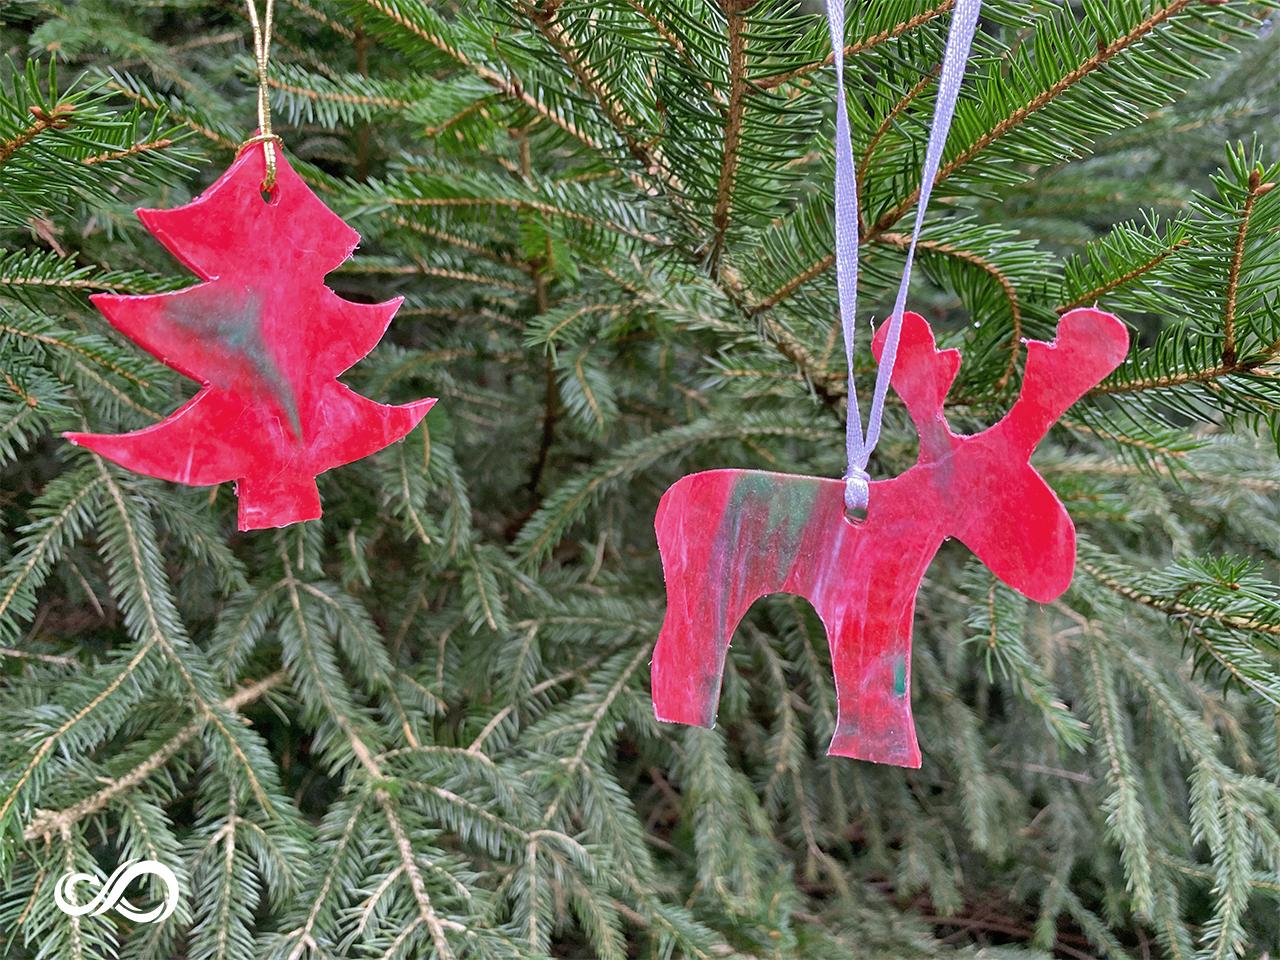
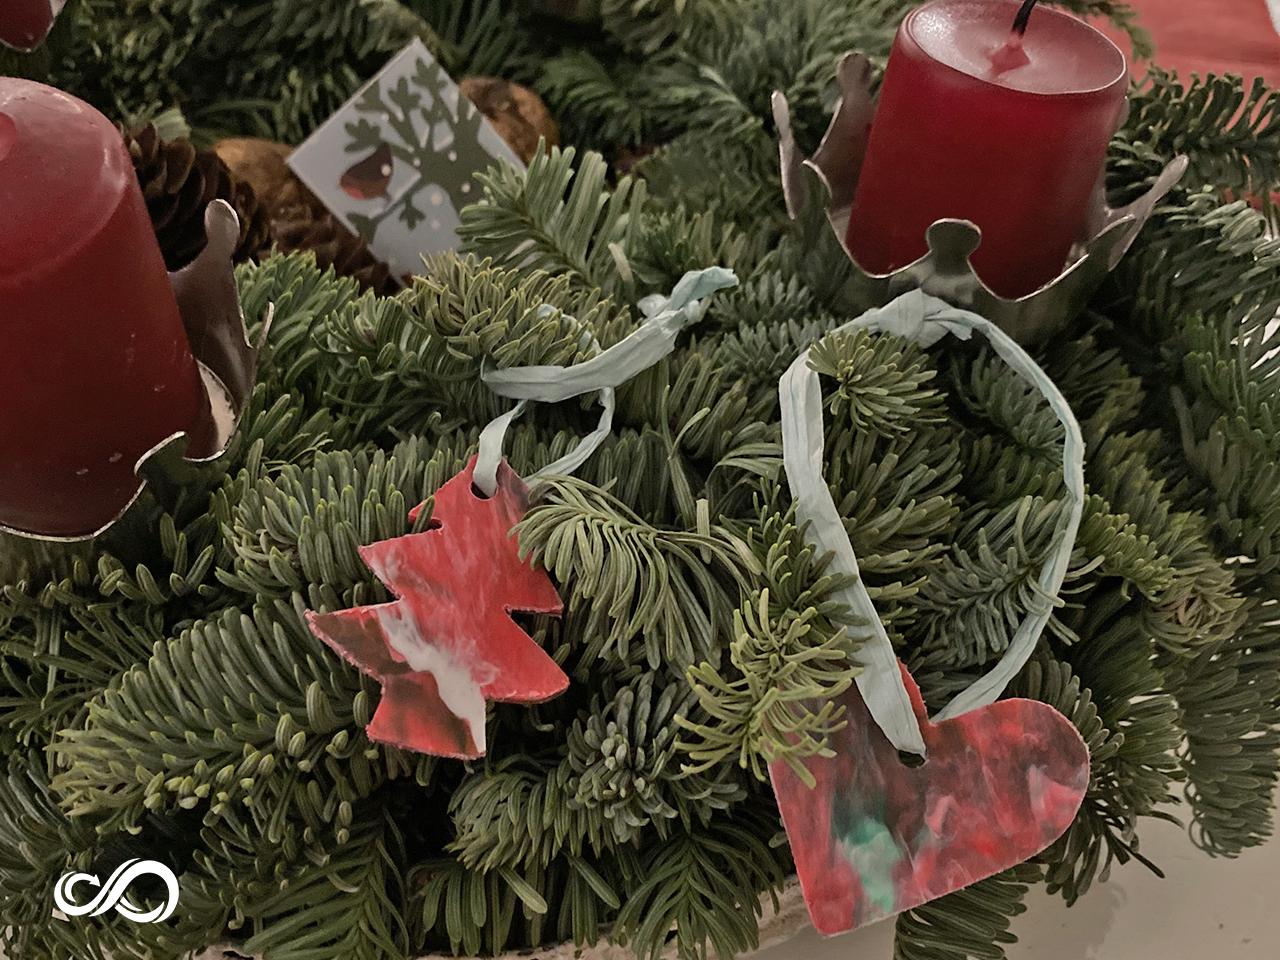
That`s it, your ornaments are ready. Well done and congratulations to help cut down on the trash that is produced during Christmas time.
We re-used strings that we had collected over the past years. That way, your Christmas ornaments are 100% upcycled and zero new materials were needed to create them.
That`s it, your ornaments are ready. Well done and congratulations to help cut down on the trash that is produced during Christmas time.
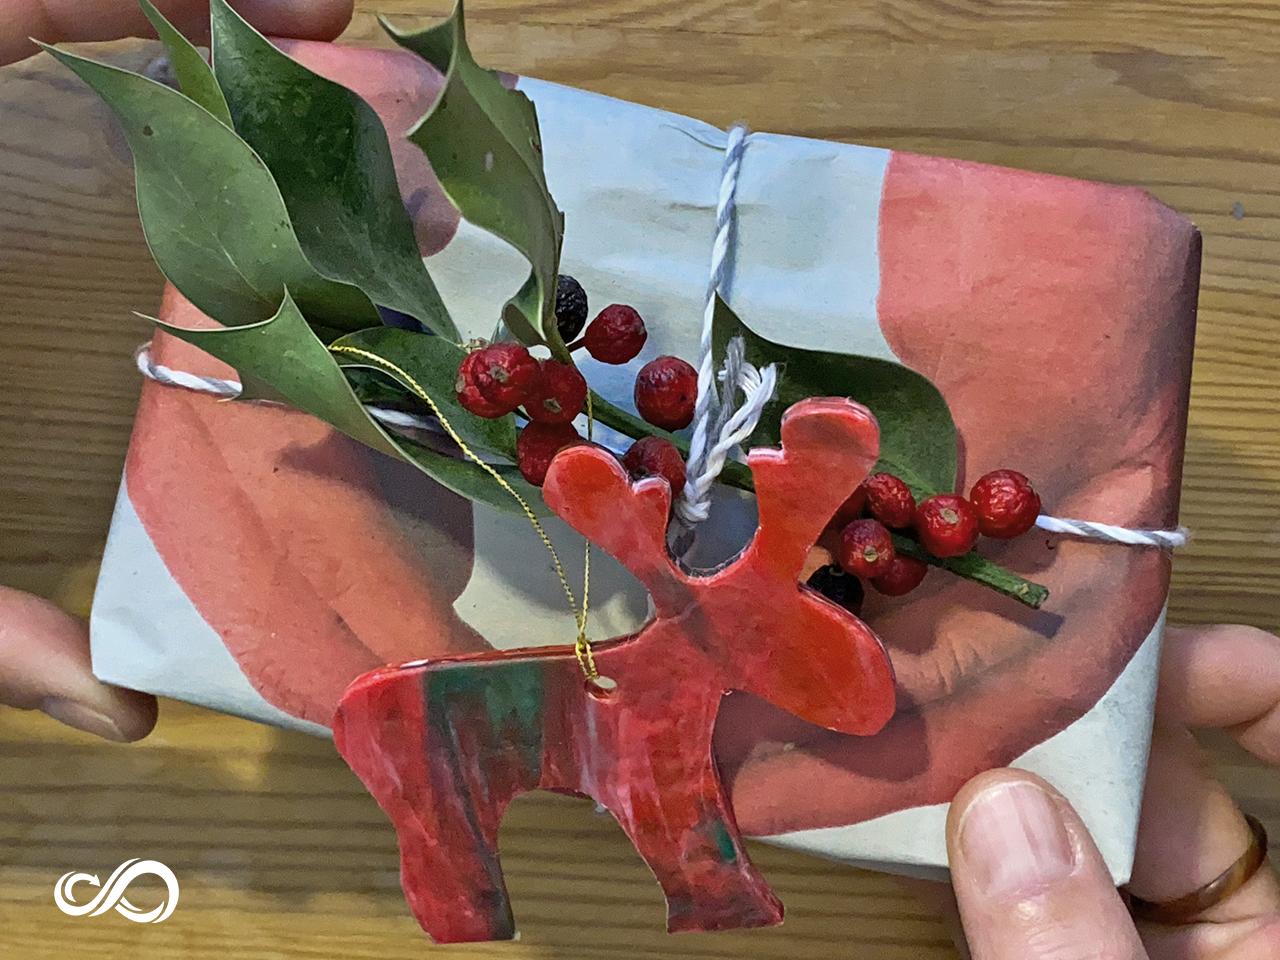
Step 12 - Gift the ornament to a friend
This step is optional, of course. By gifting your cute upcycled ornaments to friends or family, you can help to spread the important message that it`s not necessary to buy new things to decorate for Christmas. By making ornaments from bottle caps, you make great use of a precious material that would otherwise be burnt or end up in a land fill. And you create a hand made ornament that was crafted with love and care for our planet.
Merry Christmas,
Maria & Nike from IN MOCEAN
in-mocean.org
Merry Christmas,
Maria & Nike from IN MOCEAN
in-mocean.org
—
—
—
Comments