Trouble shooting injection moulding
by easymoulds
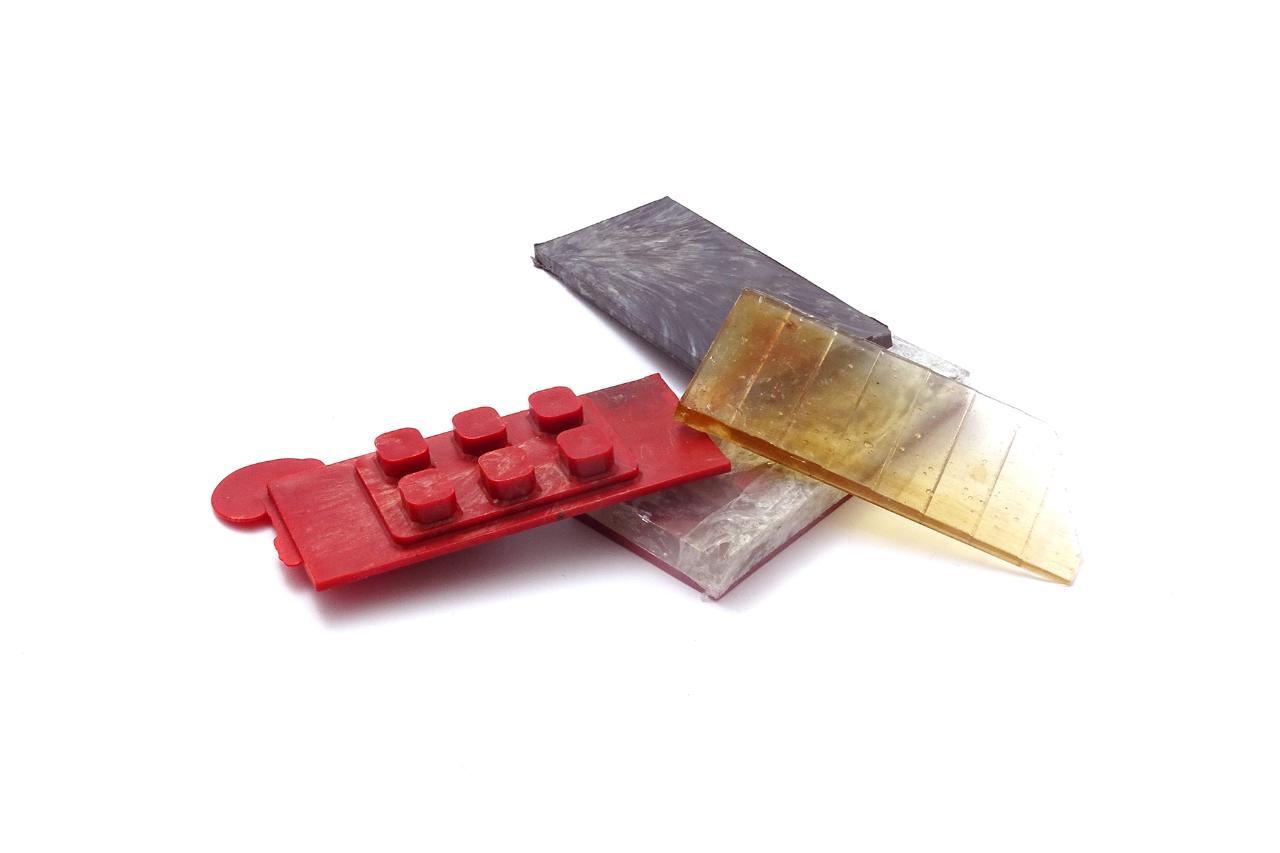
Here I try to to cover all issues that may appear while you are trying to make parts with the process of injection moulding.
Some issues might appear but not relevant for you to fix - so see it more as an optional guide where you pick the problems you want to solve. Some "problems" can also widen the artistic freedom to play :)
The solutions are ordered in a recommended order!
—
Attachments
Resources
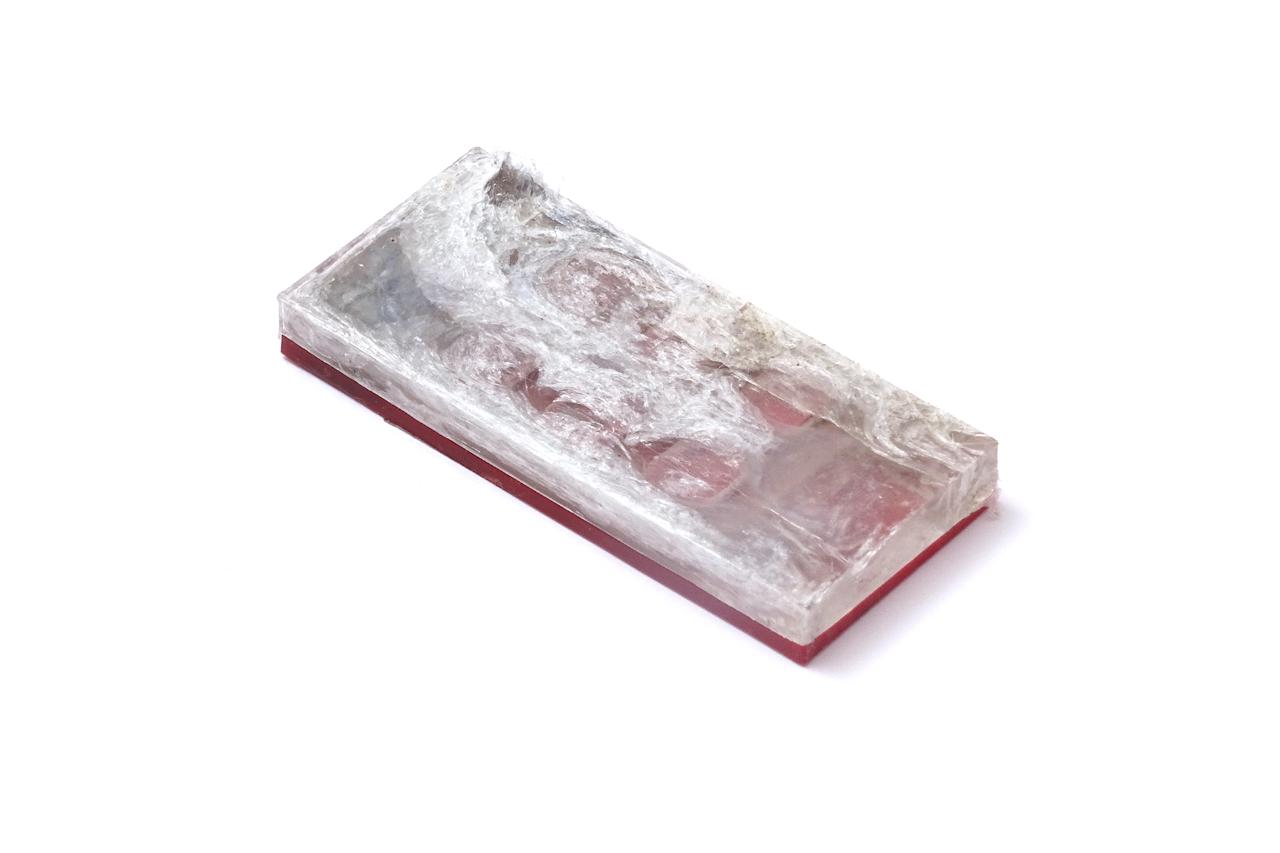
Step 1 - Incomplete fill of the mould 1
If your mould is not filled completely.
Solutions:
- Check if there is enough material in the barrel at the next try
- Check if your injection machine volume is at least +20% larger than your mould volume
- Increase the speed between opening the injection chamber and injecting the plastic
- Check there is no "cold material" at the nozzle front
- Increase material temperature
- Increase mould temperature
- If your mould volume is just under the machine volume, you may need to pre-compress the material several times with a closed nozzle to densify the material

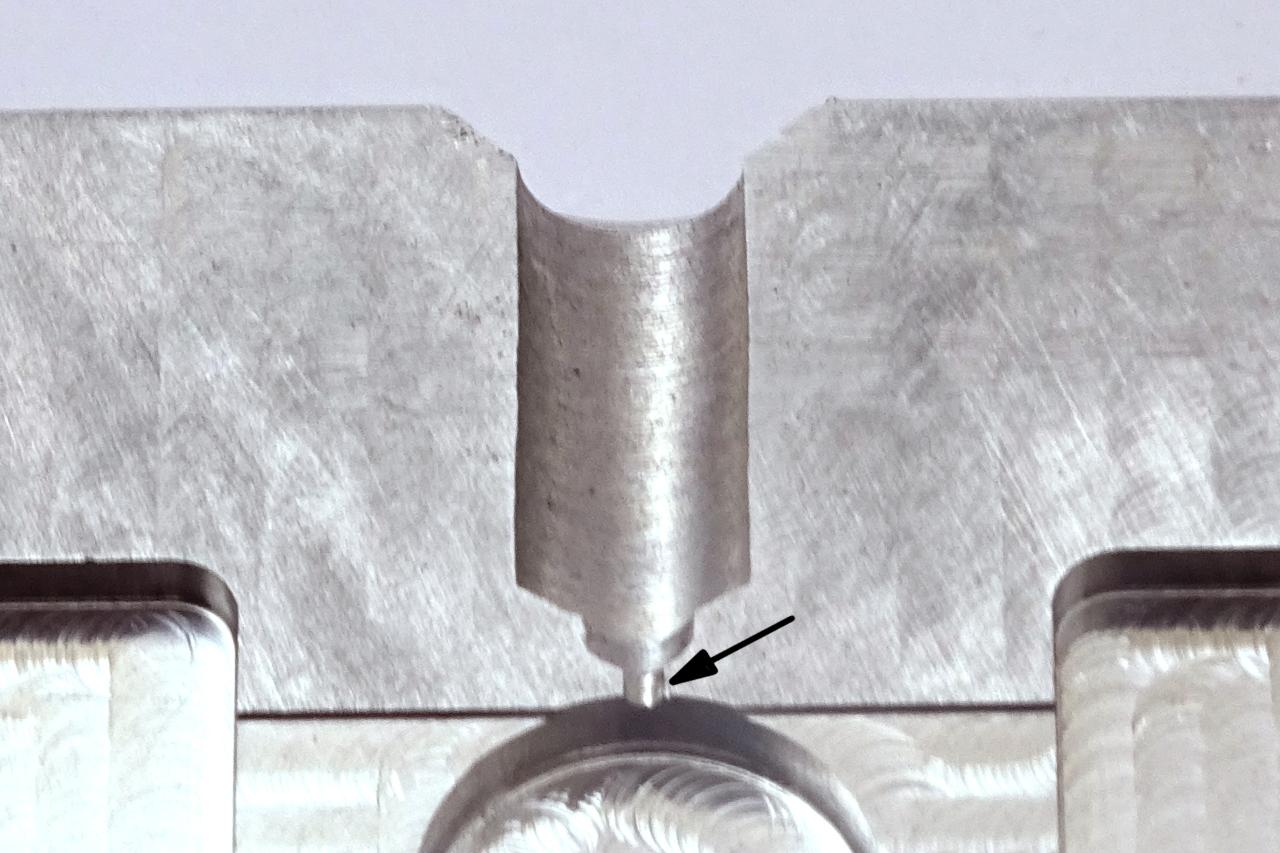
Step 2 - Incomplete fill of the mould 2
If nothing of the above helps, there are ways you can modify the mould to ease the injection process. Please contact your mould provider prior to those changes!
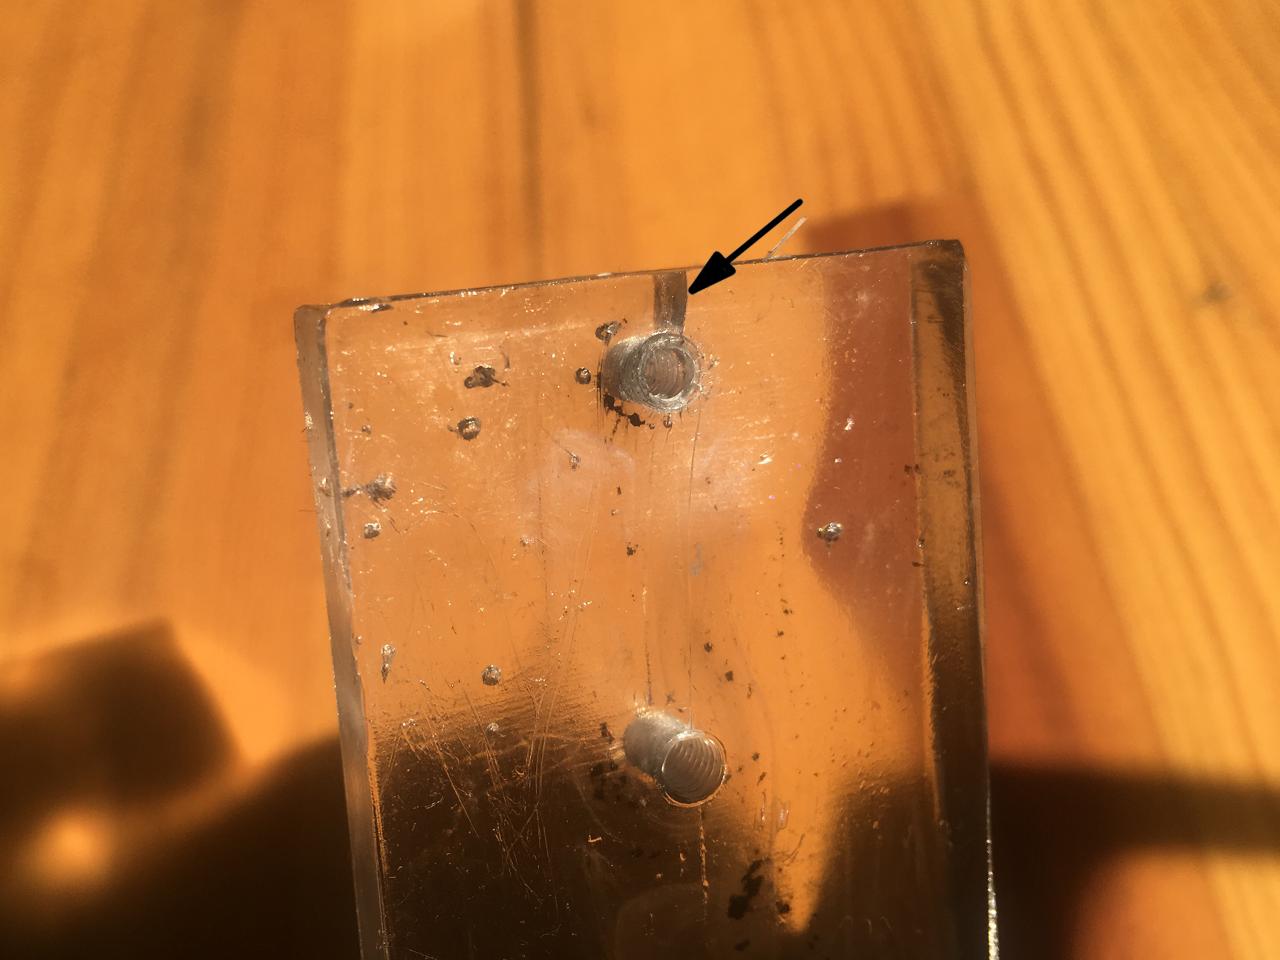
- Add air vents. Especially on thin walled and large parts air vents will help with the injection process. Everyone can add air vents after the mould is made. Use a triangular file to add small channels from the cavity area which is hit last by the plastic to the outside of the mould. Do not make them deeper than 0,1mm! Otherwise you will end up with flash at those areas.
- Increase the gate size. You can increase the surface of the gate (where the plastic flows into your part geometry) to decrease the necessary injection pressure
Step 3 - Flash
If plastic comes out through the split surface of your mould halfs.
Solutions:
- Check if your mould is fully clamped at the next try. Increase the clamping pressure if possible
- Check the flatness of your mould and if there is anything preventing your mould from closing fully
- Decrease the material temperature
- Decrease the injection pressure
Solutions:
- Check if your mould is fully clamped at the next try. Increase the clamping pressure if possible
- Check the flatness of your mould and if there is anything preventing your mould from closing fully
- Decrease the material temperature
- Decrease the injection pressure

Step 4 - Delamination
If the material delaminates from the part.
Solutions:
- Check if your material is clean
- Check if your material mix is pure from one material type only. Some materials will not create a chemical connection through different characteristics on a molecular level
- Decrease the material temperatue. You can verify that by cutting the part in half to check if the delamination appears at the core too
- Decrease the mould temperature. You can verify that by cutting the part in half to check if the delamination appears only at the surface
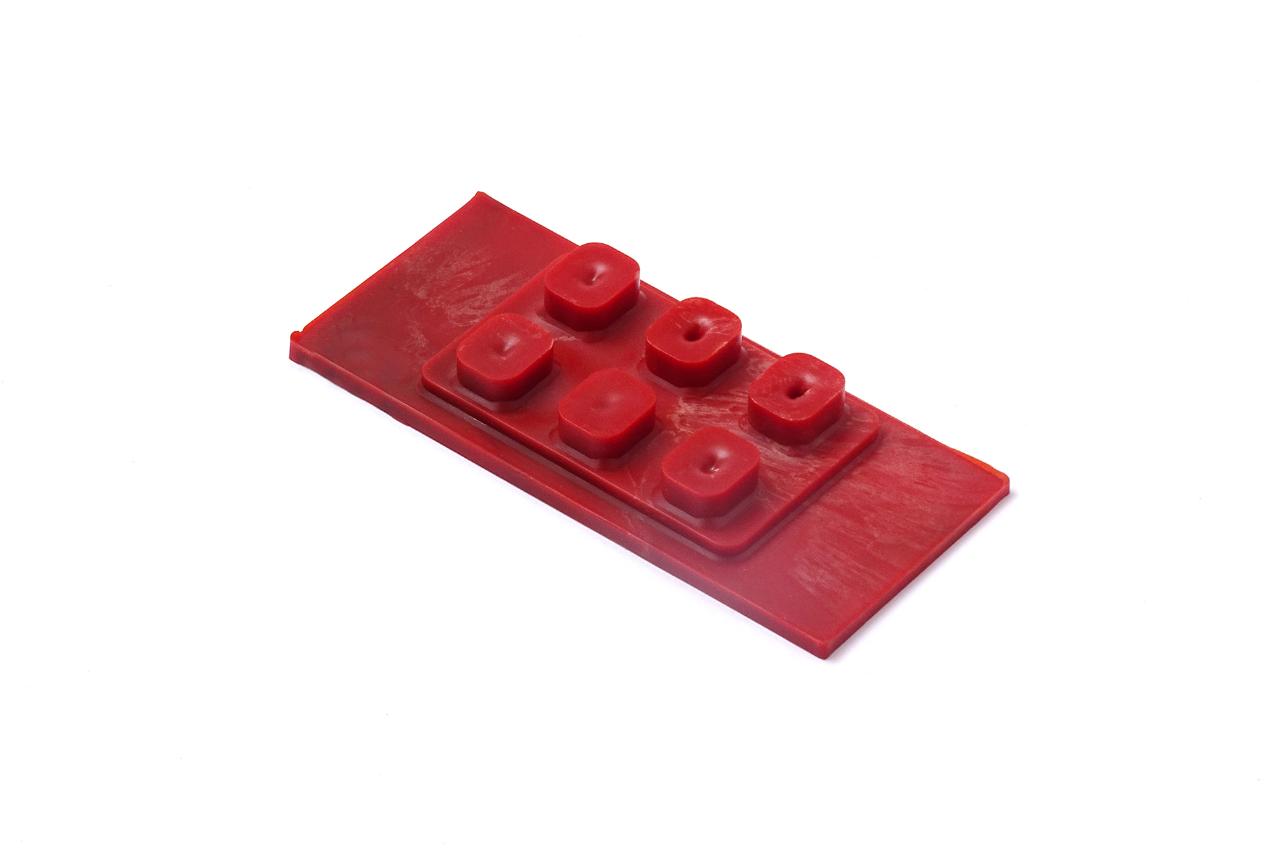
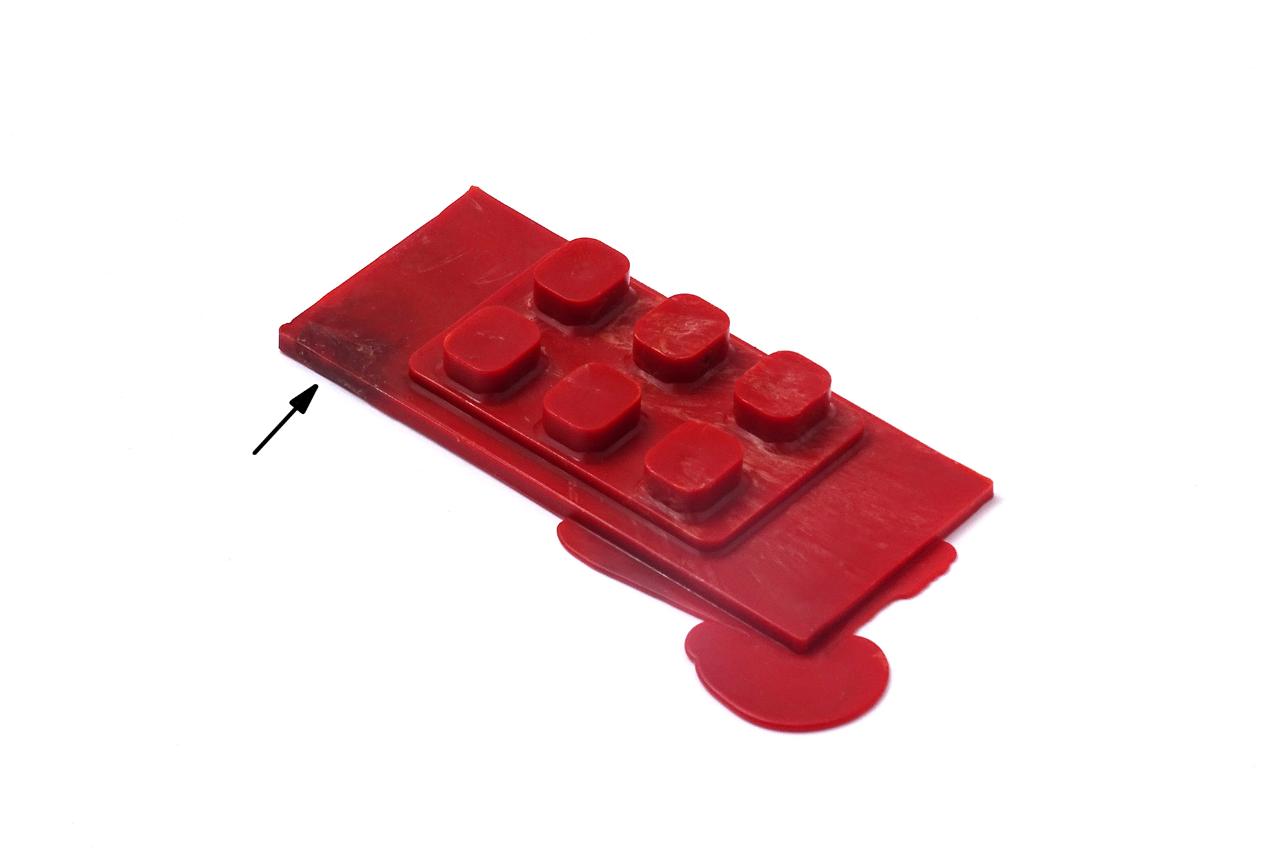
Step 5 - Sink marks
Sink marks are sections of your part surface where the material shrinks more than on other sections and creates holes or indents.
Solutions:
- Increase the holding pressure after the injection operation. After injecting it is recommended to hold the pressure for 2-15sec. depending on your wall thicknesses and part design
- Decrease the material temperature
Solutions:
- Increase the holding pressure after the injection operation. After injecting it is recommended to hold the pressure for 2-15sec. depending on your wall thicknesses and part design
- Decrease the material temperature
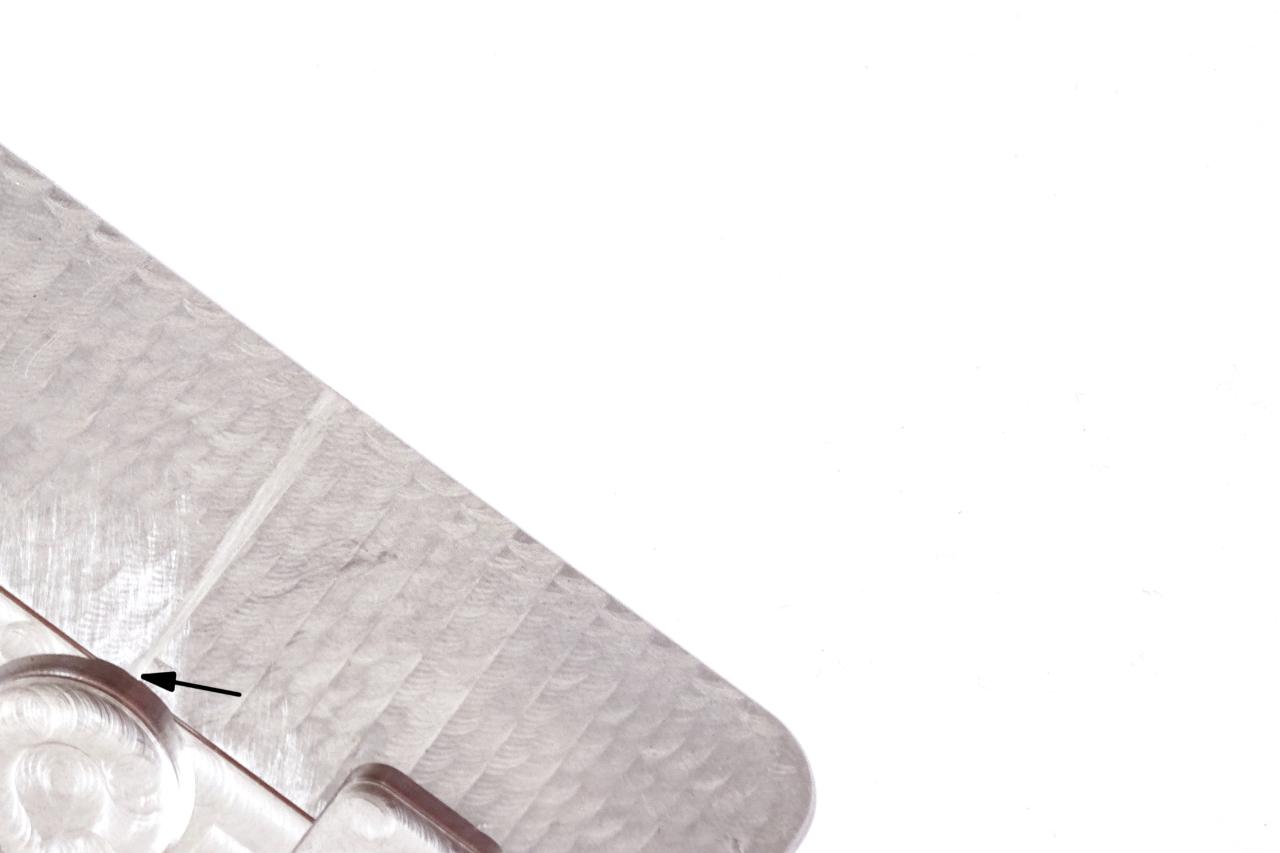
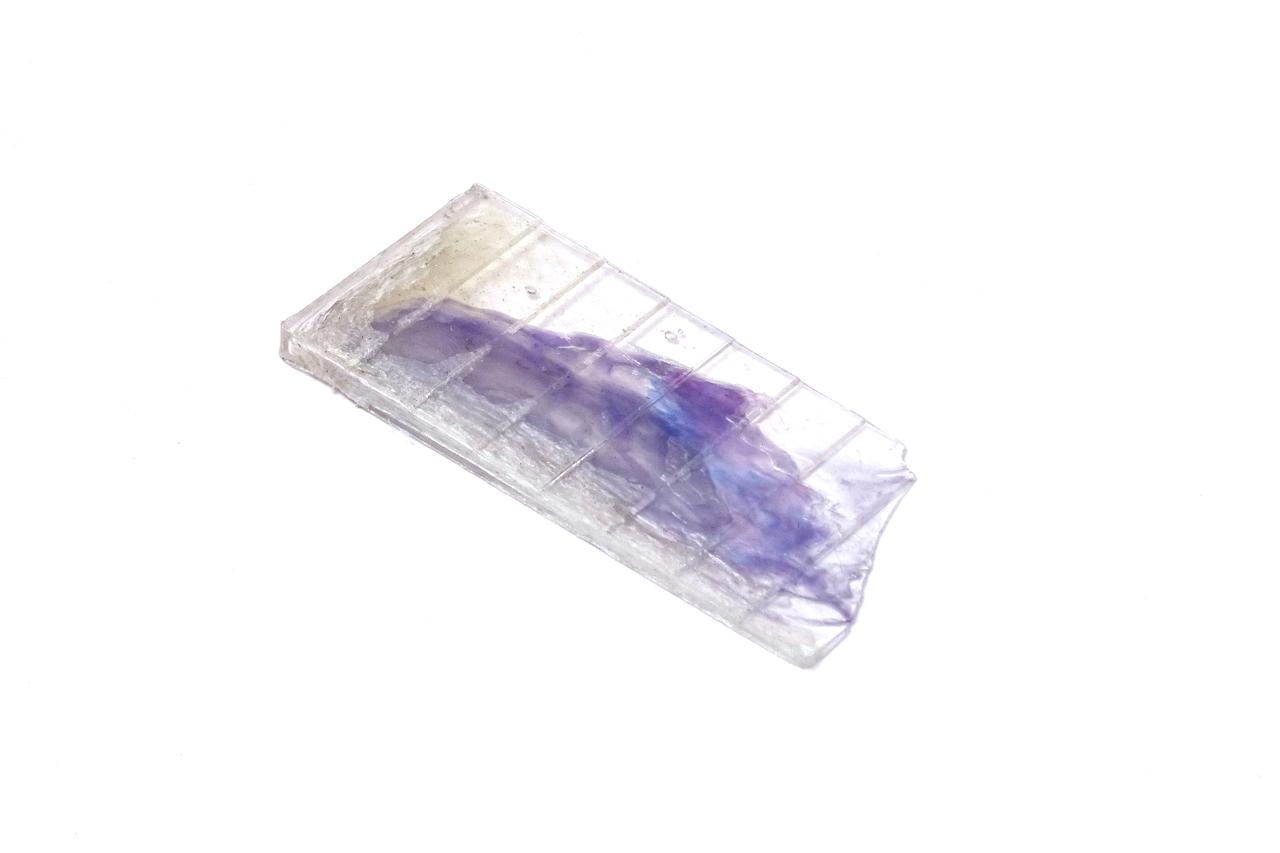
Step 6 - Weld seams
In case your mould shapes geometries where the material has to flow around, chances are that at the point where the material meets again a "line" is visible. This is also the case if your mould has multiple gates into one cavity.
Those lines are called weld seams. They vary from a line which is only visible at the surface of the part to a line which actually is a surface through the whole geometry. In those cases the structural rigidity of this section will be influenced and a predeminated breaking point is created.
Solutions:
- Increase the material temperature
- Increase the mould temperature
- Check if the material is clean from any contaminiations, especially free of dust or oils

Step 7 - Colors don't mix up
In case you look for specific target colors you have to consider some parameters on colormixing plastics.
Solutions (specifc for each case)
- To add a second color to a white material start with around 2-5% of color to 95-98% white material
- To add a second color to a black/colored material start with around 30% of color to 70% black/colored material
- To achieve a solid color you may need to "masterbatch" your material. This means you have to mix the different colors with an extrusion machine prior to the processing with the injection machine.
- If you use special color to colorize your material masterbatching is crucial. Try to Divide the color pellets to a smaller size.
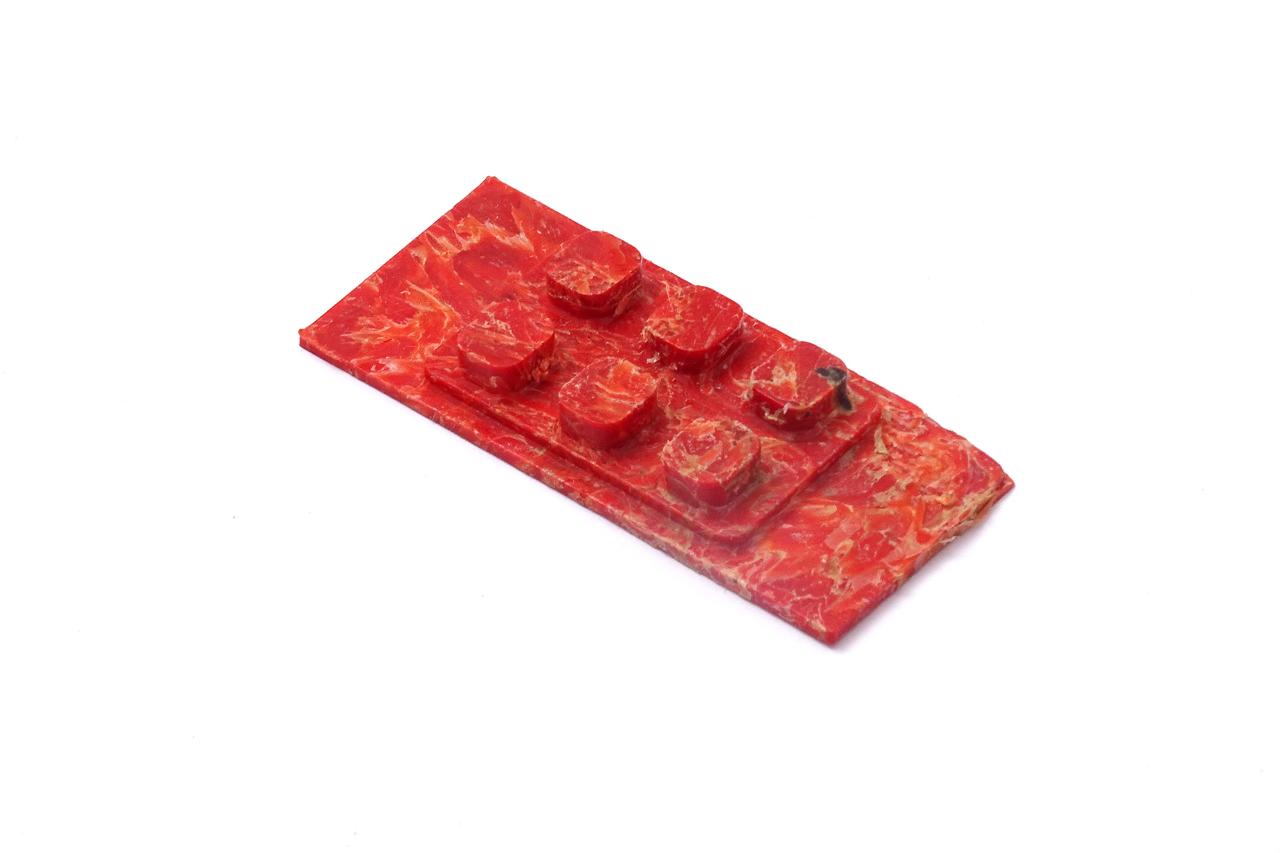
Step 8 - Burn Marks
Your material has a darker color than the inital raw material.
Solutions:
- Decrease the material temperature
- In rare cases: Decrease the mould temperature
Solutions:
- Decrease the material temperature
- In rare cases: Decrease the mould temperature
Step 9 - Silver Streaks
Silver Streaks describe the appearance of silver lines on your part. This occurs mostly with the use of PS or ABS material.
Solutions:
- Pre drying of your material will solve the problem. A standard oven with convection heating can be used as a quick fix. For long term use special pre drying applications should be used for higher energy efficiency.
Solutions:
- Pre drying of your material will solve the problem. A standard oven with convection heating can be used as a quick fix. For long term use special pre drying applications should be used for higher energy efficiency.

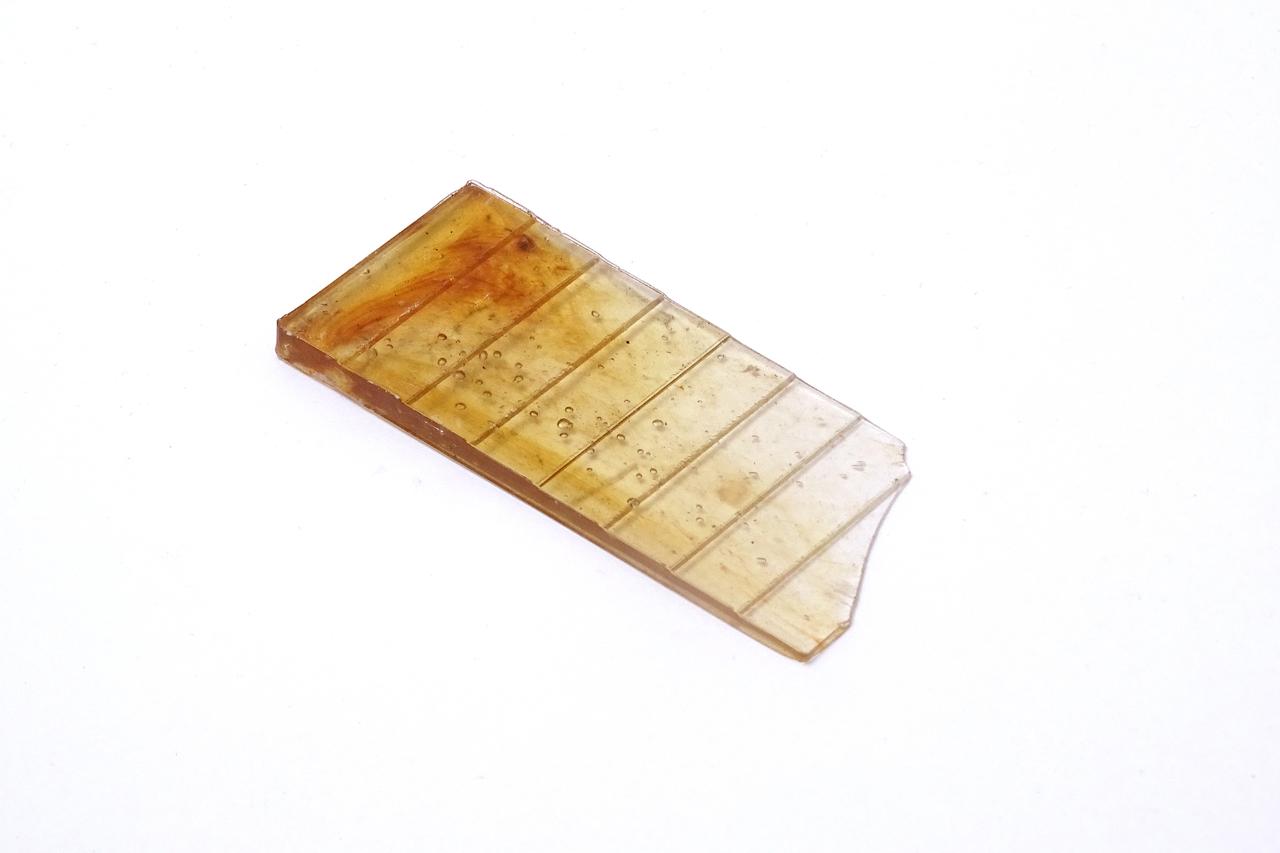
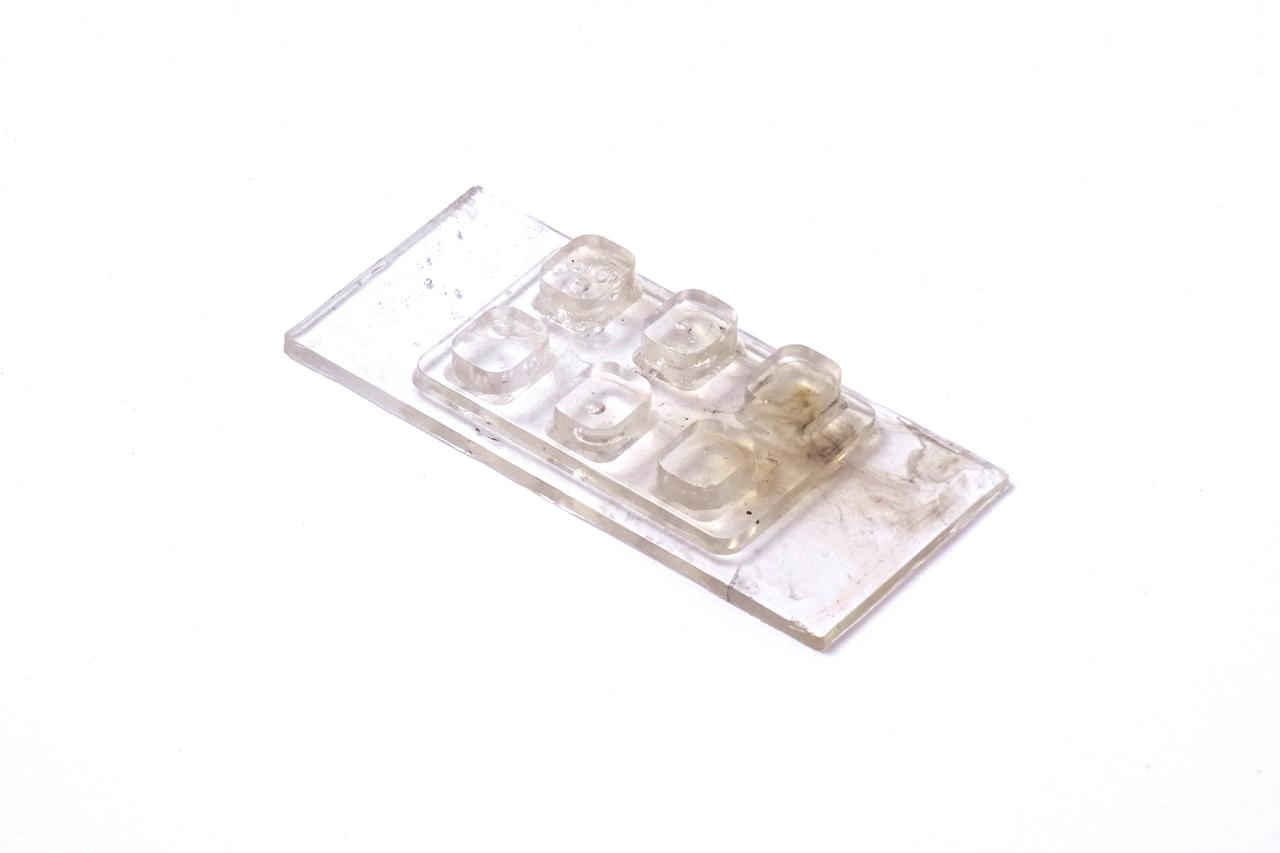
Step 10 - Air bubbles inside the part
In case you process clear material, make parts with integrated function (like flexing) or your parts get post processed by machining you want to avoid that air is trapped within your parts. To verify there are no air bubbles within your parts, cut them into sections carefully!
Solution:
- Decrease the material temperature
- Pre-compress the material with a closed nozzle and make sure the material is fully molten
- Increase the pressure
Solution:
- Decrease the material temperature
- Pre-compress the material with a closed nozzle and make sure the material is fully molten
- Increase the pressure
Step 11 - Forgotten anything?
In case you experience a new problem - please shoot me a mail with your issue + image and I will try to help out.
https://community.preciousplastic.com/u/easymoulds
I would like to add them to this How To, so please declare if your are okay with sharing the image here!
https://community.preciousplastic.com/u/easymoulds
I would like to add them to this How To, so please declare if your are okay with sharing the image here!

—
—
—
Comments