Trash Printer Flake Extruding 3D Print Head
by OSR-Plastic
This is a modified extruder design, optimized for large-format 3D printing of recycled Polypropylene, using shredded plastic flakes rather than filament.
—
Attachments
Resources
Step 1 - Watch the video!
First, take a look at the build video to get a sense of how things go together! The trash printer extruder head is a modified version of the precious plastic extruder, that integrates a vertical axis and NEMA23 stepper motor, making it easy to control with existing 3D printing software.
This tutorial covers how build the print head. To get it printing, you'll need to mount it to a CNC gantry that can move it around and run gcode. Here, I'm using the MPCNC LowRider2 gantry designed by V1Engineering. While not technically open-source, the LowRider2 is neat because it is designed around 3D printable parts and commonly available hardware.
This tutorial covers how build the print head. To get it printing, you'll need to mount it to a CNC gantry that can move it around and run gcode. Here, I'm using the MPCNC LowRider2 gantry designed by V1Engineering. While not technically open-source, the LowRider2 is neat because it is designed around 3D printable parts and commonly available hardware.
Step 2 - Acquire the parts!
These are the parts you'll need to assemble the Trash Printer extruder. Everything listed here should be readily available at local hardware stores, or on Amazon. The estimate cost is $150-$200, and most of that cost is just the motor. Everything else is quite cheap.
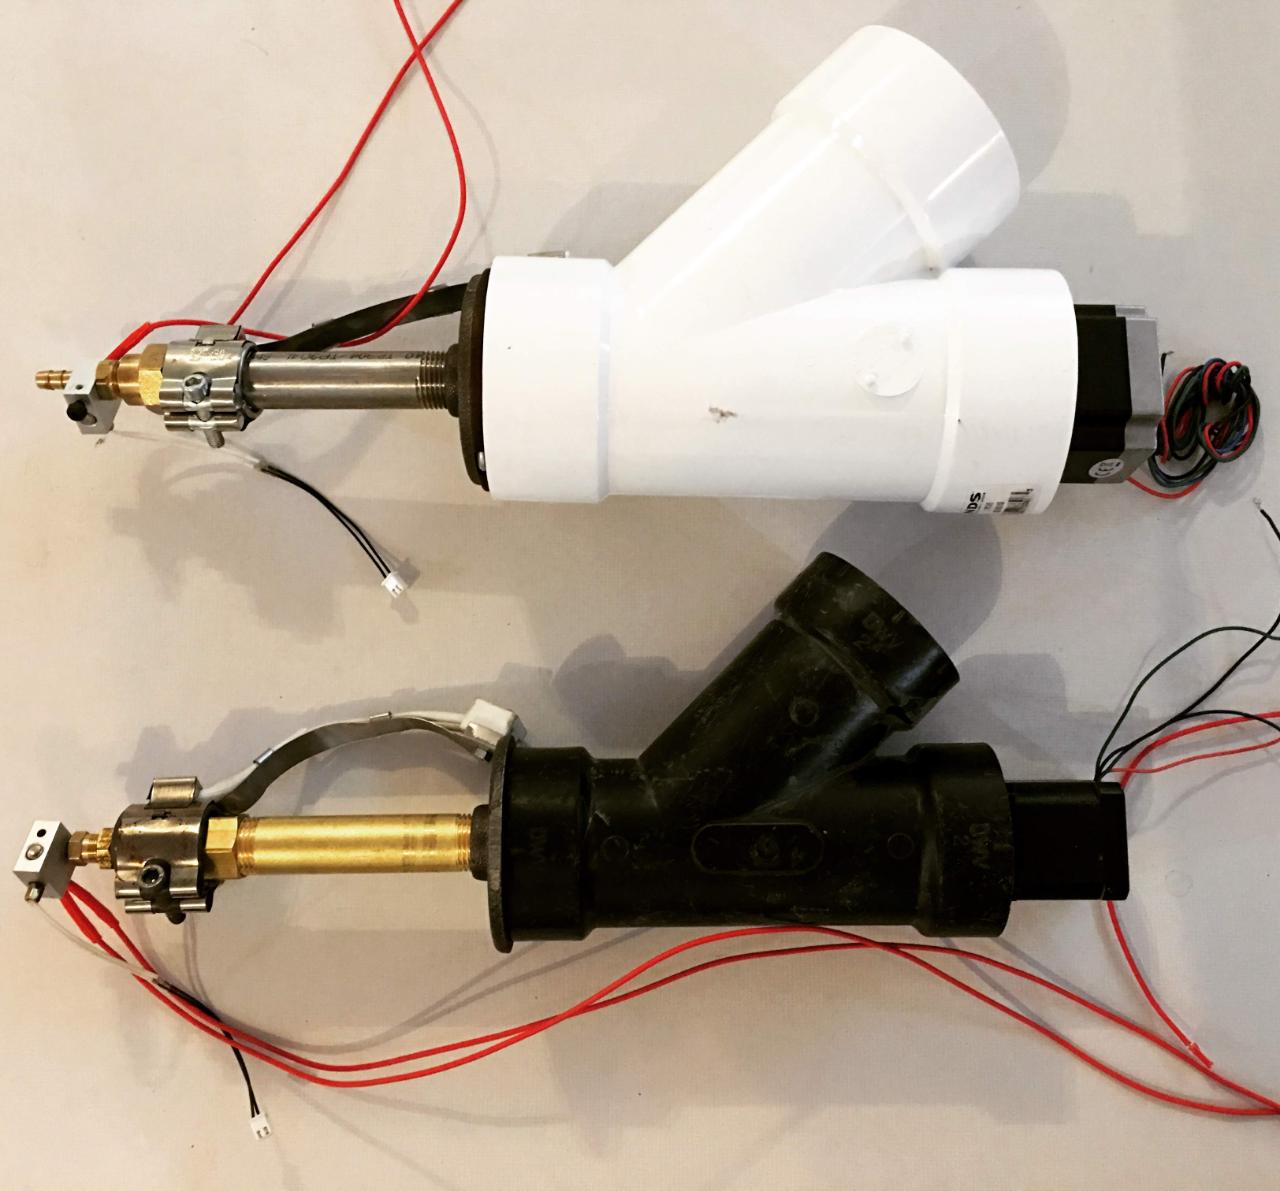
The design is built around a 3" PVC plumbing wye fitting, that acts as a hopper. These are widely available in the United States, I'm not sure if the dimensions are different internationally. If so, the custom parts may need to be modified.
The design is built around a 3" PVC plumbing wye fitting, that acts as a hopper. These are widely available in the United States, I'm not sure if the dimensions are different internationally. If so, the custom parts may need to be modified.


Step 3 - You'll also need these tools
The tools you need are all fairly basics, but you will need laser cutter or CNC router to cut the wooden spacers that hold the extruder together. If you don't have access to these tools, you can use the provided files as a reference, and cut/drill them by hand. Note that you can use a variety of materials for the spacers, but wood is ideal because it is cheap, sturdy, and doesn't get soft when it heats up.
The bottom flange should never get hot enough to burn the wood, but it can get hot enough to melt plastic, so using wood for the bottom spacers is highly recommended. The top spacers and adapters can be 3D printed out of plastic if you wish.
The bottom flange should never get hot enough to burn the wood, but it can get hot enough to melt plastic, so using wood for the bottom spacers is highly recommended. The top spacers and adapters can be 3D printed out of plastic if you wish.


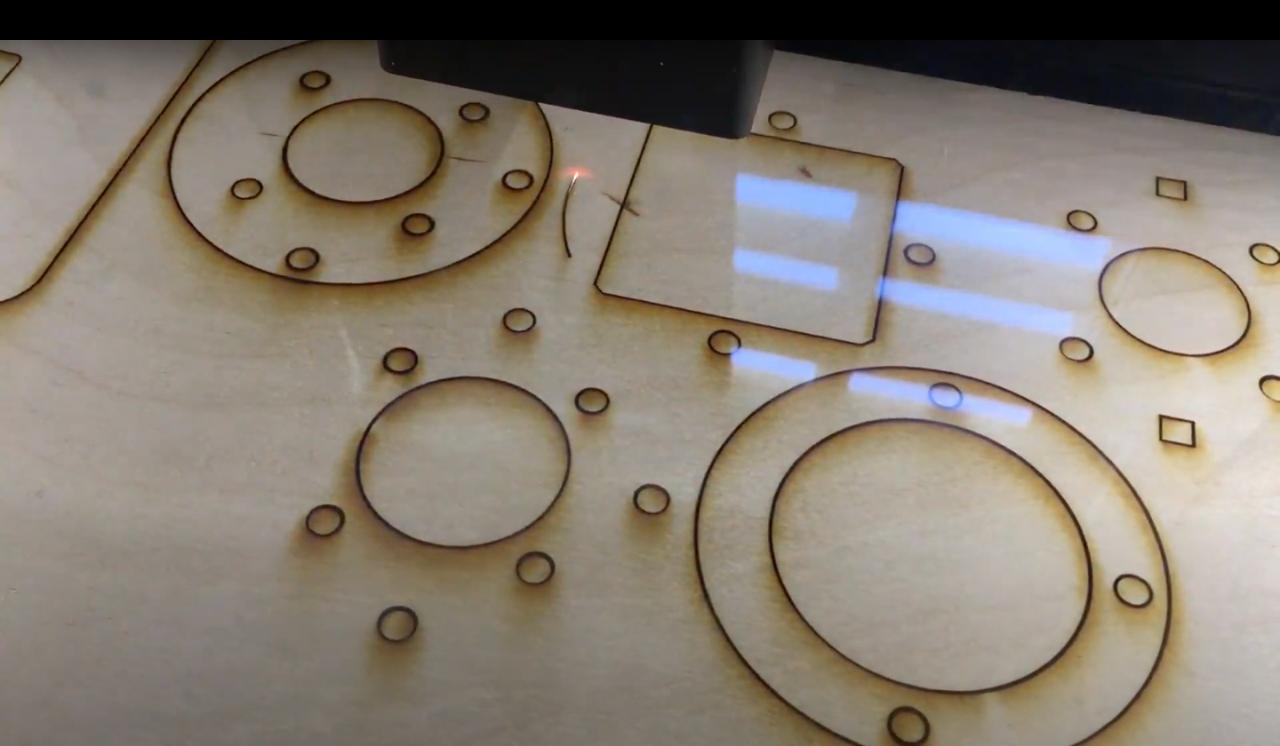
Step 4 - Cut or Acquire Spacers
In the attached zip folder, you'll find a set of .svgs for cutting the spacers you need. These can be cut using a laser cutter or CNC router, or drilled by hand if need be.
I used a Glowforge Basic laser cutter.
I used a Glowforge Basic laser cutter.
Step 5 - Assemble to bottom spacers
Slide all of the bottom spacers starting with B1, onto the two long threaded bolts. These should go in sequential order from smallest hole to largest, and there should be 7 of them. If your material is thinner than .25", you may need more spacers.

Step 6 - Mount Pipe Flange
Tighten the nuts onto the spacers to hold them together, then install the smaller bolts from the opposite direction. Fit the pipe flange over the shorter bolts (covering the recessed heads of the longer bolts) and secure in place with nuts.
Slide two top spacers (T2) behind the T1 motor bracket, then mount the NEMA 23 Stepper motor to the motor bracket spacer (T1) with M4 bolts.
Slide two top spacers (T2) behind the T1 motor bracket, then mount the NEMA 23 Stepper motor to the motor bracket spacer (T1) with M4 bolts.

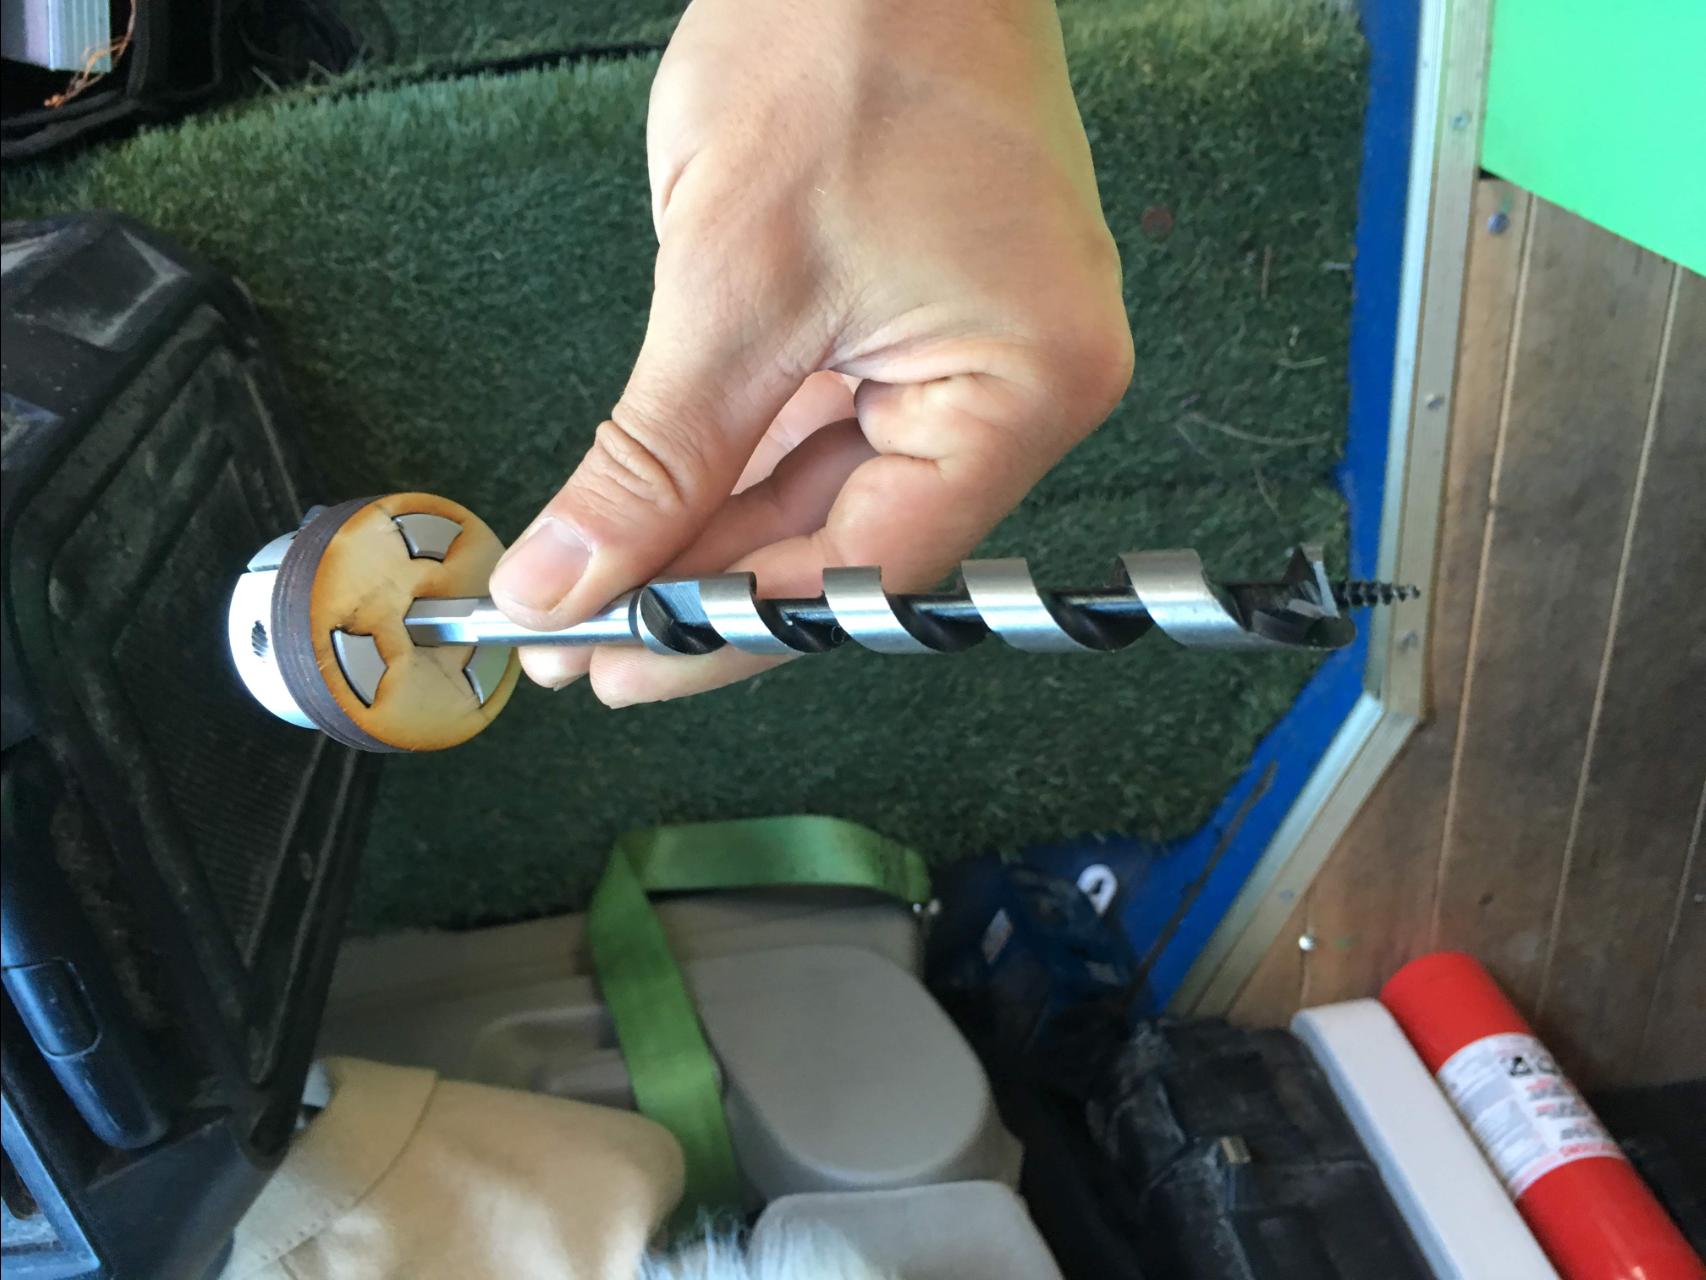
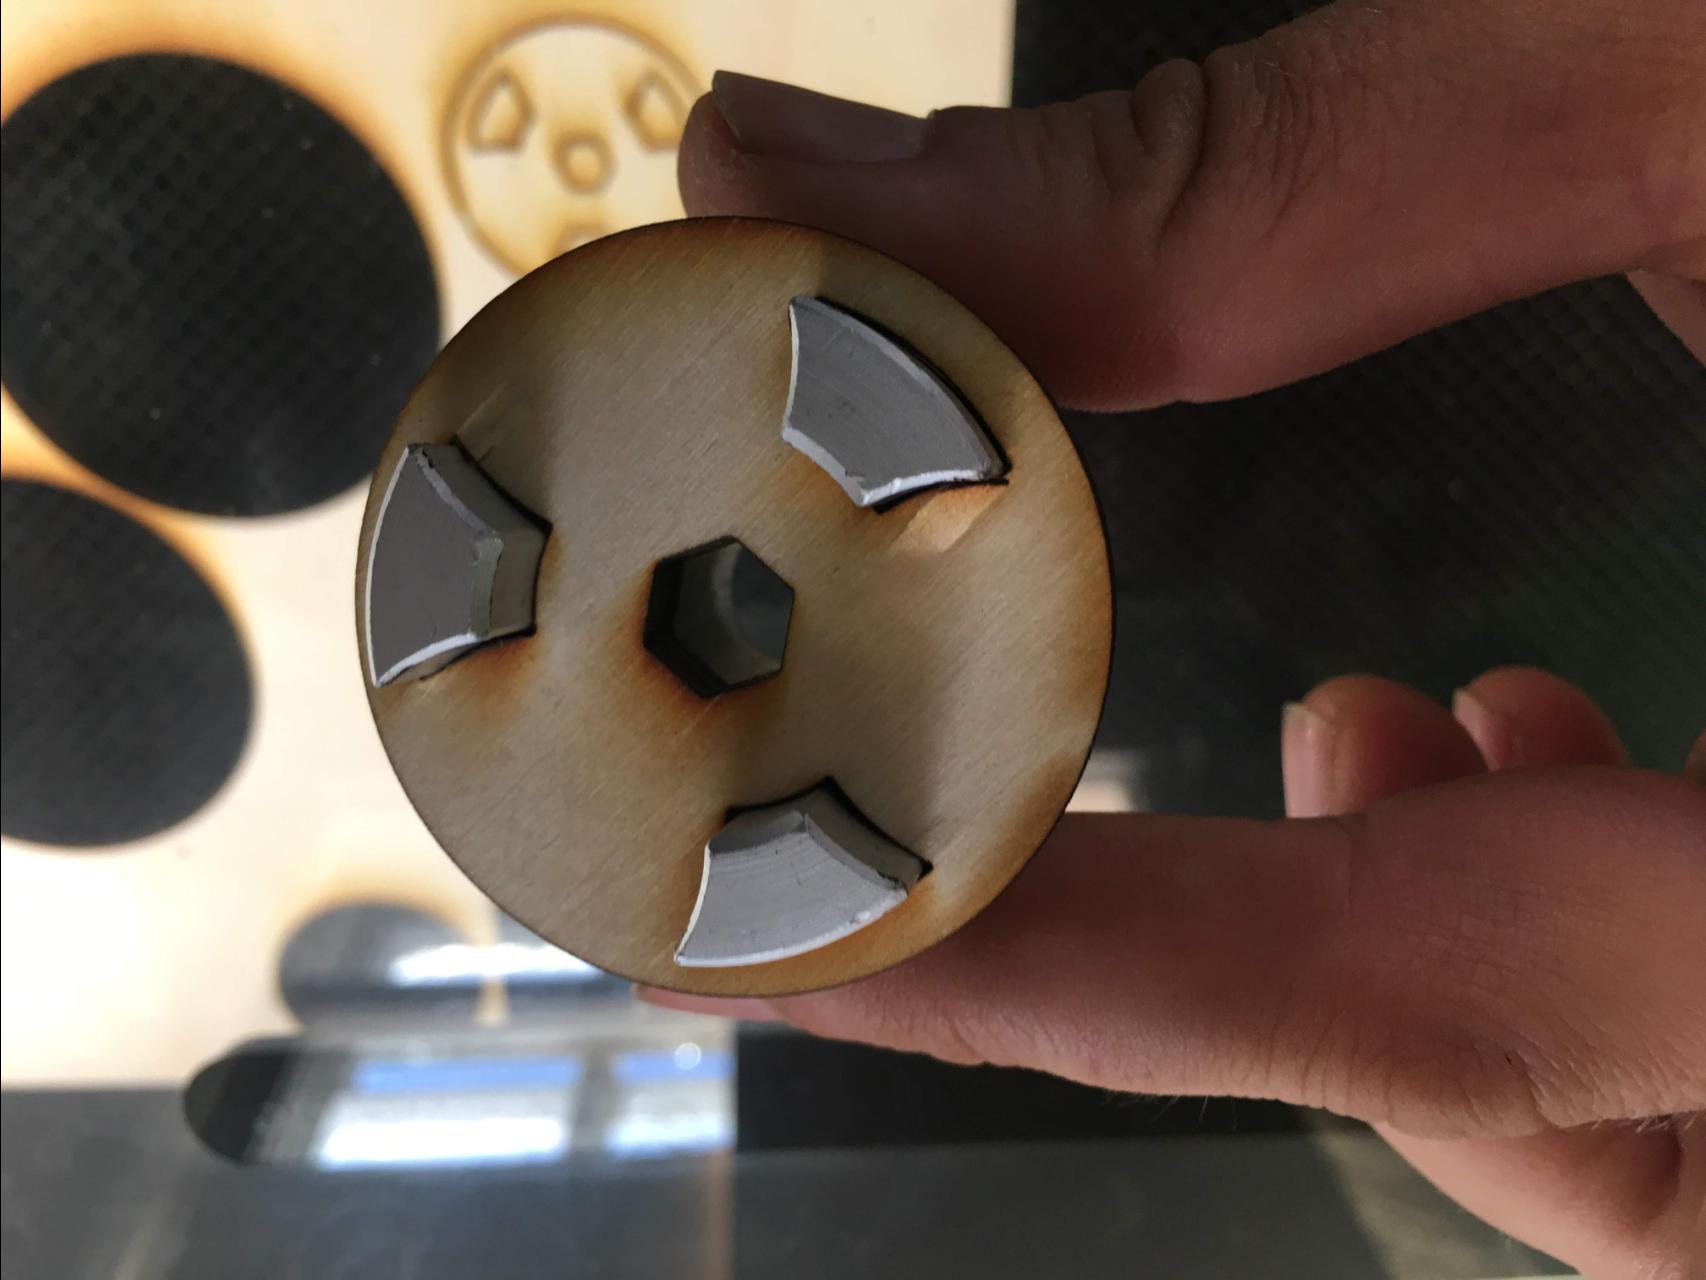
Step 7 - Install Auger
Tighen the shaft coupler onto the motor spindle with a hex wrench, then press-fit the shaft coupler adapter into the teeth. This will fit a typical US hex shank for most 7/16" drill bits. The internal hex shape can be modified to fit other auger shanks.
Slide the two assemblies together so that bolts from the bottom assembly line up with and push through the two holes in the top assembly.
Slide the two assemblies together so that bolts from the bottom assembly line up with and push through the two holes in the top assembly.

Step 8 - Tighten it all together
Tighten the 1/4"-20 coupler nuts onto the ends of the protruding threaded bolts. It can be a tight fit, so using a ratcheting tool can be handy. Additional spacers (B7 or T2) can be added if needed. Adding additional spacers can help you set how far the auger extends into the extrusion tube. In general, I've found about 1-2" is sufficient.
If the auger extends to far into the tube and into the melt zone, it becomes much harder to turn, and can become locked in place when the plastic cools. So keep it just far enough in that it can put pressure on the unmelted flakes.
Next assemble the extrusion barrel, and slide the heater band over the barrel onto the brass adapter.

Step 9 - Assemble the Extrusion Tube
Screw the pipe onto the pipe flange. This must only be secure enough to not come loose, hand tightening is fine, and no thread tape is required. Just screw it on until you can't anymore.
Secure the heater band in place. I like to also see if I can slip the thermistor probe between the band and the pipe, and secure it so that it holds the temp probe in place.
Secure the heater band in place. I like to also see if I can slip the thermistor probe between the band and the pipe, and secure it so that it holds the temp probe in place.

Step 10 - Modify Hot End
Use a drill to widen the hole in the aluminum hot end block, so that it fits snugly but easily around the barbed nozzle.
Next, turn the hot end on it's side, and drill and then tap a small hole for an set screw to hold the hot end in place against the nozzle.
Install the heater cartridge and screw-in thermistor into the hot end. They should just fit.
Slide the modified hot end assembly over the nozzle barb, and tighten it in place, about 1/2" (4-5mm) above the end of the nozzle.
You want this block to be as close to the tip as possible, but not so close that it gets covered in plastic during printing, which will increase fumes and is generally not ideal.


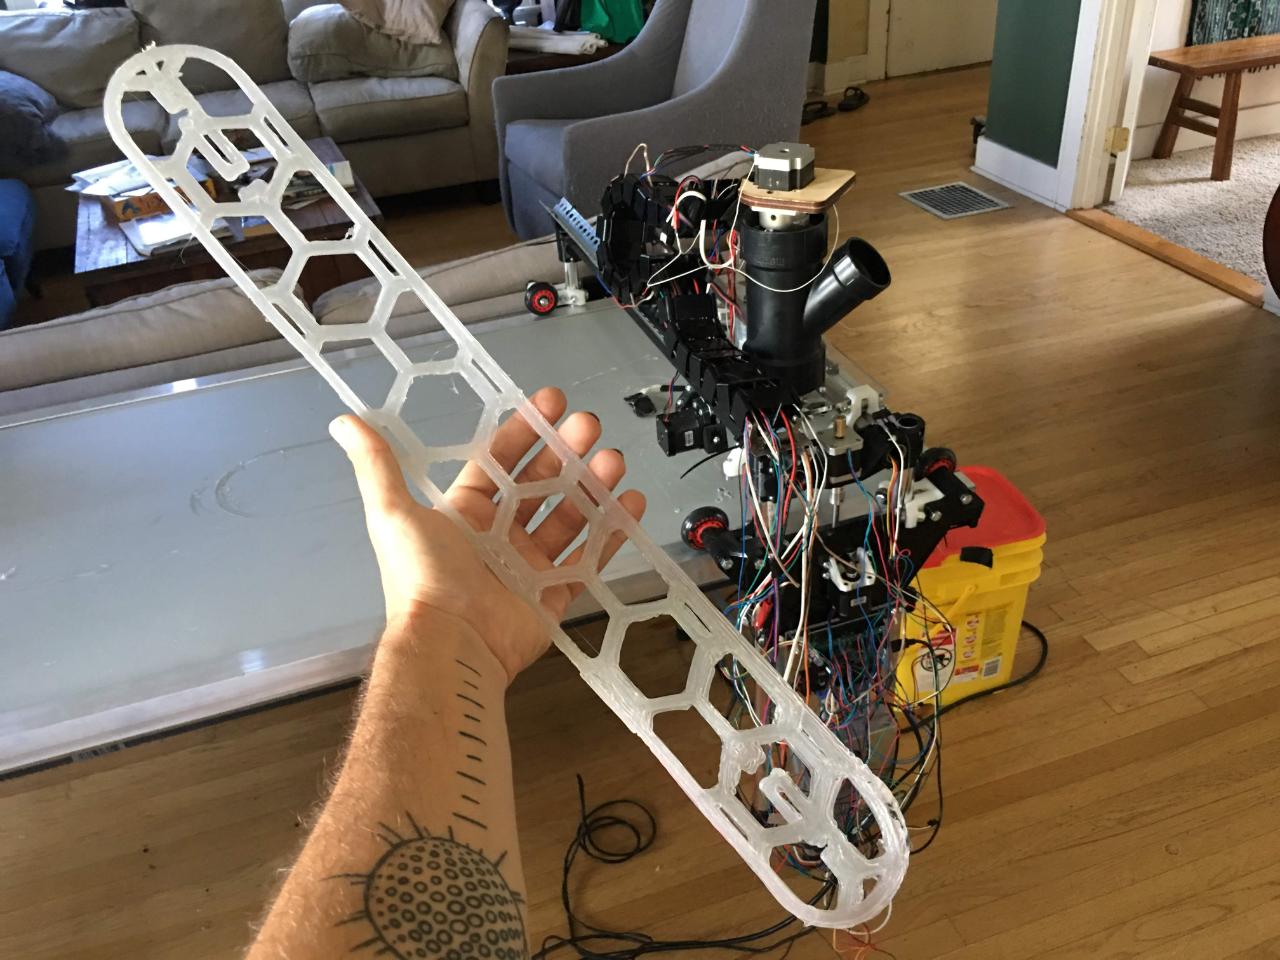
Step 11 - Now Strap it to a Robot!
Now you'll need to mount the extruder onto an appropriate CNC gantry. That's a whole other project, and it's fairly technical, but I use an MPCNC Low-Rider2, with a RAMBOv1.4 board running Marlin firmware, and Repetier-Host as the control software.
The NEMA23 works best at 24V, so I run the whole system at 24VDC. I used an SSR (Solid State Relay) module, like the ones used in the other PP machines, to switch AC mains power on and off, which powers the band heater. The SSR is controlled by the heater relay on the control board. When it turns on 24V, it activates the SSR, and turns on the Mains switch, allowing the system to deliver a lot more power to the extruder than it otherwise could.
The NEMA23 works best at 24V, so I run the whole system at 24VDC. I used an SSR (Solid State Relay) module, like the ones used in the other PP machines, to switch AC mains power on and off, which powers the band heater. The SSR is controlled by the heater relay on the control board. When it turns on 24V, it activates the SSR, and turns on the Mains switch, allowing the system to deliver a lot more power to the extruder than it otherwise could.

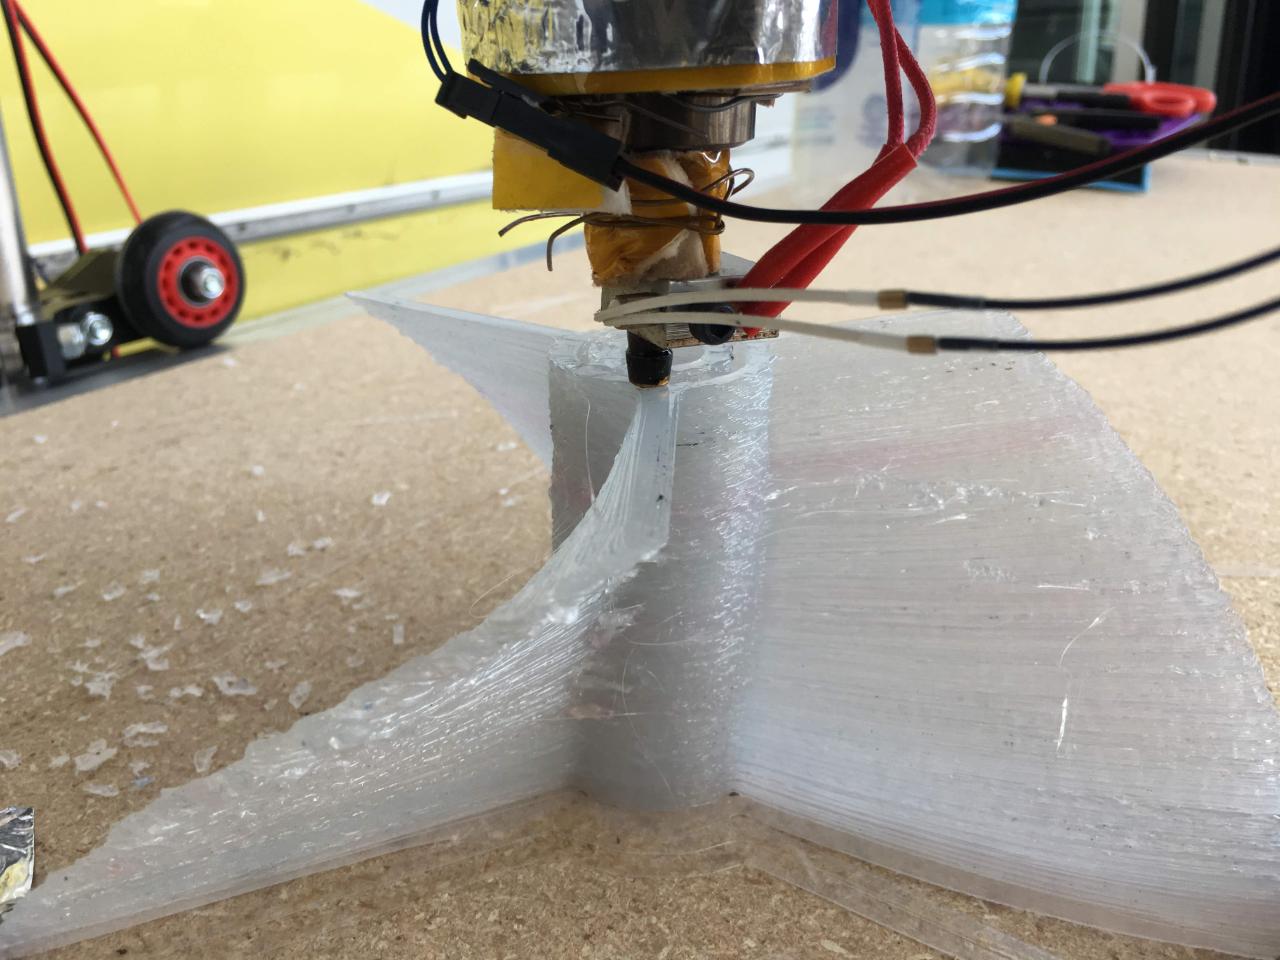
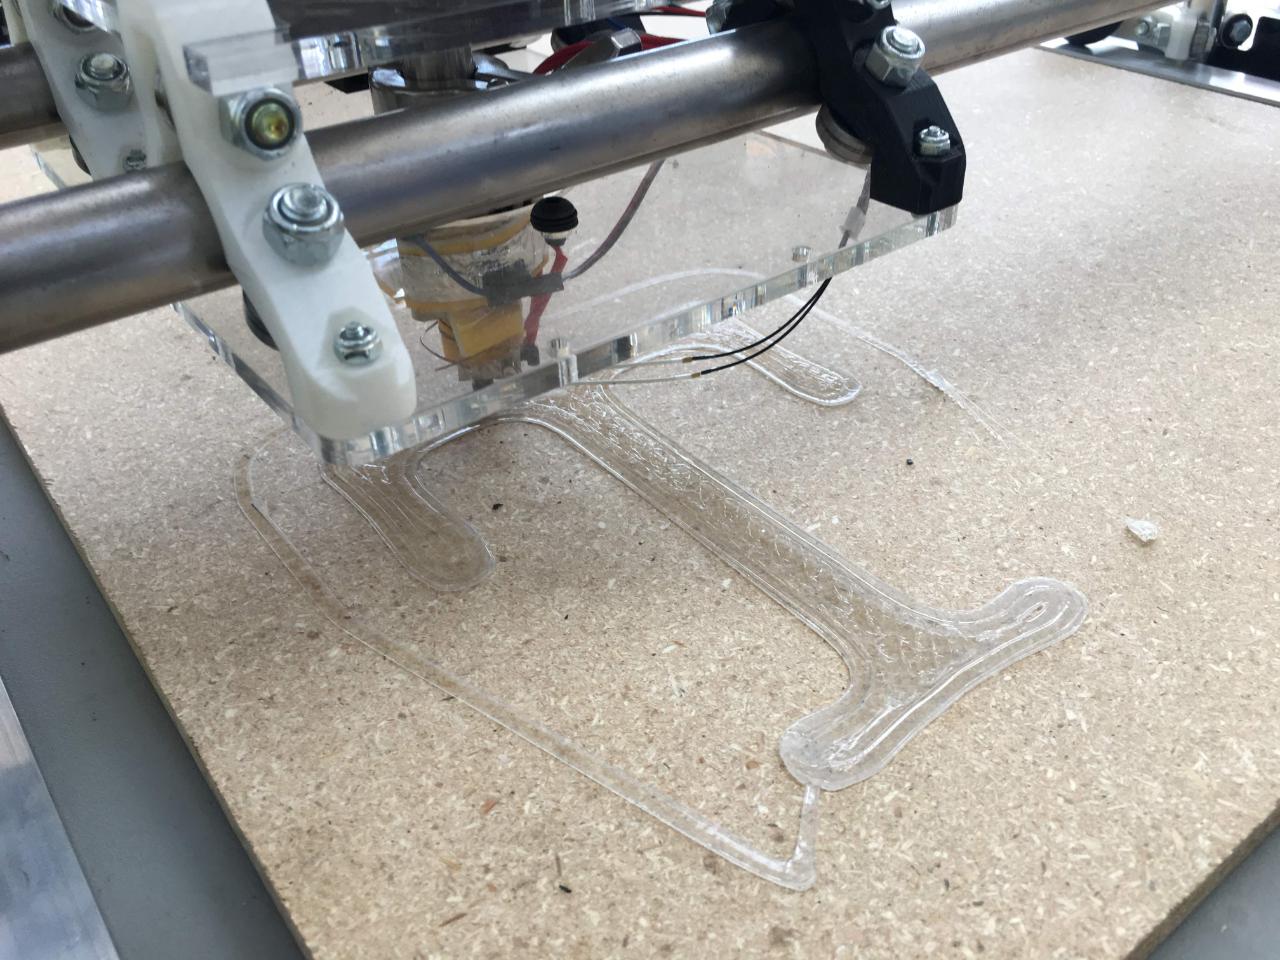
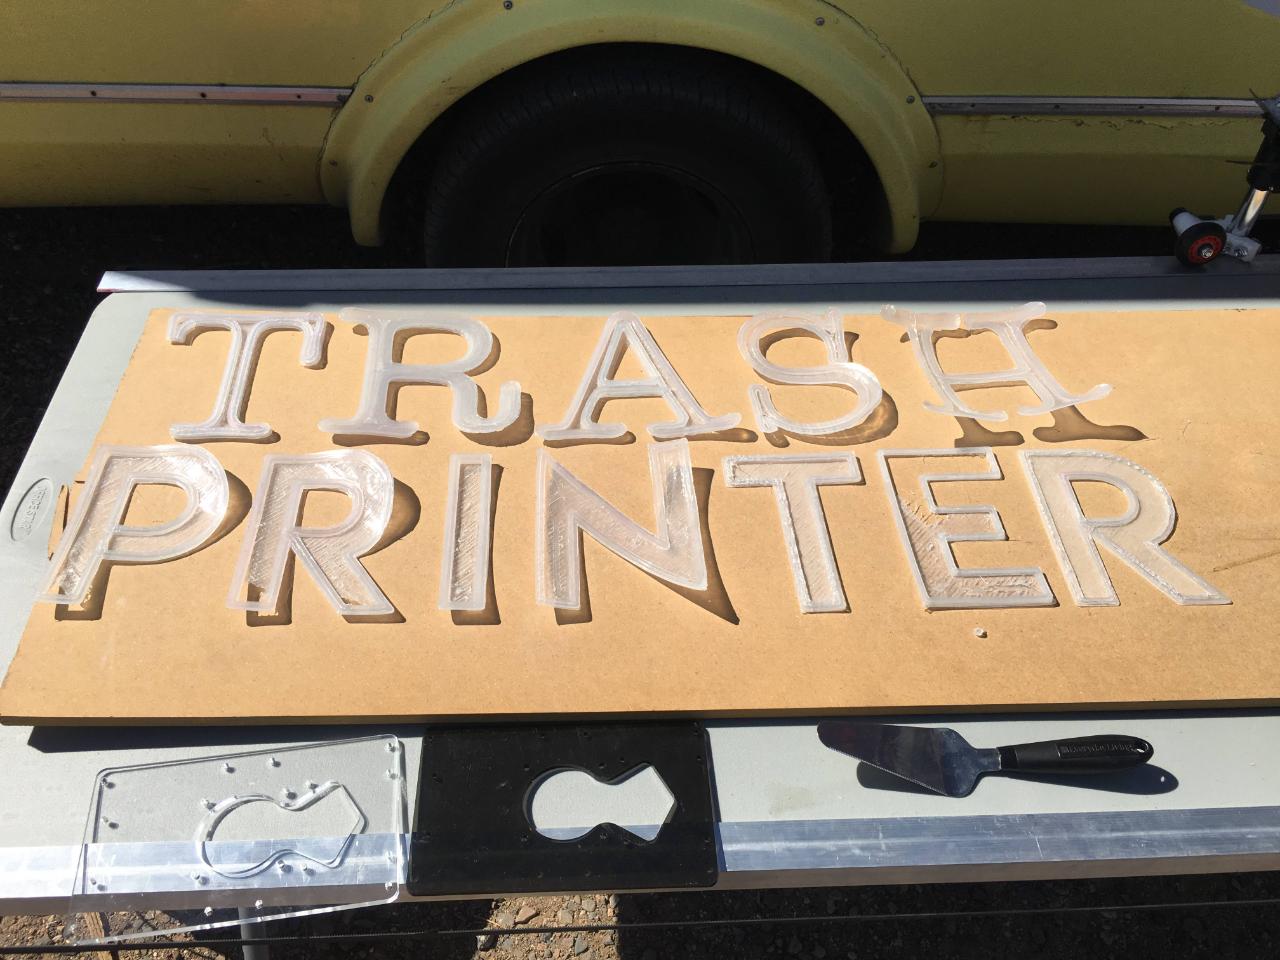
Step 12 - Start Trash Printing!
This design was inspired by Precious Plastic and is 100% open source. Feel free to use, share, modify it with or without credit or permission. But if you do replicate it, please let me know and show me your build, and if you make improvements, please share them with the world! Replication is the highest form of flattery.
If you want to learn more about my open-source infrastructure designs, and/or help support this work, you can follow my monthly project updates at Patreon.com/DisruptivelyUseful
If you want to learn more about my open-source infrastructure designs, and/or help support this work, you can follow my monthly project updates at Patreon.com/DisruptivelyUseful

—
—
—
Comments