Build an Extrusion Pro
Welcome to the Extruder Pro! This is a stronger, bigger and more robust version of our V3 extruder so if you are looking for serious production and have advanced milling and lathing skills, continue on! If you are starting out, or looking for a smaller and easier machine to build, we advise you to start with the original extruder (which is still badass).
Tip : Making the extruder requires fine precision and eye for tolerances, if you are not precise enough try to find complex parts on the bazar. They are small and easy to ship.
Video Chapters
- 00:07 Introduction
- 01:30 Bearing body and shaft
- 08:49 Barrel inlet
- 12:17 Barrel
- 15:13 Motor adapter
- 16:35 Hopper
- 17:39 Electronics
- 19:45 Frame
- 20:19 Final assembly
- 24:11 Maintenance and how to run
Required machinery & skills
| Build Extrusion Pro | Machines needed | Skills needed |
|---|---|---|
 |
- Lathe |
- Drill press
- Milling machine
- Welding machine (TIG or MIG/MAG recommended)
-
Torq wrench - Welding (advanced) - Machining (advanced)
- Assembling (intermediate)
- Electronics (intermediate)
Materials and parts
Motor selection & explanation
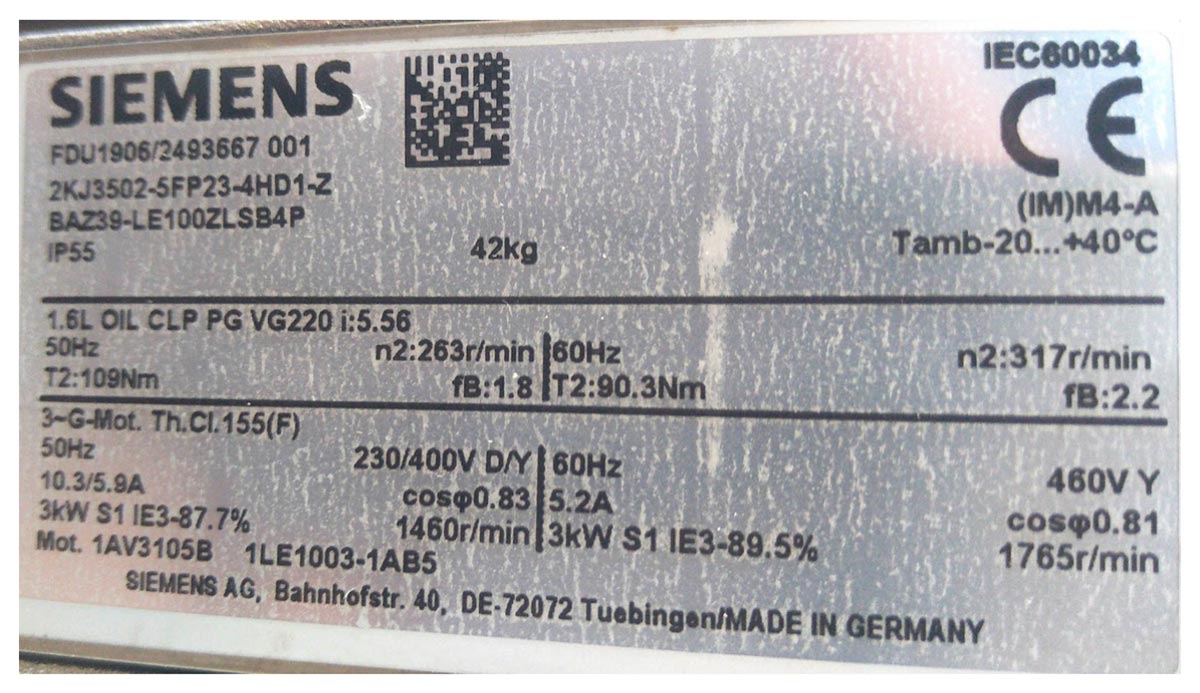
We recommend to use motor output torque in the range of 80-120 Nm, in which 120 Nm is the recommended Max. output torque value and 80 Nm the minimum value. We recommend to use a motor with a max. power output of 3 kW Which corresponds to a maximum (Output shaft) speed of 220 - 320 RPM (assuming 90% gearbox and motor efficiency). We recommend to avoid worm-type gearboxes due to their low efficiency.
Before buying a motor, you need to be aware of the standard voltage and frequency of electricity in your country. These numbers vary worldwide and can make importing a motor complicated:
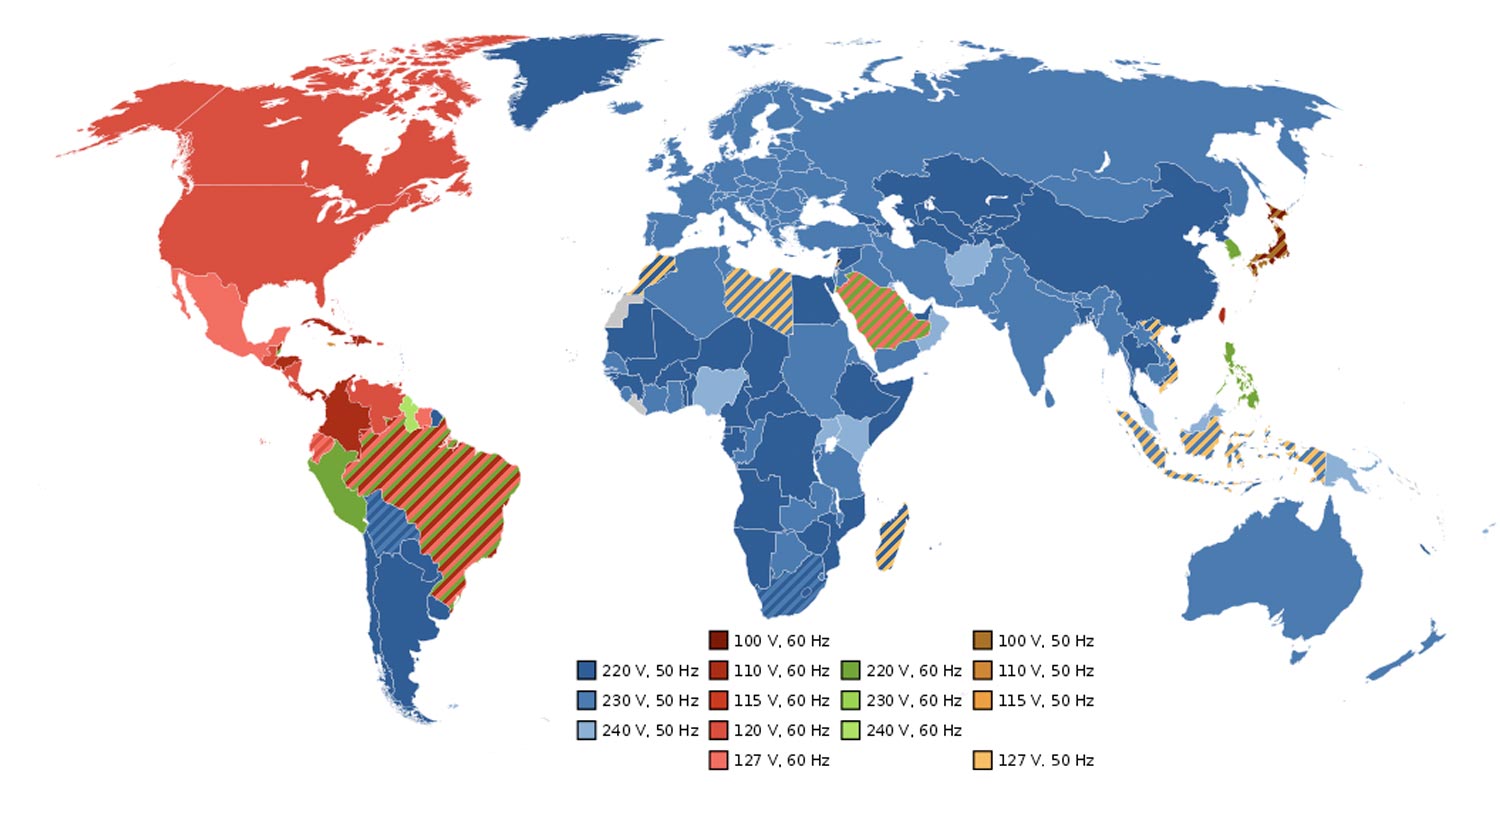
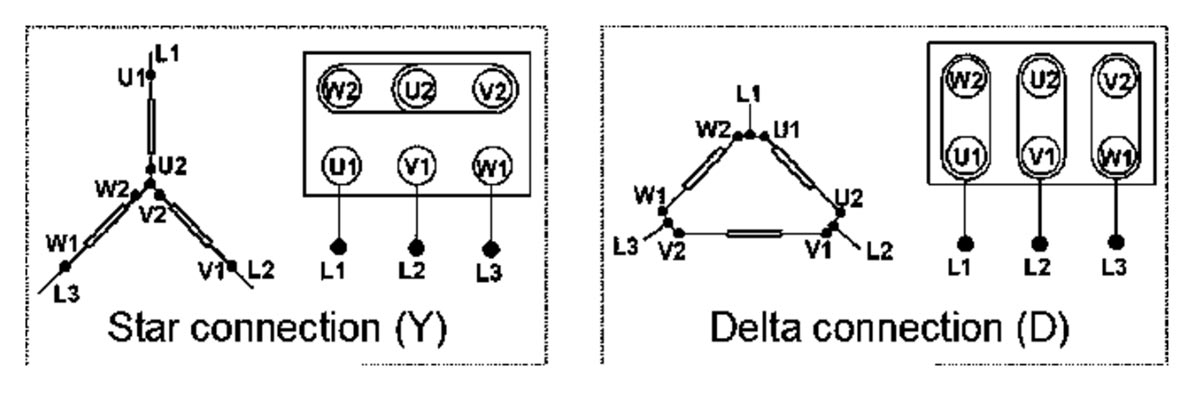
The coupling of your asynchronous motor (delta or star) depends on the mains voltage of your installation and the rated voltage of the motor. If your configuration is wrong the motor may run but with low torque, it may trip your building’s circuit breaker, or it could burn out your motor.
Most Variable Frequency Drives (VFD’s) ore required to work with the motor connected in a Delta configuration, but check your VFD manual for more information.
Coupling option & explanation
A Shaft Lock Cone Clamping method was chosen to clamp the extrusion screw because it can handle large torques in a small amount of space. It is also designed for easy maintenance of the extruder’s components. It is easy to install and remove the coupling from the gearbox. Be sure to use a clamp that can support a minimum 250 Nm torque.
Hopper shape
Square feed hoppers work well, except when there is a large variation in plastic particle size and shape. The choice of hopper bottom shape is influenced by many factors. Pyramid hoppers are typically used with relatively free flowing products that are stable with time and with bulk materials with uniform pellet size. Conical vessels are relatively simple to construct and have an excellent shape to sustain internal pressures.
Electronic box
Explanation of electric component roles
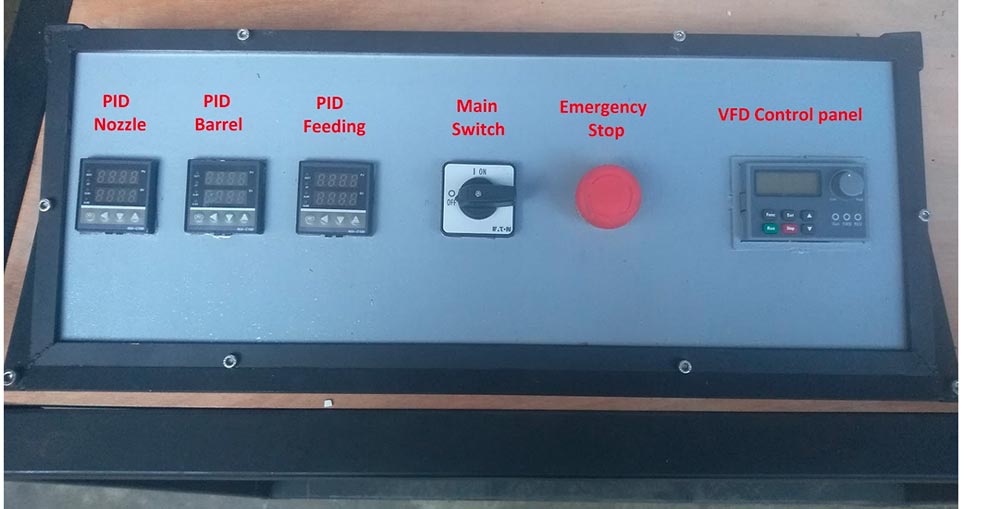
PID controllers
The three PIDs control the temperature of the heating collars. Each is paired with a thermocouple that measures the temperature at a designated point in the process. These temperature sensors are extremely rugged, low-cost, and self-powered. You do need to be careful because there are many types of temperature sensors. The most common thermocouple models are J, T and K type thermocouples, which are available in pre-made forms.
Ensure your thermocouple sensor as the same type as your PID (J,T Or K).
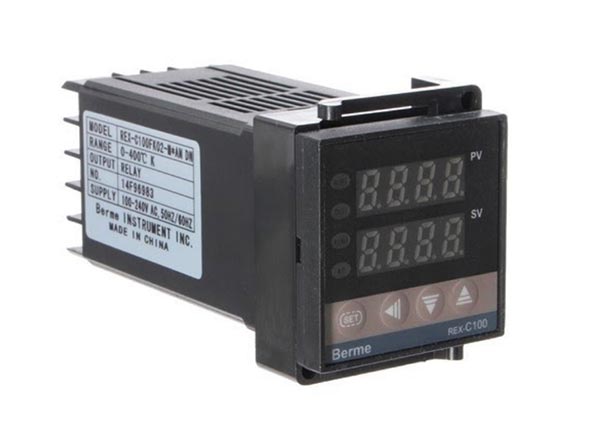
The majority of PIDs are type K by default, but it is sometimes possible to use other types by changing the initial setting through the initialization mode:
- PID REX C100 Page 7 Chapter 7.1 https://www.mpja.com/download/rex-c100.pdf
Frequency Driver
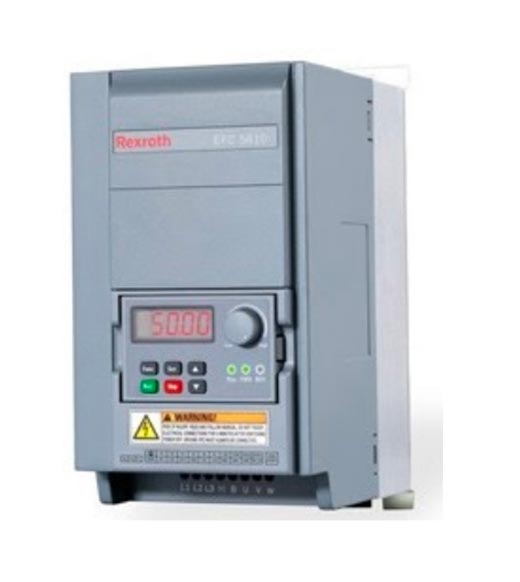
A VFD (Variable Frequency Drive) is a precision electronic device specifically designed and used to control the speed of AC induction motors without affecting the electric consumption, torque, impedance, etc. of the motor.
Tips & tricks while making
Mould
At the nozzle of the machine, you can use different types of connections to attach your mold. Cam lock & dovetail are good for quick release applications, and a screw nozzle is great for products requiring high pressure output.

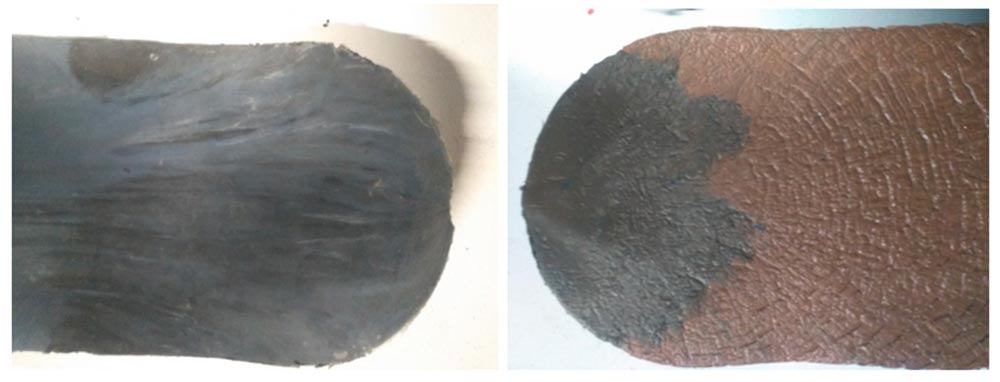
You will obtain different surface finishes depending on the temperature of your mold. Preheated molds give you a very smooth finish and cold molds will be wavier.
When using the machine to make beams, it is easy to see when the mold is full, but for other objects things get tricky. Here are a few tricks that we found:
- Set a timer if you know the material flow rate and volume of mold,
- Tiny exit holes (1 mm)
- For the brick, we have been using vise grips on the dovetail connection. When the pressure gets high enough, the vise grips start to open and indicate completion.
If you want to make bigger object, a technique that works well is to create back pressure in the mold so that the plastic fills the whole section. A plunger with a high temperature silicone seal is the cheapest and most simple solution we found up to now. If you want to augment the pressure, you can add weight to the plunger.
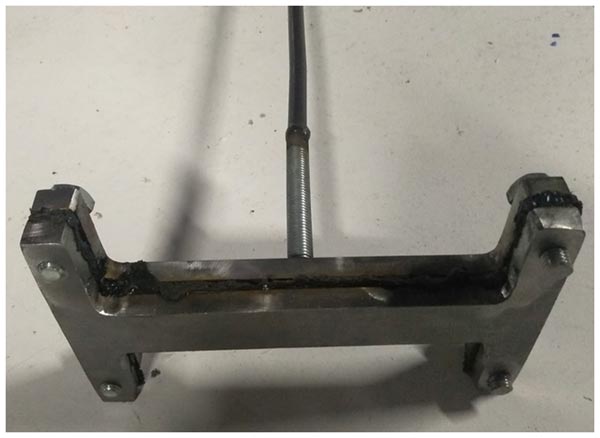
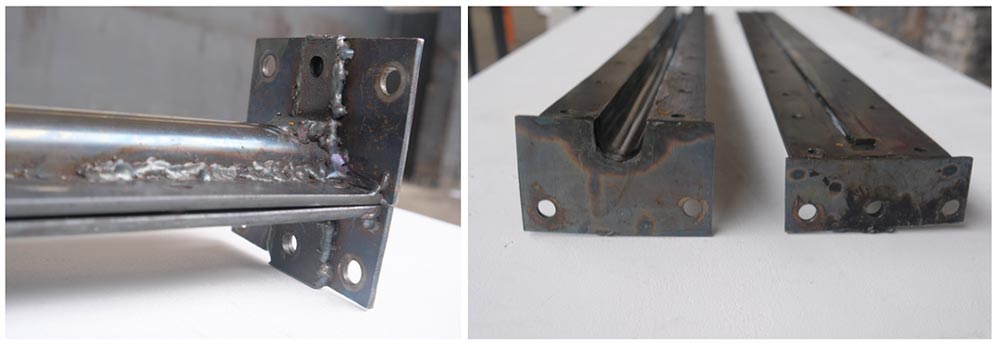
When you want to make beams with a complex profile or with a plastic with a small shrink rate (such as PS) two part molds can be a good solution to facilitate the unmolding process. The photo below shows a screwed flat bar that will create a groove in the beam, and minimize additional machining for its designed purpose. This kind of design reduces post processing time and prevents the creation of microplastics.
Additional Options
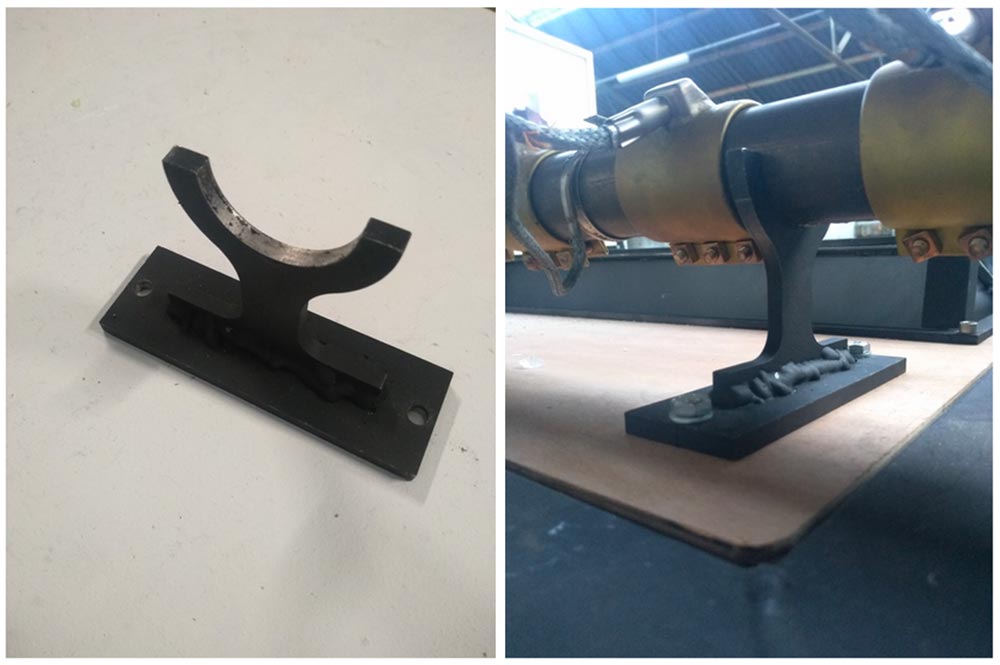
Barrel support
If you frequently use your machine with heavy moulds attached to it, you may need a barrel support to avoid bending the extruder from the repeated stresses.
You can find the technical drawings in the download kit.
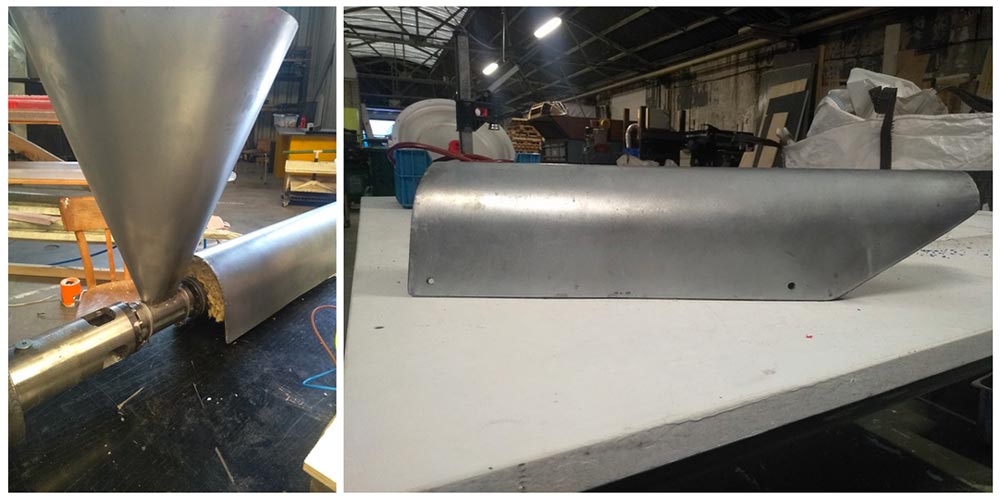
Heating protection option
We recommend to cover the barrel of the extruder to prevent burning and minimize the thermal diffusion in the air of the heating collars. To build this protection, simply cut and fold a thin steel plate manually (a cylindrical object can be used to make the bending pattern).
You can find the technical drawings in the download kit.
It remains to use an insulating material to be inserted between the barrel and the steel plate. Different types of insulation can be used:
- Ceramic wool (best option)
- Mineral wool
- Rockwool
- Glass wool
Comments