Continuously Produce Sheets
How to continuously produce sheets in a full “work day" or “work week” scenario using the Precious Plastic Sheetpress system to achieve a semi-mass-production scale output.
Filled with lots of optimization and efficiently tips and tricks we have learned over the years!
—
Attachments
Resources
Step 1 - Check your setup
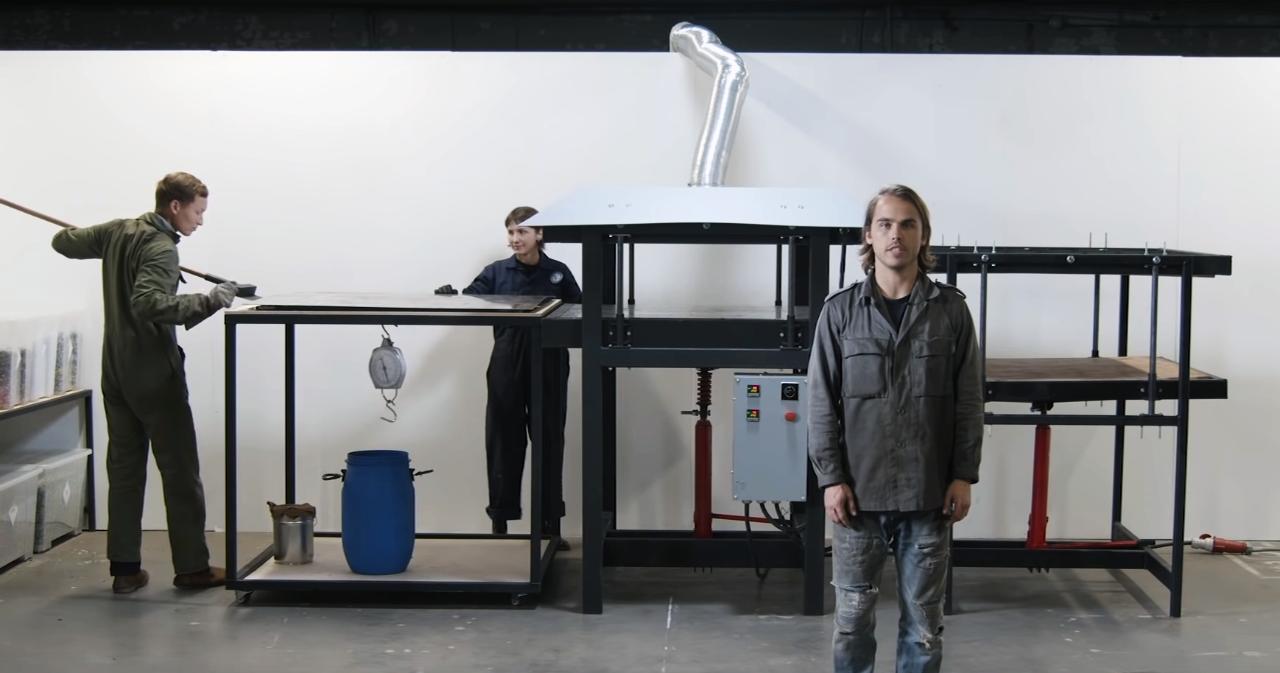
First, check if you have the right safety equipment: You will need gloves, a mask, safety glasses and ventilation.
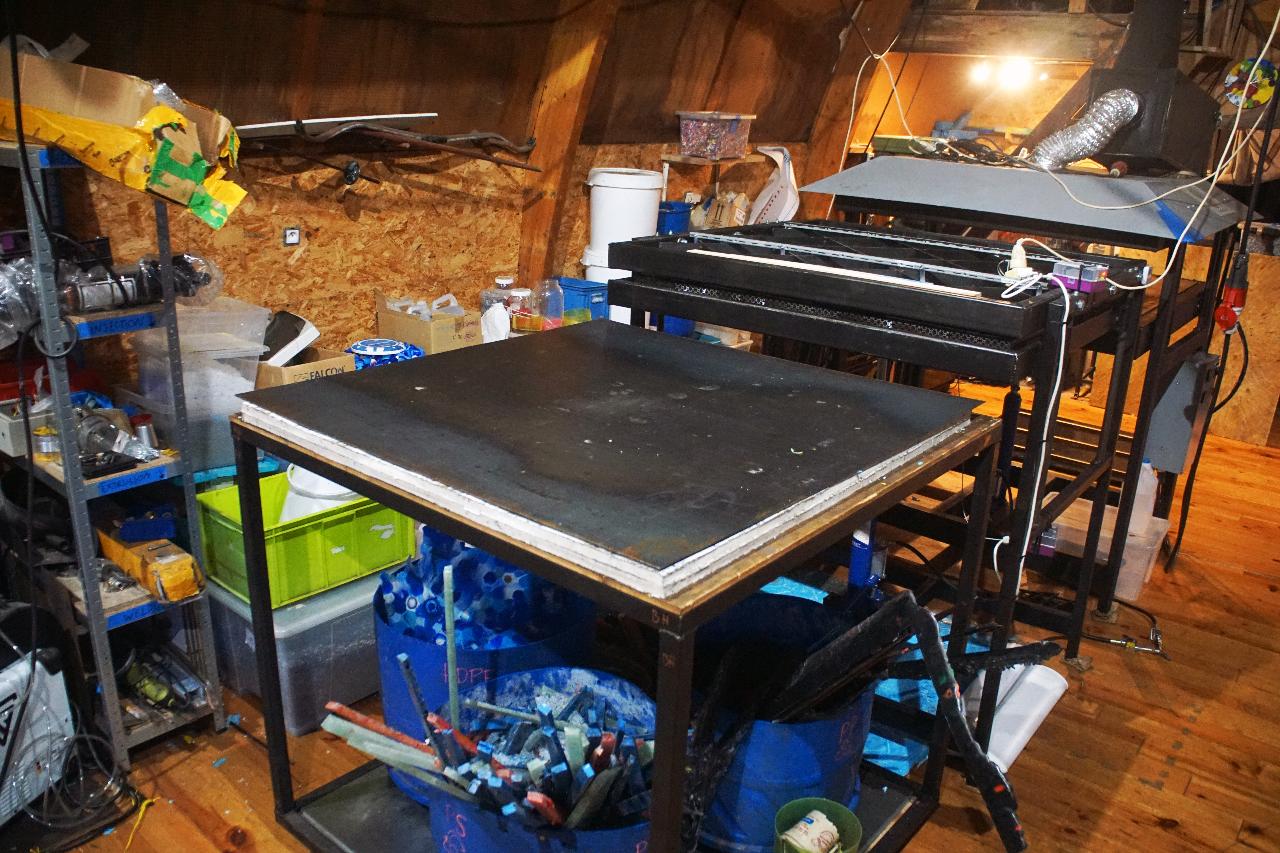
As well as a sheetpress you will also need: a cooling press, prep table and sliding tools. (👀 https://tinyurl.com/3epj9222)
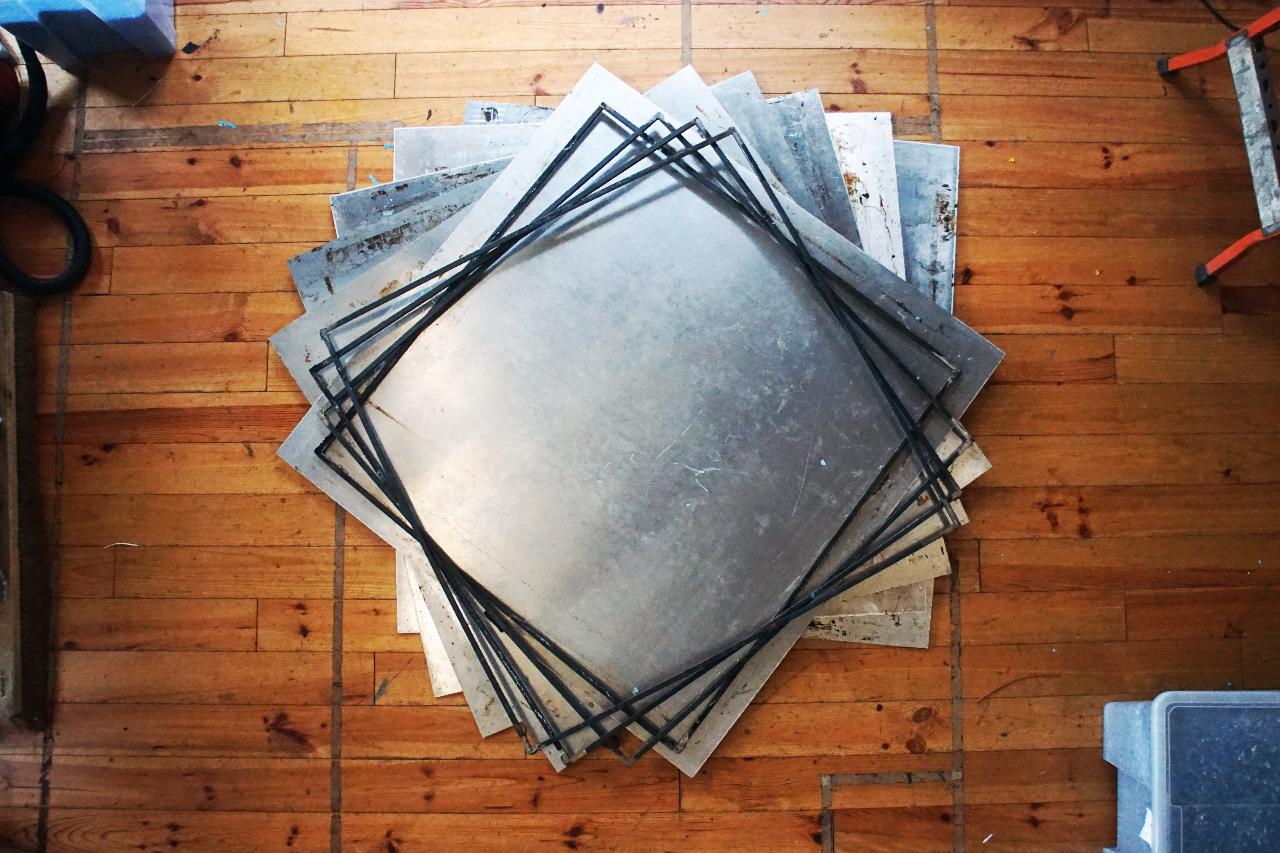
To continuously produce sheets you will need a minimum of three pairs of mould sheets and one frame for each sheet you plan to make per day. It is a good idea to have a spare set of moulds in case any get damaged. The best beams to use for the mould frames are T beams as they are strong, light and cut the edge of the sheet nicely. We used 3mm Aluminium sheets for the mould as they are strong, light, conduct heat fast and do not stick to the plastic.
As well as a sheetpress you will also need: a cooling press, prep table and sliding tools. (👀 https://tinyurl.com/3epj9222)
To continuously produce sheets you will need a minimum of three pairs of mould sheets and one frame for each sheet you plan to make per day. It is a good idea to have a spare set of moulds in case any get damaged. The best beams to use for the mould frames are T beams as they are strong, light and cut the edge of the sheet nicely. We used 3mm Aluminium sheets for the mould as they are strong, light, conduct heat fast and do not stick to the plastic.

Step 2 - Write a timetable
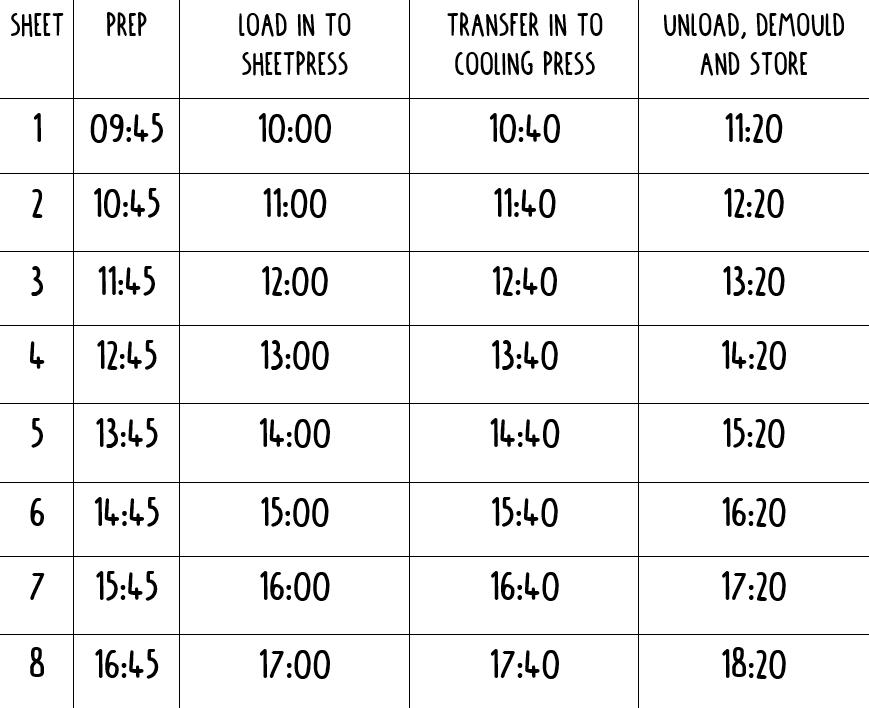
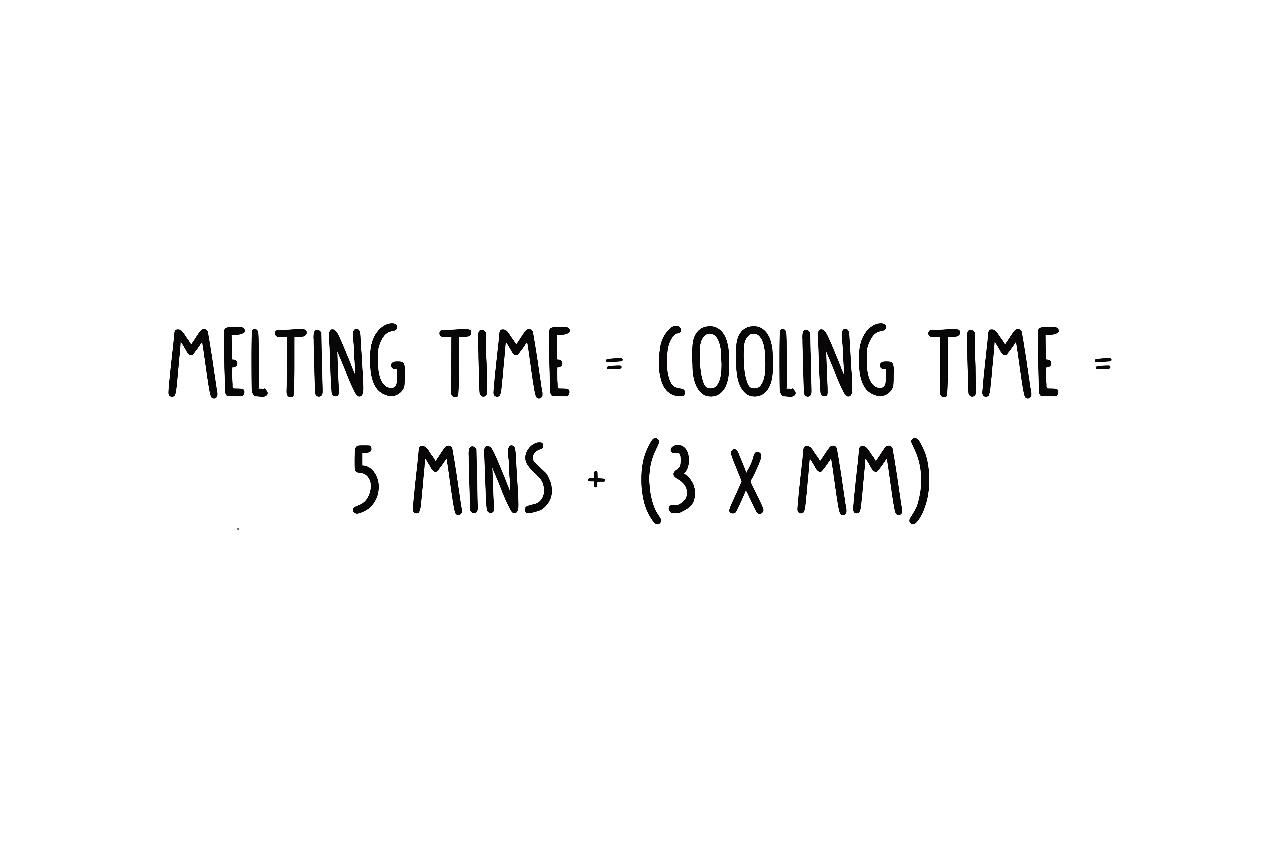
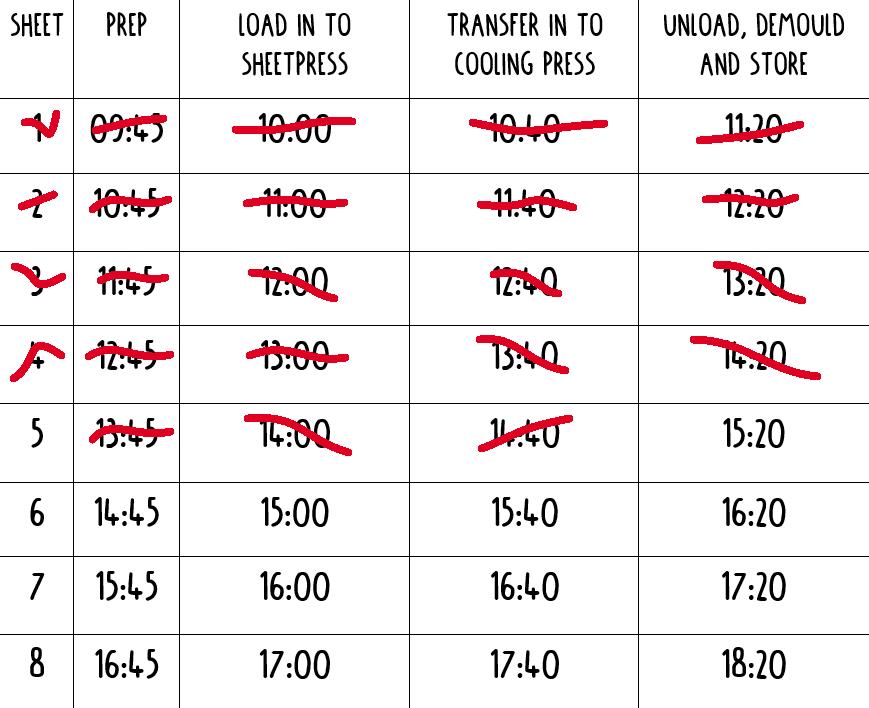
The heating and cooling time are typically the same.
To estimate the heating and cooling times you can use the equation: 5 mins + (3*mm) as a rough starting point. This is only an estimated so make sure to test and optimize before a full day.
You can offset each of the three transitions (1. Load in to sheetpress, 2. transfer into cooling press 3. Unload, demould and store) by half the cooling time (In this example 40 mins / 2 = 20 mins) to give you two nice big windows of time.
You can use one of the windows to demould the sheet and one of the windows to prepare the next sheet.
To make sure you don't miss any of the steps you can use a simple kitchen timer as a reminder.

Step 3 - Turn on your system
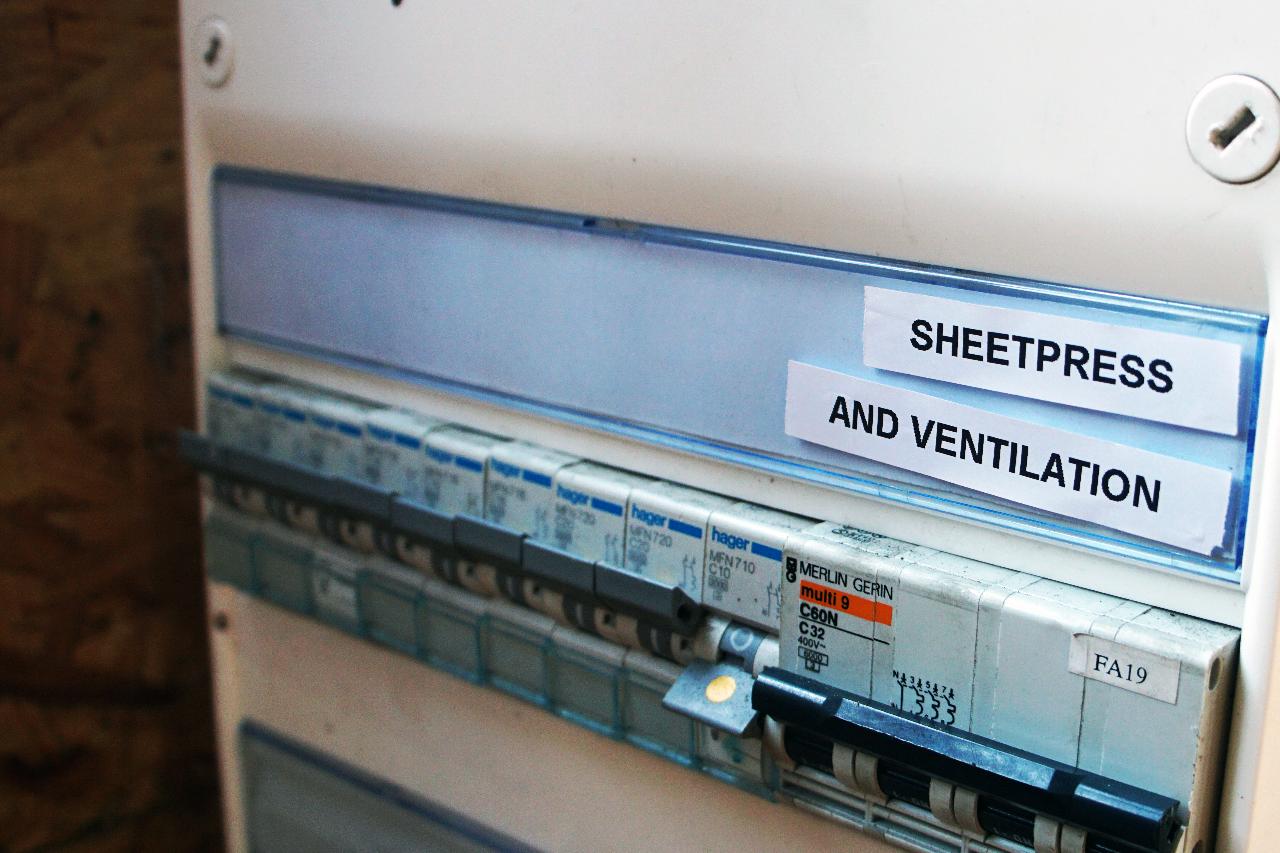
One way to make sure you don't forget ventilation is to attach it to the same switch as the outlet for the sheetpress so it's impossible to turn on the sheetpress without the ventilation being on.
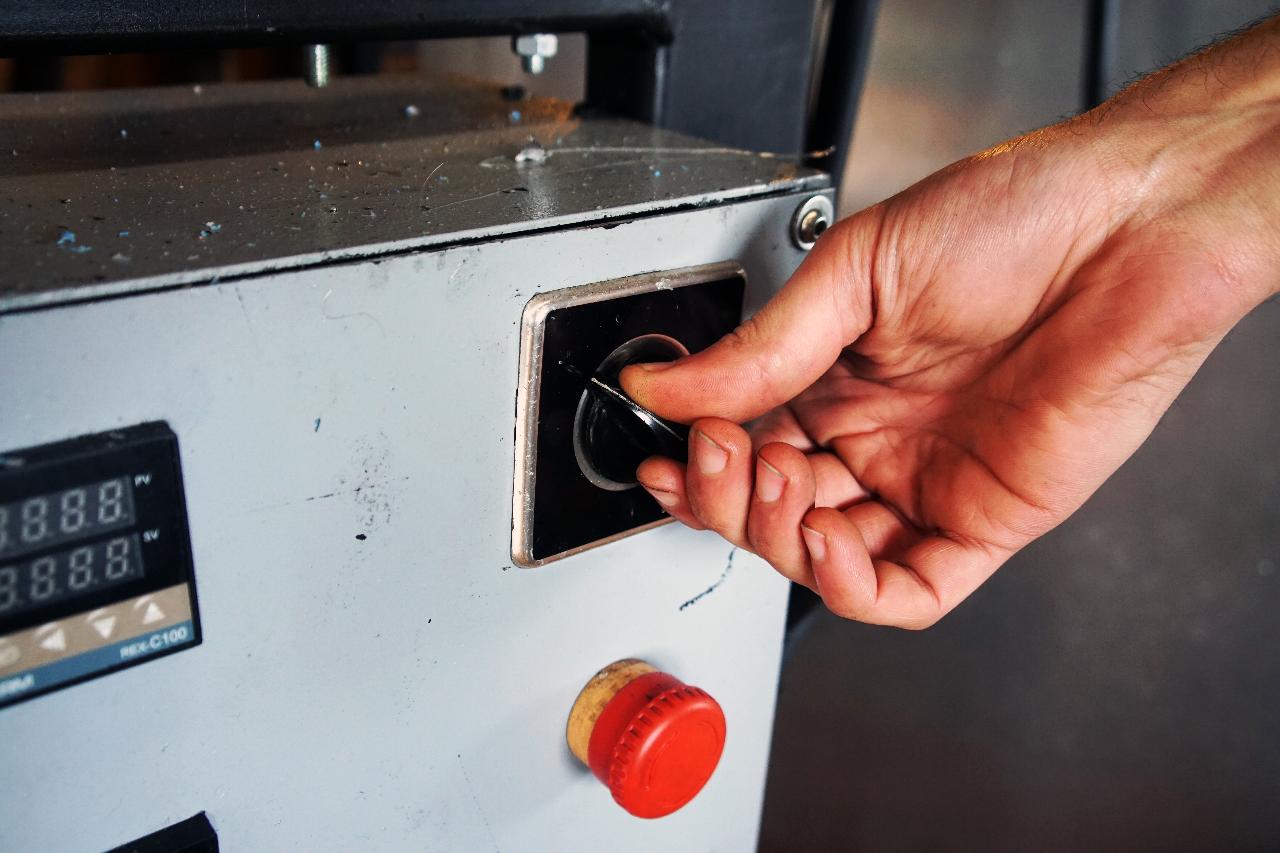
Turn on the sheet press 45mins before your first sheet is due to go in, with the pressing plates closed, to allow it to heat up. Set the PID controller to match the type of plastic you are melting, if you are not sure you can check our “Melting temperatures” poster in the download kit or on the academy.
Now that the press is on, you should wear a mask whilst in the space.

Step 4 - Prepare the mould
Place one mould sheet on to the prep table. You can leave the other mould sheet flat on the ground with the side that will contact the plastic facing up.
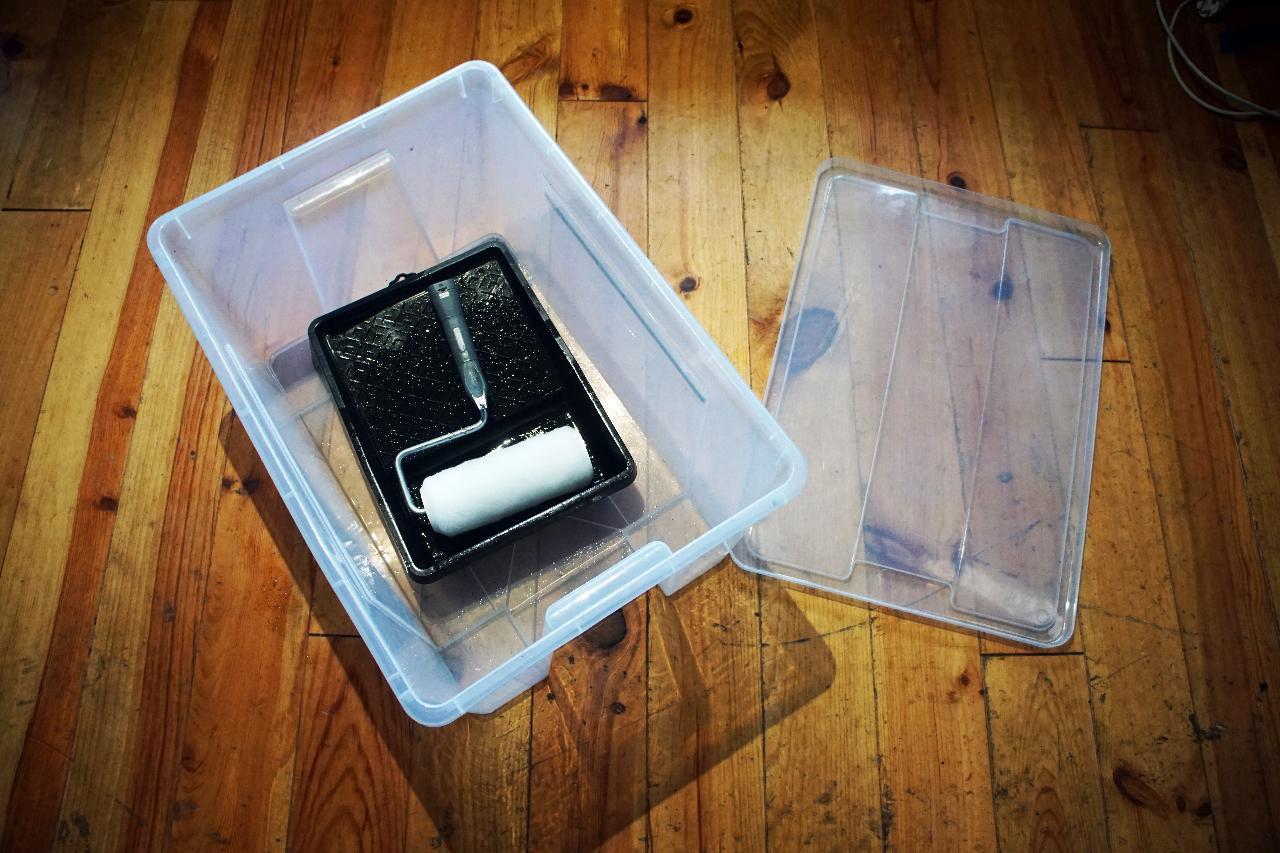
Apply a light layer of silicone to the mould sheets. We can highly recommend using a paint roller for this. We keep the paint roller in an airtight box to keep it free of dust. Try and find a sponge roller like in the picture, not one that has hair as they will break off and stick to the mould.
Place the mould frame in the middle of the mould sheet on the prep table.

.JPG)
Step 5 - Add your plastic
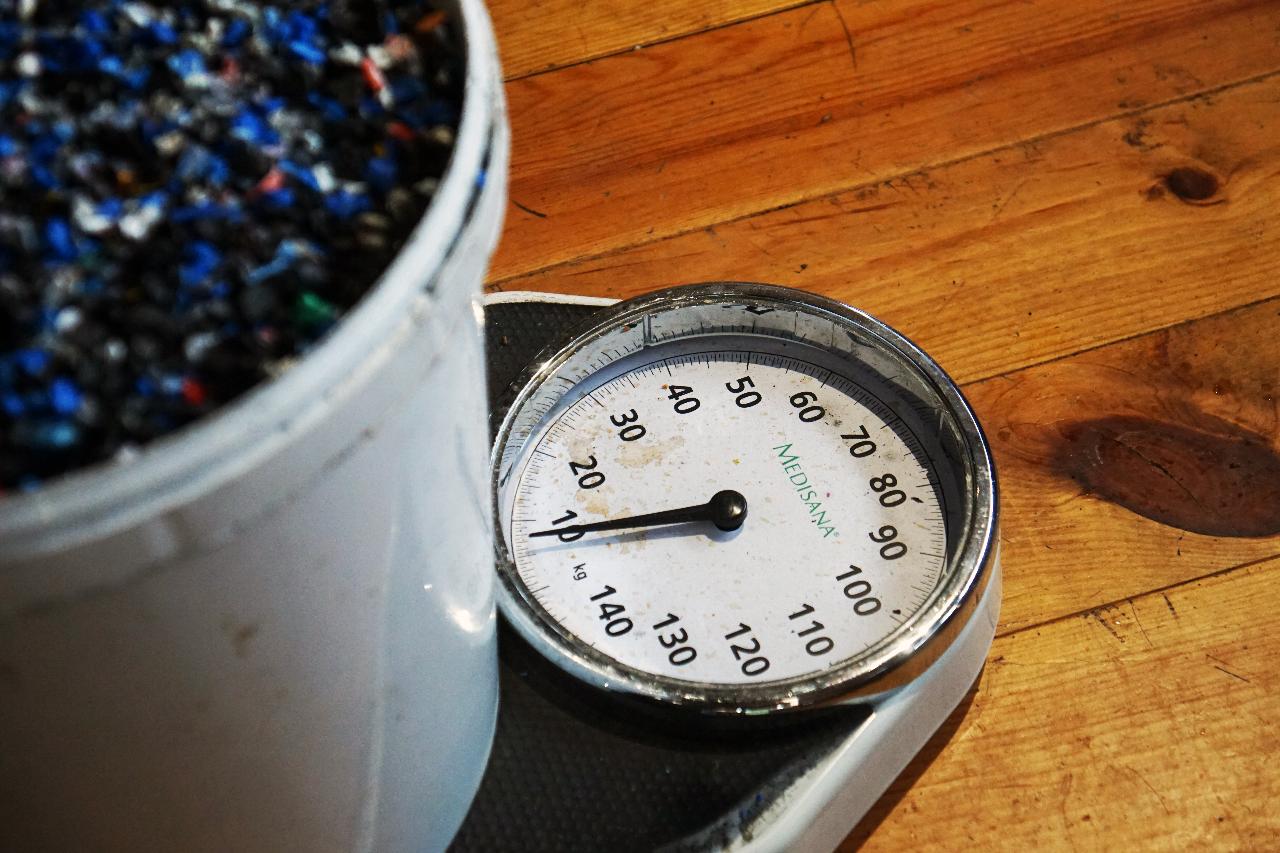
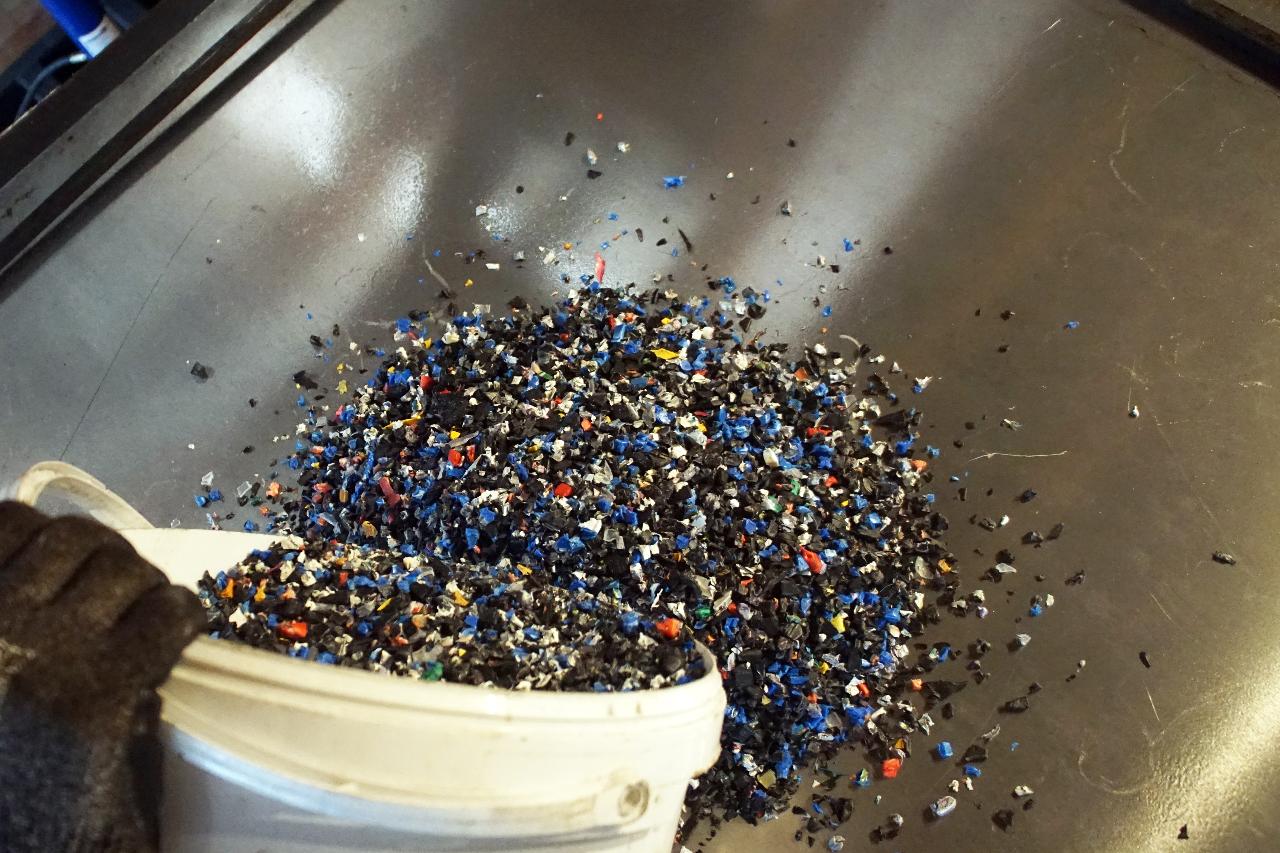
Weigh your plastic - you can use a bucket on a bathroom scale, or hang one from a travel scale. To make it easy we found a bucket that matches the amount of plastic.
Tip: For 1sqm sheet it's 1kg of plastic (for most types) per 1mm of thickness +5%.
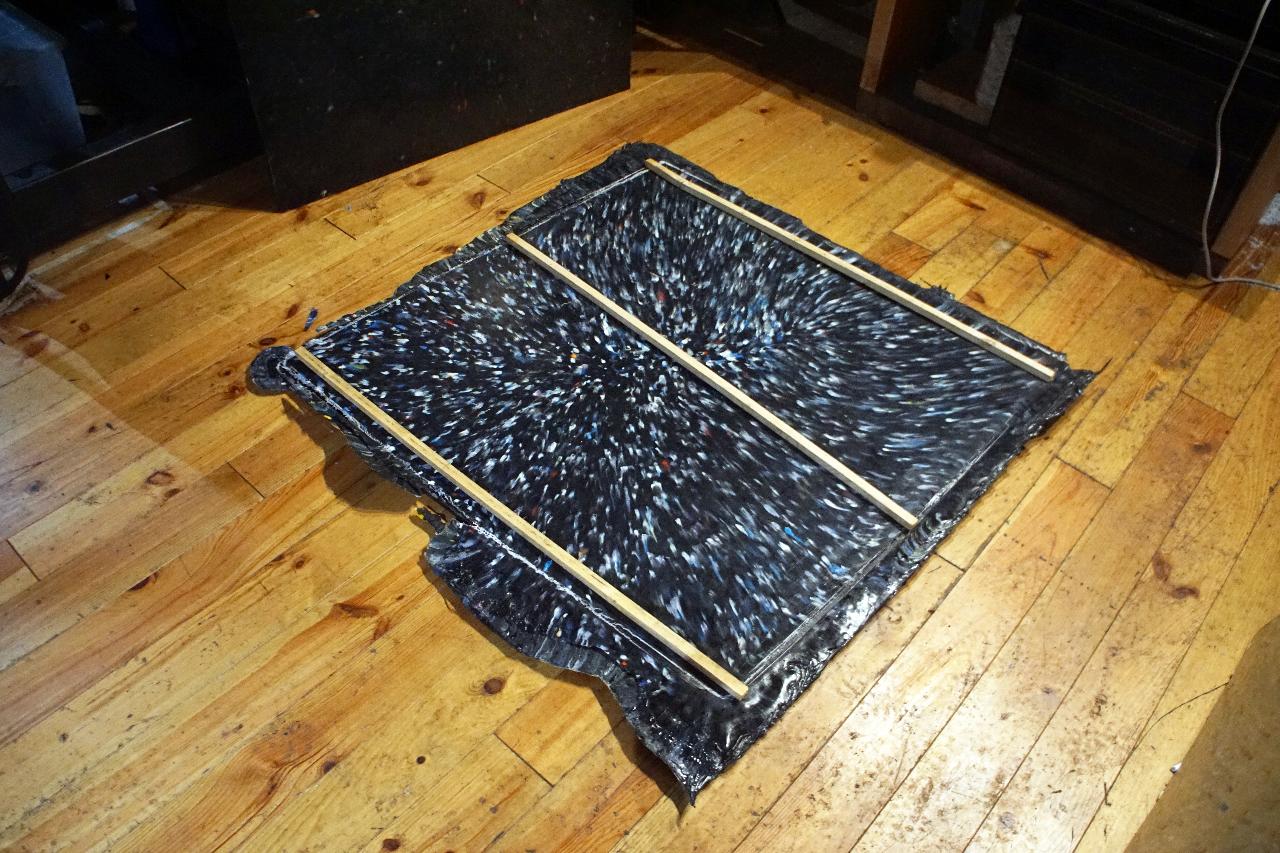
Once weighed, pour the plastic into the mould frame. It’s important to spread the plastic as evenly as possible to reduce warping. To make sure it’s level, place two beams on each side of the mould, then rest a beam between them and drag it back and forth to flatten the surface.
Finish preparing the mould by adding the second mould sheet.
Check your timetable for when the sheet is due to go into the sheetpress.
Tip: For 1sqm sheet it's 1kg of plastic (for most types) per 1mm of thickness +5%.
Once weighed, pour the plastic into the mould frame. It’s important to spread the plastic as evenly as possible to reduce warping. To make sure it’s level, place two beams on each side of the mould, then rest a beam between them and drag it back and forth to flatten the surface.
Finish preparing the mould by adding the second mould sheet.
Check your timetable for when the sheet is due to go into the sheetpress.


Step 6 - Press the sheet
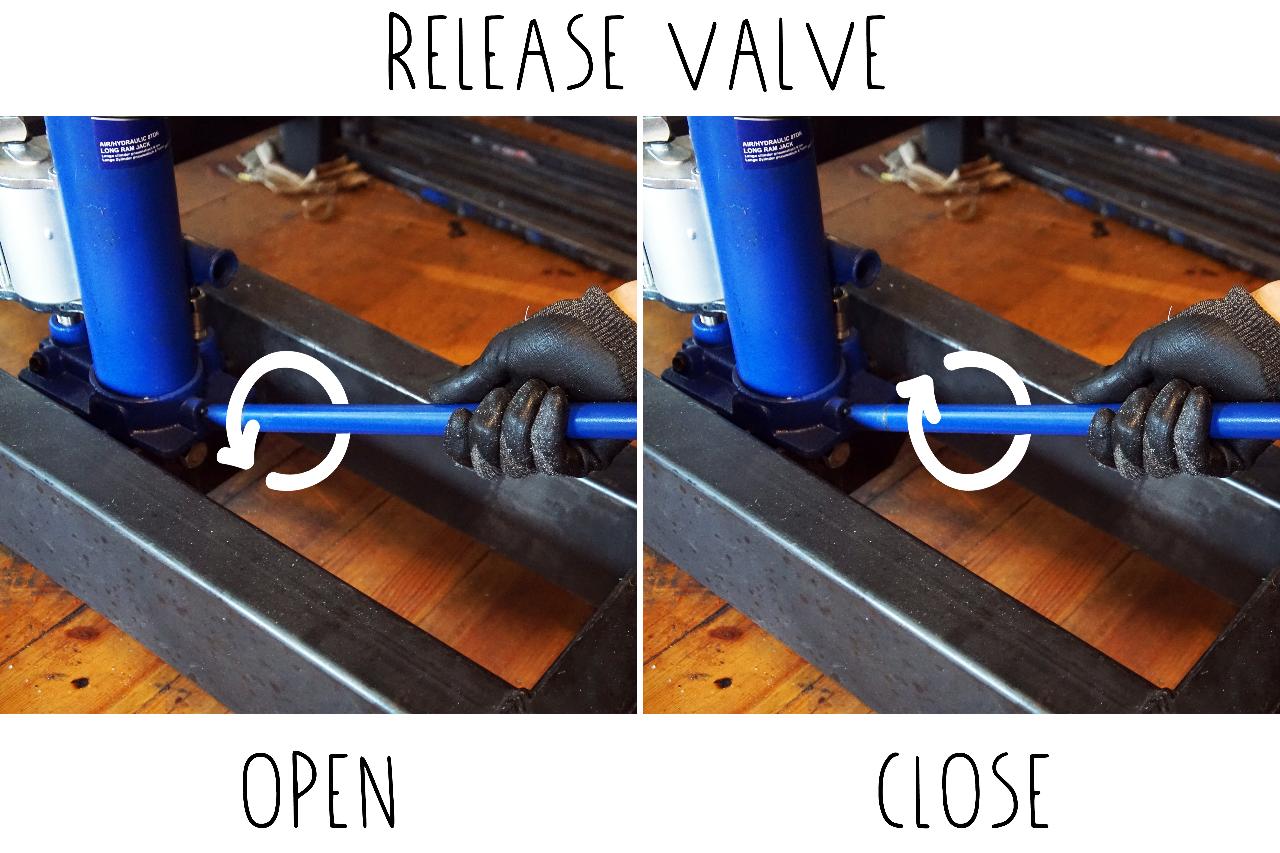
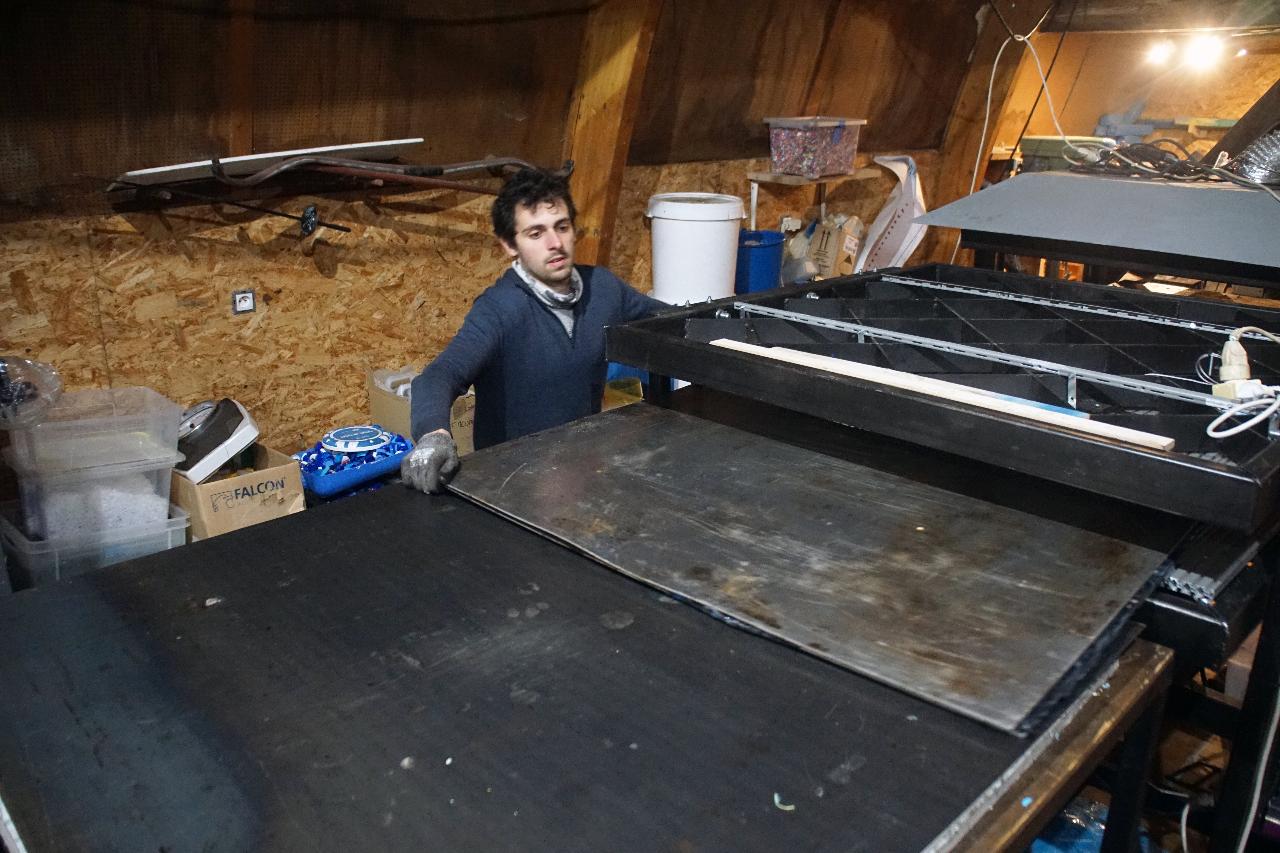
Open the sheetpress by releasing the jack. Most jacks release valve which opens using the pumping rod.
Using the sliding tool, transfer the mould into the sheetpress. It’s important to slide it straight otherwise it will catch on the side frame.
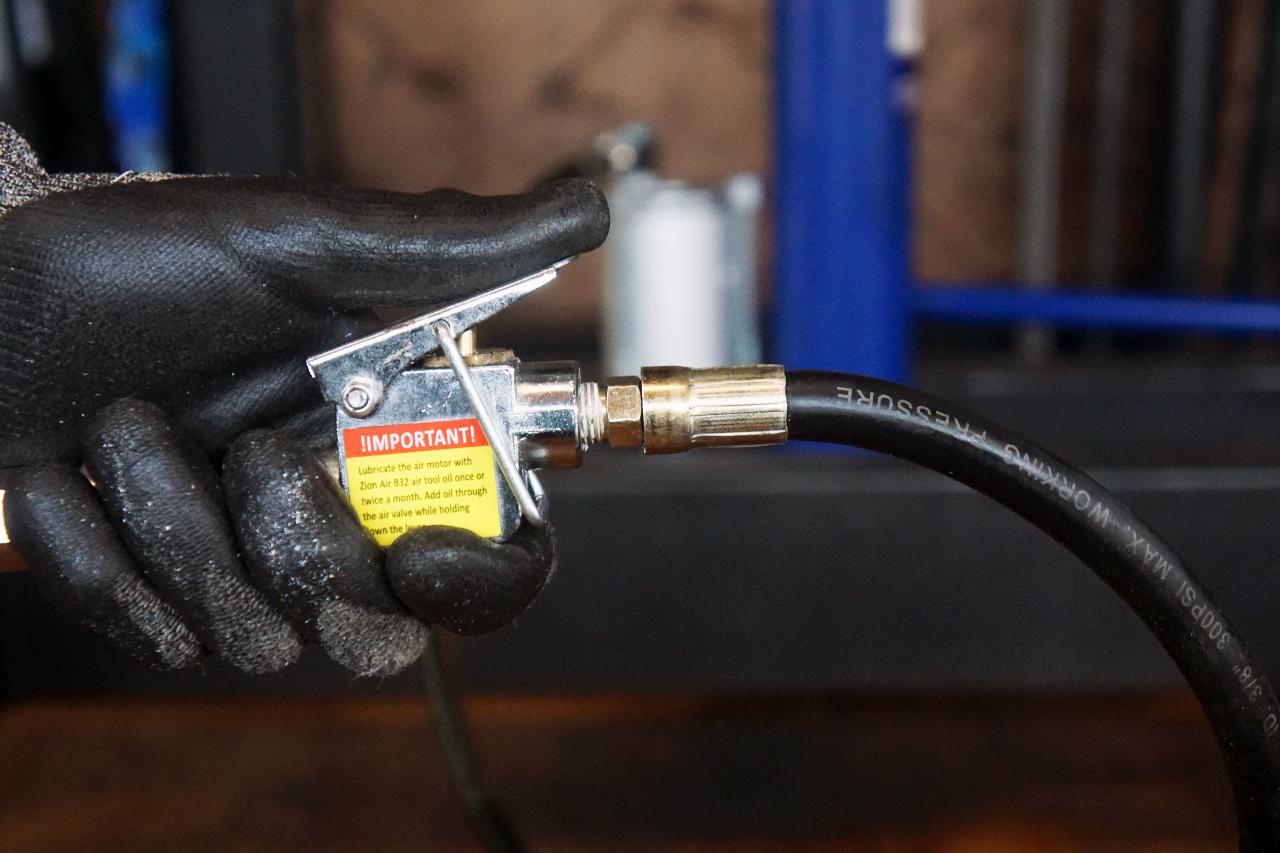
Now close the sheetpress (here we used pneumatic jacks with an air compressor to make it easy and fast).
Watch the spring to tell when the press is closed, if it's fully compressed, stop pressing.
You should check the spring every 10 minutes, pressing when needed. Make sure the mould stays in the middle. Check your timetable for when the sheet has to be transferred.
Using the sliding tool, transfer the mould into the sheetpress. It’s important to slide it straight otherwise it will catch on the side frame.
Now close the sheetpress (here we used pneumatic jacks with an air compressor to make it easy and fast).
Watch the spring to tell when the press is closed, if it's fully compressed, stop pressing.
You should check the spring every 10 minutes, pressing when needed. Make sure the mould stays in the middle. Check your timetable for when the sheet has to be transferred.

Step 7 - Use the melt time to prepare
Whilst the sheet is melting, you can use the time to prepare the place where the sheet will be stored.
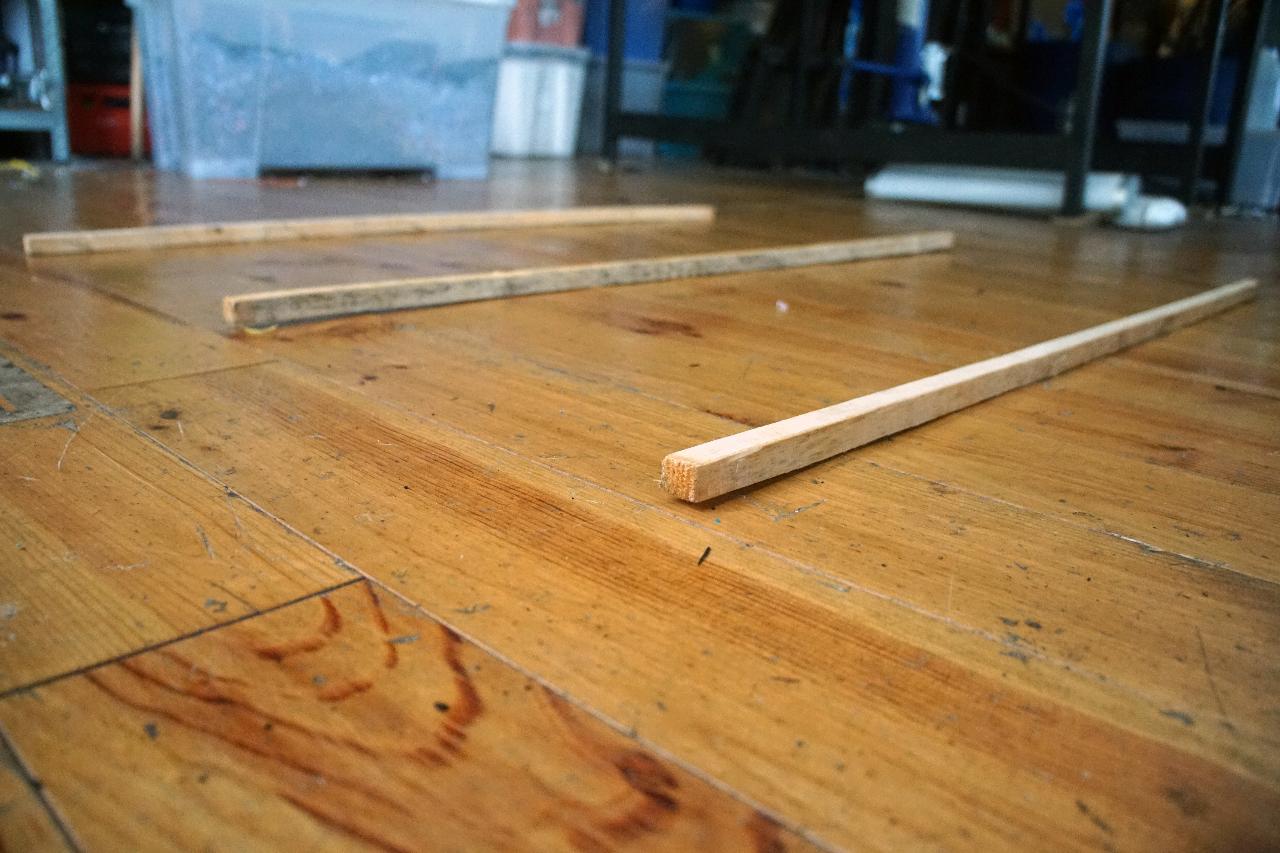
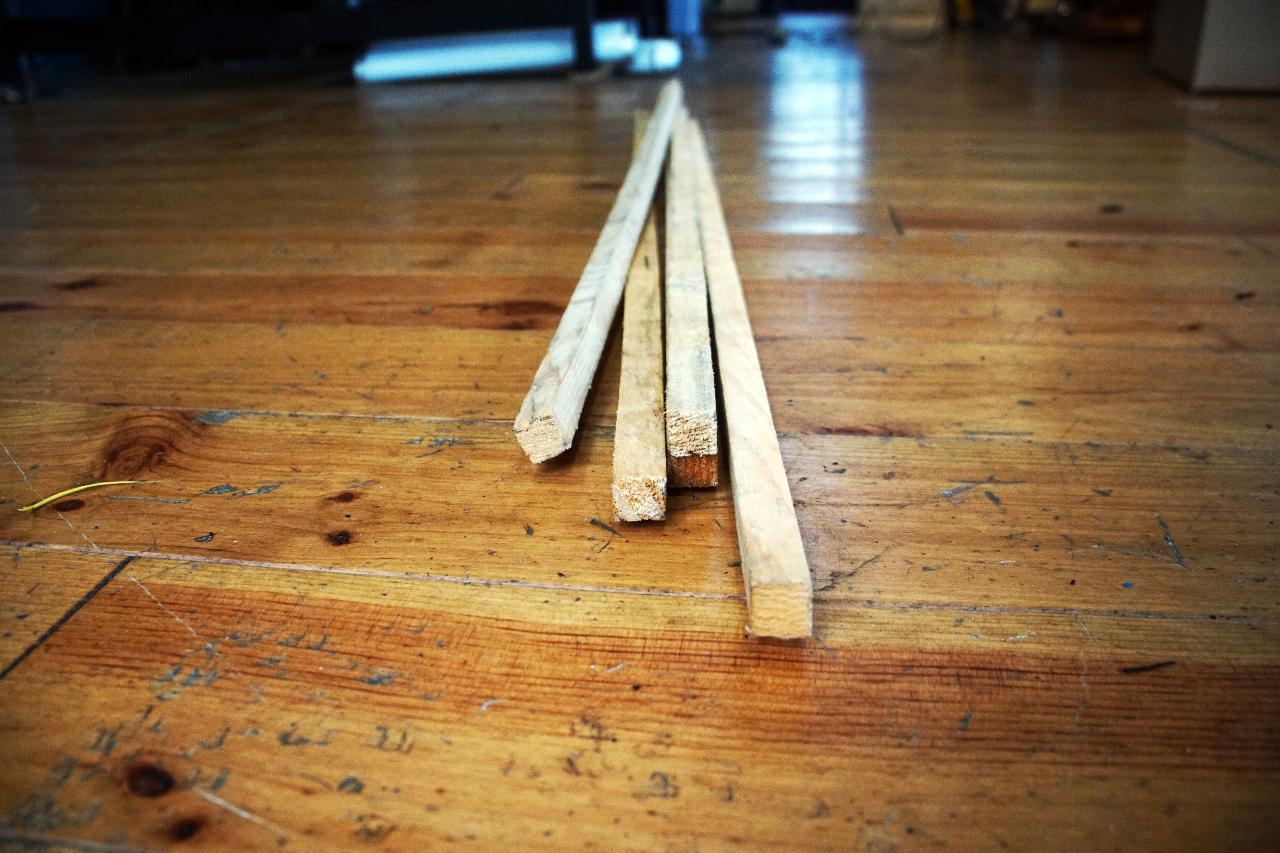
The sheets will be placed directly on strips of wood so that each side remains exposed to the uniform ambient temperature. Each successive sheet will be placed on top of the previous with more strips of wood perpendicular to the last. All of these strips of wood should have the same thickness to prevent uneven storage.
You can also prepare the second sheet on the prep table (Same as steps 4-5). In preparation for the next sheet make sure that the cooling press is open. (It opens the same way as the sheetpress).
Step 8 - Transfer the sheets
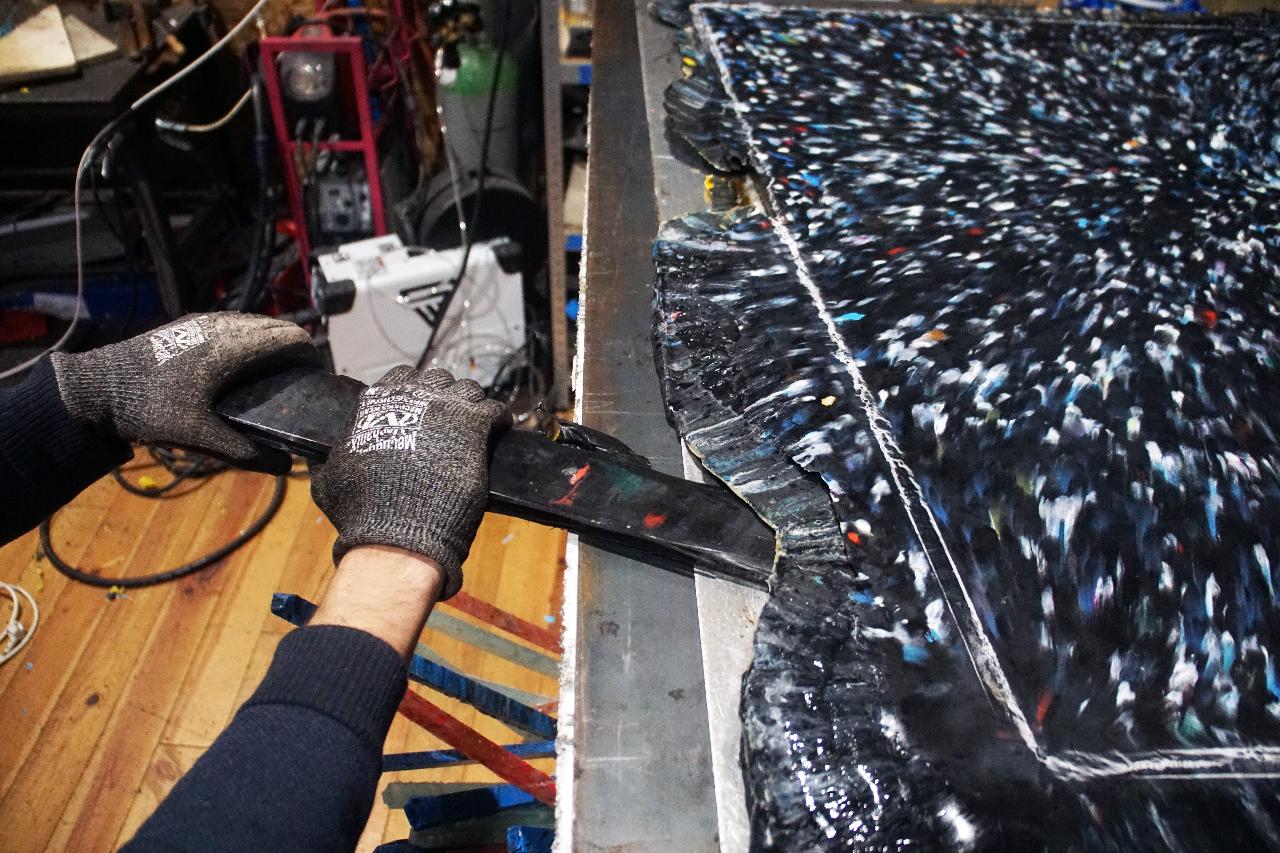
Two minutes before the mould is due to be transferred from the sheetpress to the cooling press, apply pressure using the jack one last time, fully. During this two minutes scrape off any overflow from the mould to keep the transfer process clean.
Once the melting time has completed, open the sheetpress. Using the sliding tool slide the sheet from the sheetpress into the cooling press.
Make sure to wear gloves. If you need to pull it from the other side you can use pliers to grip the edge of the bottom mould sheet allowing it to be moved. Do not pull the top mould sheet as it can open the mould.
Close the cooling. Once the coldpress is fully closed, close the sheetpress to keep the heat.


.JPG)
Step 9 - Transfer the next sheet
Check your timetable for when the next sheet is due to go into the sheetpress.
Open the sheetpress and then using the sliding tool, transfer the mould into the sheetpress and close the sheetpress (same as in step 6).
Check your timetable for when it is time to unload from the cooling press, demould and store the first sheet. You can prepare by moving the prep table in front of the cooling press.

Step 10 - Unload and demould the sheet
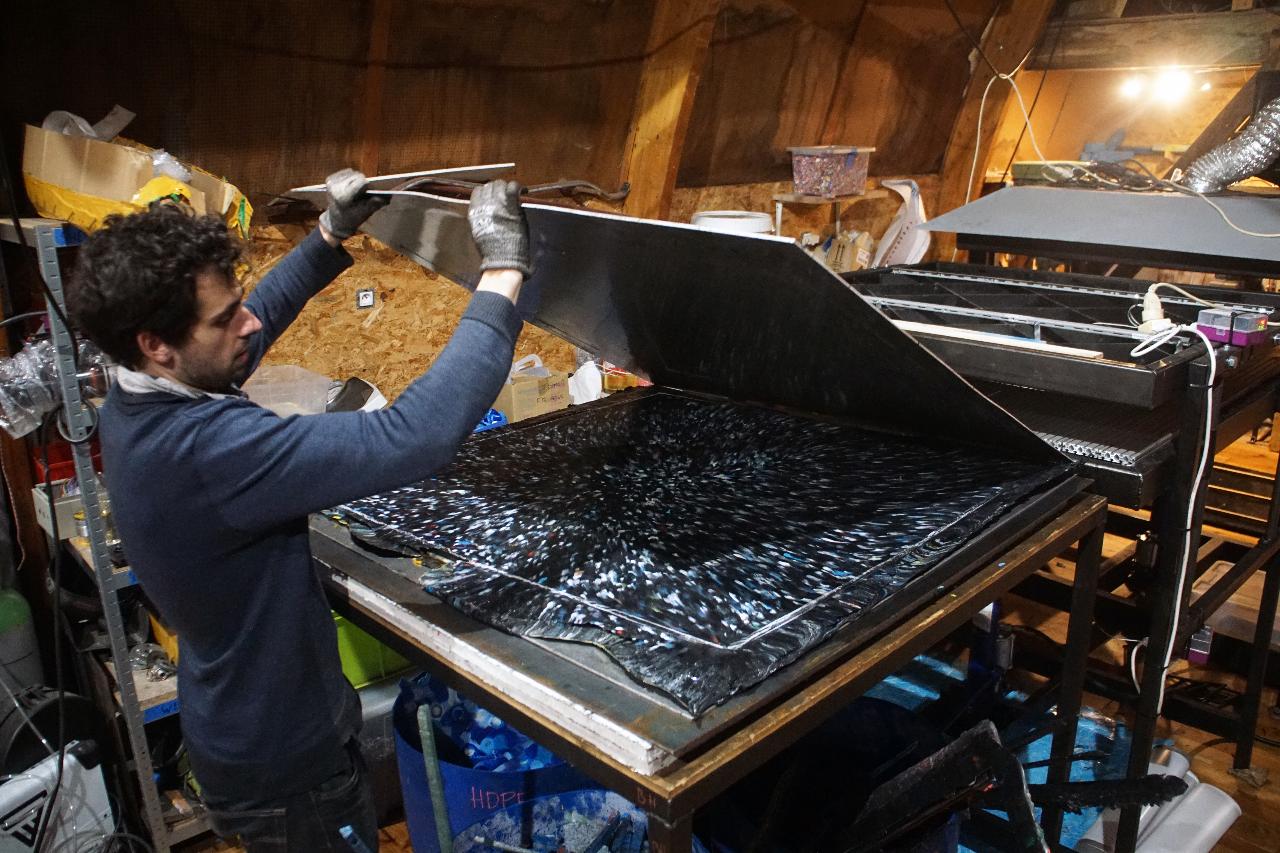
Once the cooling time has completed, open the cooling press and slide the mould onto the prep table.
Lift the top mould sheet off the mould and place it to one side. It should lift off without any resistance but if it's stuck, you may need to use a bit of force. Try not to bend it! If you lever it, make sure to use something that won't scratch the surface of the mould sheet (like a plastic beam or the overflow from a previous sheet).
Gently try and remove the sheet from the bottom plate. If it has not stuck, it should slide freely on the mould sheet. If it has, use the same method as above to gently remove it. If it is stuck inside the frame you can leave it inside until full cooled.
Step 11 - Store the sheet
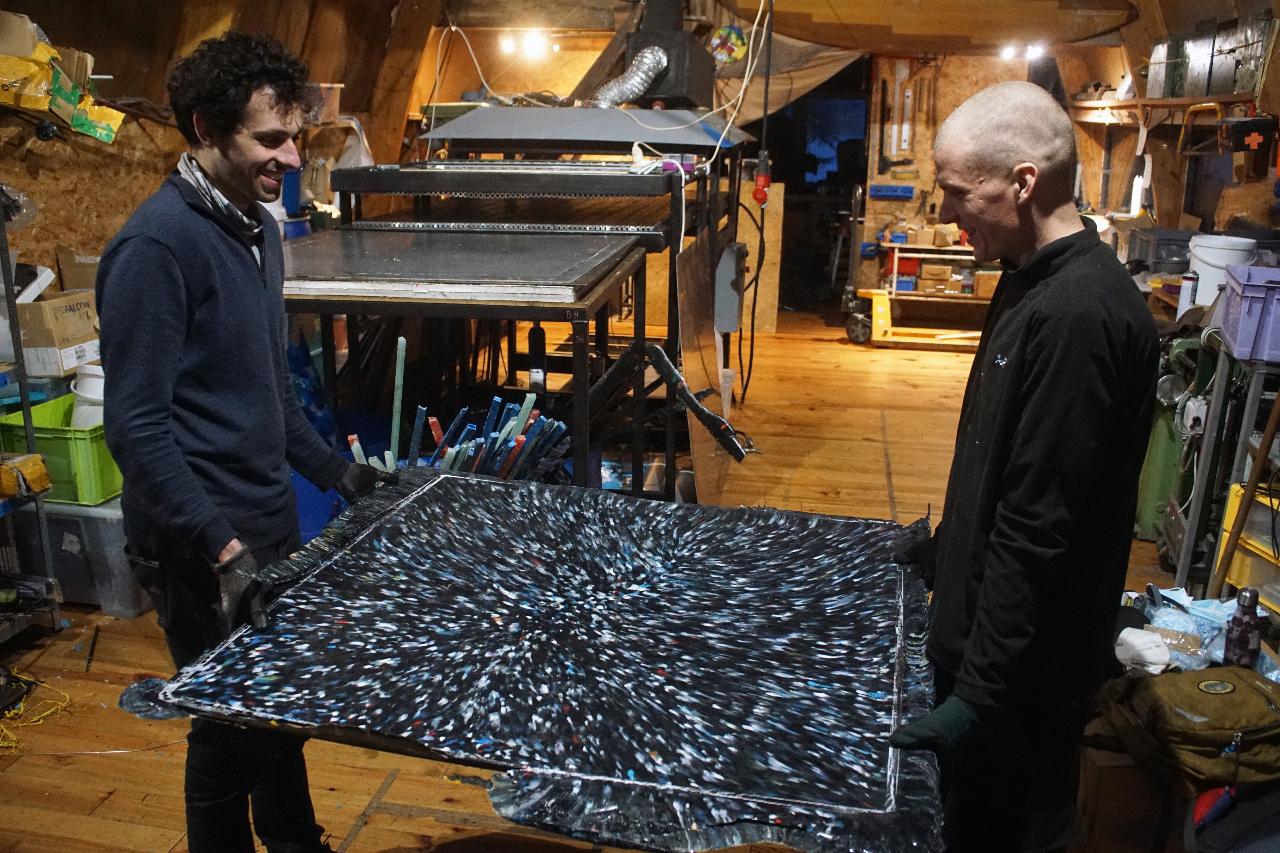
Lift the sheet and lay it on top of the flat wooden strips you prepared earlier.
It is important to be very gentle with the sheet as you move it, any bends or twists at this stage increase the chances of it to warp later.
Place the next row of wooden strips on top of the sheet perpendicular to the last.
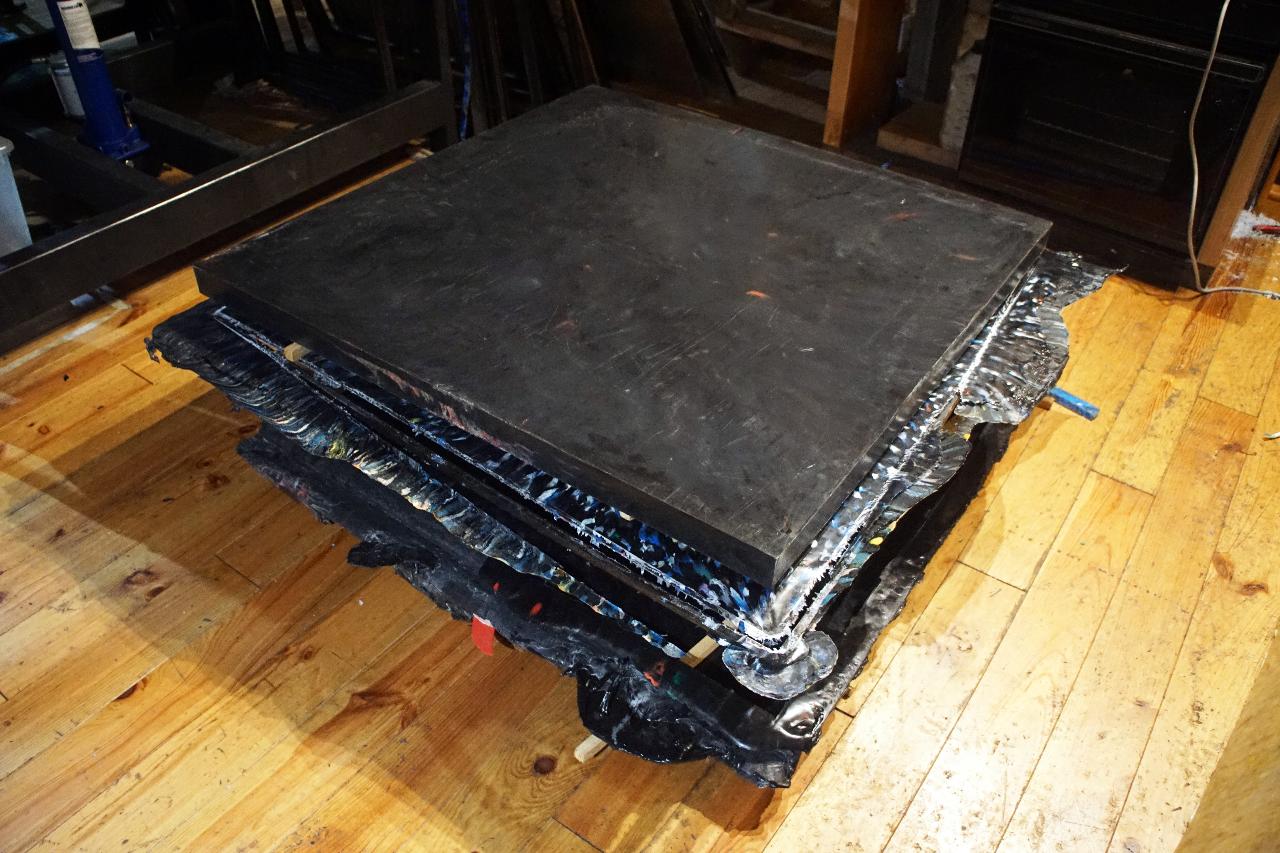
If you have one available, place a flat heavy sheet on top of the strips to keep them weighed down - in our case we used a spare heating plate.
Check your timetable for when the next sheet has to be transferred to the cooling press. Once it has been transferred (Same as step 9), move the prep table back in front of the sheetpress ready to prepare the next sheet.
It is important to be very gentle with the sheet as you move it, any bends or twists at this stage increase the chances of it to warp later.
Place the next row of wooden strips on top of the sheet perpendicular to the last.
If you have one available, place a flat heavy sheet on top of the strips to keep them weighed down - in our case we used a spare heating plate.
Check your timetable for when the next sheet has to be transferred to the cooling press. Once it has been transferred (Same as step 9), move the prep table back in front of the sheetpress ready to prepare the next sheet.

Step 12 - Repeat!
You can now repeat steps 4-11 until your day is finished.

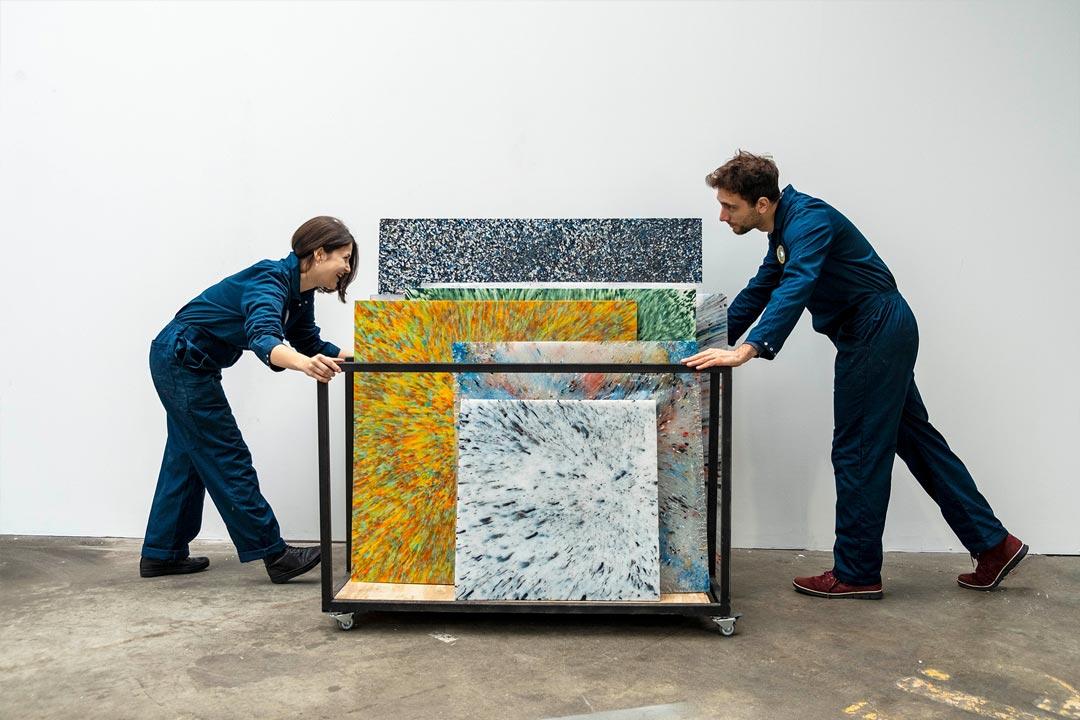
Step 13 - Move to long term storage
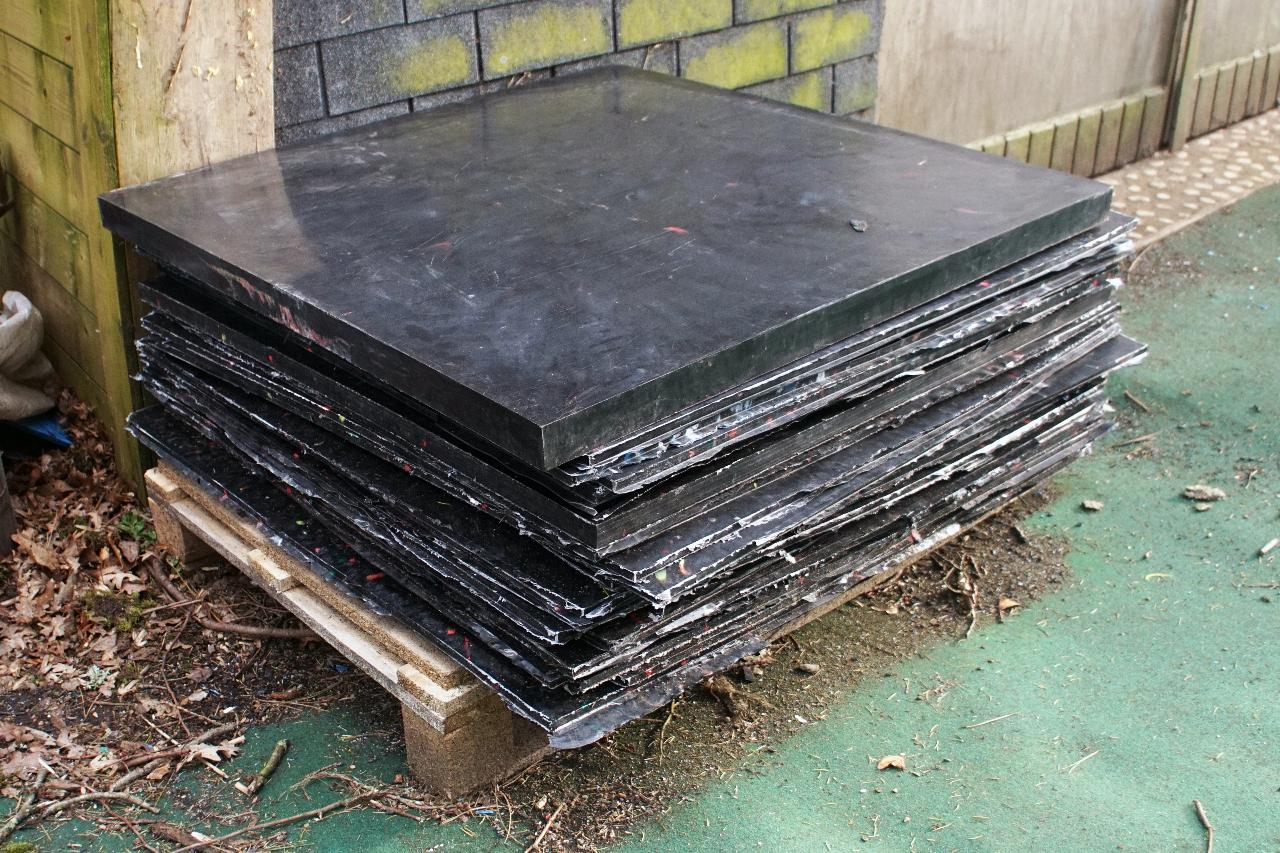
After the sheets are fully cooled, they can be moved into their long term storage. We recommend to let them cool down for a minimum of 12 hours (so the next morning whilst the press is heating up might be a good opportunity to do this).
When transferring to long term storage, you can remove the wooden strips and stack the sheets ontop of eachother. Again, if you have one available, place a flat heavy sheet on top of the sheets to keep them weighed down.
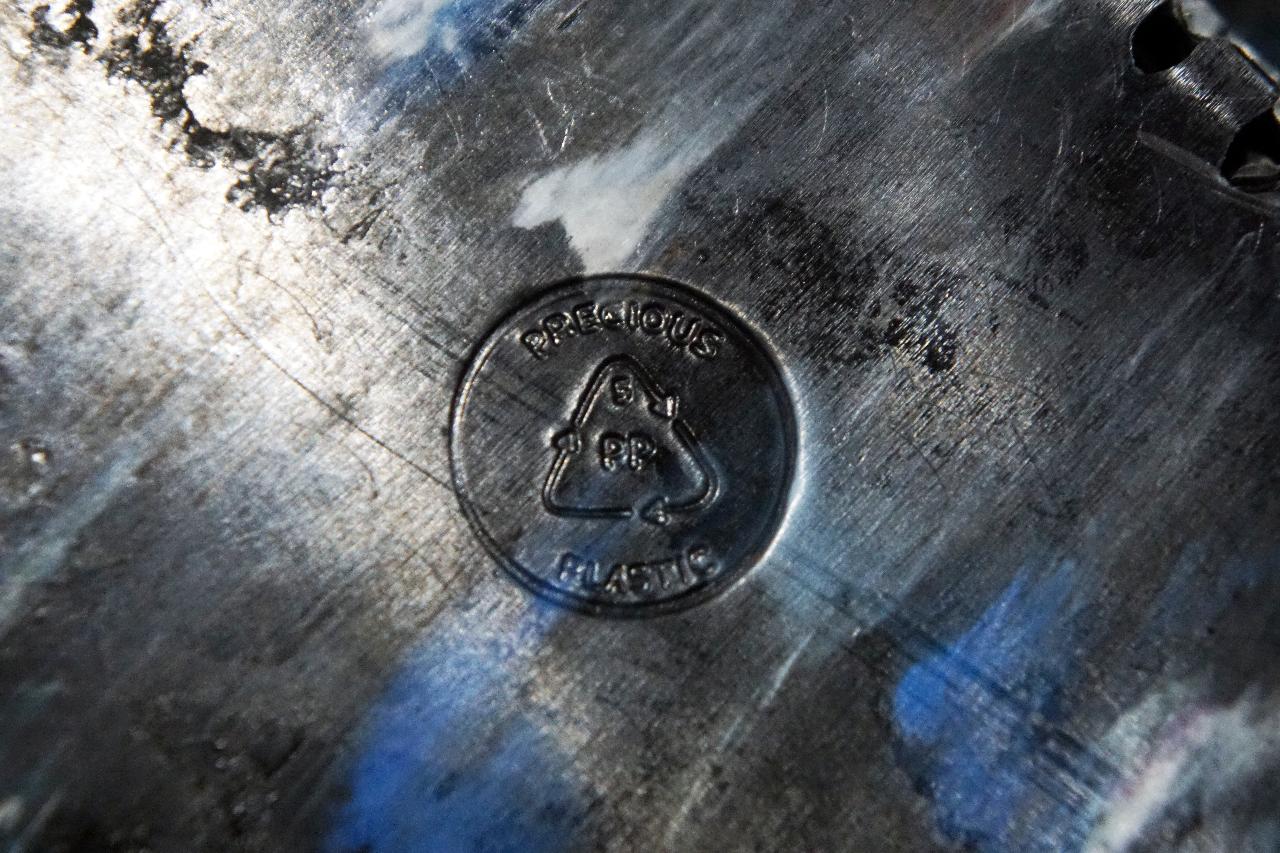
Don't forget to stamp them before you move on! (Check out here to find out How-to: https://tinyurl.com/3ymuf4wh)
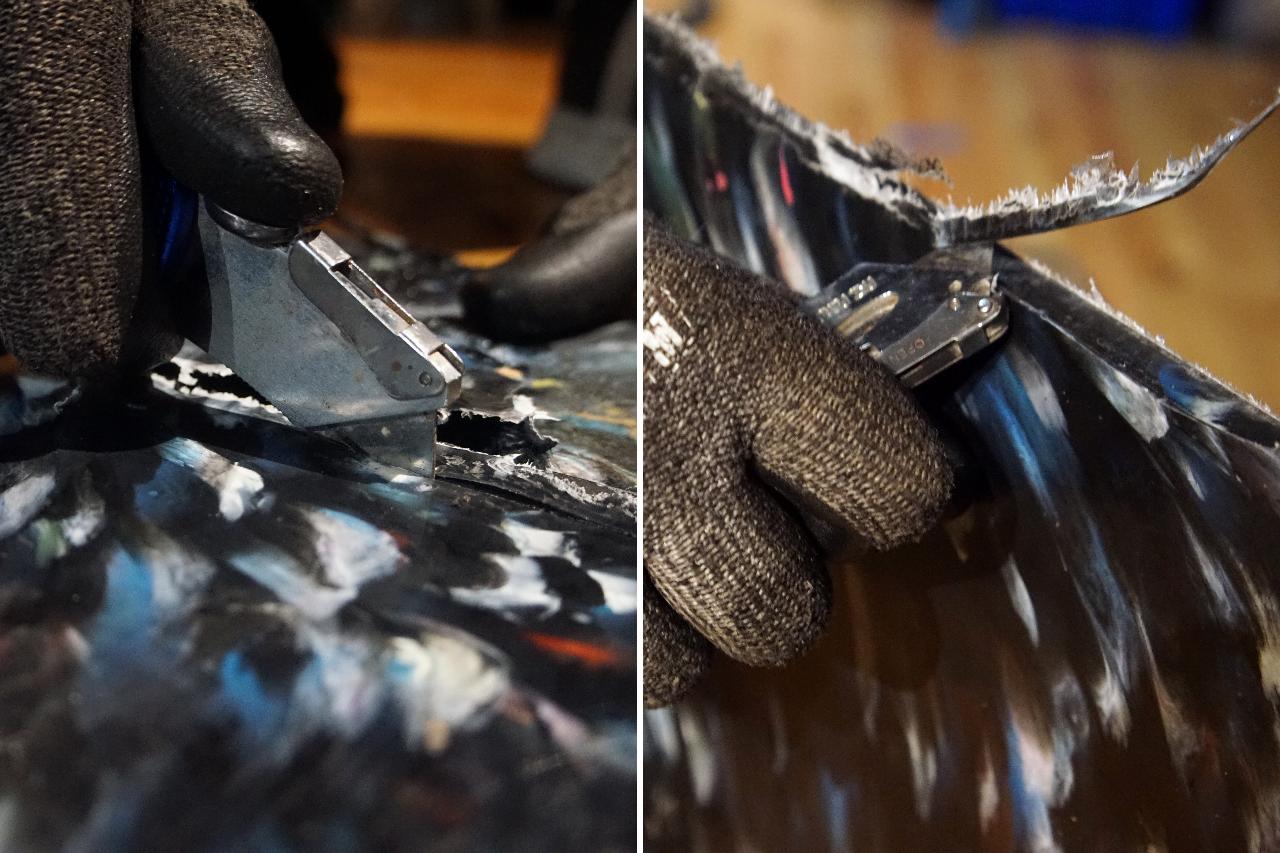
If they have any rough edges, you can clean them using either a knife or deburring tool.
When transferring to long term storage, you can remove the wooden strips and stack the sheets ontop of eachother. Again, if you have one available, place a flat heavy sheet on top of the sheets to keep them weighed down.
Don't forget to stamp them before you move on! (Check out here to find out How-to: https://tinyurl.com/3ymuf4wh)
If they have any rough edges, you can clean them using either a knife or deburring tool.
Step 14 - Enjoy pressing and sharing!
Make sure to share some pictures of your beautiful sheets, and products you make from them, on Discord, Facebook and Instagram (be sure to tag us in your posts and stories so we can share them too! @realpreciousplastic) when you come up with useful new techniques, machine hacks or products, make a How-to, upload it to our community platform and share it with the world! Remember what makes a community strong is that we are all working on this together, collaboratively, not competitively 😉 If you share it will encourage others to share also, which will help you and everyone else too!
Happy pressing, keep sharing!
Happy pressing, keep sharing!


—
—
—
Comments