Extrude into a closed mould

The extrusion machine provides continuous flow which means with the right mould we can create much larger objects than possible with the injection, while also allowing us to create products faster.
—
Attachments
Resources
Step 1 - Getting ready
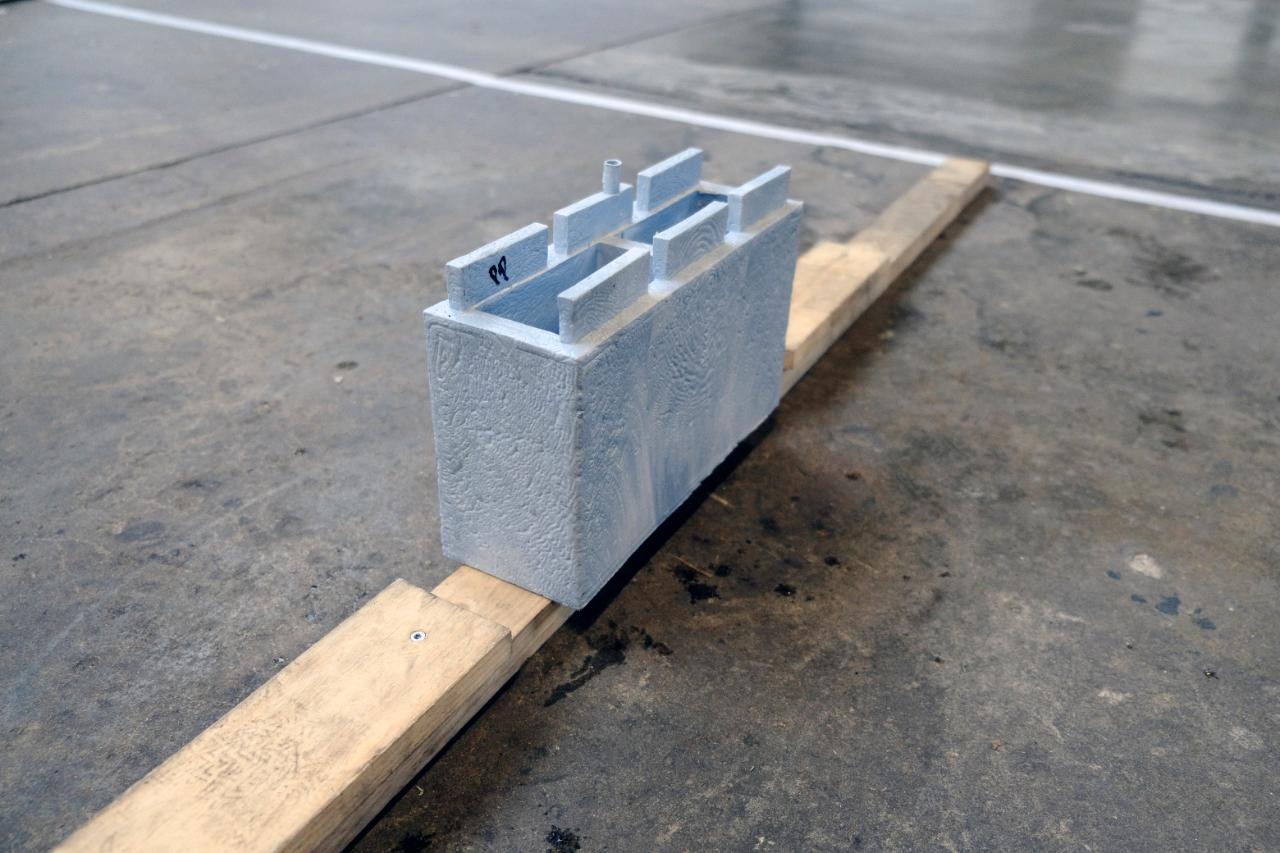
To follow this How-To you will need an extrusion machine, a closed mould (like this brick mould) and lots of shredded plastic.
Related links:
Make the brick mould 👉 https://community.preciousplastic.com/how-to/make-extruded-plastic-bricks
More about the Extrusion Pro machine 👉 https://community.preciousplastic.com/academy/build/extrusionpro
Related links:
Make the brick mould 👉 https://community.preciousplastic.com/how-to/make-extruded-plastic-bricks
More about the Extrusion Pro machine 👉 https://community.preciousplastic.com/academy/build/extrusionpro

Step 2 - Prepare the mould
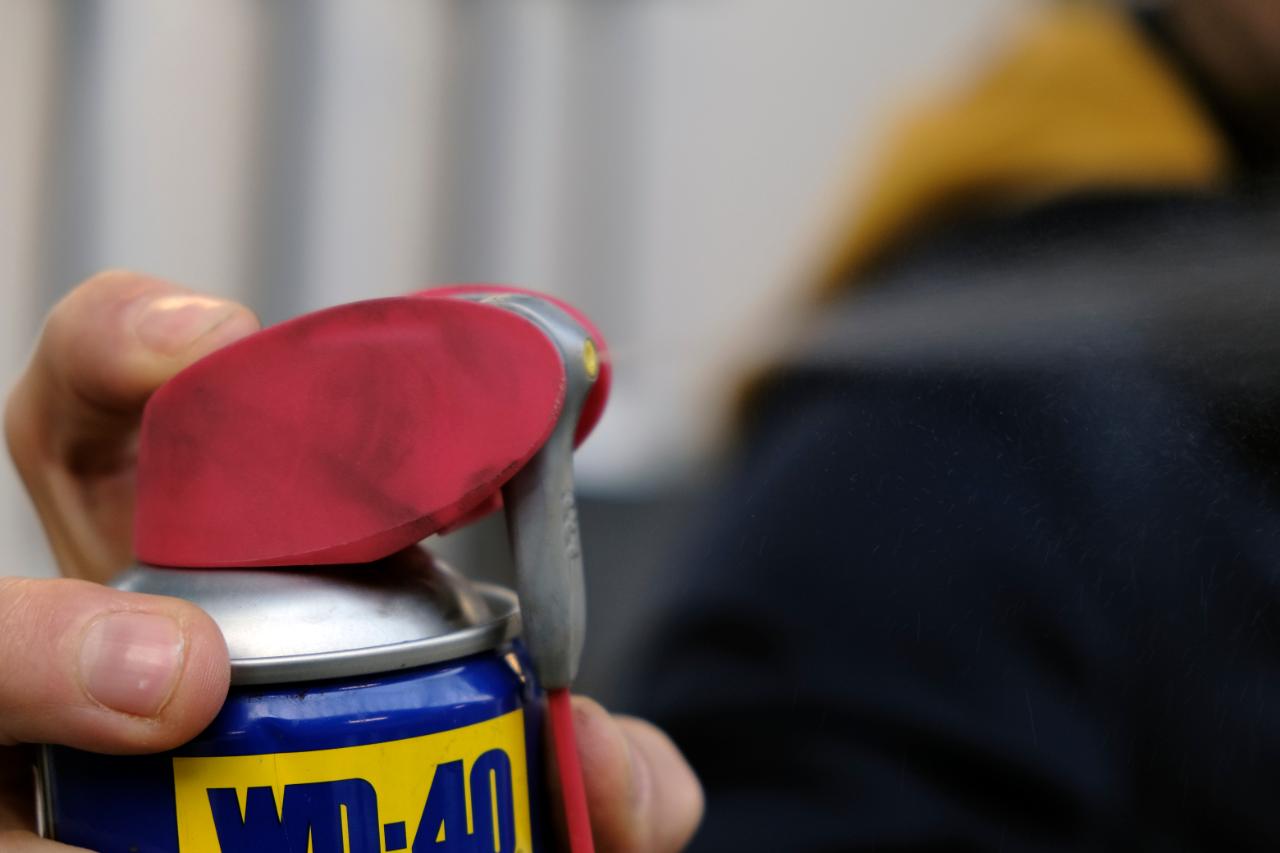
Make sure the internal of your mould is free of rust and remains a smooth surface by lightly coating it with oil or grease (Silicone Oil is perfect). For a smooth surface, it also helps a lot to preheat the mould (especially the nozzle part) before extruding plastic into it.

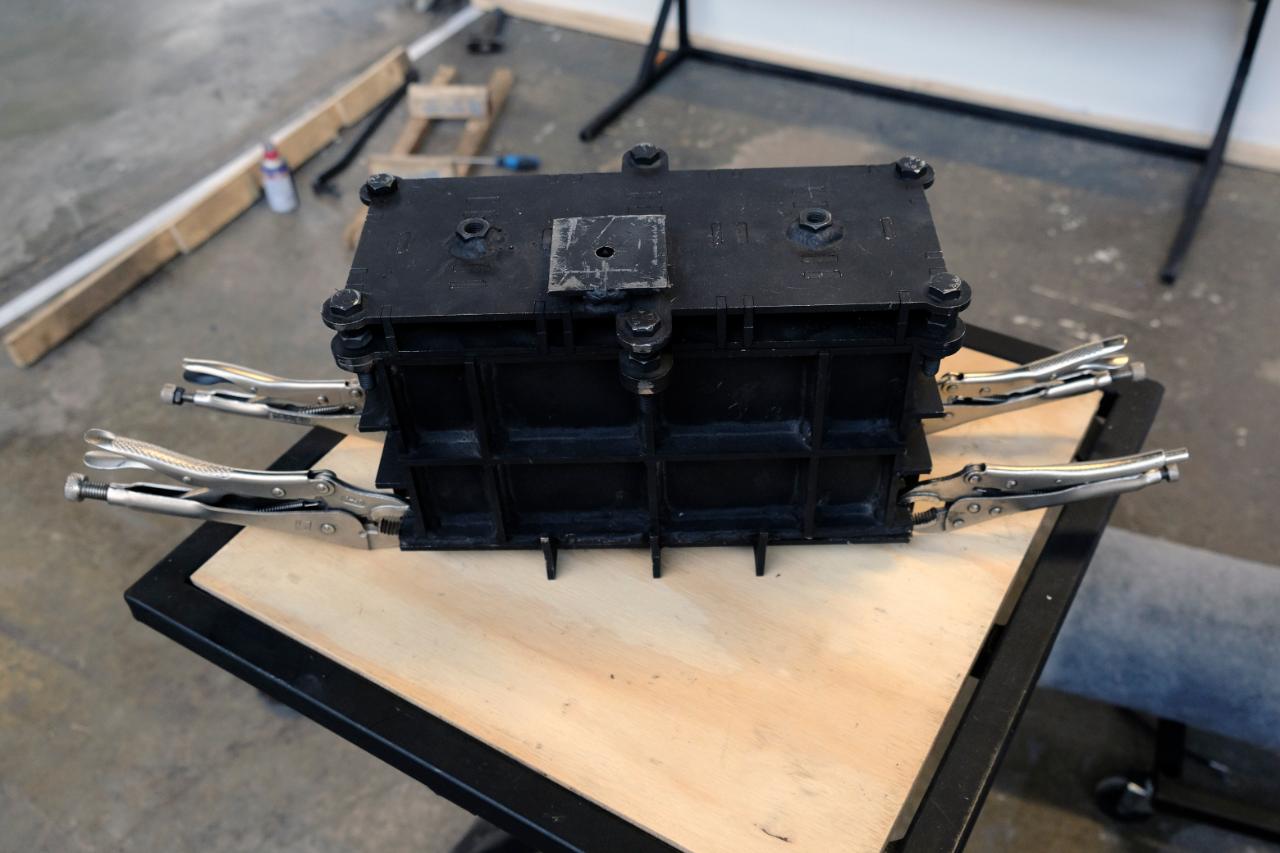
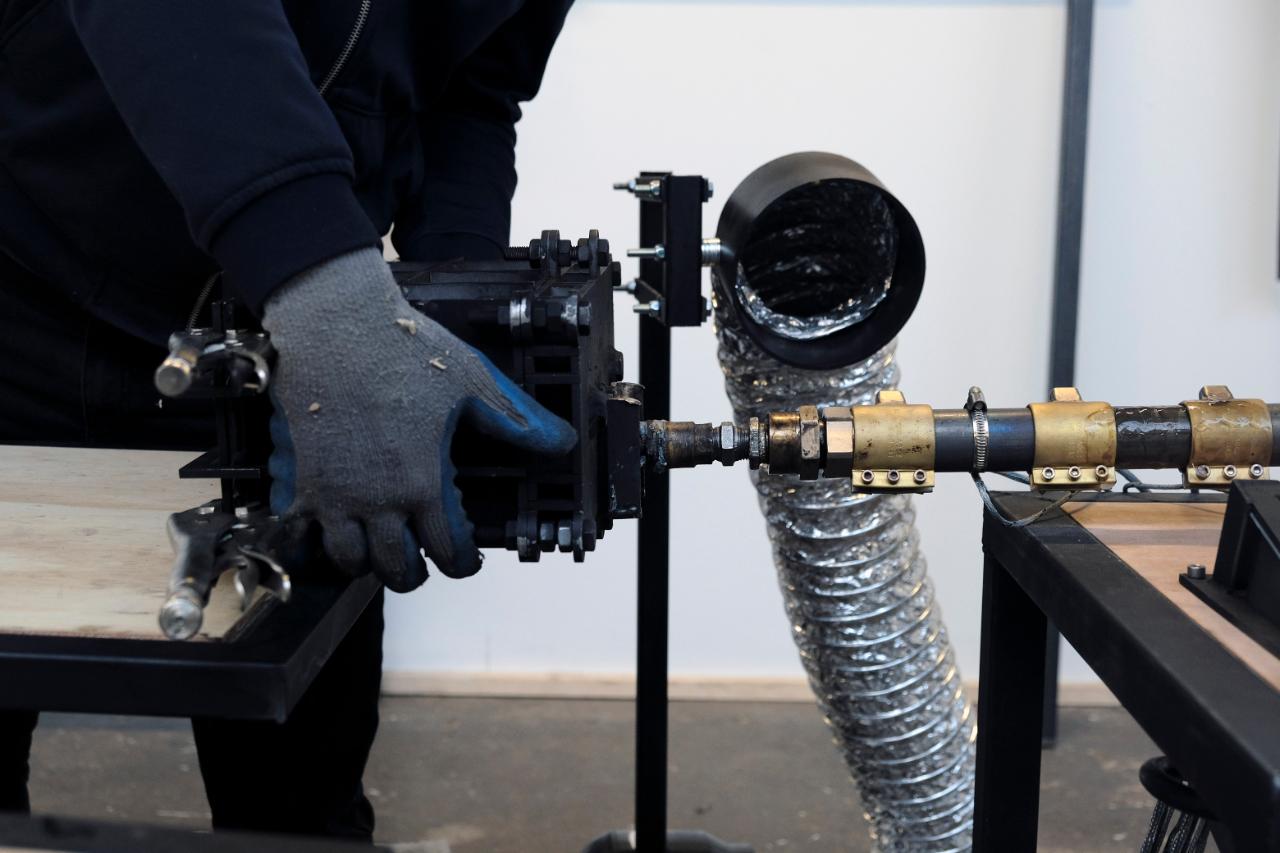
Step 3 - Join the mould
Closed moulds will come in two or more parts. In this example, the brick mould uses two parts. Clamp firmly together, we use locking pliers for this mould, which are quick to release while also acting as a good safety to release excess pressure.
Step 4 - Understanding extruding times
Depending on the specs of your extrusion machine and the type of mould the time to fill it up will vary. For the V4 brick mould on the V4 extrusion, it takes exactly 4min. However 20 seconds either side can result in underfilled mould or even a burst one. So it’s very important to get this timing right!
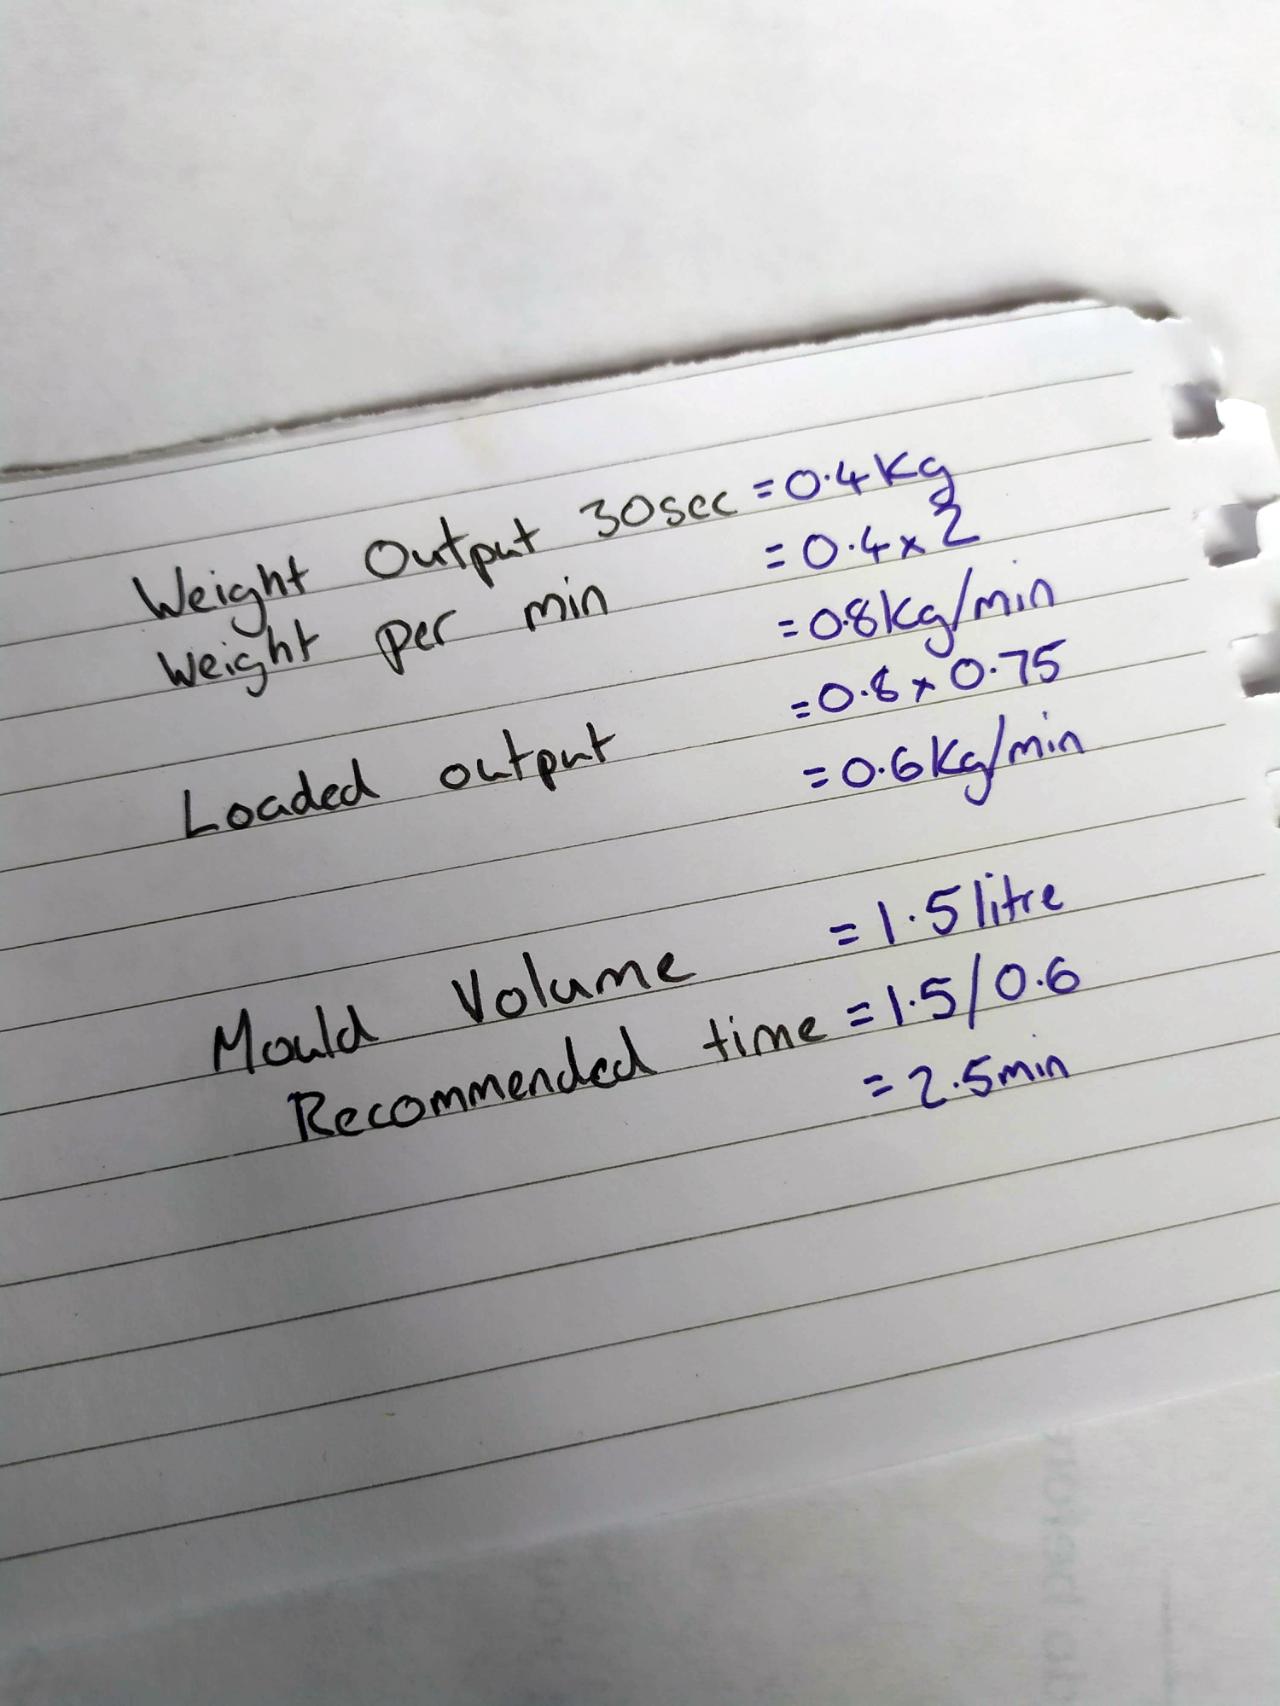
One way to figure this out: Extrude at the speed you intend to work with, without a mould for 10sec, cutting the plastic and then extruding for a further 30sec collecting and weighing the result.
Make sure to run the test again if you decided to change the size of plastic granules, or the type of plastic you are extruding as it will affect your extrusion speed.
Step 5 - Calculation Example
Our result was 0.4kg (multiply by 2 to get feed rate per min) so 0.8kg/min but because this was unpressurised we need to reduce the result by about 25%. 0.6kg/min meaning on the first extrusion test we shouldn’t let it run for longer than 2.5min before checking its progress and repeating the process adding 10second intervals until we find the exact right time.
Step 6 - Measuring extruder pressure
We also invested in a pressure sensor that screwed onto the end of our barrel. This gave us accurate readings on if the pressure built up too high and kept us safe. These are not cheap (2,800euro) but worth the money if you intend on making lots of products.

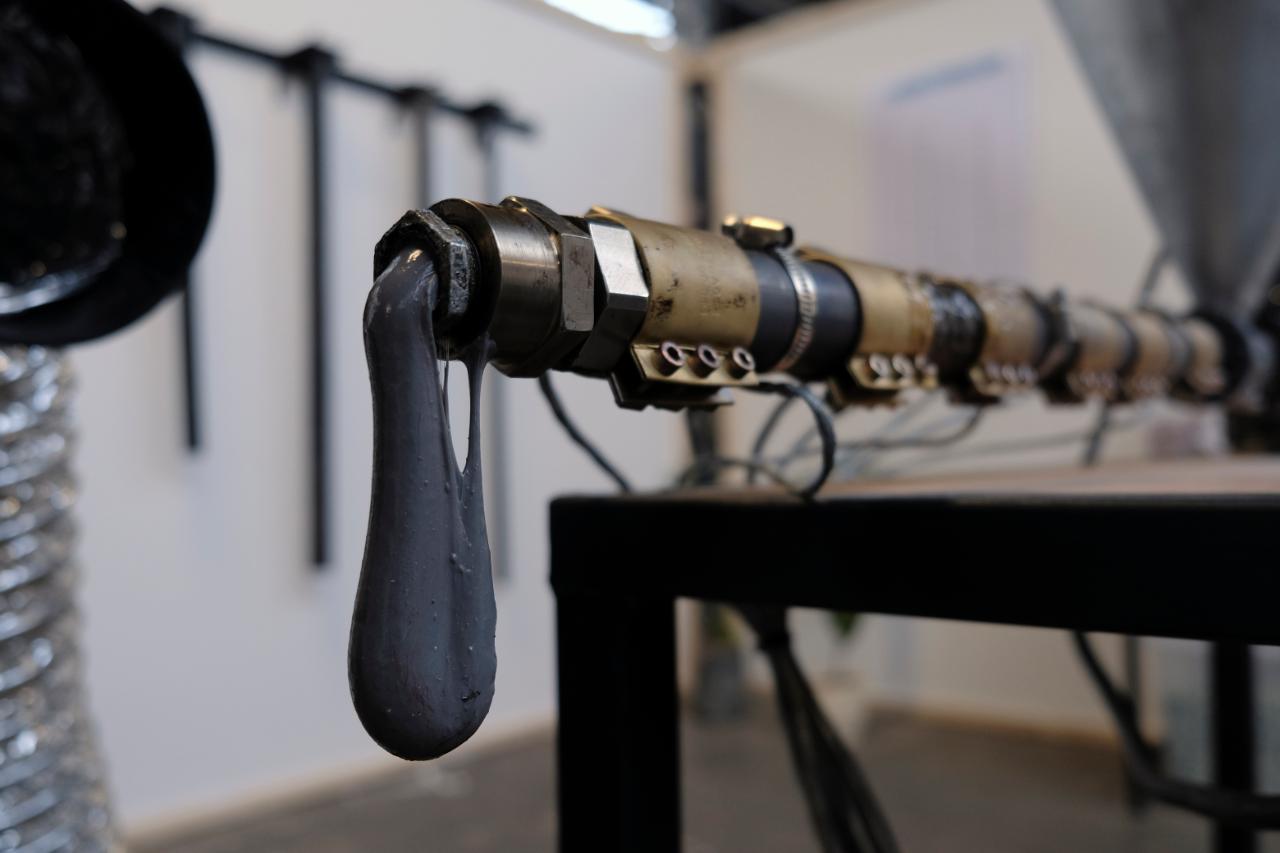
Step 7 - Extruding
After connecting your mould to the extrusion ensure that you stay clear of the nozzle while the machine is running. Always wear Personal Protective Equipment (PPE) and never leave the machine running unattended. Routinely checking your mould for signs of over filling and blockage. While also making sure the extruder has a constant batch of plastic granules.

Step 8 - Removing the mould
Once the mould is full/set time has passed, wait a moment before removing the mould to allow any build up in pressure to defuse within the barrel. 15-30sec. This will protect you from being potentially sprayed with hot plastic. While doing this remember your PPE and use thick welding gloves to remove the hot mould.
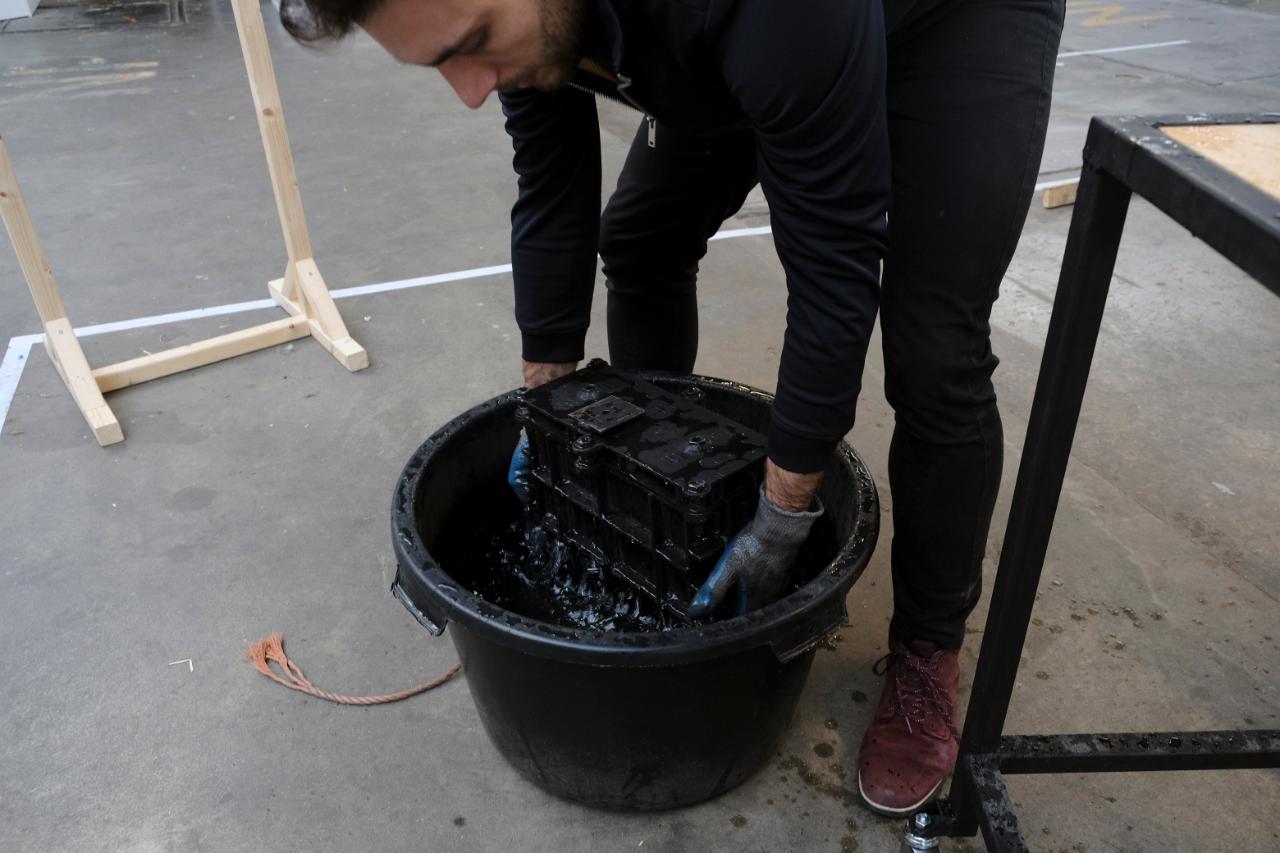
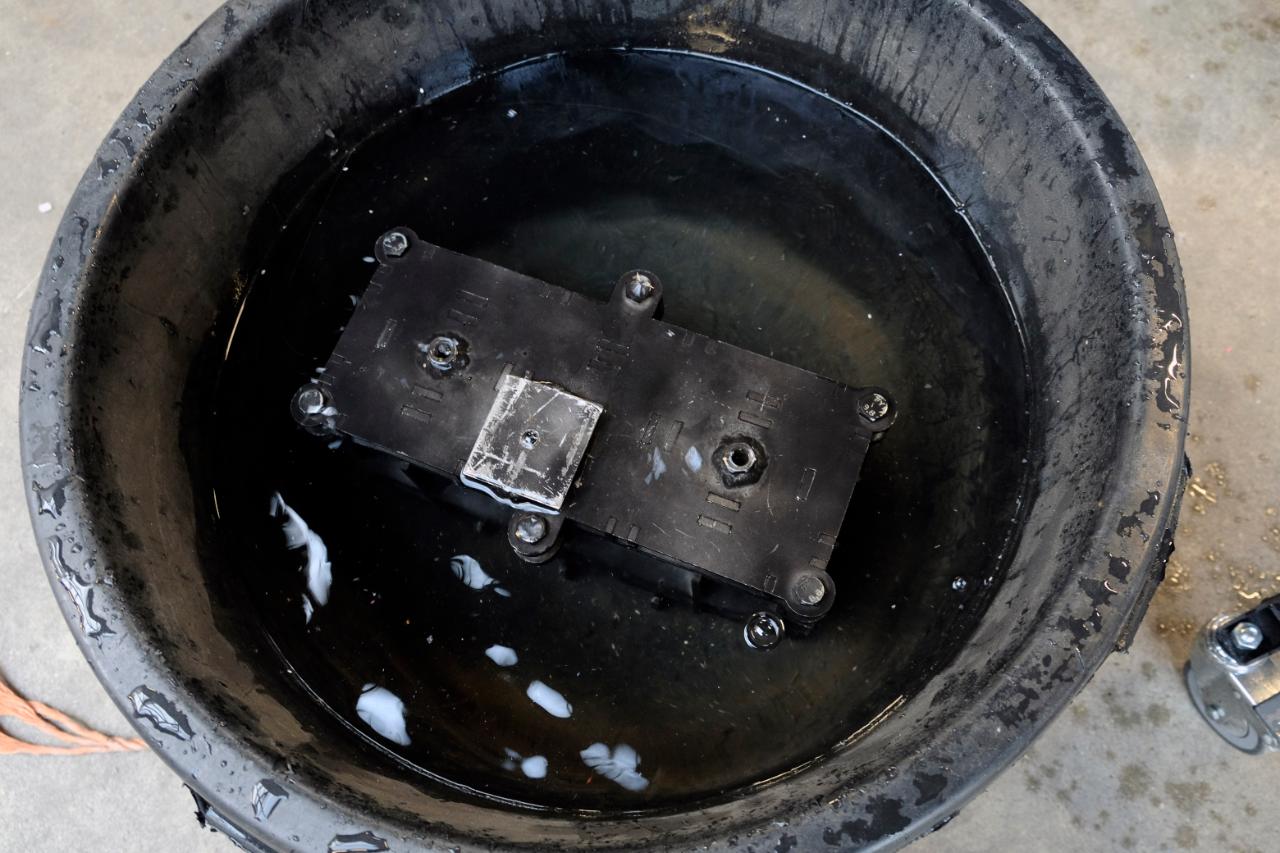
Step 9 - Cooling the mould
Depending on your mould and product we recommend placing the mould in a bath of water to cool the plastic allowing quicker removal. Depending on your mould you may want to leave it in water for a while. However, in this case, it’s crucial to remove it while the plastic is still warm to prevent the plastic from shrinking and sticking to the male part of the mould. So for hollow objects, be aware of this shrinkage!
The water will get very warm over time so its best to change it regularly or use a large body of water.
The water will get very warm over time so its best to change it regularly or use a large body of water.
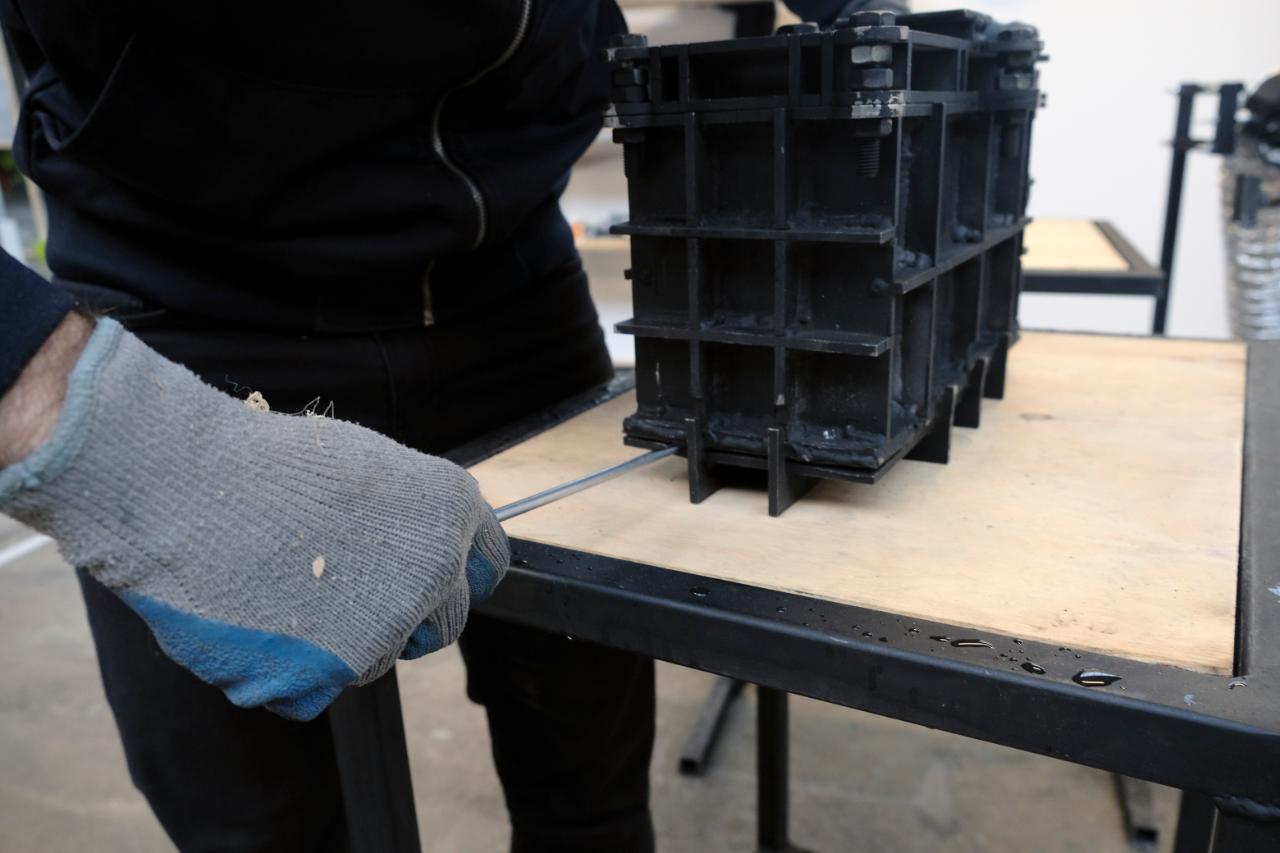
Step 10 - Opening the mould
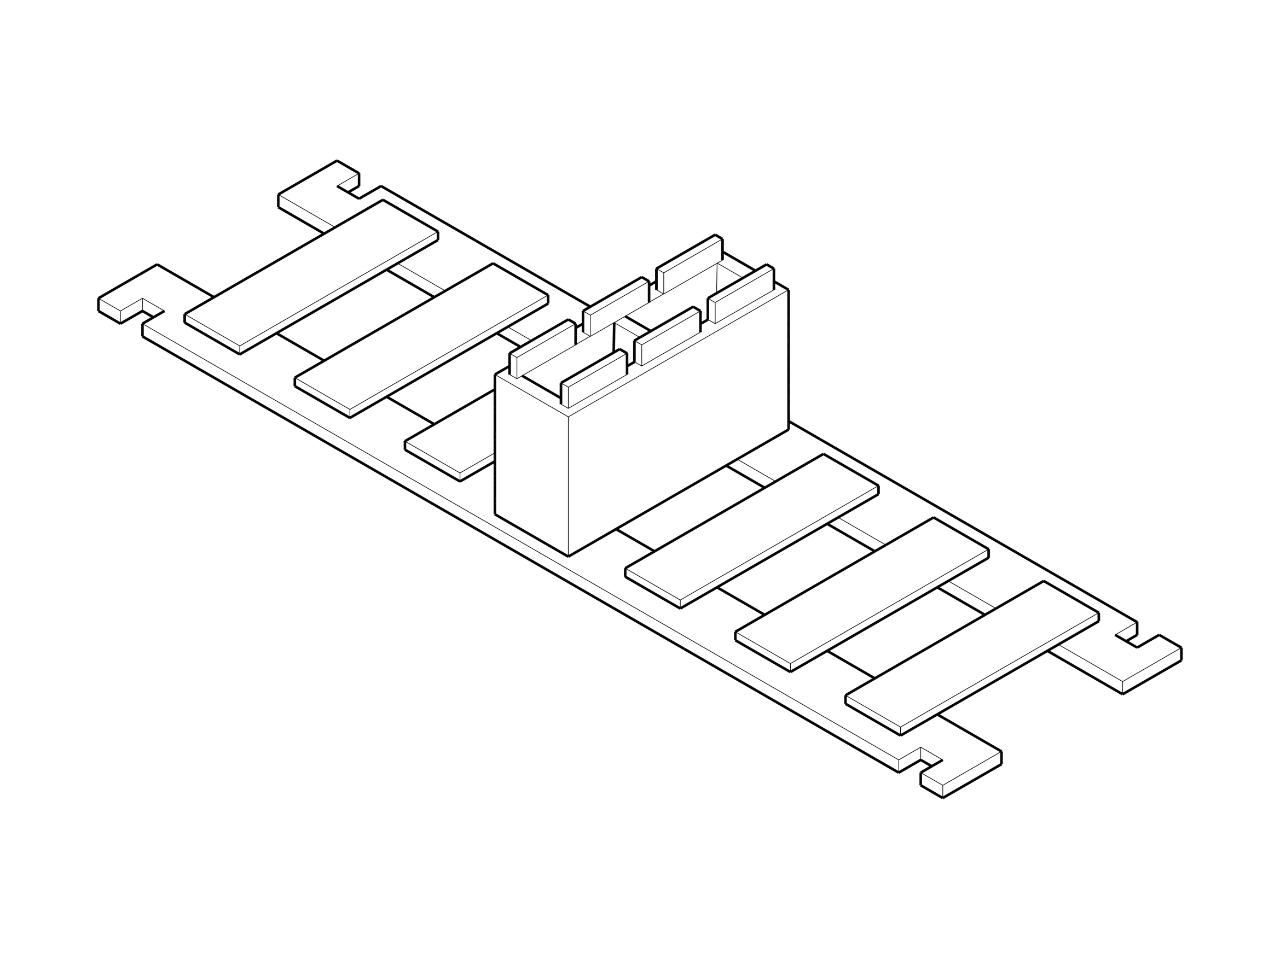
We like to use thick and strong screwdrivers to prize open the mould. With the brick, we need two slowly leveraging it open at the same time on either side. We also created a rig made of wood to rest the mould on to allow us to hammer through the brick from the top, which forces it away from the two parts.
Step 11 - Cooling
Because we removed the product while it was hot, we need to ensure that the product doesn't warp after being released from the mould. To do this we place it on a jig that restricts the shrinkage. For several bricks, we made several jigs, because it takes time for the bricks to cool down. We keep distance between the jigs, so air can flow between the hot bricks, which helps cooling.
Step 12 - Repeat!
Want to make more? Good, now all you need to do is repeat steps 5 to 9! Obviously the process can vary with different moulds and we would love to hear and learn from your experiences of this process.
What next?
Check this link and learn how to "Build brick structures":
👉 https://community.preciousplastic.com/how-to/build-brick-structures
What next?
Check this link and learn how to "Build brick structures":
👉 https://community.preciousplastic.com/how-to/build-brick-structures
—
—
—
Comments