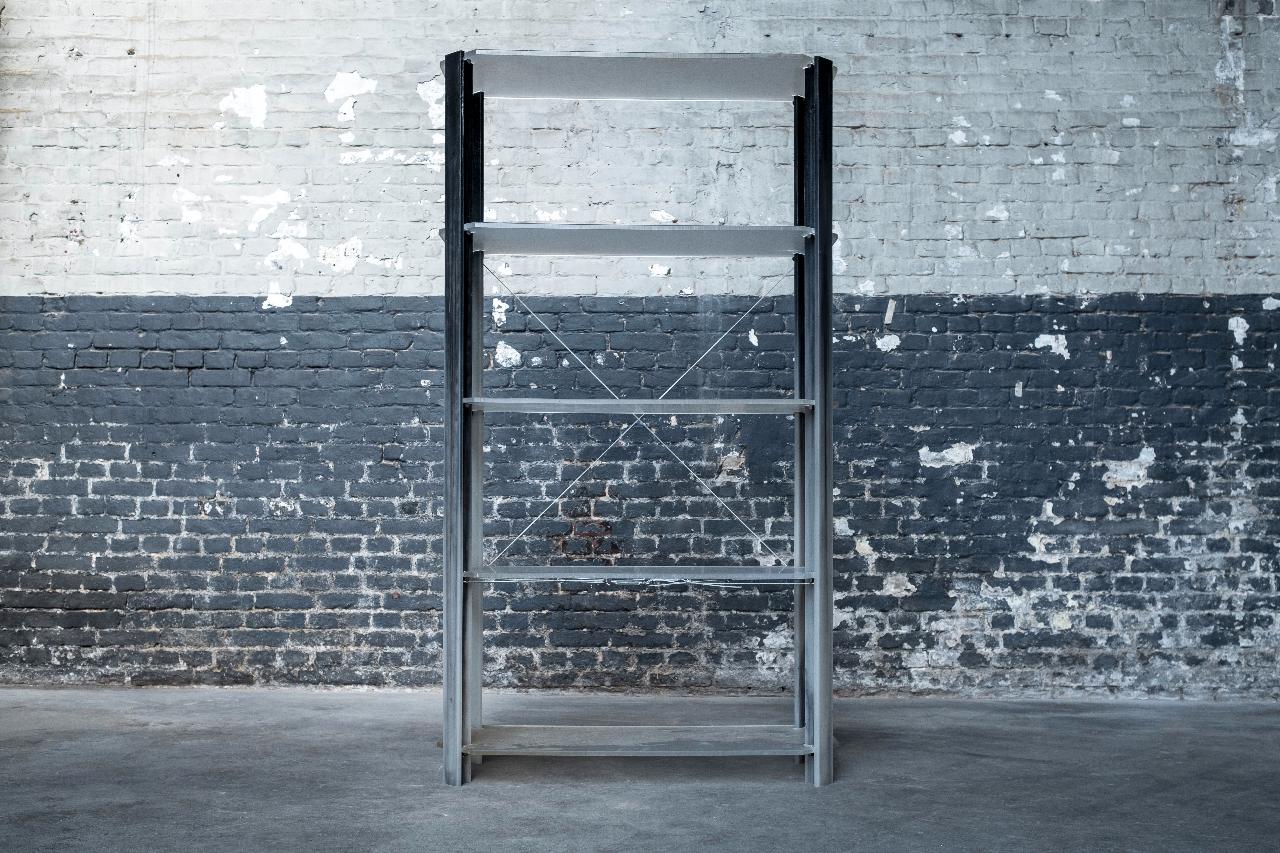
Make a shelf with sheets & beams

Contrary to popular belief, plastic is durable and tough enough to be used as a supporting material as well!
Here we show how you can make a shelf completely made of recycled plastic sheets and beams.
—
Attachments
Resources
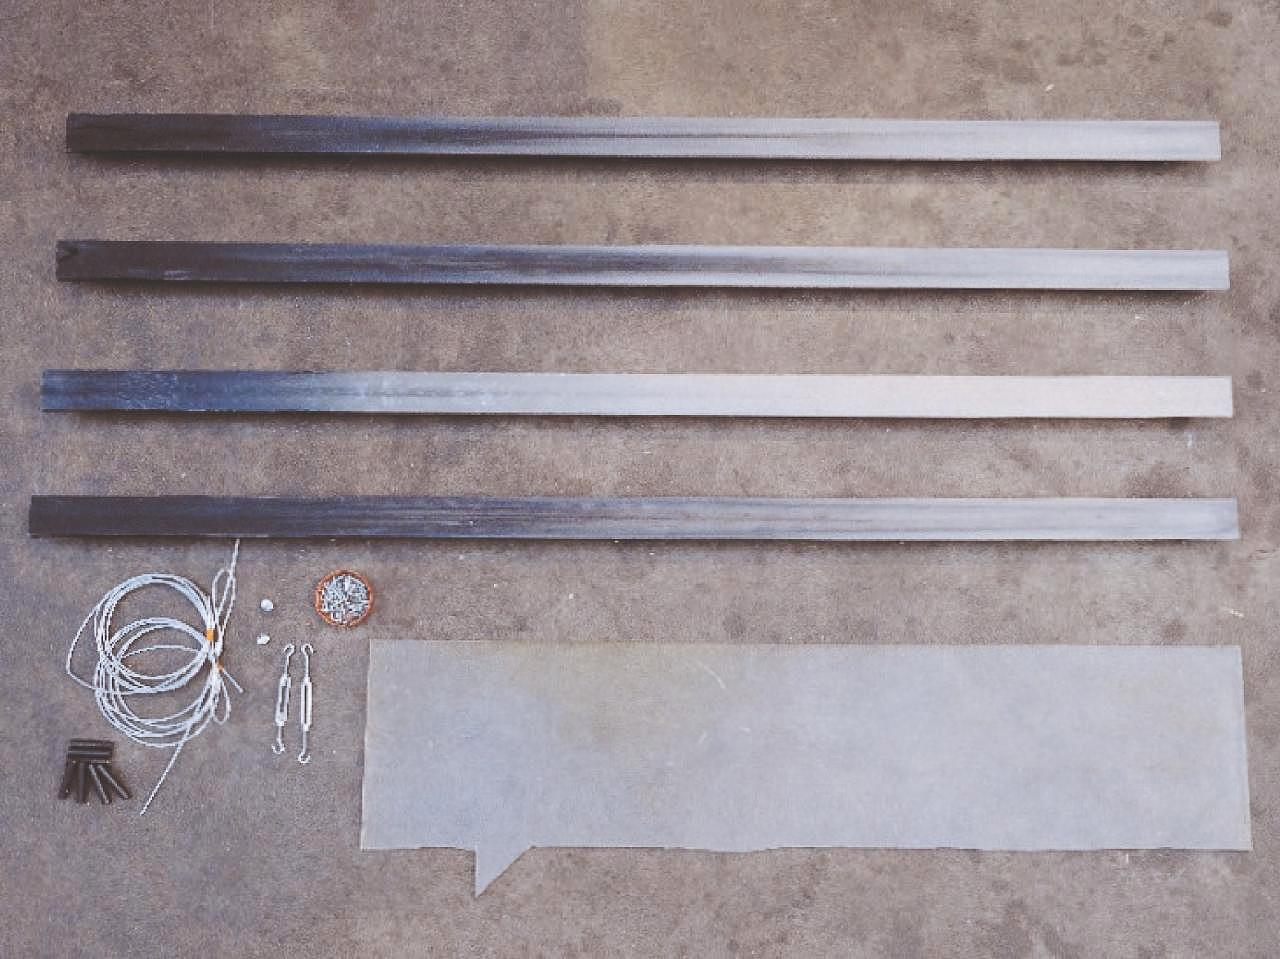
Step 1 - Get ready
Before you start, make sure you have everything that you need:
4x T-shape beams
5x plastic sheets 100cm x 40cm
40x Metal pins 12 mm x 6 mm
80x M5 screws
2x Tension Wires (3,5 m each)
General plastic working tools
Related links:
How to make T-shape beams 👉 https://community.preciousplastic.com/how-to/make-a-t-shape-beam-
How to make plastic sheets 👉 https://community.preciousplastic.com/academy/build/sheetpressrun
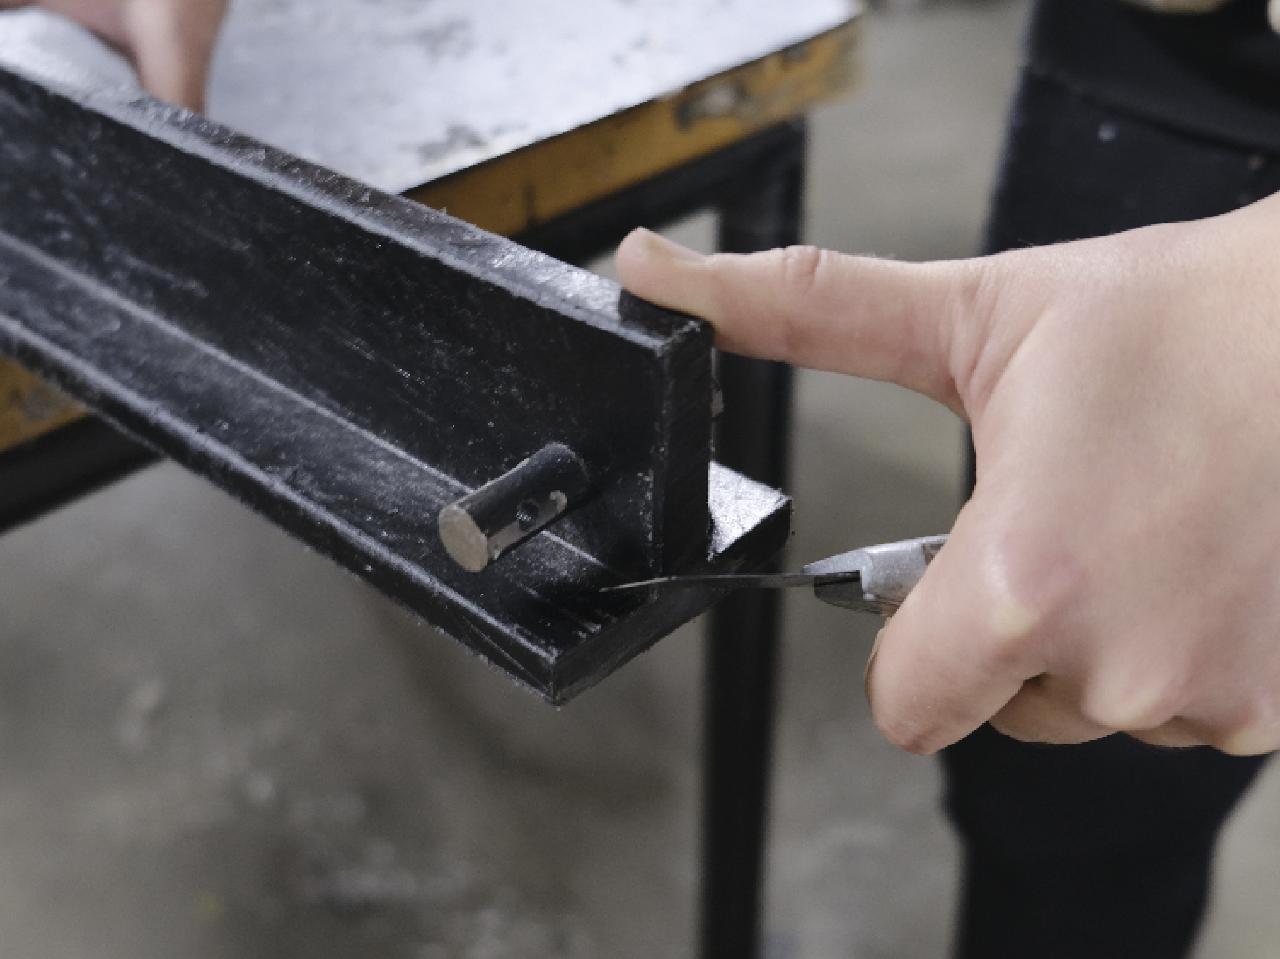
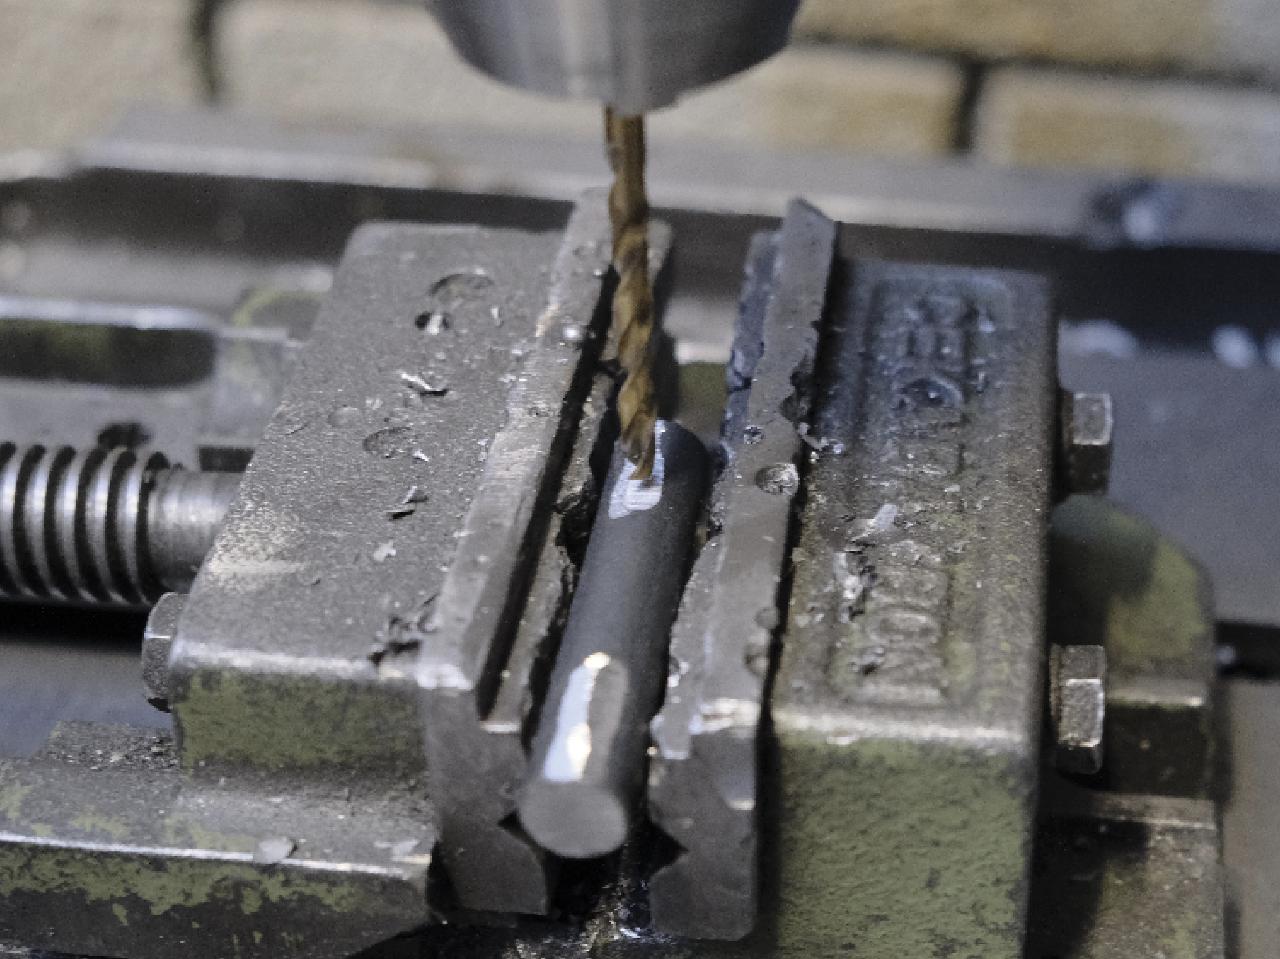
Step 2 - Drilling the beams
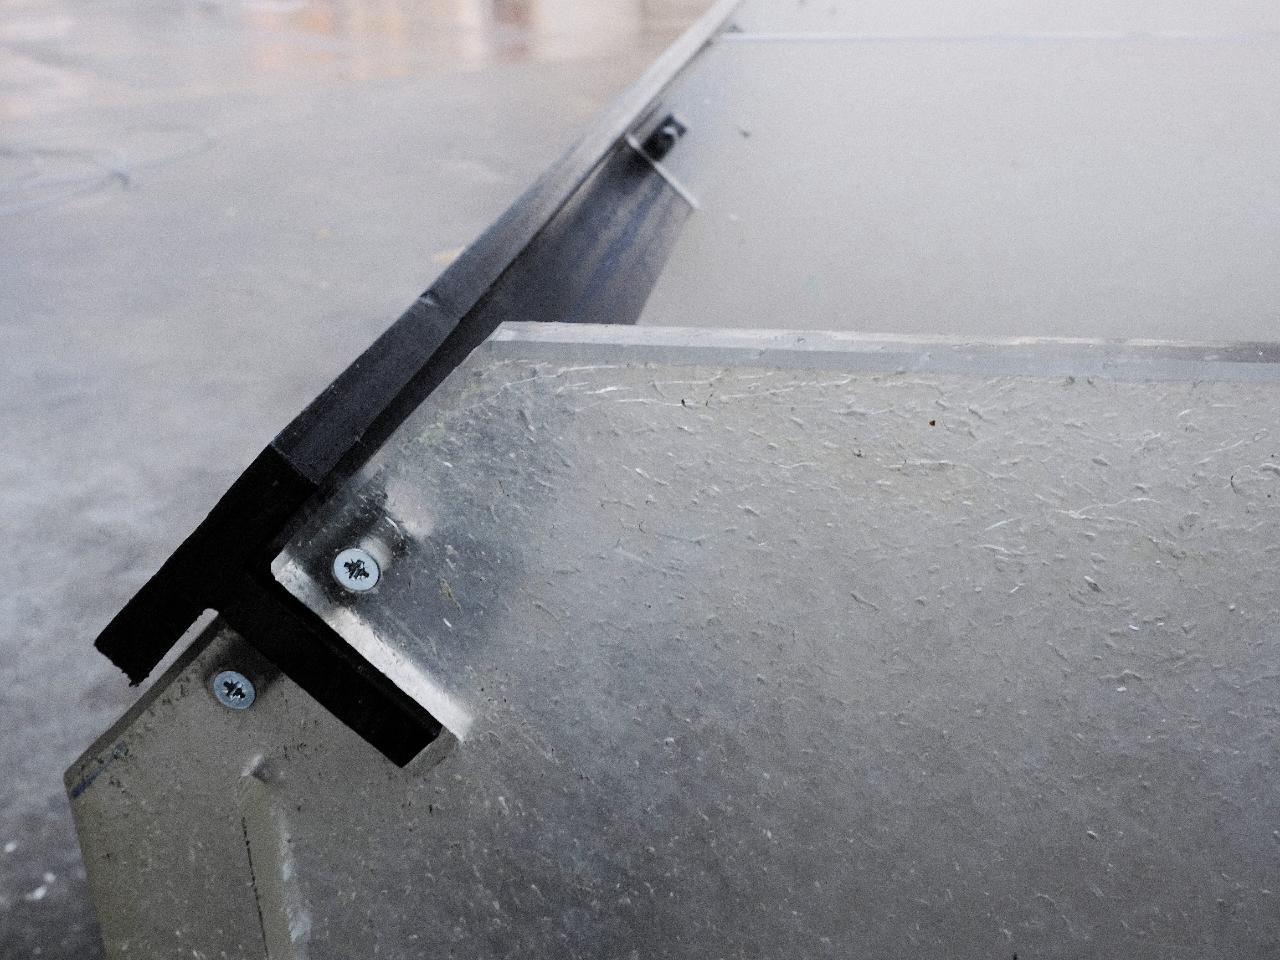
Now that we have our beam ready, we need to drill 12 mm holes on the leg of the T. The first hole will be 7,6 cm from the floor. The distance between the next holes will be 42,5 cm, as the template. Here you will insert the metal pins.
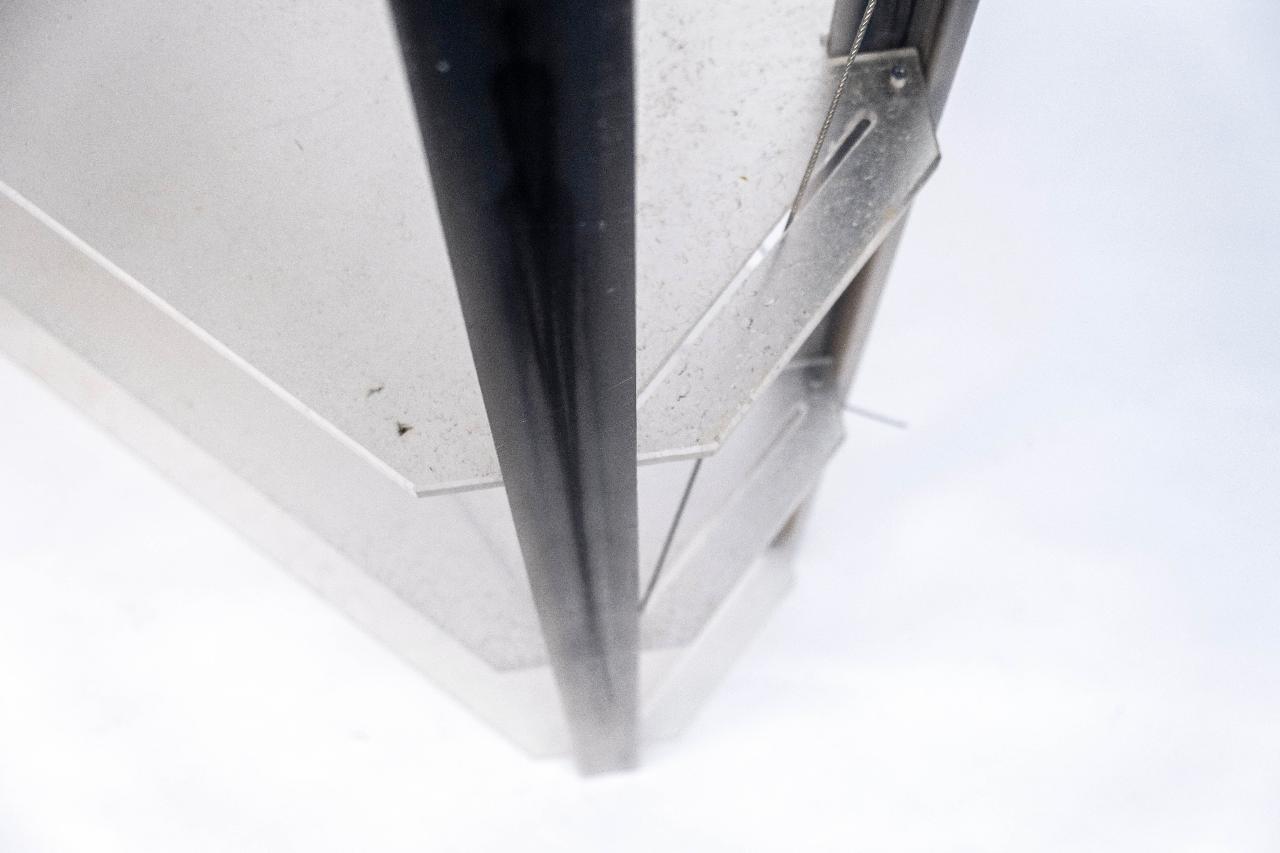
Between this hole and the corner of the T beam, you drill a 3 mm holes, to pass the tension wires, to hold the four beams together and tigh. In our design we drilled the four corners of the second shelf, and the back corners of the fourth shelf.
Take a look on the edges of the beam, you may need a knife to shape the sharp edges. Remember to stay safe and use a mask and glasses here.
Feel free to change the heights of the shelves.
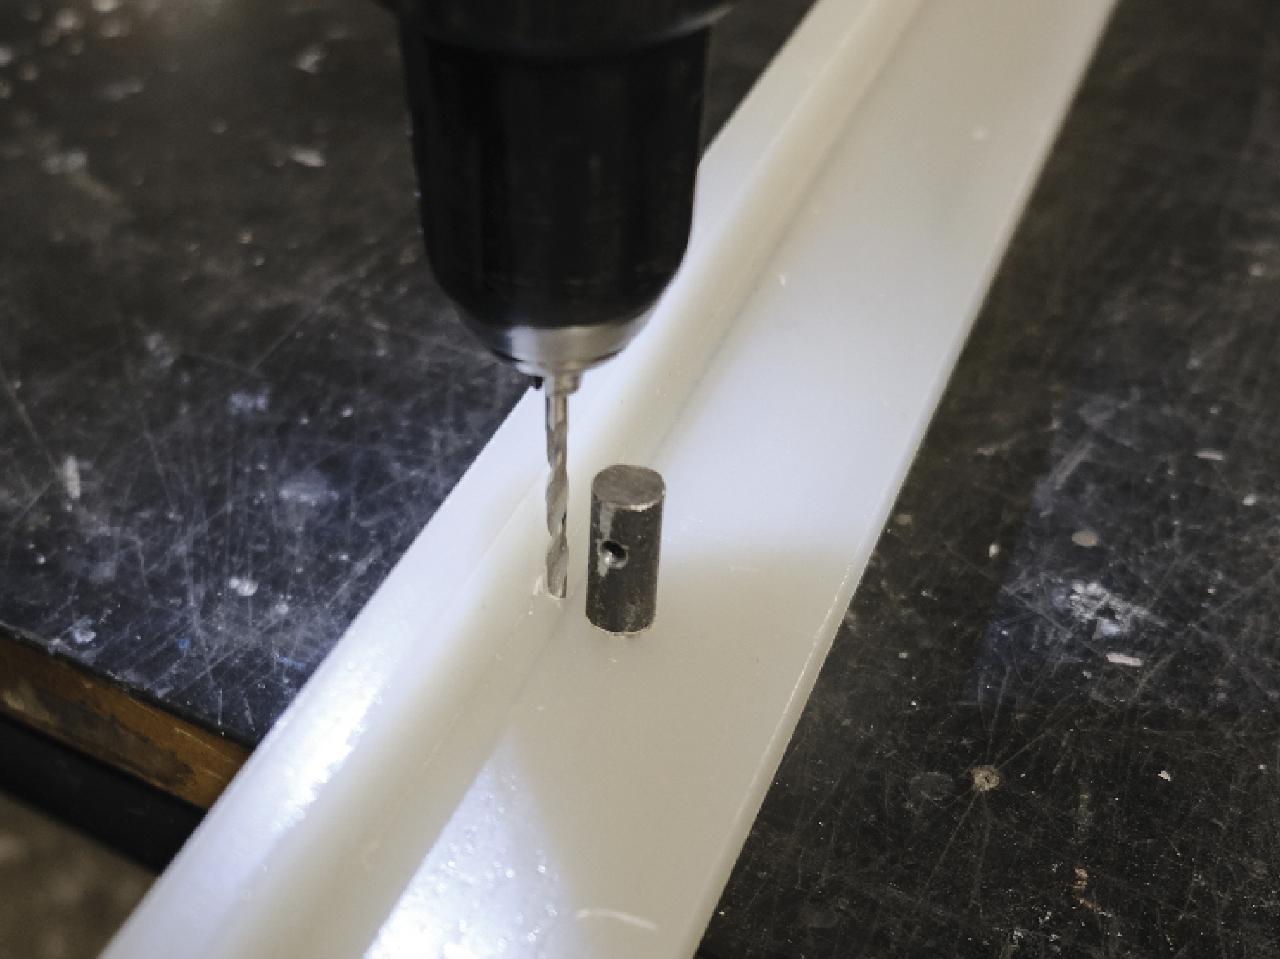
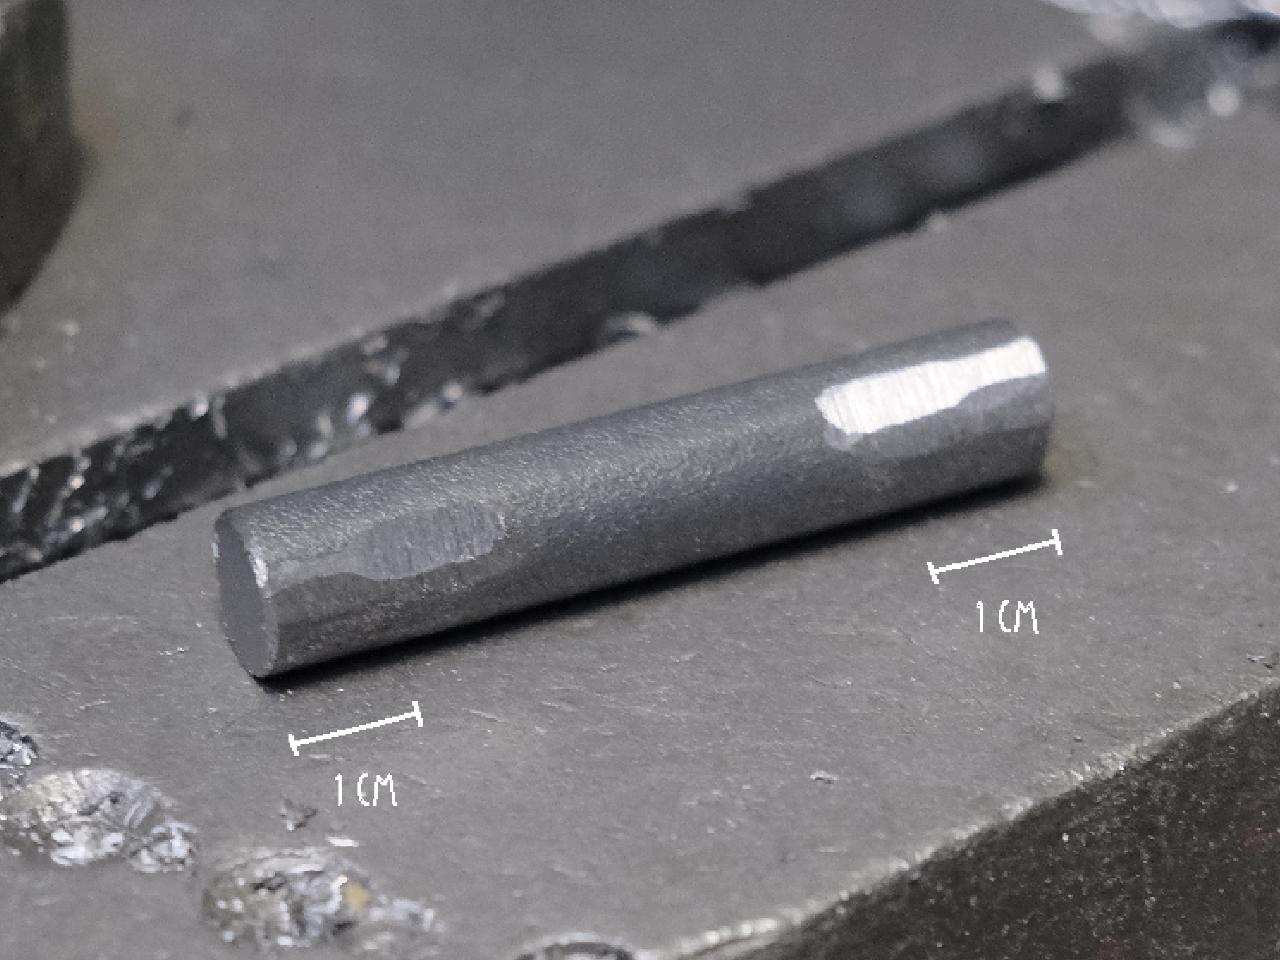
Step 3 - Making the pins
Cut 6 cm from the round metal bar and mill it on one side, so you get a flat surface to drill two 4,2 mm holes, 1 cm away from the edges, each. Then make a M5 thread.

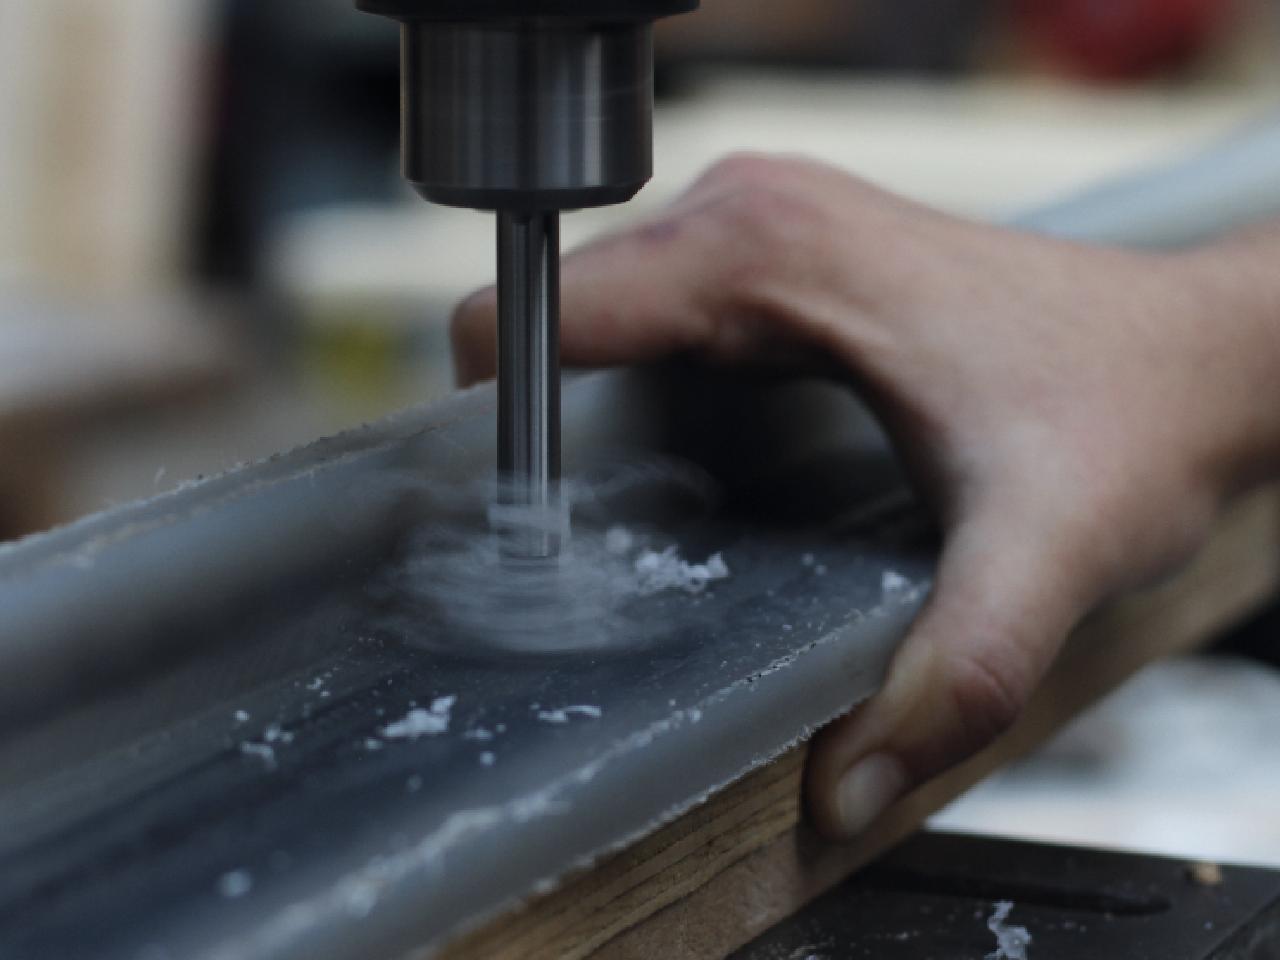
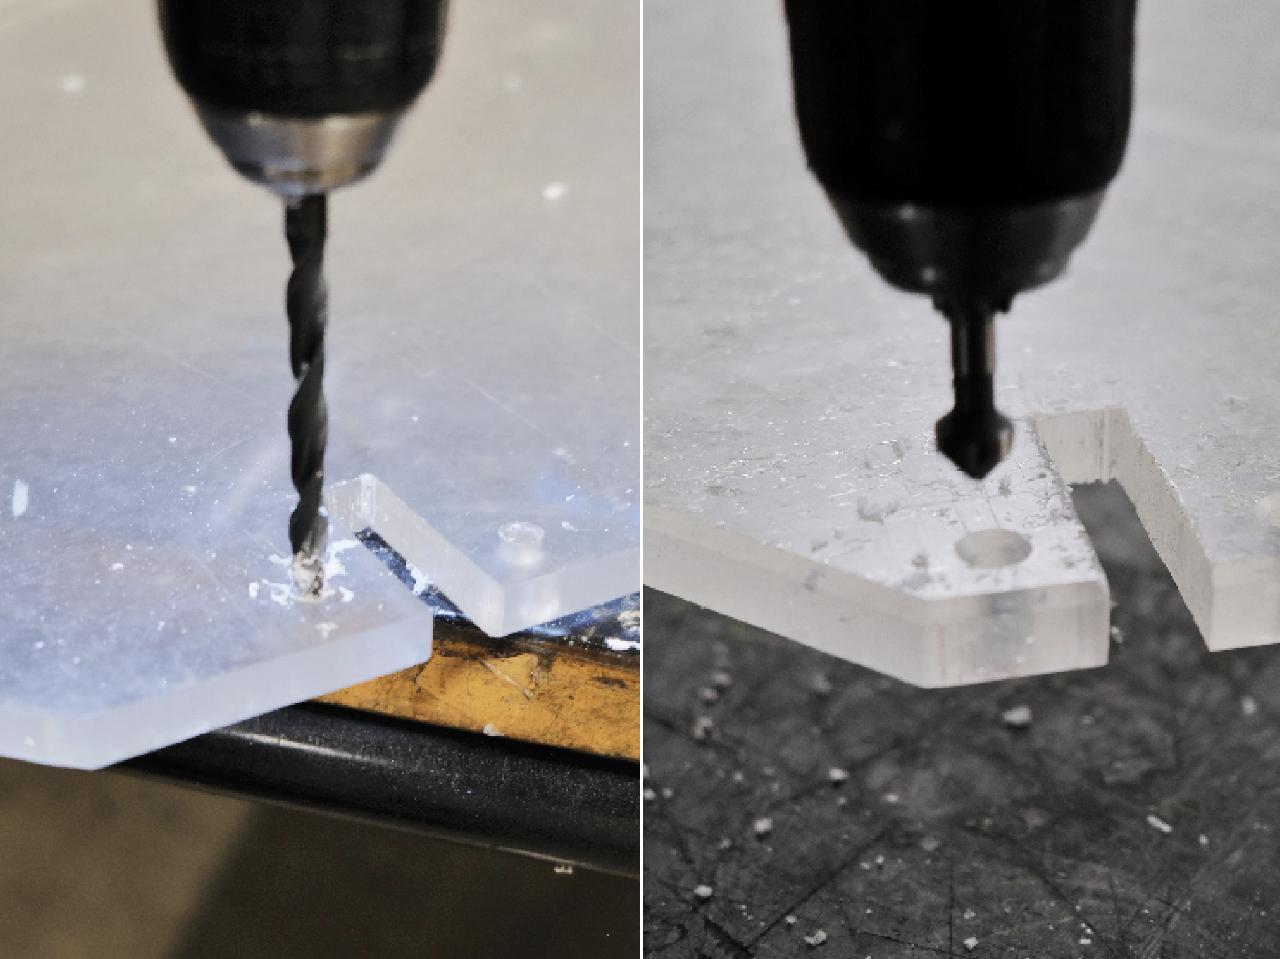
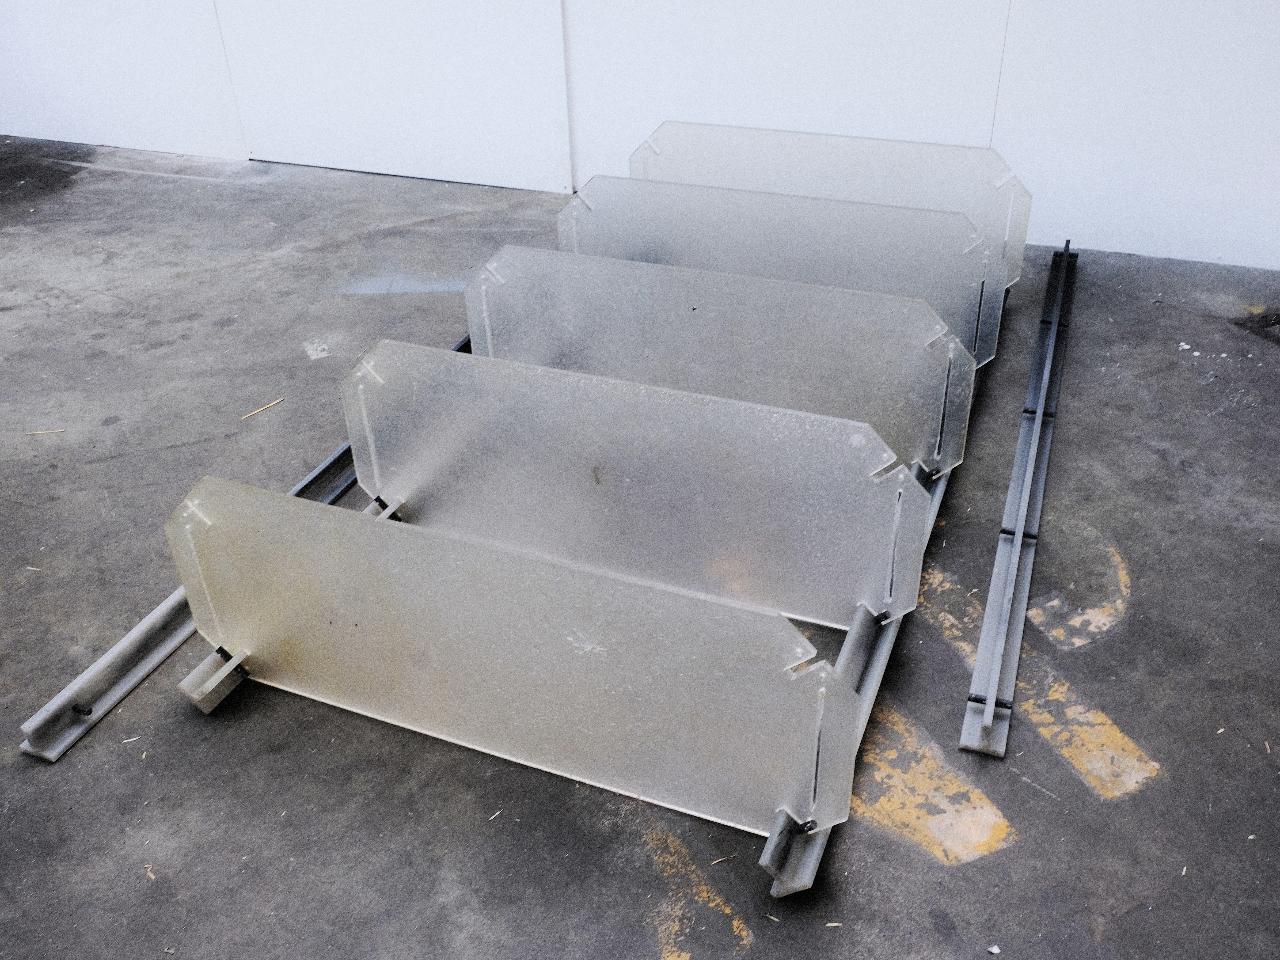
Step 4 - Make the shelves
Let’s continue with the sheets.
Print the shape of the shelves which are provided in the download files. Create a template on a MDF sheet and use it to copy this shape five times on your plastic sheets.
Cut it roughly with the jigsaw and route the edges with the help of the template. Drill and countersink the holes.
Remember to wear a mask and glasses here!


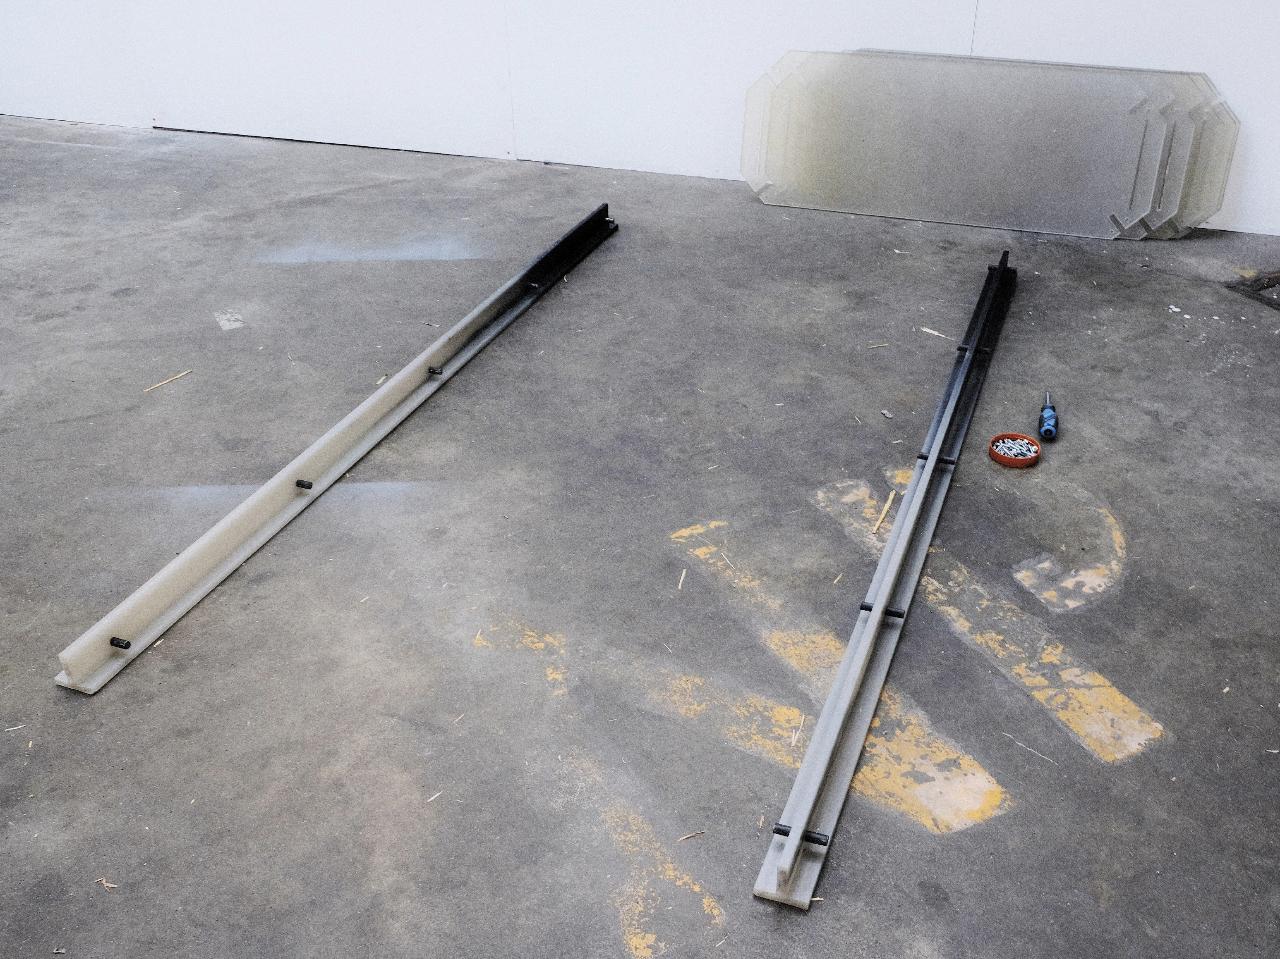
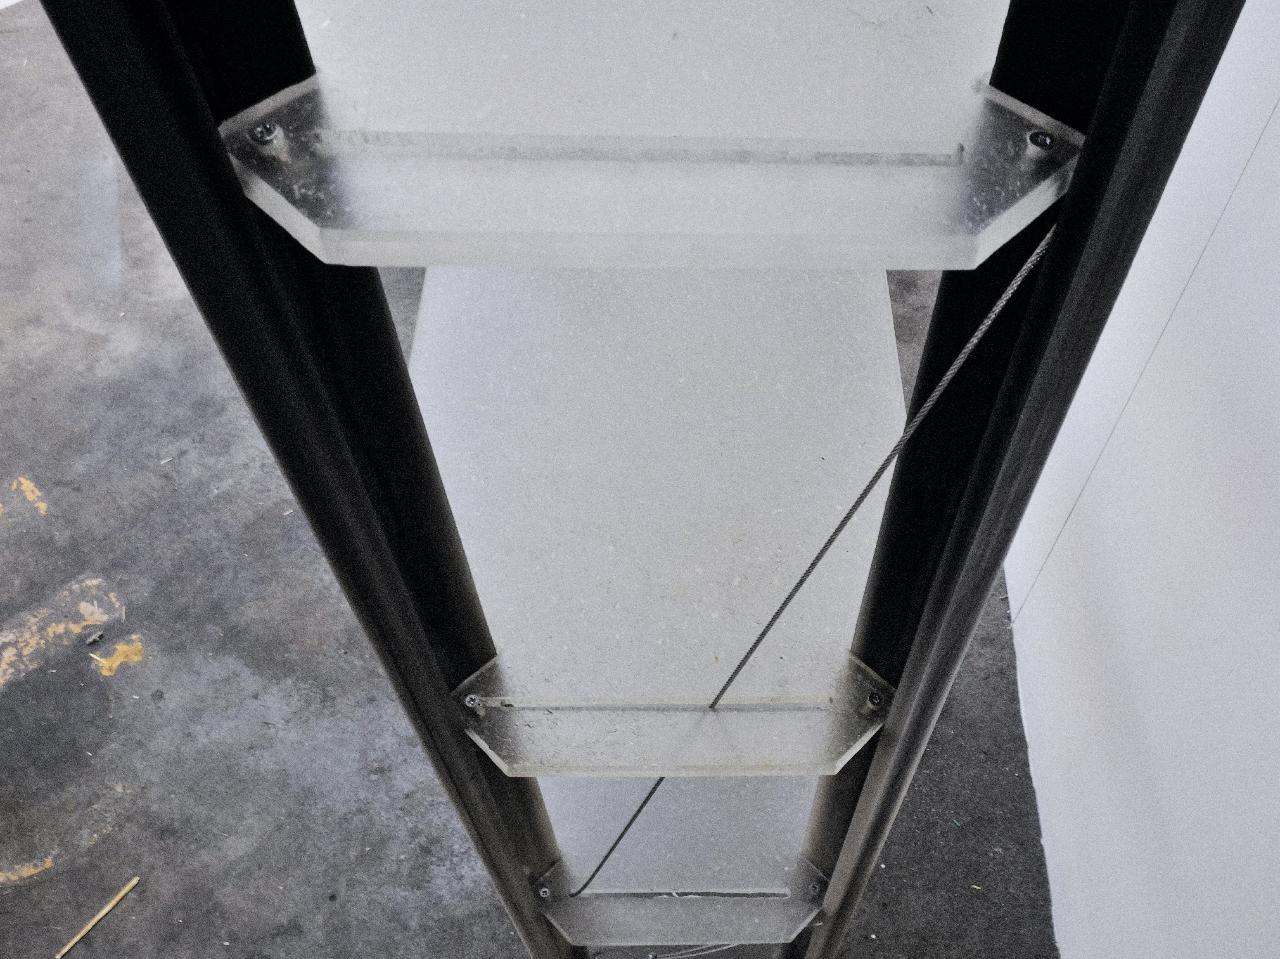
Step 5 - Assembling
With the five 12 mm holes made on the four beams, you can insert the metal pins.
Start with the two back beams on the floor, for assembling the first shelf (bottom one) and tighten the screws from the shelf into the metal pins.
Repeat this process with the five shelves.
After connecting the five shelves to the two back beams, you can insert the two front beams, and tighten the screws from the shelves into the metal pins.
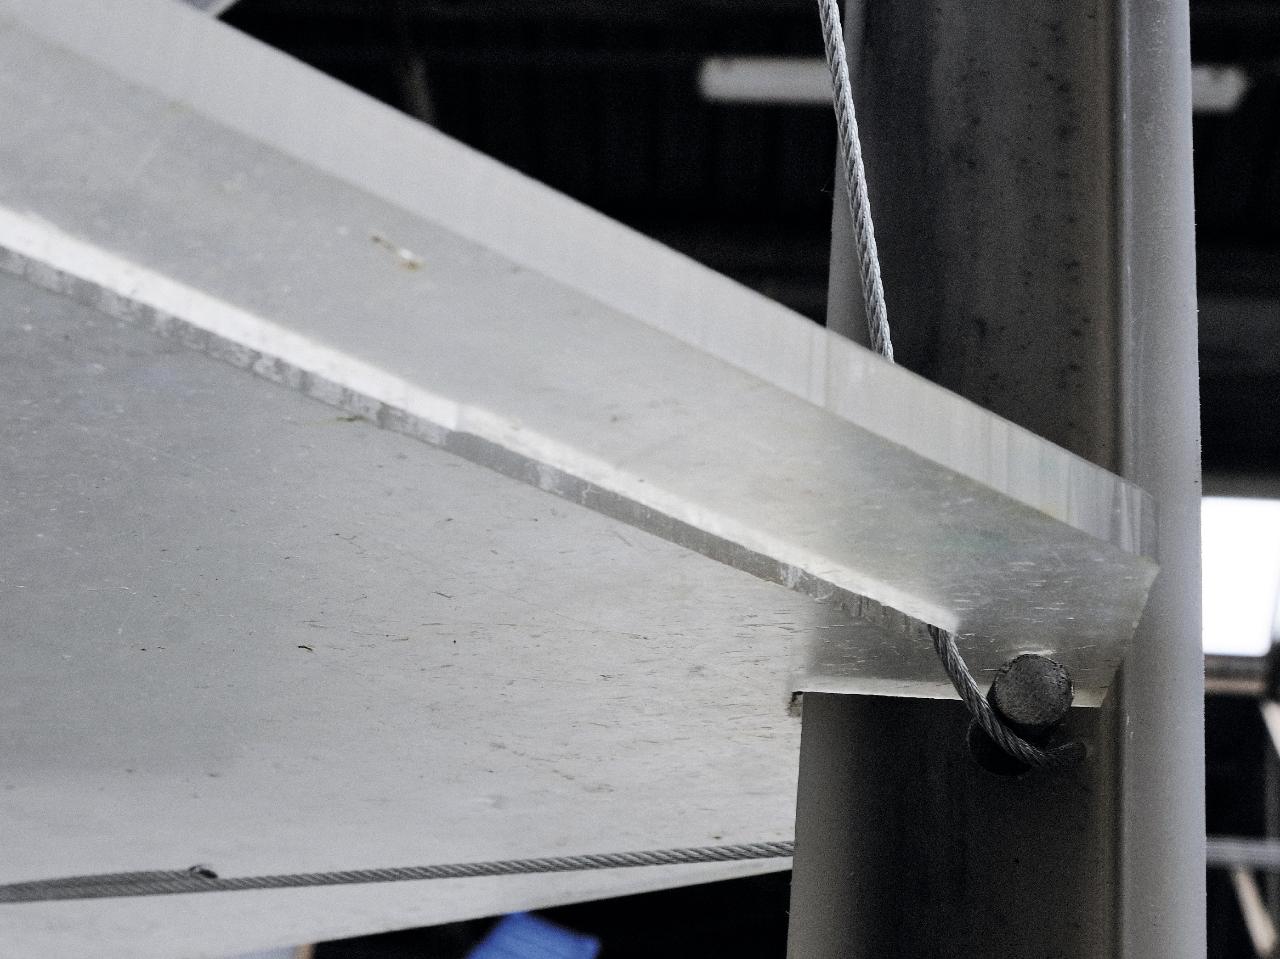
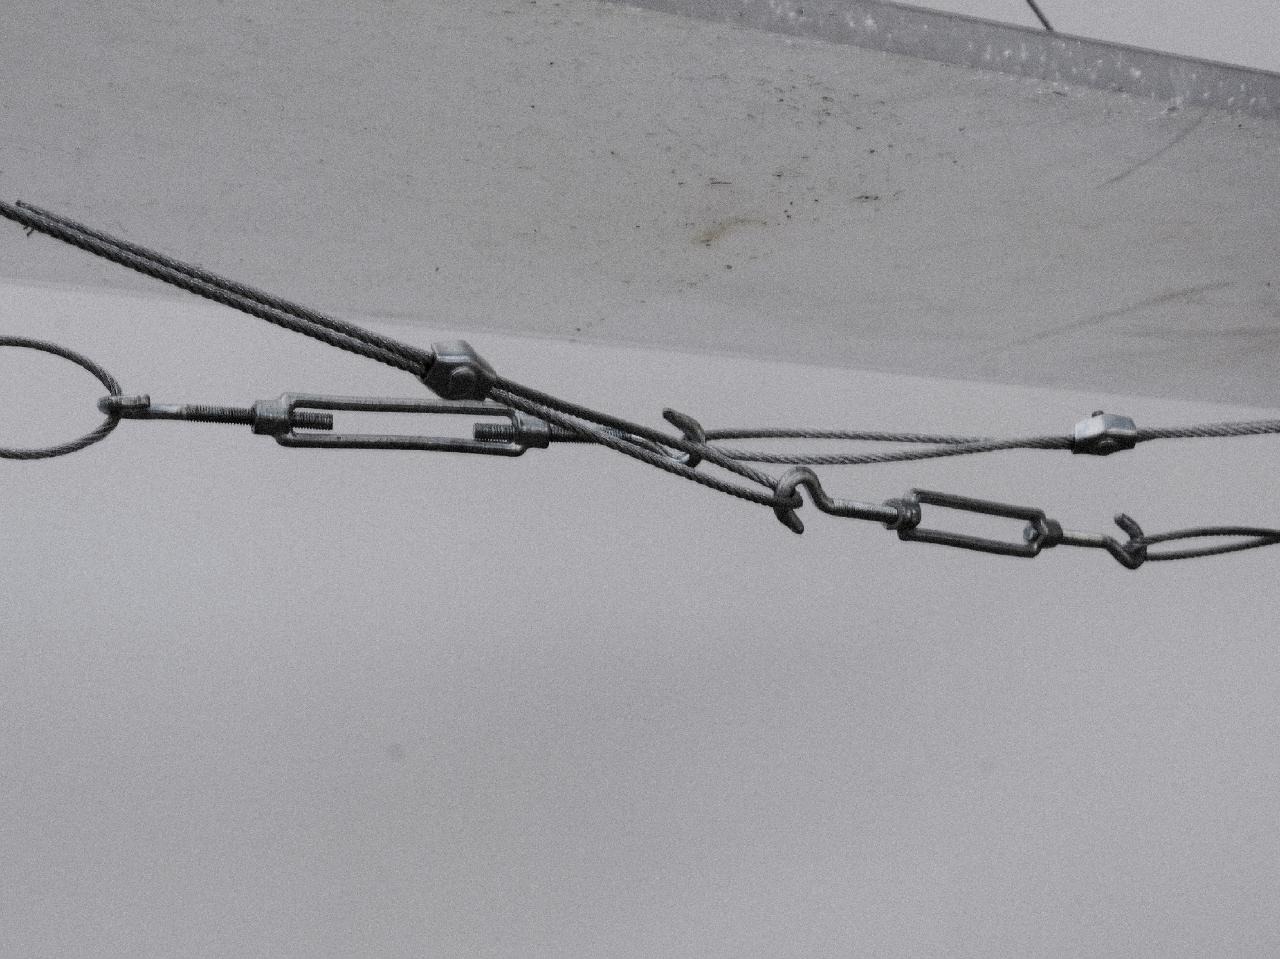
Step 6 - Tension Wire
Time to apply our two tension wires for some more stability. Have a look at the drawing from the download files as a reference.
Lift the shelf from the floor, and pass one the first tension wire through A, B and C. Then connect A to C.
Take the second tension wire and pass it through 1, 2 and 3. Then connect 1 to 3.
Lift the shelf from the floor, and pass one the first tension wire through A, B and C. Then connect A to C.
Take the second tension wire and pass it through 1, 2 and 3. Then connect 1 to 3.
Step 7 - You’re done
Alright, you're done!
Time to enjoy your new precious shelf.
Oh, and in case something breaks, make sure you bring the plastic parts to a Precious Plastic Workspace nearby or recycle in another reponsible way. :)
Time to enjoy your new precious shelf.
Oh, and in case something breaks, make sure you bring the plastic parts to a Precious Plastic Workspace nearby or recycle in another reponsible way. :)
—
—
—
Comments