Make glass-like beams

Creating with recycled plastic offers a big variety of colours and transparencies.
In this how-to we will show how you can transform discarded Polystyrene into a beam with a glass like colour and finish.
—
Attachments
Resources
Step 1 - Get ready
Alright so before starting, here some basics to check out and prepare first.
For this technique you will need:
Machines: Shredder (or already shredded plastic), Extrusion machine, Oven
Tools: Scissors / Knife, Pliers, Weighing scales and two containers, Silicone oil, Clamps, Spanner
Materials: Polystyrene and pigment
If you haven't extruded beams before, learn more in the How-to "Make a mould for beams".
(https://community.preciousplastic.com/how-to/make-a-mould-for-extruding-beams)

Step 2 - Stay safe
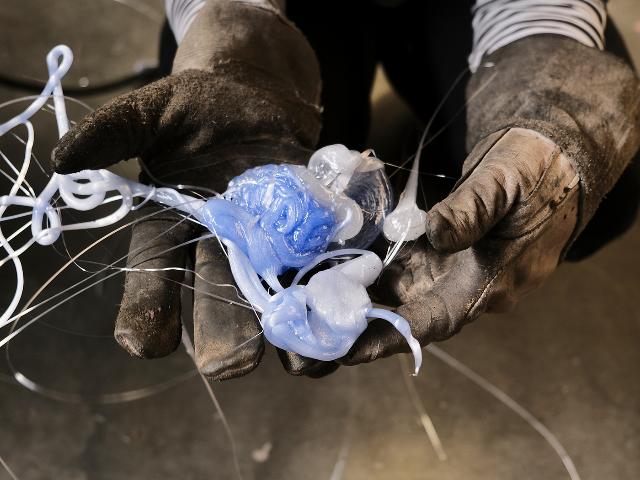
When melting plastic, bad fumes can be released. In order to work safer, make sure to use a breathing mask with ABEK filters to prevent inhaling possibly toxic fumes. Special attention on plastics like PS (polystyrene) and PVC. Also when handling with heated elements and plastic we recommend to wear working gloves.
Recommended safety equipment: ABEK mask, gloves and glasses
Recommended safety equipment: ABEK mask, gloves and glasses

Step 3 - Prepare your polystyrene
Selecting the right material is crucial when it comes to aesthetics. What properties does the material have, what colour is it?
As PS stays transparent in the recycling process, it has the perfect quality to make a light. Collect your clean PS, which is typically found in old CD and cassette cases. Make sure to shred enough, the required amount will vary depending on the size of your mould.
As PS stays transparent in the recycling process, it has the perfect quality to make a light. Collect your clean PS, which is typically found in old CD and cassette cases. Make sure to shred enough, the required amount will vary depending on the size of your mould.

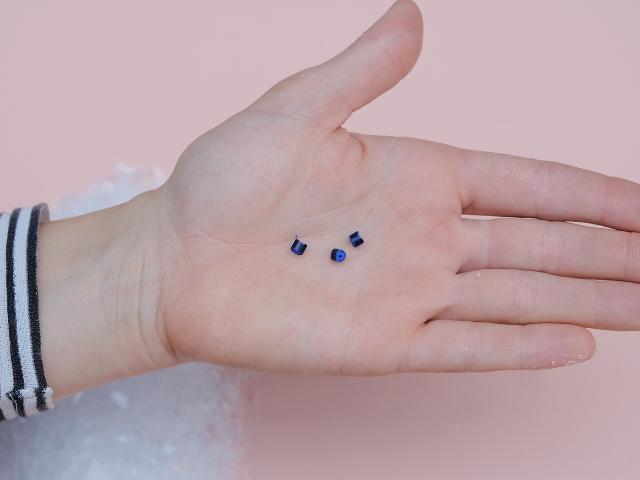
Step 4 - Prepare your colour
Now we use pigment to add colour to the transparent polystyrene. You can find it online (search for 'pigment for polystyrene'), but do check out if you can find it in a local shop. Using pigment has the advantage that it keeps the translucency of your material. If you only have access to coloured PS plastic, you will probably not get the same effect (unless the plastic is also translucent), so this will need some testing.
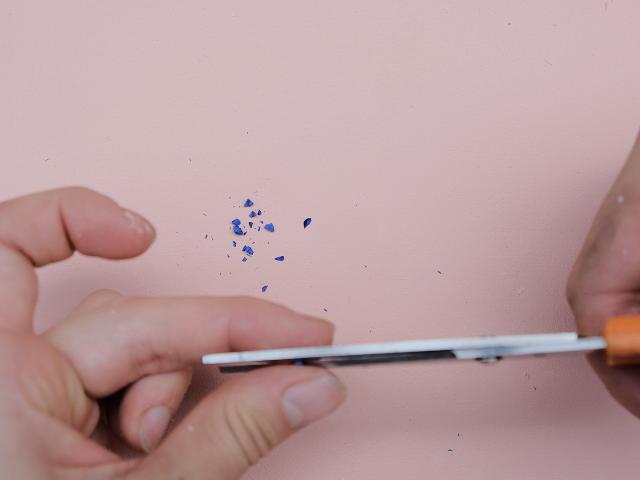
Start by cutting one pellet of pigment into smaller pieces. The pigment we use (___) has a really strong affect so you only need a small amount to mix with.
Start by cutting one pellet of pigment into smaller pieces. The pigment we use (___) has a really strong affect so you only need a small amount to mix with.
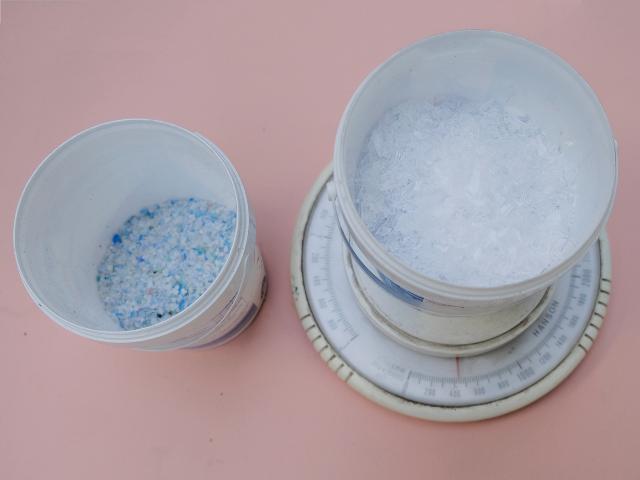
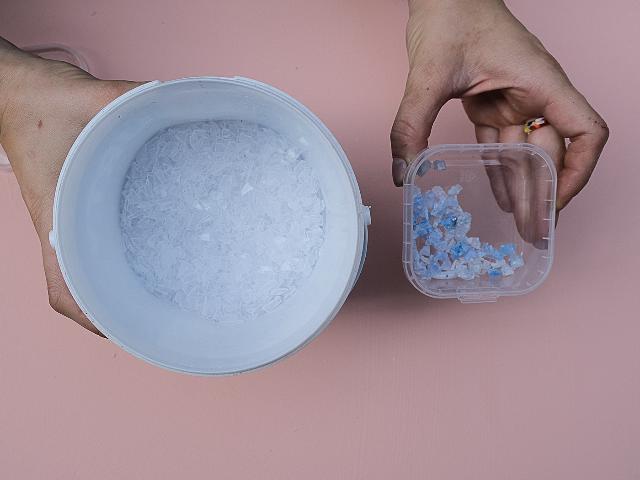
Step 5 - Weigh your quantities
Controlling your quantities is important to get your desired colour and effect. You can weigh a piece of a previously made beam to get an idea of the required total weight.
Weighing out the quantities of your materials into separate containers will enable you to have more control of your result.
In the next steps we will show the mixtures and results of two processes:
Mixing clear PS with pure pigment (Step 7)
Mixing clear PS with a PS-pigment-mix (Step 8)
Weighing out the quantities of your materials into separate containers will enable you to have more control of your result.
In the next steps we will show the mixtures and results of two processes:
Mixing clear PS with pure pigment (Step 7)
Mixing clear PS with a PS-pigment-mix (Step 8)
Step 6 - Get ready for extruding
Alright, let’s get everything ready to melt!
First, turn on the extruder and set the temperature to 230°C.
And then there are a few tricks to prepare your mould for a smoother process and outcome. We recommend to coat the inside of the mould with silicone oil to help getting the beam out of the mould after it cooled down. And in order to achieve a smooth material surface it helps to heat up your mould with a heat gun or warm it up in an oven for around __ minutes before attaching it to the preheated extruder.

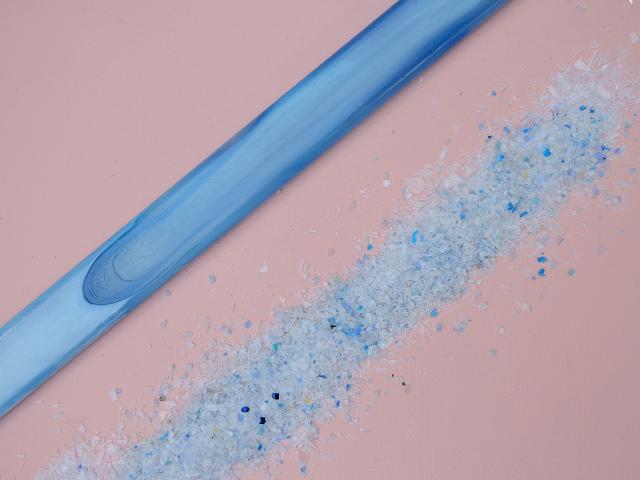
Step 7 - Extrude (1) - Concentrated colours
Time to melt!
Mixture: 95% clear PS, 5% blue cut-up pigment
Put your clean PS in your extruder hopper and sprinkle the smashed pigment in evenly. Do not add all of your mix in at once, gradually sprinkle making sure there’s enough mixture in the hopper. Keep an eye on the other end of the mould and stop the extruder as soon as you see material approach the end.
It will come out as a strong concentrated colour. To create a cloudy pastel colour, we will mix this material again in a further process (Step 8).
Note: Collect your excess material and squish it flat before it hardens, so it will be easier to shred it again for further processes.


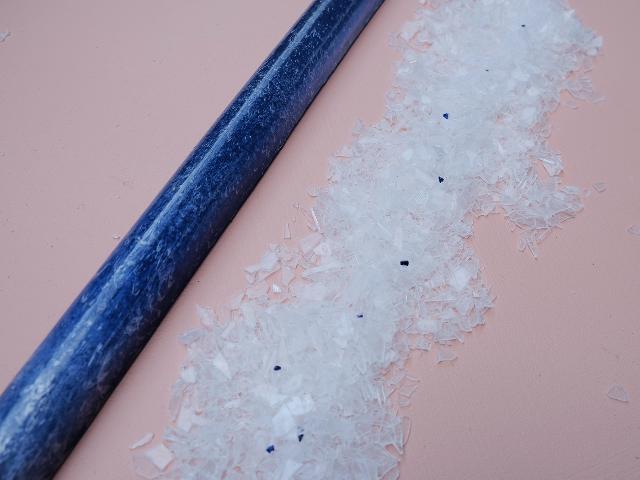
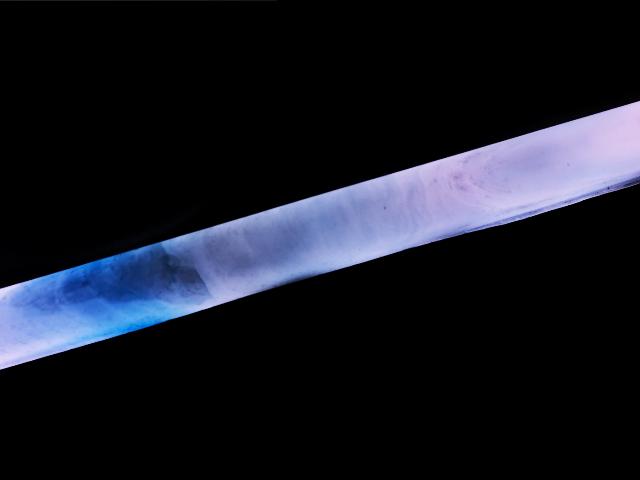
Step 8 - Extrude (2) - Cloudy colours
Now we use the re-shredded excess material from the previous process which makes the colour more cloudy. In this example we used the following mixture:
Mixture: 70% clear PS, 30% shredded PS-pigment-mix
Start by putting your clear PS into the extruder followed by the PS-pigment-mix. You can experiment with adding more colour by putting pigment back into this mixture to create dynamic colour tones and patterns.
P.S. Keep collecting your left over material to melt it again, this is the stuff that will make your material glass-like.
Step 9 - Explore the possibilities!
Et voilá , this is how you create beams and materials with magical colours, transparencies and patterns. As the mixing process is hard to control, achieving exactly the same outcome is unrealistic. But the beauty of melting plastic this way is that each piece will be unique! The transparency of PS offers itself perfectly for lighting, like shown in our how-to "Make a lamp from PS".
But the further possibilities of this material can be taken into many other directions.
Have fun exploring!
But the further possibilities of this material can be taken into many other directions.
Have fun exploring!

—
—
—
Comments